

How to do it? Color Jitter

Copy link to clipboard
Copied
Hello everyone,
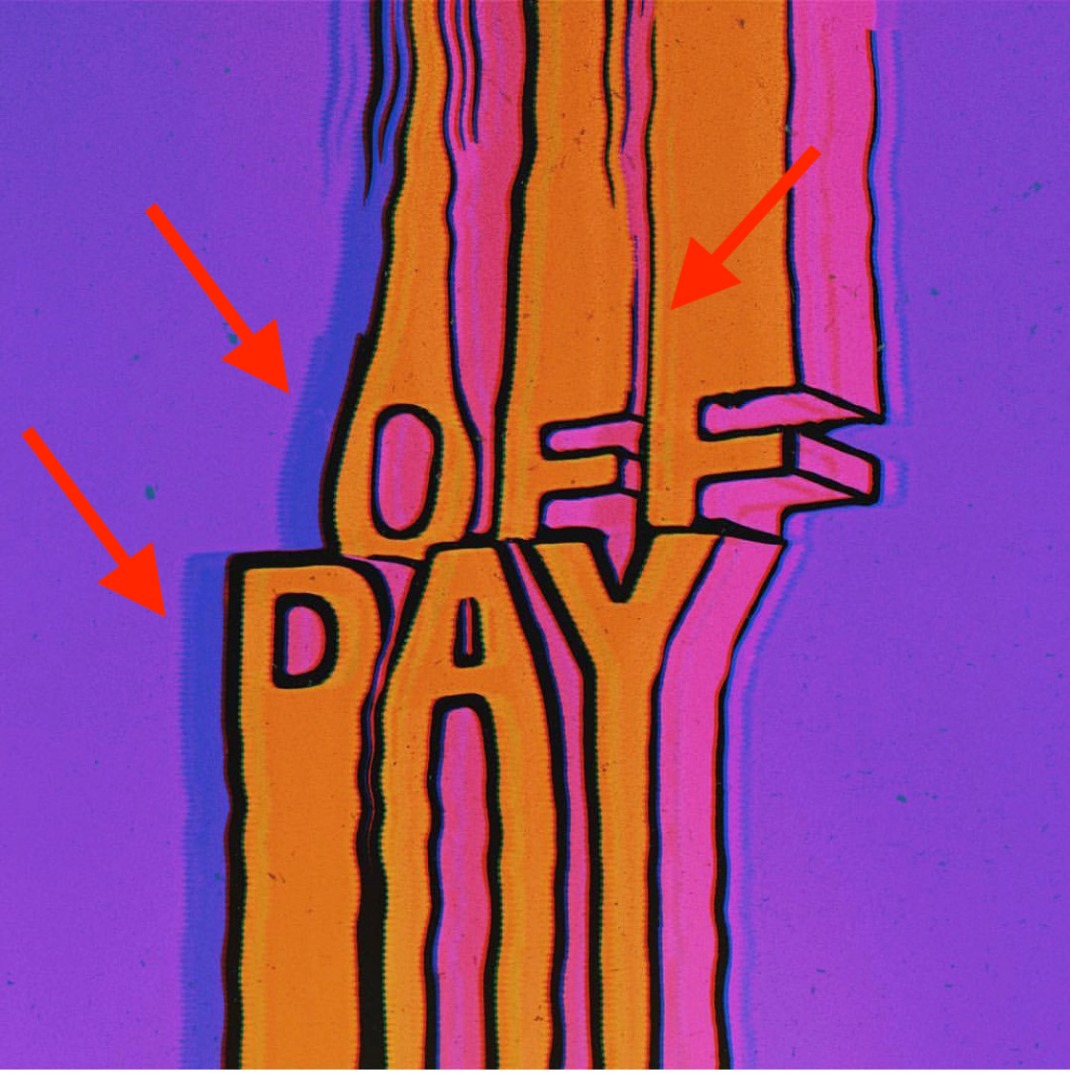
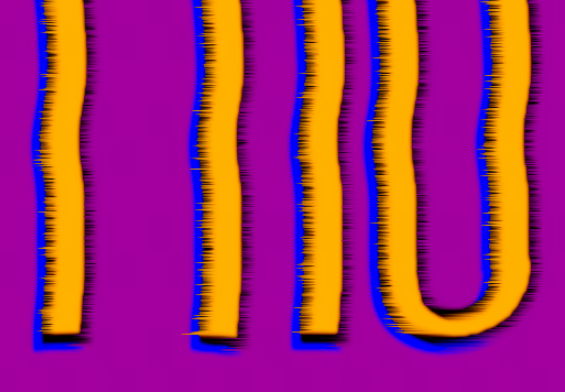
someone cold help me to understand how could be made the artwork below?
In particular how have been realized the jitter of different shades of color.
Thanks in advance.
[Title edited for clarity by moderator. Was “how to do it.”]


Explore related tutorials & articles
 15
Replies
15
15
Replies
15

Copy link to clipboard
Copied
Some options would be to use a displacement map or smudge tool.

Copy link to clipboard
Copied
They might have added an inner glow. im on my phone away from home right now, but will take a closer look when I get home.
Copy link to clipboard
Copied
Never mind my reply above - I couldn't see it so well on my phone. Trying a drop shadow - stay tuned.

Copy link to clipboard
Copied
Assuming you know how to use Free Transform to stretch some text.
Remember you'll need to rasterize the text and split it up into separate layers, or the horizontal components will become fatter.

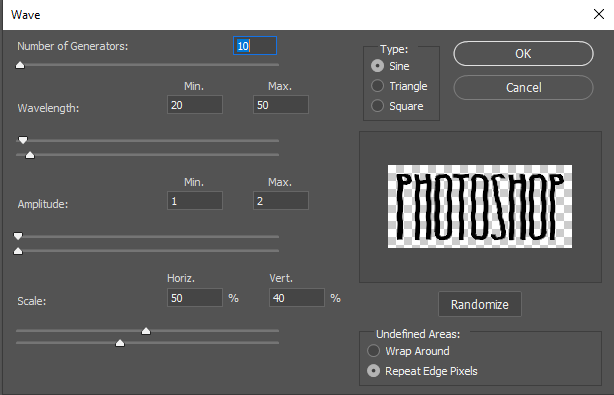
Displacement Map would definitely do the distortion as Chuck says, but I was thinking Filter > Distort > Wave might be quicker.
I made that conditional, because I don't use Wave often, and find it a bit trial and error to get the settings I like.
So with that in mind, make the layer a Smart Object, so you can keep going back in and trying different settings.
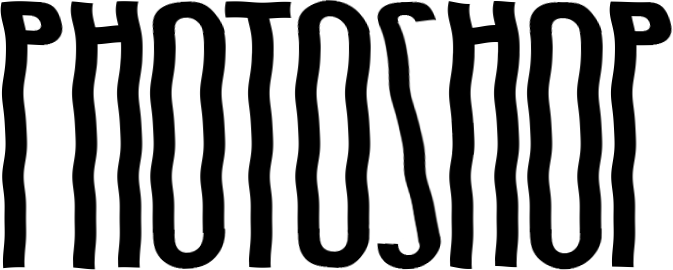
I ended up with these settings on text 700 pixels wide
Which gave me this
Because you'll want to fine tune the shape etc. use Layer Styles to do the other effects
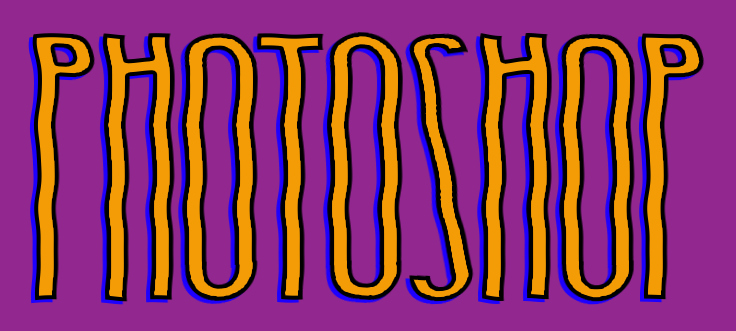
What you can't do with this approach, is change the text after distorting it. The problem is that you can't make the text layer a Smart Object, because of the need to split into separate layers.
Copy link to clipboard
Copied
Thanks a lot Trevor.Dennis it been very usefull,
but i'm in trouble in particular with the jitter/striped effect on borders of text.


Copy link to clipboard
Copied
Hi
You could try something like this
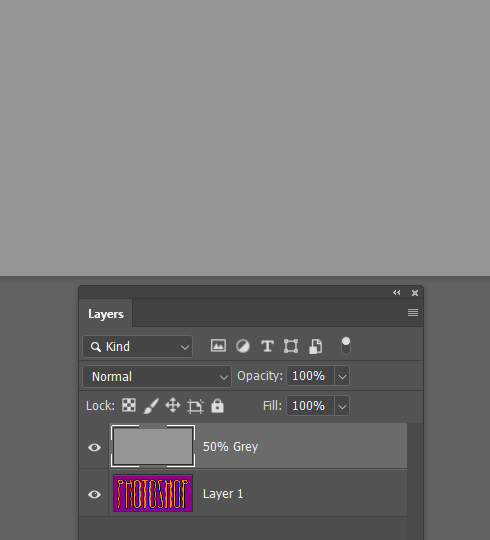
Starting with the wavy text as shown by Trevor, create another document the same size as your current and fill a layer with 50% gray. Go to Filter Gallery an choose Half-Tone pattern, with size 1 and pattern type "Line"
Go to the channels panel and Select the Green channel - and fill it with 50% gray. Repeat for the blue channel
This should leave you with a horizontal striped patten in the Red Channel.
Save this as DisplaceMap.psd (ensure Maximise compatibility is checked in Preferences File Handling)
In your text document put the text and background in a smart object and duplicate it.
On the upper duplicate use Filter Distort >Displace with scale set to 1 or 2 and choose the DisplaceMap.psd you made above as the displacement map.
Add a gaussian blur and change the blend mode to luminosity. Adjust the opacity to get the effect you need.
Dave
Copy link to clipboard
Copied
Dave, that's a clever workaround. I've tried to think of an alternative, but it always comes back to Halftone one way or another.
What I did is create the 50% layer and apply Halftone > Lines. I compressed that vertically by 50%, copied, moved down, and merged the layers to give me finer lines. This is a section at 100% zoom — the lines appear closer in Photoshop.

From there I kept it simple.
Turned off the lines layer.
Duplicate the artwork layer.
Copied the lines layer as a selection, and add a layer mask to the duplicated artwork layer.
It was then down to offsetting the upper artwork layer. I quite like this approach as it is so easy to vary the effect by using the move tool.
BTW I did look at the Video filters with a vague thought about deinterlacing, but I've never used those filters before, so did not have a clear idea of how they work. I also looked at Wind, but the lowest setting is way to much
Copy link to clipboard
Copied
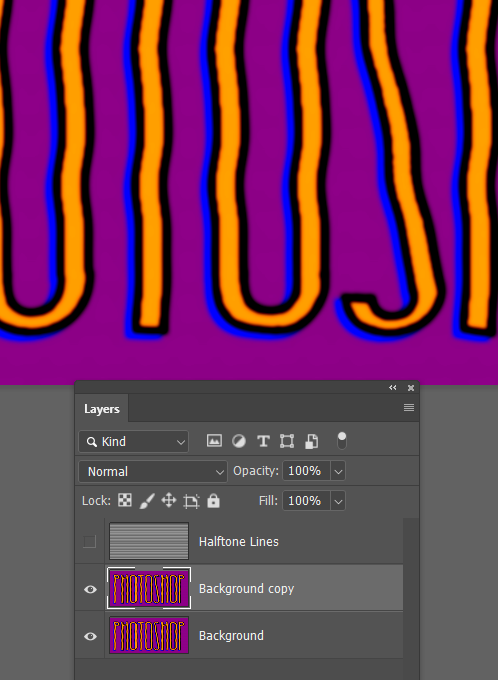
Trevor.Dennis i think the closest option is the one you shown in the first picture above, but i didn't understood the process
please could you show it more clearly?
Copy link to clipboard
Copied
matibuc4eva wrote
Thanks a lot Trevor.Dennis it been very usefull,
but i'm in trouble in particular with the jitter/striped effect on borders of text.

Pretty much looks like some Gaussian Blur was used, maybe after a rough outline of the original text was made/copied and then masked after the "scanlines" were applied.
That's my guess, anyway.
Copy link to clipboard
Copied
That part almost looks to me like it's just an image (raster) that was blown up a lot larger than its original size.
Copy link to clipboard
Copied
Please someone could tell me what does it mean when Trevor.Dennis say: "Copied lines layer as a selection" and "add a layer mask"
I miss just this step, but in that context i don't understand how to proceed.
Thanks.
Copy link to clipboard
Copied
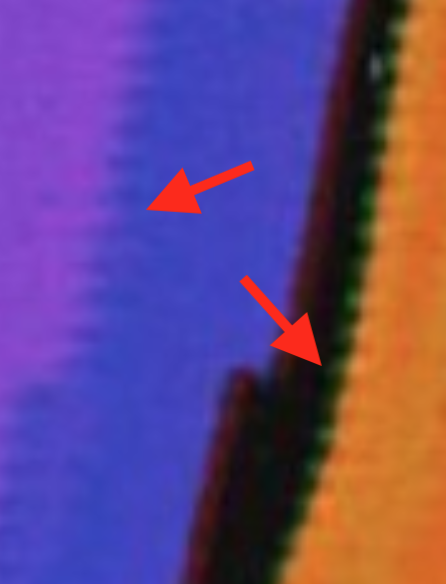
Have the lines layer at the top of the stack so it is covering the rest of the graphic, and ctrl click any of the channels.
I've zoomed well in here for the sake of clarity.
Ask as many questions as you like. We'll never get fed up answering.
Copy link to clipboard
Copied
I'm so sorry Trevor.Dennis but i can't understand the procedure to achieve the image you posted above:

Copy link to clipboard
Copied
No problem.
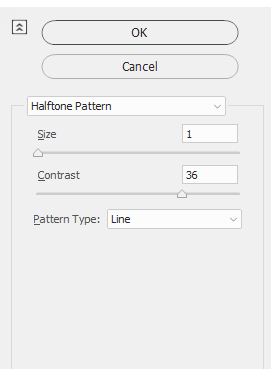
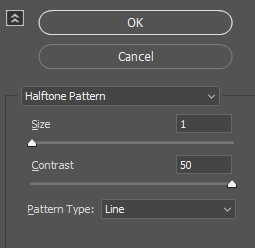
First we need to make some lines. We'll use Halftone, but that filter needs something to work with, so we fill a new layer with grey. The exact shade of grey does not matter.
Now you MUST set foreground/background colours to black and white. Hit the D key to make that happen.
Go Filter > Sketch > Halftone
Use these settings
I thought the lines were not spaced closely enough when I made my previous post, so I doubled up, but let's ignore that step for now.
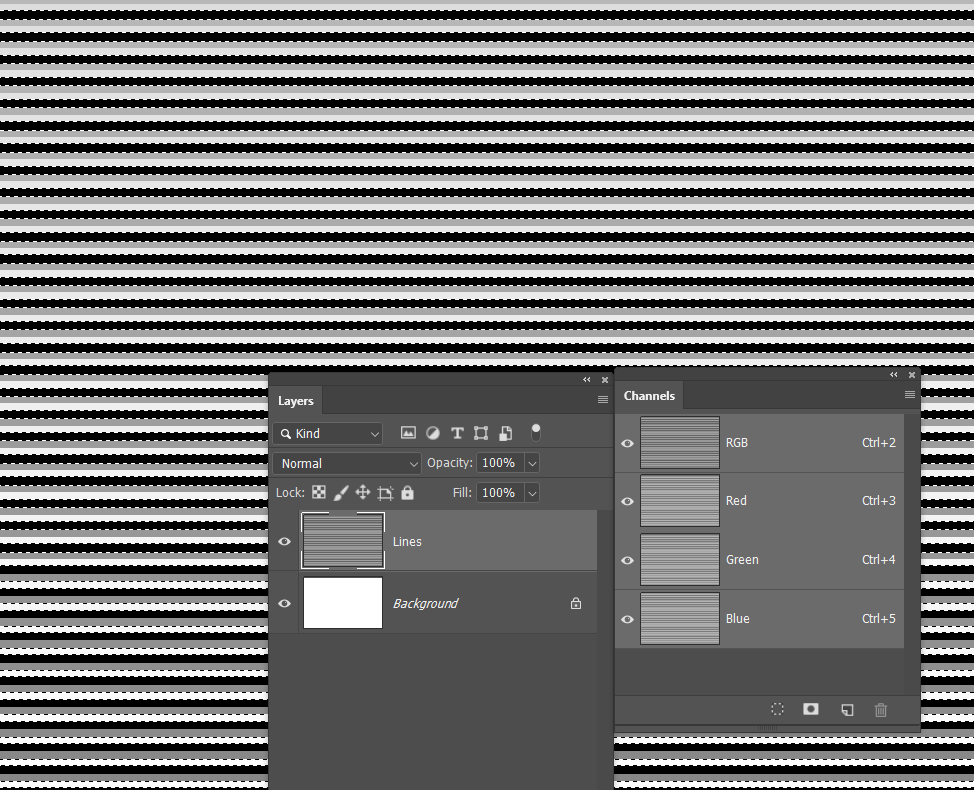
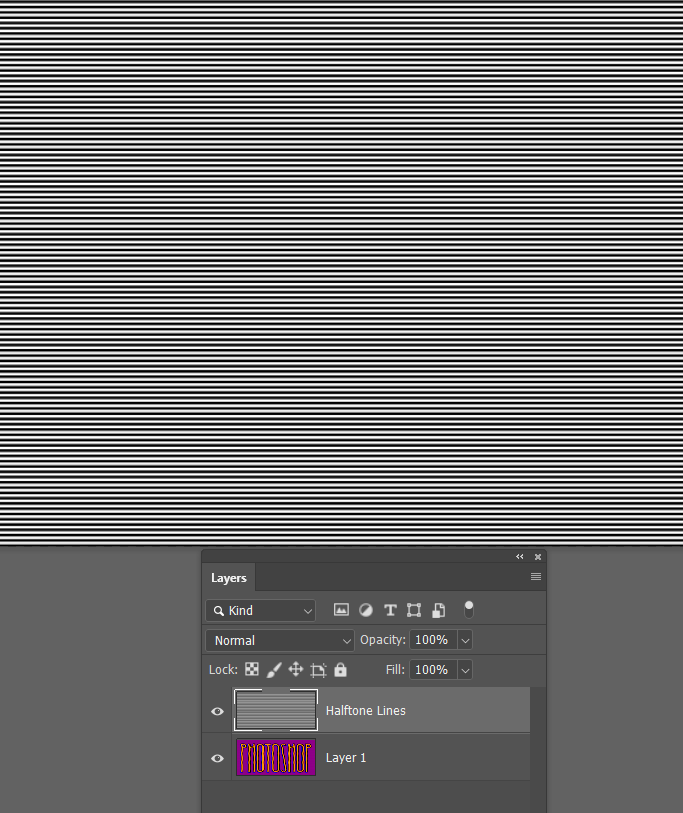
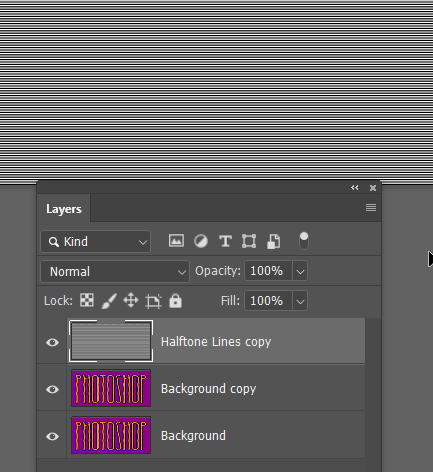
So I turn off the Halftone lines layer, and copy the artwork layer (Ctrl J)
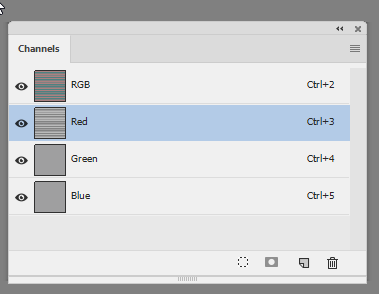
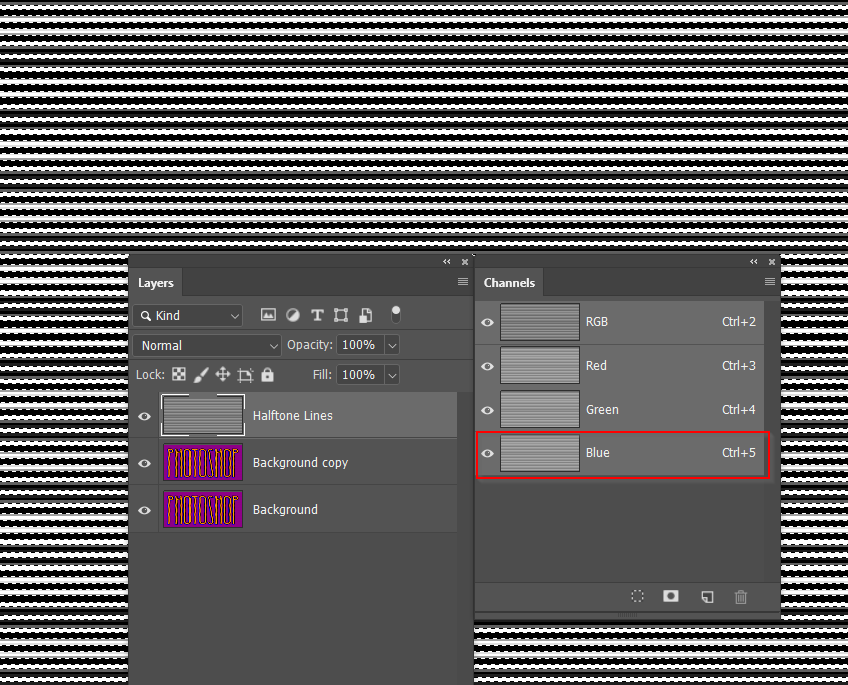
Now we need to load the lines layer as a selection, because we need to use it in a mask.
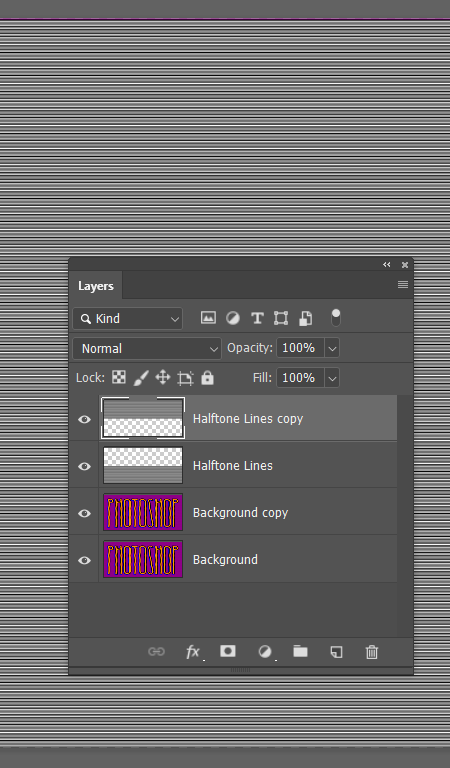
So we turn the lines layer back on, and go to the Chanels panel (you can undock the panels and drag out to the middle of the screen like I have, if that makes it easier).
With the lines layer turned on, Ctrl click _any_ of the channels. I've highlighted the Blue channel, but they are all the same so it does not matter. You should see the marching ants to indicated that the black lines are selected, and the white lines are not selected.
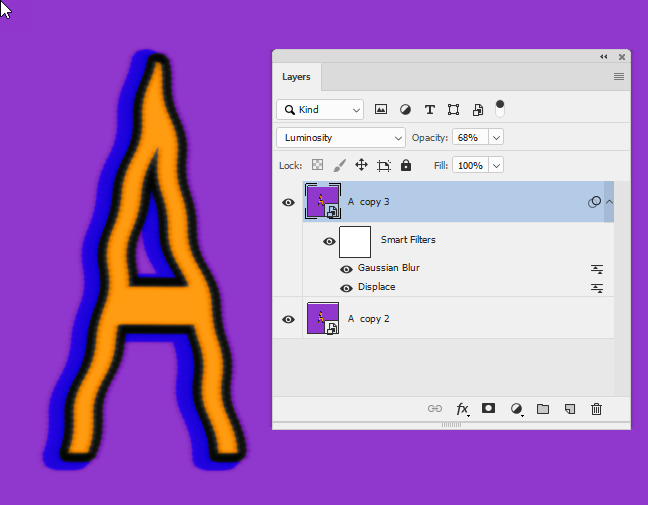
Now we turn off the lines layer, and add a layer mask the copy of the background layer by clicking on the icon at the bottom of the layers panel.
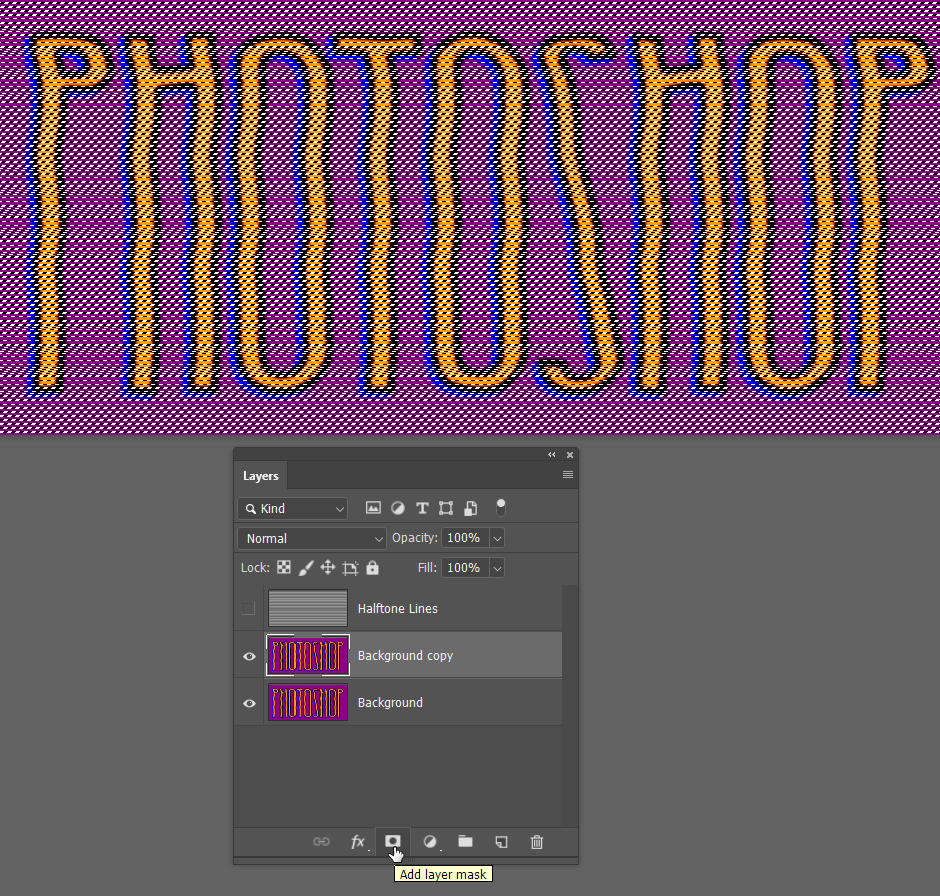
Your layers panel should now look like this

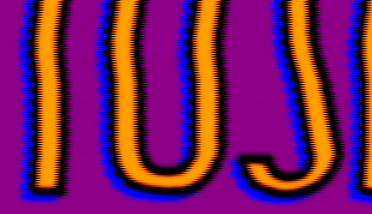
What happens now is that where the layer mask has black, it will hide that layer's contents. Where the layer mask is white, it will show the layer's content. So if we move the upper layer sideways.
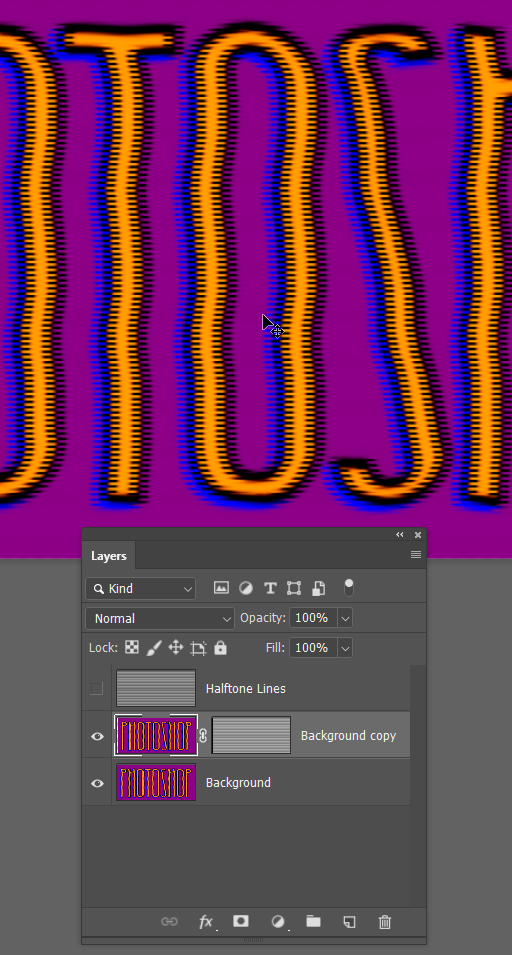
You just about see the transparent area to the left of the upper layer.
I'll move it some more to make it more apparent
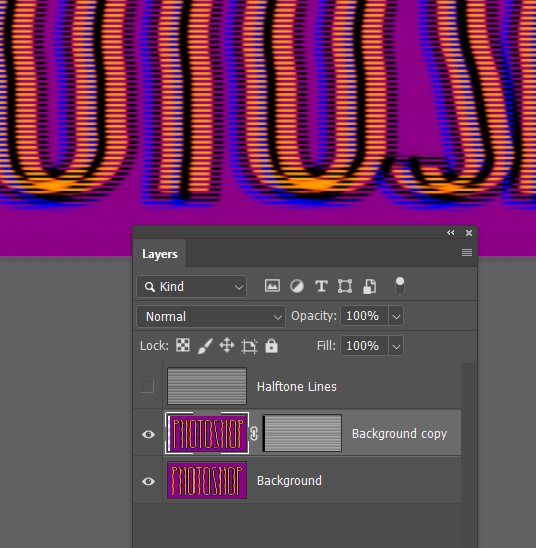
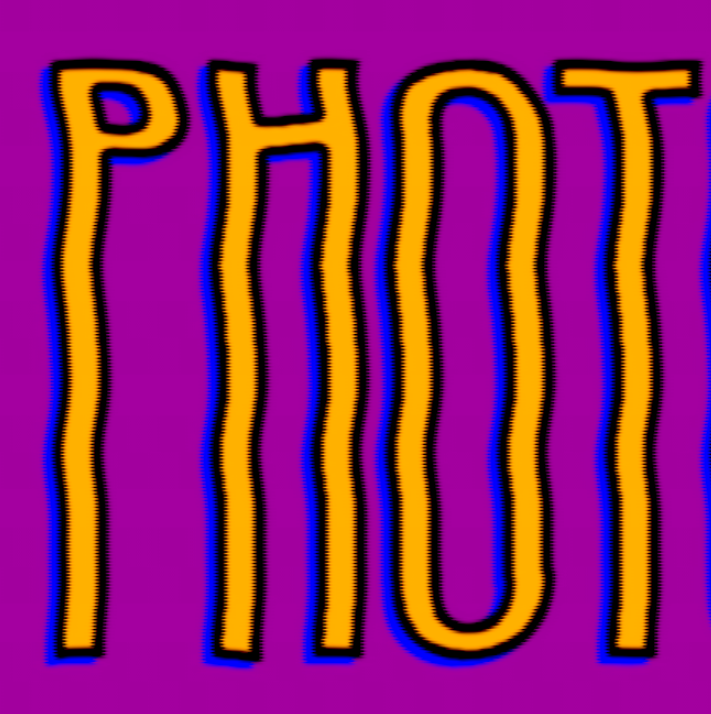
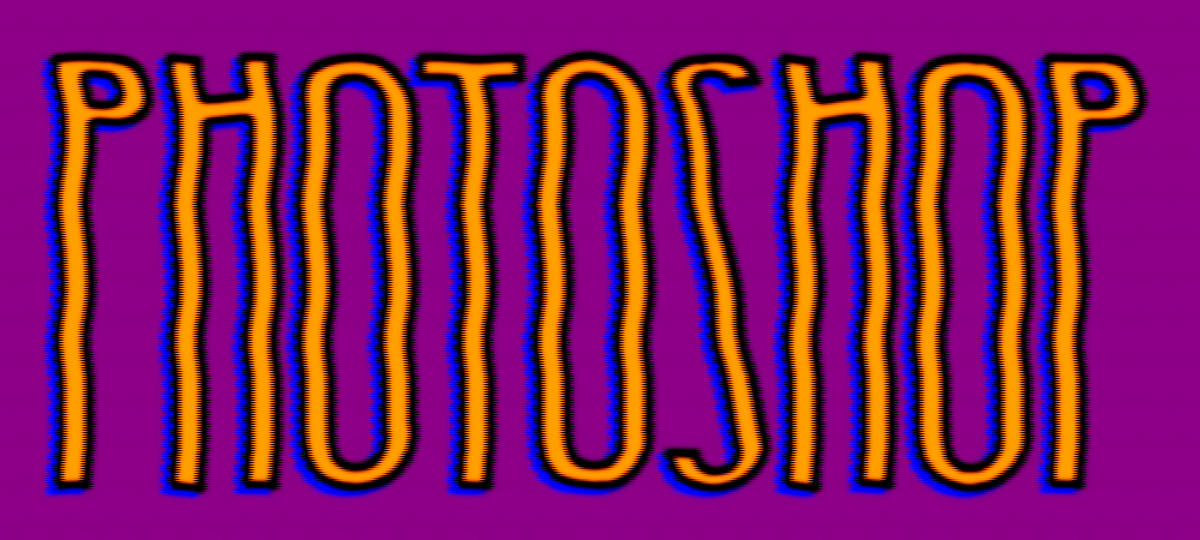
You can see that the jitter effect is fairly course. What I did to fix that was use Free Transform (Ctrl T) on the lines layer.
You need to hold down the Shift key, and drag the top center handle down to about half way
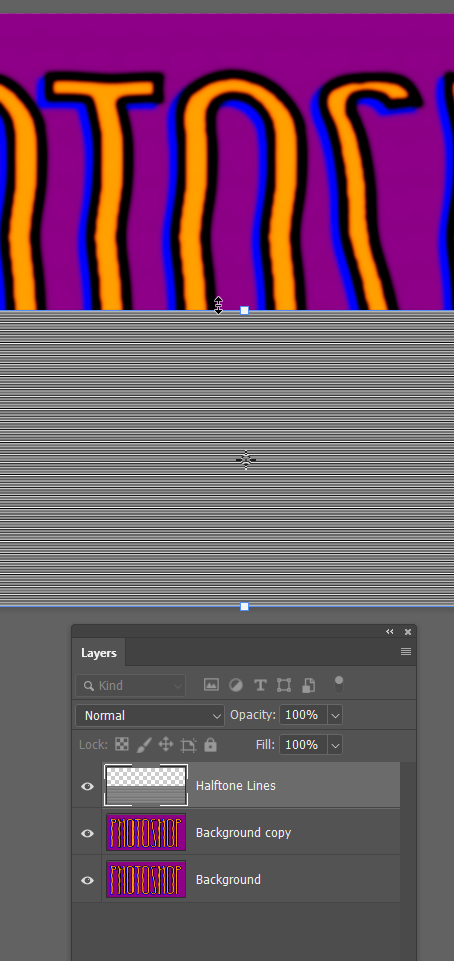
OK that, and copy the lines layer (Ctrl J)
Move the copy to the top of the page so it lines up with the original lines layer
Then merge the lines layer (Select both layers and use Ctrl E)
You will now be back to where you were earlier, but with finer line spacing
Giving you a finer jitter effect
Copy link to clipboard
Copied
I'm travelling for a few days, so can't help you till you get home, but Dave, or Chuck or someone will help I am sure.

Find more inspiration, events, and resources on the new Adobe Community
Explore Now
 AdChoices