 Adobe Community
- Home
- Photoshop ecosystem
- Discussions
- How to fit image in particular frame?
- How to fit image in particular frame?

Copy link to clipboard
Copied
Hi all, me again with a new trouble.
I'm trying to insert a photo inside a file, so I can standardize the rest of my collection.
I tested all the scripts I found and tips on FIT IMAGE TO FRAME but no success.
Where am I going wrong?
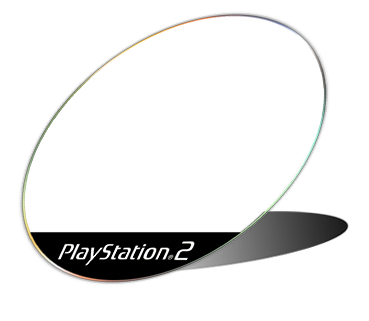
Below is the image I want and where I need to put it
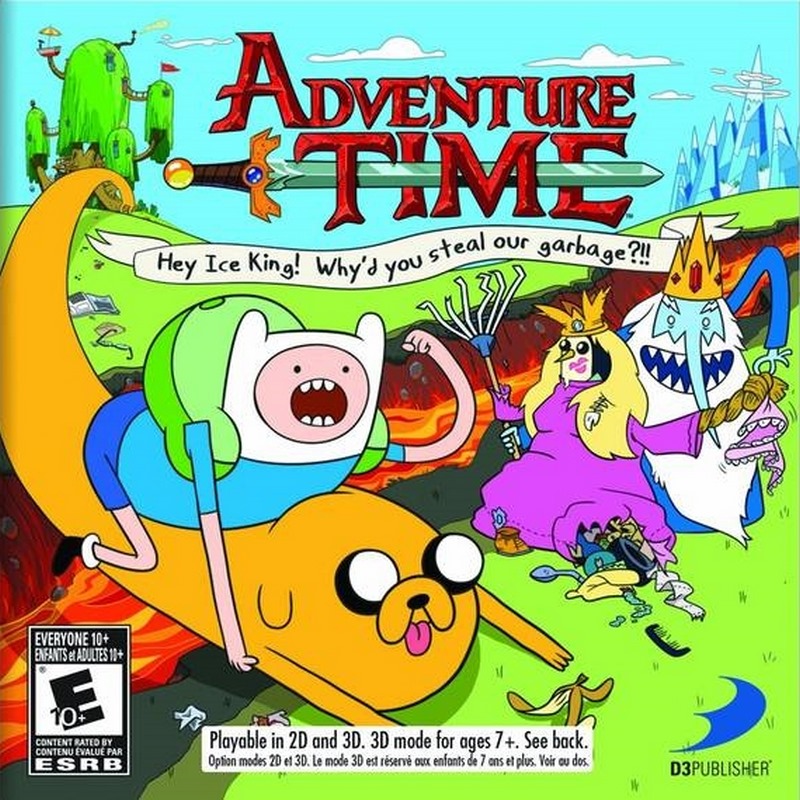
My goal
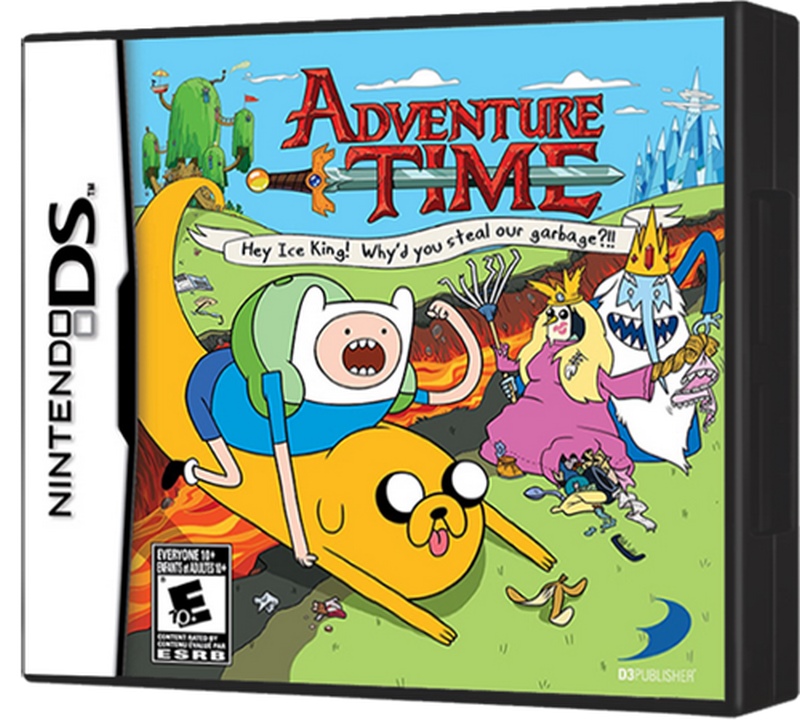
How to make this?? I have 320 images to make this, any Actions tip?
Thanks in advance.
Claudio


 1 Correct answer
I have created template and recorded action. Download it from here Claudio files.zip - Google Drive You will need Image Processor Pro installed ps-scripts - Browse /Image Processor Pro at SourceForge.net . I am running 2.3.0 version while testing. Note: I will assume that all your images which you want to use for replacement are 940x842px with single layer present.
- Open PSD template which I have prepared in Photoshop.
- Load action Batch replace SO content (it is included with template)
- With templat
Explore related tutorials & articles
 36
Replies
36
36
Replies
36
Copy link to clipboard
Copied
Another great help for thread!!
Thanks again Sir Bojan Živković.
Im shared with my friends. subscribe YT too!!
Claudio

Copy link to clipboard
Copied
That Script had an additional step t set a color for the back-cover, below is an amended version.
The gif shows running the Script on an image with a transformed Smart Object selected and selecting three mock-up covers and then the resulting images.
// replace smart object’s content and save psd;
// 2018, use it at your own risk;
#target "photoshop-120.032"
if (app.documents.length > 0) {
var myDocument = app.activeDocument;
var theName= myDocument.name.match(/(.*)\.[^\.]+$/)[1];
var thePath = myDocument.path;
var theLayer = myDocument.activeLayer;
// psd options;
psdOpts = new PhotoshopSaveOptions();
psdOpts.embedColorProfile = true;
psdOpts.alphaChannels = true;
psdOpts.layers = true;
psdOpts.spotColors = true;
// check if layer is smart object;
if (theLayer.kind != "LayerKind.SMARTOBJECT") {alert ("selected layer is not a smart object")}
else {
// select files;
if ($.os.search(/windows/i) != -1) {var theFiles = File.openDialog ("please select files", "*.psd;*.tif", true)}
else {var theFiles = File.openDialog ("please select files", getFiles, true)};
if (theFiles) {
// work through the array;
for (var m = 0; m < theFiles.length; m++) {
// replace smart object;
theLayer = replaceContents (theFiles
var theNewName = theFiles
//save jpg;
myDocument.saveAs((new File(thePath+"/"+theName+"_"+theNewName+".psd")),psdOpts,true);
}
}
}
};
////// get psds, tifs and jpgs from files //////
function getFiles (theFile) {
if (theFile.name.match(/\.(psd|tif|png)$/i) != null || theFile.constructor.name == "Folder") {
return true
};
};
////// replace contents //////
function replaceContents (newFile, theSO) {
app.activeDocument.activeLayer = theSO;
// =======================================================
var idplacedLayerReplaceContents = stringIDToTypeID( "placedLayerReplaceContents" );
var desc3 = new ActionDescriptor();
var idnull = charIDToTypeID( "null" );
desc3.putPath( idnull, new File( newFile ) );
var idPgNm = charIDToTypeID( "PgNm" );
desc3.putInteger( idPgNm, 1 );
executeAction( idplacedLayerReplaceContents, desc3, DialogModes.NO );
return app.activeDocument.activeLayer
};
Copy link to clipboard
Copied
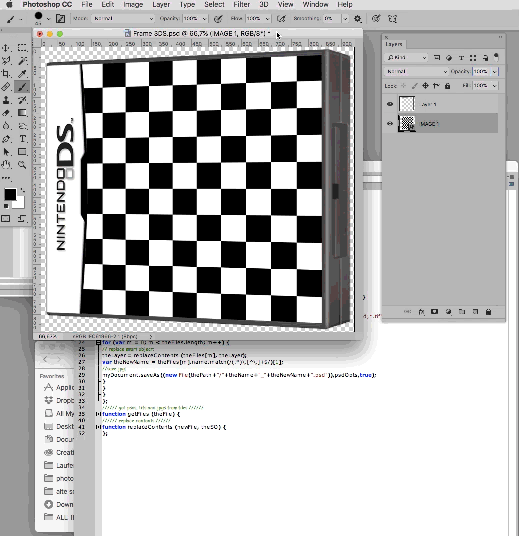
Hi Bojan, I make it but some step is missing on my mind.
Here: 3DS.zip - Google Drive
Its contain 2 files.
Thanks,
Claudio

Copy link to clipboard
Copied
I've been using this method for almost anything i can think of. I have run into an issue where I'm a little stumped on how to fix. Every image goes perfectly into place but there is a space in the middle where I would like to keep white. Instead, you see the previous images from this batch. Is there a way to not show the previous images in the middle? I've attached an example so you can better see what I'm talking about. I've using the batch script you provided. If there is a way to adjust that script let me know.
In the picture you can see the blue and yellow which I do not wan there. I have a bunch of images where the middle portion does not line up everytime but If there was a way to remove the previous image before the top layer pastes, that would probably solve my issue.
Thanks.

Copy link to clipboard
Copied
I've been using this method for almost anything i can think of.
Can you give us more details about method? Which particular method?
Copy link to clipboard
Copied
I've attached a video showing what i'm doing. It's basically the same script you provided up abode in this thread.
Copy link to clipboard
Copied
From the first look at your video, it seems to me that problem is layer to which is clipped SO layer and bottom layer with cast shadow because they both have content which is showing in the final exported image.
When you clip something to layer below it will replace pixels but you will have problem when you have no content (transparency) on layer which is clipped to layer below. In that case pixels on layer to which is clipped another layer will show up (white on your final image).
Do you need clipping mask and why?
Another problem is bottom most layer which is easier to solve, remove content (white ellipse) and leave only cast shadow. If you are using that layer to add white border around then you must have another approach and to look for a different solution.
Here is quick solution which comes to my mind for clipping mask: do not clip SO layer but instead use ellipse to which is clipped to create selection for layer mask applied to SO layer then delete ellipse to which is clipped SO layer.
Update: it seems that I have missed the point and what you really want. How many layers do you have in images which you are batch processing?
Copy link to clipboard
Copied
Thank you for your help. To answer your update question, I want one layer, which it does create. I am using a tipping mask because it is easier for me to hide all the imperfections along the edges of that layer. I know there are other ways around that but this was the easiest for me to do. In the end, I want one layer where the middle portions do not overlap.
If removing the clipping mask will fix that then I will try that. If not, then I have to go through each file individually and remove that section.
Copy link to clipboard
Copied
Your output images have desired image and one more image below from what I see on your video. Please correct me if that's not true.
Action expects only one layer in images which you are batch processing and that layer will be deleted using one of the action step. If you have multiple layers in source images (images to batch process or folder with images in section 1 in Image Processor dialog) then you need another approach and additional steps in action to merge layers to a single layer).
If you can not figure out what to do then please upload or deliver to me files: template and few images for batch process with detailed description what you want as output image: do you want transparent areas in the middle or you are ok with white in the middle circle?
Copy link to clipboard
Copied
I still cannot figure it out. Ideally, I would like to have the middle portion transparent. I had a white middle because that was the only way I could figure out how to do a clipping mask.
Template
Some files for batch
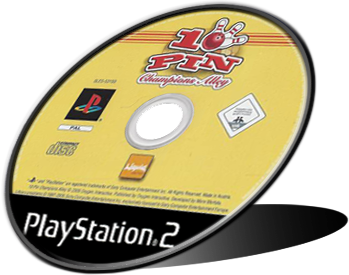
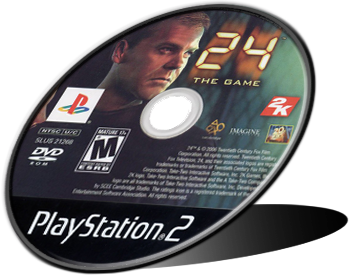

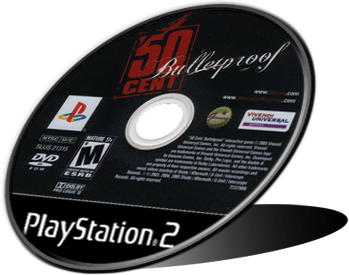
Is there a way to have the middle of each disc be placed in the exact same spot? Some middle portions are not in the same spot as the other discs and that might solve my issue if i could stretch out the other portions of the image and not keep the middle intact.
Copy link to clipboard
Copied
My action provided above is not recorded for this type of problems. Action is suitable in case that you have images/designs which go inside of disc as a separate files. Images should not be distorted, that should be done after converting image to Smart Object layer in the file which will be used as template. Another component is frame or disc which should be above.
Do you have images or designs which are inside disc as a separate files? That will work to use my action which you are trying to use.
Copy link to clipboard
Copied
Unfortunately I don't have them in separate files. I found the images online and save them on my computer. I make the images the same size with a transparent background but that's all I can really do in order to automate what I'm trying to do. If I have to manually remove the middle portion then I will. I was hoping there might be an easier way. Thanks for your help!
-
- 1
- 2

 AdChoices