- Home
- Photoshop ecosystem
- Discussions
- Re: How to make path behind anamation
- Re: How to make path behind anamation
How to make path behind animation
Copy link to clipboard
Copied
I have a simple key frame animation of a caricature moving on the screen. I would like to have it leave a trail of its path of movement. How do I do this in Photoshop?
Thx
D
Explore related tutorials & articles
Copy link to clipboard
Copied
I will get back to this late Monday or early Tuesday. in the meantime thanks for the help!
D
Copy link to clipboard
Copied
Hi Michelle
Your demo is for a video timeline whereas daveo58 is using a frame animation timeline. There are no keyframes just the frame by frame animation.
daveo58 when you get a chance show us the screenshot and we should be able to see what is causing the issue.
Dave
Copy link to clipboard
Copied
Hi Dave!
I thought about that too. Here is a screenshot of the dropdown menu that is at the top right of the animation panel:
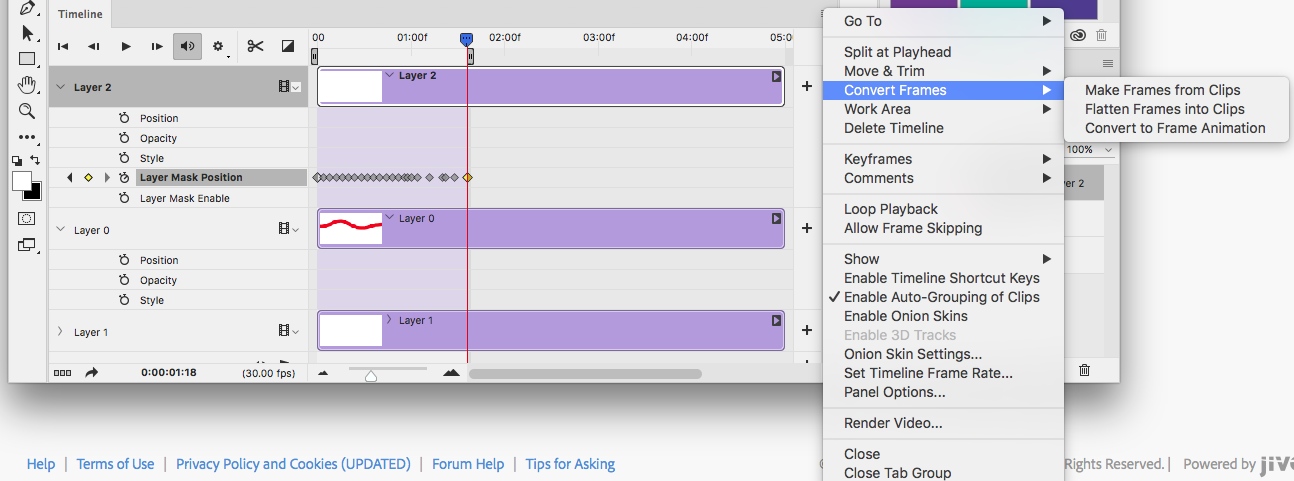
One you select Convert to Frame Animation, you get the following dialog box:
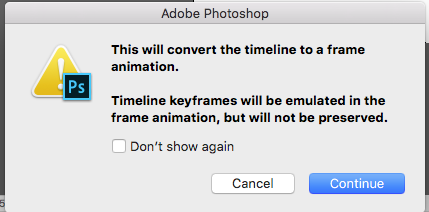
And it converts it to frames. See the following:
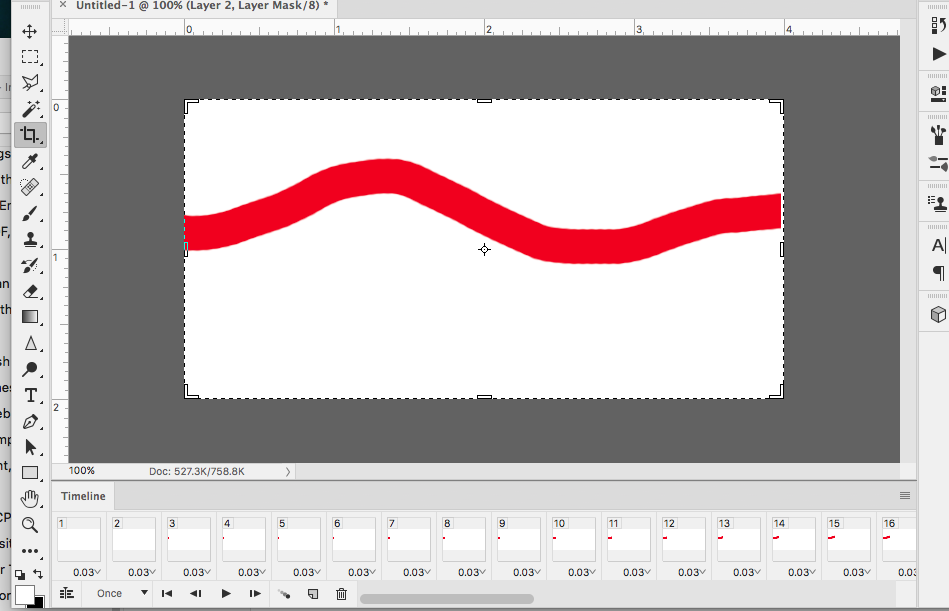
And when you hit ok, the timeline has turned into frames. It seems to work pretty well. I think it might be easier to work with the video timeline to create and adjust the timing and then convert it to frame by frame. What are your thoughts?
Michelle
Copy link to clipboard
Copied
Hi Michelle
That will work - although you will need to ensure the path layer is transparent. However, whilst you can do that , in this case there is no need to use a video timeline.
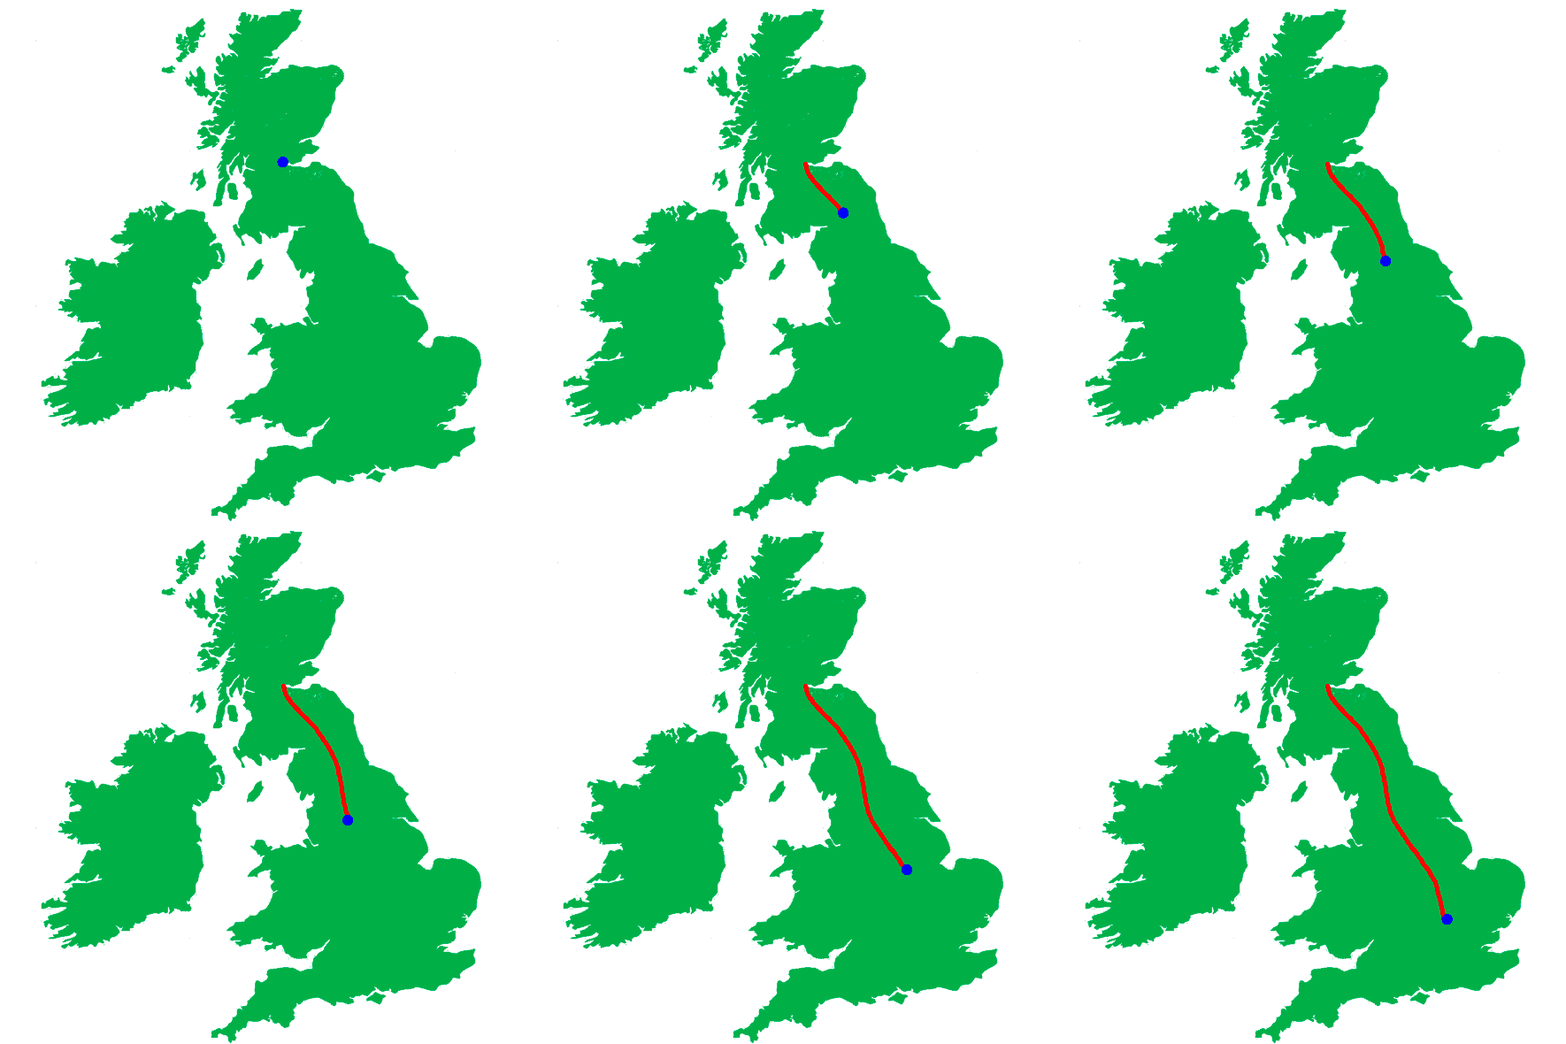
Below is a gif created using just 41 frames in the frame animation timeline - all set to 0.1 secs except frame 1 and frame 41 which were 1.0 secs.
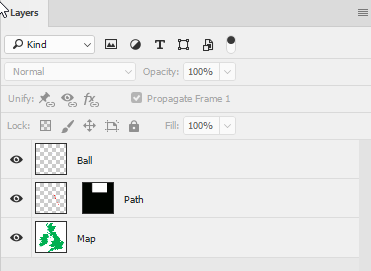
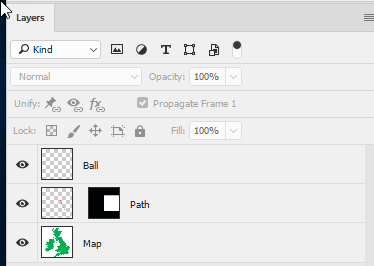
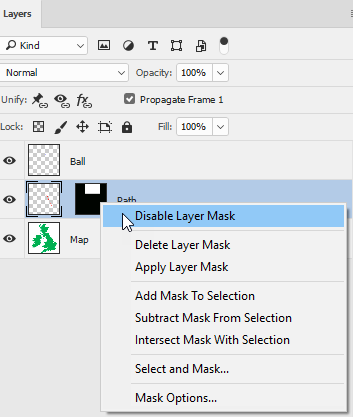
I used 3 layers only. After creating the 3 layers I disabled the layer mask and went through each frame moving the ball layer along the path which was fully visible due to the layer mask being disabled.
I then went through each frame again - enabling the layer mask in each frame and moving it so that the edge of the white rectangle matched the movement in the "ball" layer as previously described.
So at frame 1 it looks like this:
At frame 41 it looks like this (the ball layer and the path mask are the only two things that have moved):
Dave
Copy link to clipboard
Copied
Dave,
Your gif is what I'm trying accomplish. I have three lays with a mask on the path layer, with mask unlinked from the layer. I then have a rectangle that I filled with white so that you can now see all the path. I then move the rectangle off the image so the path is now not visible. This is the point I'm not sure what to do next. Also I'm in timeline below the image.
D
Copy link to clipboard
Copied
Hi
I'll lay out the steps in some more detail - hopefully that will help.
1. Create a layer with the map
2. Use new layer to create a new transparent layer and on it use a brush to paint the "path". (Note this refers to the path of the object not the Photoshop use of paths)
3. Add another transparent layer and on it paint the ball, which was just a dot with the brush at 100% hardness. (In your case you will use your bird image.
4. Select the "path" layer and use Layer - Layer Mask - Hide all to create a black mask. This will hide the brushed path.
5. Use the rectangular marquee to select around the path and, with the mask selected, fill with white. This will once again reveal the path.
6. Unlink the mask from the layer.
7. Ensure your move tool does not have auto-select checked but show transform controls is checked

8. Move the mask upward so that the bottom of the rectangle is just above (in your case to the left) of the path start point. This will hide the path.
9. Right click on the mask and disable the layer mask - this will reveal the path layer
10. Open the timeline and click on create frame animation. The first frame will be created.
11. In the timeline click on new frame.
12. Select the ball layer and use the move tool move the ball along the path
13. Repeat steps 11&12 so that you have enough frames to have the ball move end to end.
14.Select frame 1 and set the time to 1 second
15. Select the last frame (in my case 41) and set the time to 1 second
16. Select the in between frames (in my case 2-40 ) and set the time to 0.1 seconds.
17. Check the animation of the ball (or in your case the bird ) plays in the timeline.
18. Select frame 1
19. In the layers panel right click on the mask to enable it (which will hide the path)
20 Select frame 2
21 In the layers panel right click on the mask and enable it. Then use the move tool over the image to drag the mask down revealing the first part of the path
22. Select the next frame and repeat steps 21-22 until all frames are complete
23. Your animation should now play in the timeline with the ball moving and the path gradually revealing
24. Save the PSD file
24. Use Export - Save for Web Legacy to create the gif
I hope that helps
Dave
-
- 1
- 2
Find more inspiration, events, and resources on the new Adobe Community
Explore Now