- Home
- Photoshop ecosystem
- Discussions
- Re: How-To: Photoshop Smudge Effect on Images ?
- Re: How-To: Photoshop Smudge Effect on Images ?
Copy link to clipboard
Copied
Hi
A Photoshop newbie here, appreciate any help and guidance from the expert!
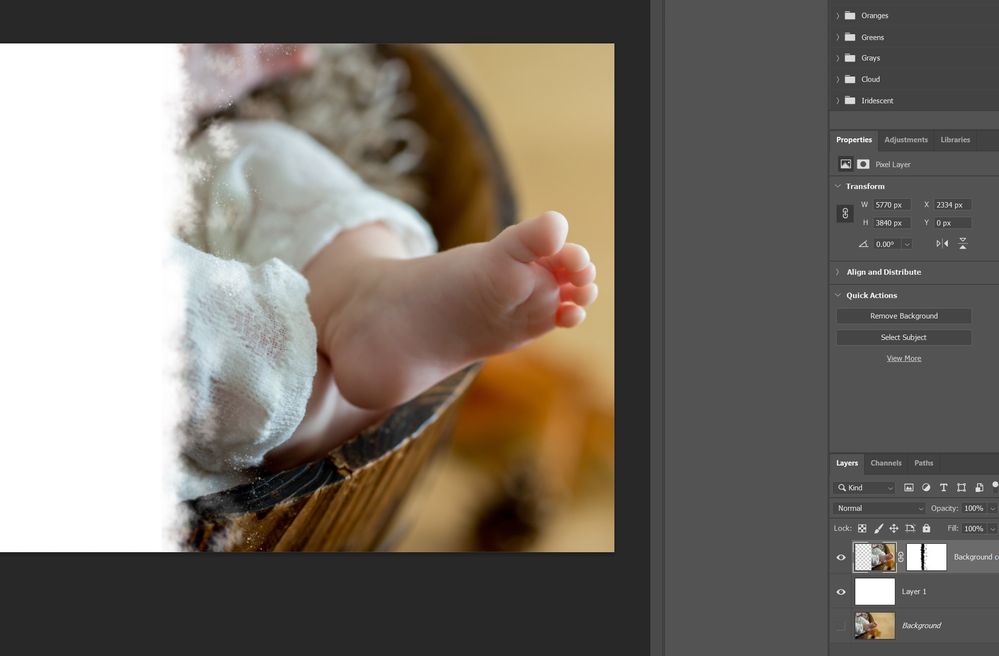
Just wondering how would i create such an effect on an image!. I believe it is a smudged effect which is a cool way to transition from the image to white space/background to write some text. It will be used for posts in Instagram or Facebook.
 3 Correct answers
Seems like the effect of Layer Masks.
To create it you could try using a randomized, scattered brush or look for stock images that provide structures you like.
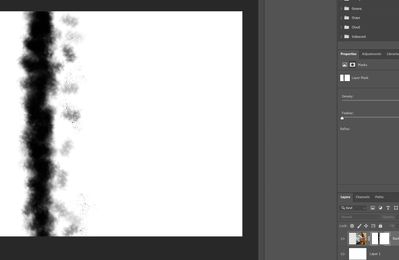
Some screenshots concerning a randomized Brush:
By putting multiple Layers in a Group with the Blend Mode »Normal« one can use a Knockout-Layer with Fill 0% one those.
By using a Linked Smart Object one can use the same Knockout in multiple files and, if onechanges the SO itself, update it the next time one opens the layered images.
A Library Smart Object may be more convenient for placing, though.
Explore related tutorials & articles
Copy link to clipboard
Copied
Seems like the effect of Layer Masks.
To create it you could try using a randomized, scattered brush or look for stock images that provide structures you like.
Copy link to clipboard
Copied
Some screenshots concerning a randomized Brush:
Copy link to clipboard
Copied
Thank you @c.pfaffenbichler
Could you please send me the settings of the brush? It seems I could not reproduce similar to your effect...
And
would it be possible to achieve this through a layer mask, therefore, it does not destruct the actual image?
Thank you
YouElz
Copy link to clipboard
Copied
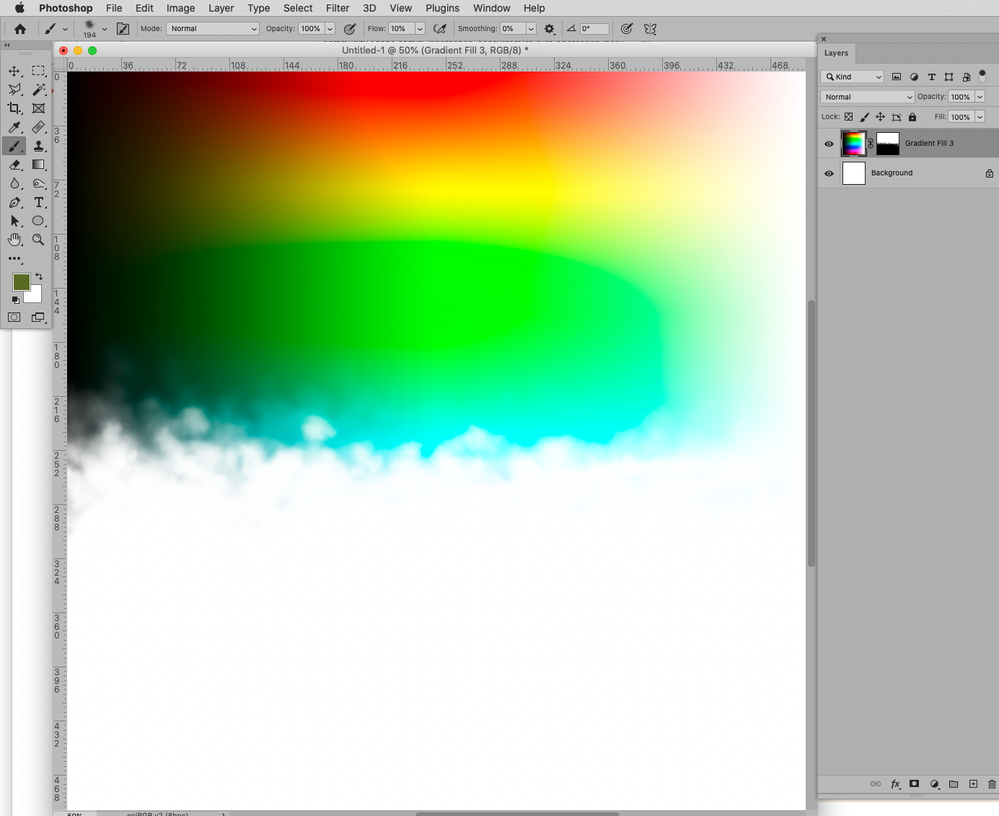
Create a foggy black splotch on white and create a brush tip (Edit > Define Brush Preset) from that.
Then you can apply Shape Dynamics and Scattering (similar to what the screenshots show) and save a new Brush with those settings.
would it be possible to achieve this through a layer mask, therefore, it does not destruct the actual image?
That’s the point and the screenshot in my first post on this thread should show that the Layer Mask does not affect the Layer’s original pixel content.
Copy link to clipboard
Copied
@c.pfaffenbichler Great, thank you I believe I achieved what I am looking for...
Now, another question please;
so I have the layer masked set up the way I wanted to appear.
How can I apply the same mask over other images without losing the effect, or recreating the mask again? In some pictures, I would like the mask to apply vertically and some are horizontal, at different lengths and widths. is it possible? just to avoid rework..

Copy link to clipboard
Copied
Many options …
I would recommend to apply the Layer Mask to a Group and put the images in the Group.
If you need to use it in many files you could create a Solid Color Layer (though you may want to make the hidden side of the mask proper black) with the inverted Mask and use it as a linked Smart Object or put in in the Library tu use as a Knockout.
Copy link to clipboard
Copied
Sorry @c.pfaffenbichler
You lost me there!
For the below instructions, would you have a guide or video that you can point me to please?
"If you need to use it in many files you could create a Solid Color Layer (though you may want to make the hidden side of the mask proper black) with the inverted Mask and use it as a linked Smart Object or put in in the Library tu use as a Knockout. "
Copy link to clipboard
Copied
By putting multiple Layers in a Group with the Blend Mode »Normal« one can use a Knockout-Layer with Fill 0% one those.
By using a Linked Smart Object one can use the same Knockout in multiple files and, if onechanges the SO itself, update it the next time one opens the layered images.
A Library Smart Object may be more convenient for placing, though.
Copy link to clipboard
Copied
Thank you very much @c.pfaffenbichler


