Participant
September 29, 2018
Answered

How to prevent pictures overlapping in grid format? Photoshop CC

  • September 29, 2018
  • 5 replies
  • 4330 views

Hello

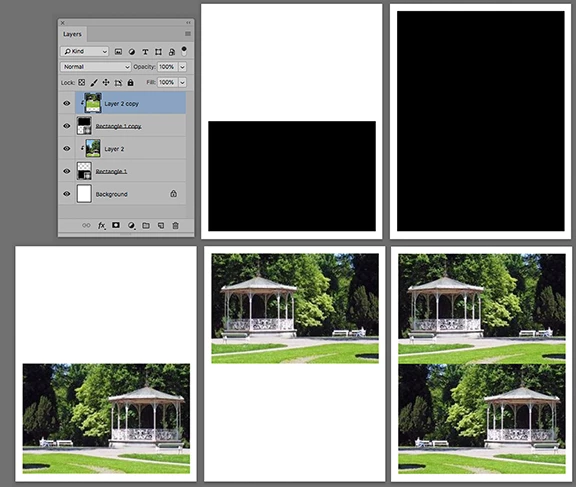
I am designing a brochure in that may have 2, 4 or 6 images that I want to be able to swap out without having them overlap each other.

I have drawn boxes in one layer with the line tool and then I insert each picture as a separate layer behind that.

The images overlap in odd ways, is there a way to make each box in the grid independent of each other so the image stays in each box without having to crop the images to fit?

Thanks

    This topic has been closed for replies.
    Correct answer Norman Sanders

    1. Choose the Rectangle tool. It is located above the Hand tool.

    2. In its Options bar choose Shape, Color: Black Stroke: Blank and drag out your first rectangle. (Fig 1)

    3. Cmd+J to duplicate the Shape layer and then use the move tool and the North keyboard arrow key to move the duplicate layer up to butt the bottom rectangle (Fig 2)

    4.. Return to the bottom rectangle. Paste an image above it. (See Layers in the top row)

    5. Choose Layer > Create Clipping Mask. The image will appear. (Fig 3) -- Note the down arrow jin the Layers panel next to the image.

    6. Move to the top Shape layer and paste an image above it.

    7. Choose Layer > Create Clipping Mask. The image will appear.It will appear in the Fig 4 position

    The completed setup. The butted Shape masks keeps the image from overlapping.

    Note: You can use Edit > Transform > Scale (hold down the shift key to maintain proportion) to resize and position the image within the Shape area.

    5 replies

    DazcAuthor
    Participant
    October 1, 2018

    Thank you Norman, that worked really well.

    Also thank you to everyone else who replied, I will look into your scripting examples JJMack as my skills improve.

    Norman Sanders
    Norman SandersCorrect answer
    Legend
    September 29, 2018

    1. Choose the Rectangle tool. It is located above the Hand tool.

    2. In its Options bar choose Shape, Color: Black Stroke: Blank and drag out your first rectangle. (Fig 1)

    3. Cmd+J to duplicate the Shape layer and then use the move tool and the North keyboard arrow key to move the duplicate layer up to butt the bottom rectangle (Fig 2)

    4.. Return to the bottom rectangle. Paste an image above it. (See Layers in the top row)

    5. Choose Layer > Create Clipping Mask. The image will appear. (Fig 3) -- Note the down arrow jin the Layers panel next to the image.

    6. Move to the top Shape layer and paste an image above it.

    7. Choose Layer > Create Clipping Mask. The image will appear.It will appear in the Fig 4 position

    The completed setup. The butted Shape masks keeps the image from overlapping.

    Note: You can use Edit > Transform > Scale (hold down the shift key to maintain proportion) to resize and position the image within the Shape area.

    DazcAuthor
    Participant
    September 29, 2018

    Thanks for the responses, unsure of exactly what to do with clipping and layer masks as I am still pretty new with PS.

    Here is an example of what I am trying to do, it is a brochure for real estate and I have 2 images separated by a dividing line.

    As you can see the bottom image pokes above the top image, unless I drop it down a bit, but then it cuts off the bottom of the image.

    JJMack
    Community Expert
    Community Expert
    September 29, 2018

    You can create 3 templates for each of your layouts and populate the one you need.  If a simple grid a script could easily do that without a template.  You do not need to write the scripts to populate the grid or templates the are available for free.  However the templates you create must be compatible with the scripts.

    Photo Collage Toolkit

    Photoshop scripting is powerful and I believe this package demonstrates this here is a video showing a 5 image collage PSD template  being populated with images

    The package includes four simple rules to follow when making Photo Collage Template PSD files so they will be compatible with my Photoshop scripts.

    1. Size the photo collage templates for the print size you want - width, height and print DPI resolution.
    2. Photo collage templates must have a Photoshop background layer. The contents of this layer can be anything.
    3. Photo collage templates must have alpha channels named "Image 1", "Image 2", ... "Image n".
    4. Photo collage templates layers above the background layers must provide transparent areas to let the images that will be placed below them show through.

    There are fifteen scripts in this package they provide the following functions:

    1. HelpPhotoCollageToolkit.jsx - Online Help
    2. TestCollageTemplate.jsx - Used to test a Photo Collage Template while you are making it with Photoshop.
    3. CollageTemplateBuilder.jsx - Can build Templates compatible with this toolkit's scripts.
    4. LayerToAlphaChan.jsx - Used to convert a Prototype Image Layer stack into a template document.
    5. InteractivePopulateCollage.jsx - Used to interactively populate Any Photo Collage template. Offers most user control inserting pictures and text.
    6. ReplaceCollageImage.jsx - use to replace a populated collage image Smart Object layer with an other image correctly resized and positioned.
    7. ChangeTextSize.jsx - This script can be used to change Image stamps text size when the size used by the populating did not work well.
    8. PopulateCollageTemplate.jsx - Used to Automatically populate a Photo Collage template and leave the populated copy open in Photoshop.
    9. BatchOneImageCollage.jsx - Used to Automatically Batch Populate Collage templates that only have one image inserted. The Collage or Image may be stamped with text.
    10. BatchMultiImageCollage.jsx - Used to Automatically Batch Populate Any Photo Collage template with images in a source image folder. Easier to use than the interactive script. Saved collages can be tweaked.
    11. PasteImageRoll.jsx - Paste Images into a document to be print on roll paper.
    12. BatchPicturePackage.jsx - Used to Automatically Batch Populate Any Photo Collage template with an image in a source image folder.  Images Rotates for best fit.
    13. BatchPicturePackageNoRotate.jsx - Used to Automatically Batch Populate Any Photo Collage template with an image in a source image folder.
    14. PopulatePicturePackage.jsx - Used to Automatically populate a Photo Collage template Fill with the same single image and leave the populated copy open in Photoshop.
    15. PCTpreferences.jsx - Edit This File to Customize Collage Populating scripts default setting and add your own Layer styles.

    Documentation and Examples

    JJMack
    lambiloon
    Community Expert
    Community Expert
    September 29, 2018

    Hi pictures not overlap here it is same like real time picture as you put on above each other can you show us what you are making so we can guide you properly...Thanks.

    Ali Sajjad / Graphic Design Trainer / Freelancer / Adobe Certified Professional
    Chuck Uebele
    Community Expert
    Community Expert
    September 29, 2018

    You can create boxes where your image will go and make clipping masks out of your images, or you can add layer masks to the images.