- Home
- Photoshop ecosystem
- Discussions
- Re: How to reduce/remove sun glare and light strea...
- Re: How to reduce/remove sun glare and light strea...
How to reduce/remove sun glare and light streak
Copy link to clipboard
Copied
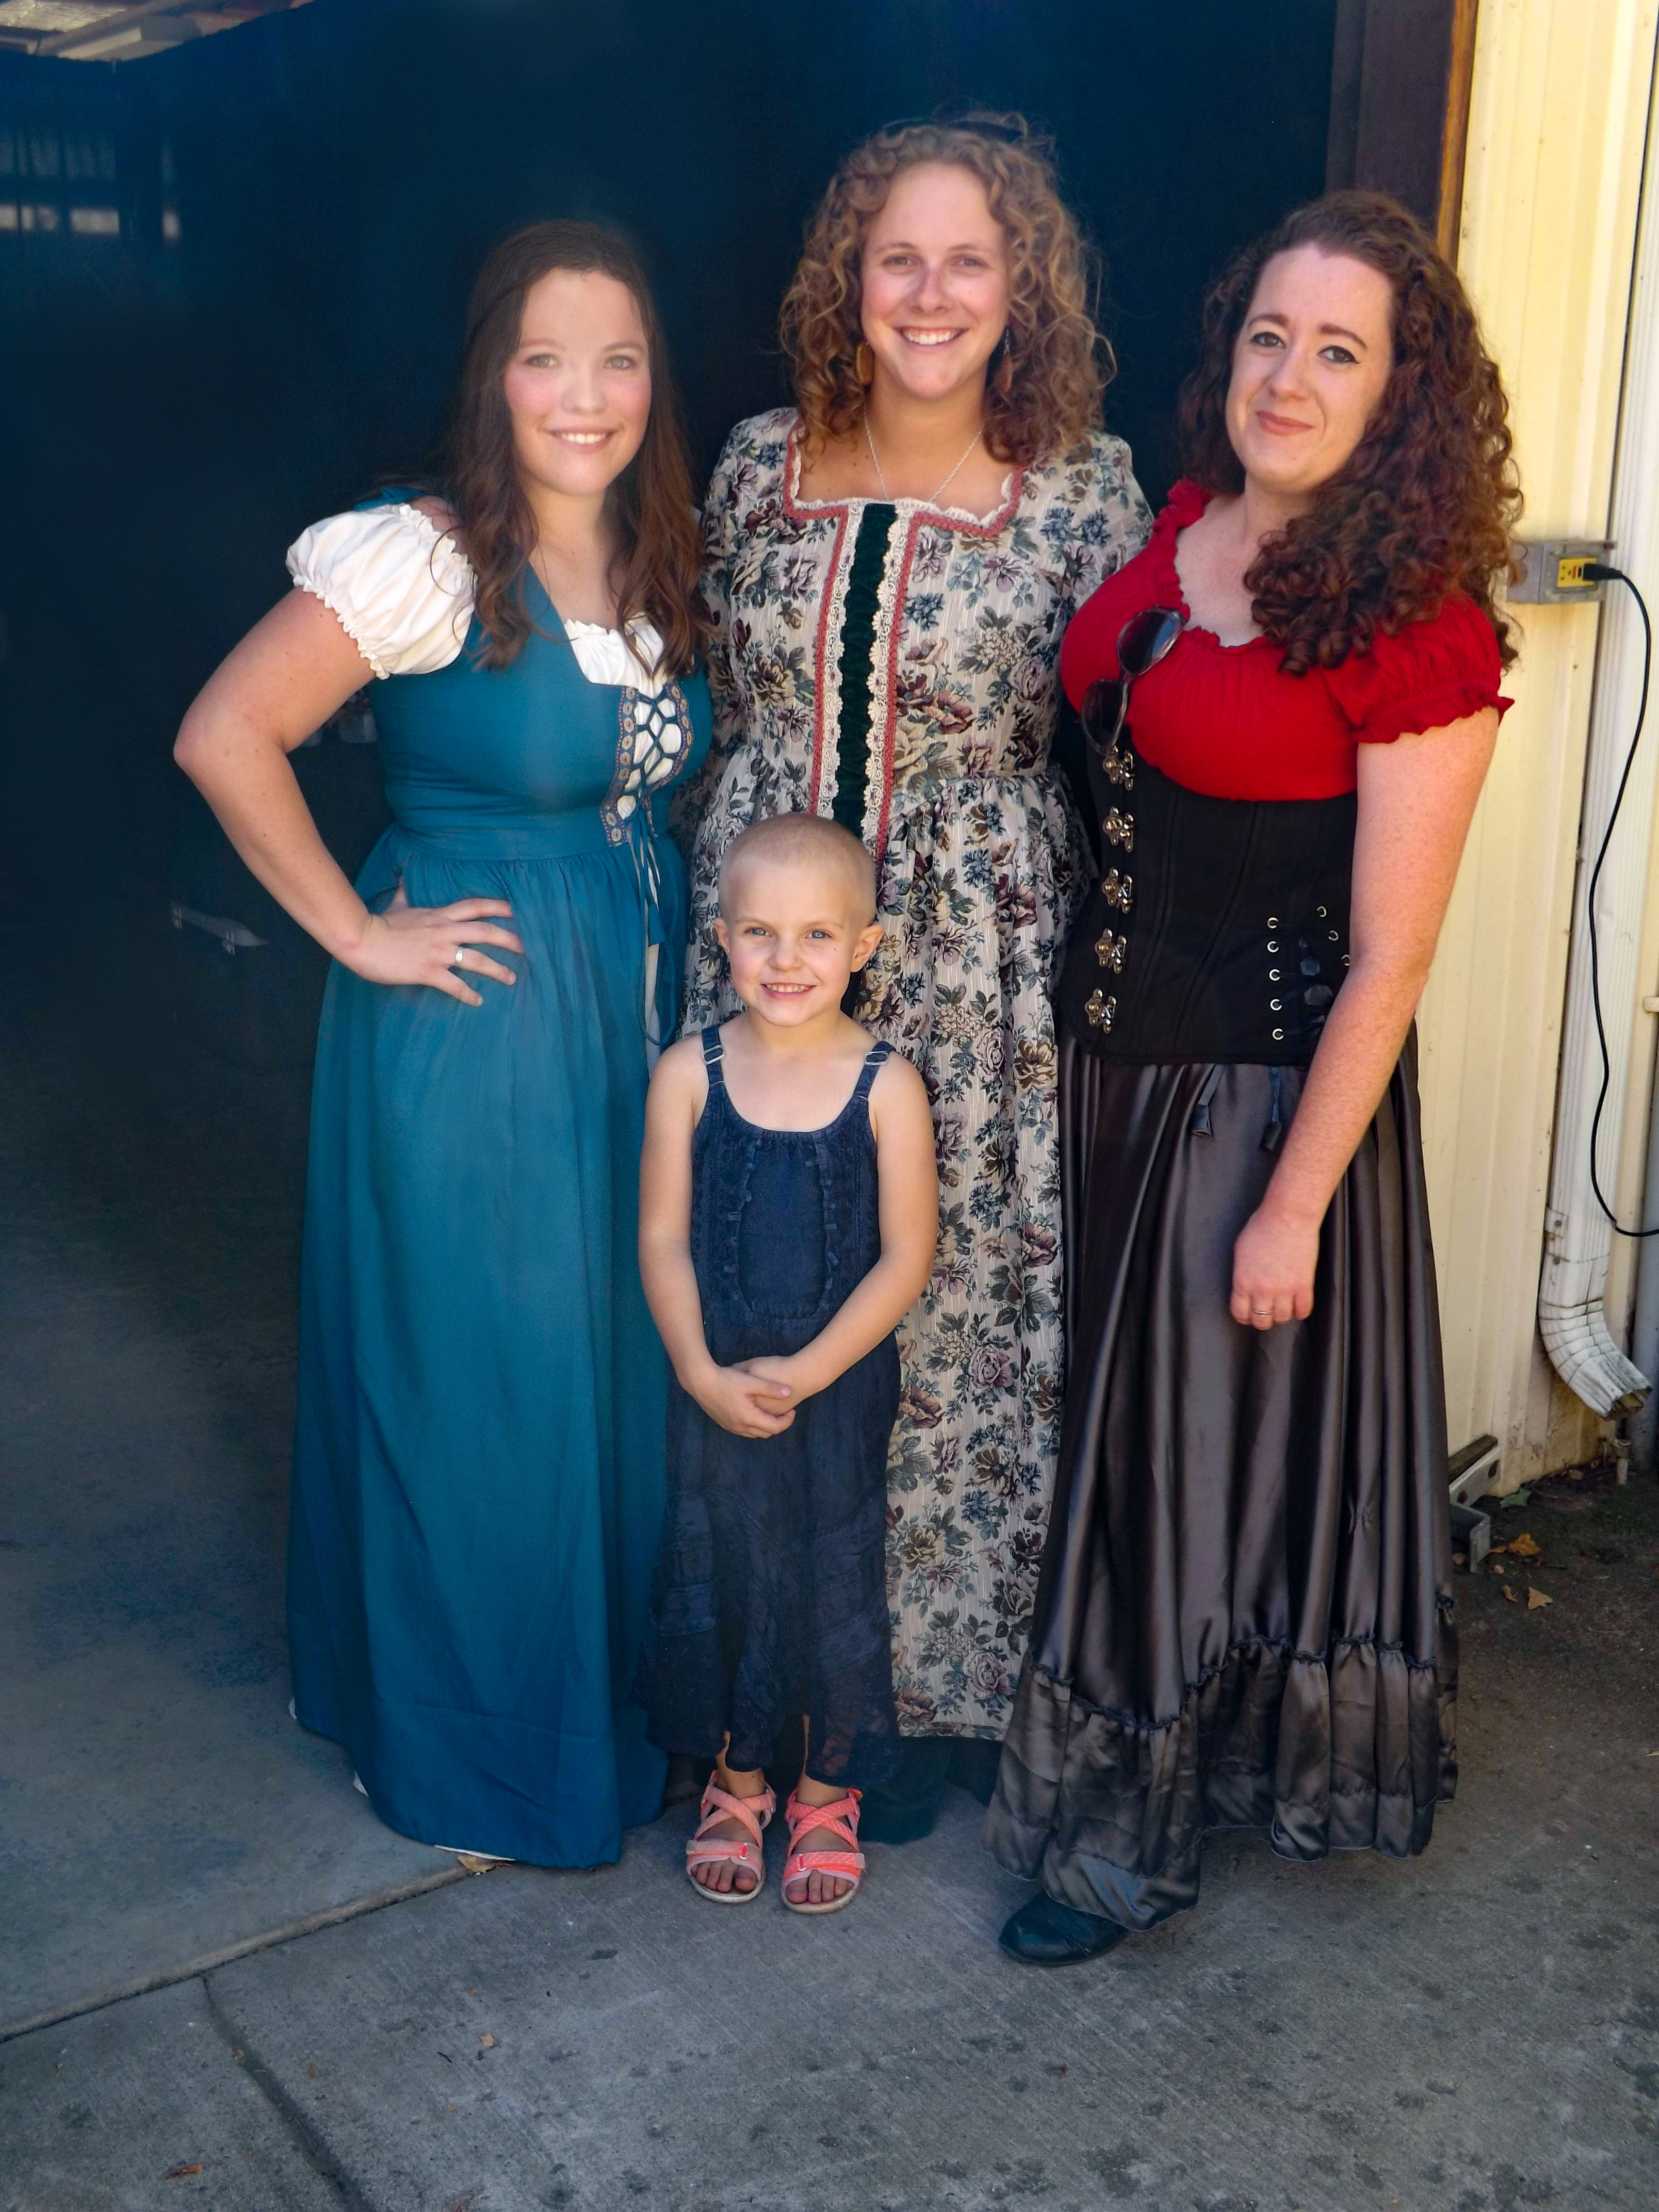
As you can see in this photo there is a significant light streak across the girl's face on the left side and there is a good amount of sun glare/ lens flare. Spot healing and patch doesn't work to correct it. I am new to using photo shop and would appreciate any hints or tips to fix this! Please and thank you!
Explore related tutorials & articles
Copy link to clipboard
Copied
There isn't enough information there to fix with Photoshop tools, so the best you can do is get it as close as you can using things like De Haze, Contrast, and Clarity, and paint in the details by hand. I guess that is not an easy thing to do without some practice, but it is not too hard, and it is a lot of fun to do. It does take some time though.
This needs more work, but she who must be obeyed wants her tea, and she gets scary when hungry. ![]() All the detail (so far) is painted in manually using just two brushes. Round pressure controls size, and the hair brush from this set.
All the detail (so far) is painted in manually using just two brushes. Round pressure controls size, and the hair brush from this set.
Skin and Hair Texture Brushes by castrochew on DeviantArt

The secret to painting hair is to lay down the darker tones, and then paint in the highlights. About twenty minutes to get this far, but I'll be in trouble if I don't get to the kitchen! 🙂

Copy link to clipboard
Copied
A couple of things Trevor didn't mention (although he does them excellently !)
You can bring out facial features (eyes mouth etc) naturally by duplicating the layer and setting the uppermost to multiply. Then use a mask to lightly reveal the features.
When brushing try not to exceed the resolution of the image - it can look unnatural to see every detail on the re-touch but have them blurred on the rest. The mixer brush is good for softening hair which you have drawn with a small round brush.
Use noise to help blend. To do this duplicate the final image and add a fair bit of noise. By using a mask you can introduce the noise into the retouched areas which make them look more natural.
Don't overdo the retouch - keep it natural as possible.
Here is a brief effort :

Dave
Copy link to clipboard
Copied
Copy link to clipboard
Copied
Best of the three Dag - nice !
Dave
Copy link to clipboard
Copied
Thank you ![]()
I have to admit that this one was very tricky, because of the complex flare patterns. But I had some time on my hands, so...
I did a number of different things (but no painting!), so that's why I just posted it without comment.
Copy link to clipboard
Copied
I would be very interested in what your methods were here as I have a photo or two that need the same repair.
Copy link to clipboard
Copied
I would first start with a raw camera file if one exists, at least one has some hope of highlight recovery etc. However if not, then i would next look at the individual channels to see if there was detail in one that could be incorporated into the others. Next shadow/highlight… next… depends on the image!
Copy link to clipboard
Copied
Hi
I must say like other posters, that's a great photo restoration.
Pierre
Copy link to clipboard
Copied
This looks great! I would really appreciate a step by step of what you did! Is it too intensive to list? Us novices really need help!
Find more inspiration, events, and resources on the new Adobe Community
Explore Now