

- Home
- Photoshop ecosystem
- Discussions
- Re: How to show overexposed areas in Photoshop?
- Re: How to show overexposed areas in Photoshop?
How to show overexposed areas in Photoshop?

Copy link to clipboard
Copied
This funcion is in Lightroom, but not in Photoshop. Is there a way how to see overexposed areas in Photoshop?


Explore related tutorials & articles
 37
Replies
37
37
Replies
37
Copy link to clipboard
Copied
hellboy801 wrote:
BTW, is it a big problem when only individual channel is clipped?
Clipping is clipping, period. Once clipped is a problem; thrice clipped is thrice the problem.
The clipping indicators are often useful in ACR because of the possibility of retrieving/recovering the information from the undemosaic'ed raw file. In Photoshop it becomes a moot point because you're looking at a cooked image file by then and the information is gone.
But, above all, we were/are still able to tell overexposed areas in the darkroom, the important goal is to expose the shot right the first time, isn't it?

Copy link to clipboard
Copied
station_two wrote:
the important goal is to expose the shot right the first time, isn't it?
But that is not always posible. If you blow a RAW file you unlike a darkroom you still have your unprocess exposure you can take a s second pass at converting your raw file or use smart object layers with independant embeded raw object with other raw conversion settings so you have version of the image you can blend together to bring out more detail...
Copy link to clipboard
Copied
Noel Carboni wrote:
Yes, but that works only for Levels and possibly a few other adjustments, right?
I do not know if it work on other adjustment then level perhaps. Levels works on a single layer but you can also create a stamp visible layers composite to check how your doing. ACR does not support layers. Levels when your displaying the RGB channel the luminosity channel the display seem to be showing when a channel or Channels start to clip by changing the displayed color. ACR overlay just show two colors overlays Red for blown highlight and Blue for burnout. With Levels you have two maps If you hold the Alt key an touch the black slider the map should be all white if nothing is under exposed burnt out. If you touch the white slider the map should be all Black if nothing is blown out over exposed. If you move the sliders the channel or channels that are blowing out or burning out are shown in their color or mixed colors. The display seems to be showing channels clipping from what I see.
I just looked at curves an there is a check box to show clipping and like levels you can she RGB, Red, Green and Blue channels

Copy link to clipboard
Copied
At this time I am a firm believer that the clipping indicators and controls in ACR7.1 are not right - see this thead in the ACR forum http://forums.adobe.com/message/4558412#4558412
Even at 100% magnification in ACR there are display errors, especially with highlights and to some degree the shadow clipping indicator. Eric C has acknowledged the bug, but I believe it is more problematic than he first thought.
Cheers
Mike

Copy link to clipboard
Copied
JJMack wrote:
Levels works on a single layer but you can also create a stamp visible layers composite to check how your doing.
There's no need to stamp a composite. As I showed earlier, a Levels Adjustment Layer will allow you to check the clipping in the same way as Levels command. A Curves Adj Layer will also do it.
Copy link to clipboard
Copied
conroy2009 wrote:
There's no need to stamp a composite. As I showed earlier, a Levels Adjustment Layer will allow you to check the clipping in the same way as Levels command. A Curves Adj Layer will also do it.
Yes a level adjustment layer applied to all will use all layers. A levels adjustment works on a single layer so your choices is add a levels adjustment layer applied to all layers or add a stamp visible layers. Either way you need to add a layer except when there is but a single your interested in then all you need is a levels adjustment you need not commit... Curves works the same way a show clipping check box is also acailable in curves.
Copy link to clipboard
Copied
hellboy801 wrote:
Nice tip. Thanks.
Anyway, I just tried the Calvin Hollywood method and it works great:
http://www.calvinhollywood-blog.com/2011/08/06/photoshop-tutorialstory -the-police-the-thief-and-the...
You're welcome, and thanks for the link to the CH method.
Copy link to clipboard
Copied
I don't know if this will be of intrest to you you can set to preview ourput device colors the best it can do on your display and when preview these colors you can have Photoshop overlay the image with a out of gammut warning map to show you problem areas. I beleive that will show blowout areas as well as other problem areas.
You can also use Ctrl+L level command and the ALT key modifyer and slide the black and white sliders to see where thing blow out and burn out. With theAlt key held down Photoshop changes the image view to map blow out area and burn out areas when you touch the black and white sliders..

Copy link to clipboard
Copied
Hello,
There's a simple and effective way to see clipping for any kind of image in photoshop.
You can achieve this by using 2 Gradient maps:
- One for the highlights.
- One for the shadows.
For highlights:
- Create new adjustment layers using gradient maps.
- Create 3 a colors gradient : Black at 0% / Black at 99% (set the gradient location as close as possible from the black)/ Red at 100%.
Set the layer transparency to multiply.
Thus everything that will be between 99% and 100% of brightness will appear red on the image.
(you can change it if you move the color cursor).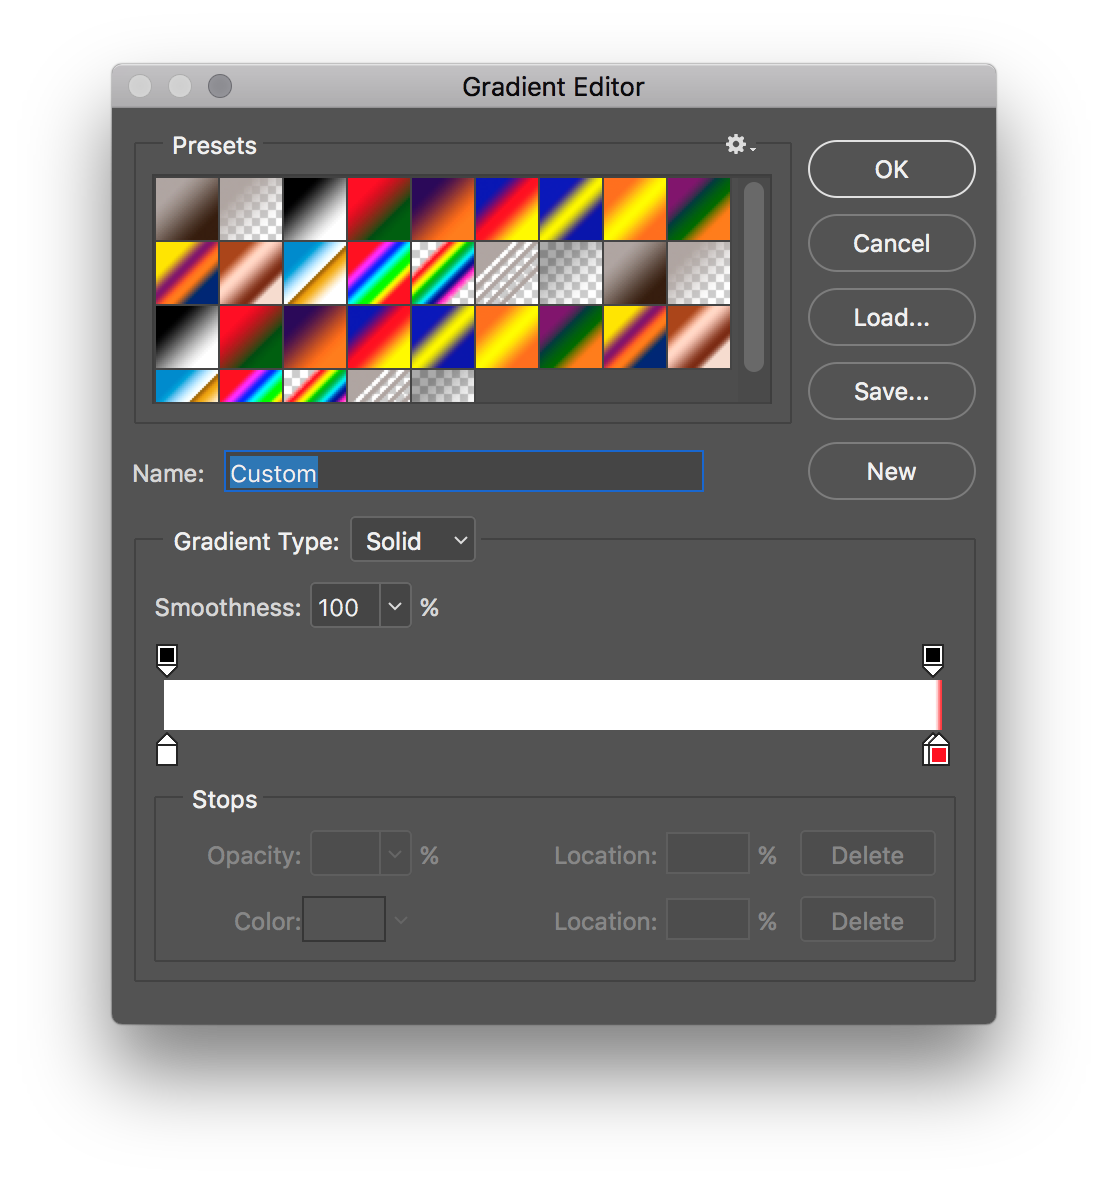
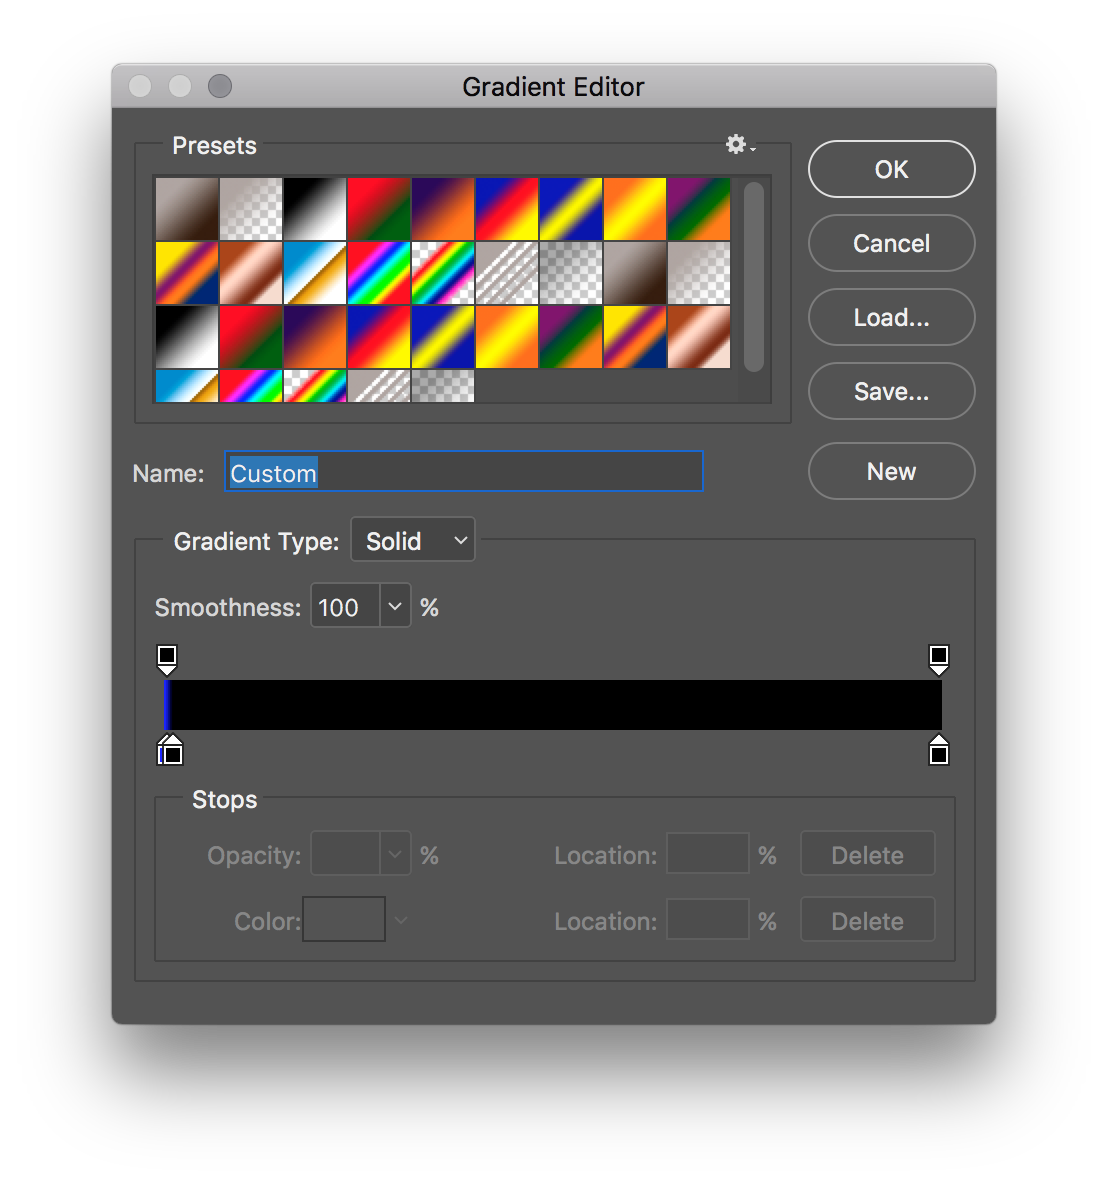
For Shadows:
Create a gradient map adjustment layer.
3 colors gradient : Blue at 0% / Black at 1% / Black at 100%
Set the layer transparency to Screen. Only the dark area will appear blue.
So far it works pretty well.
Depending on your needs, you can, of course, change the desired colors and adjust the gradient sliders to change the sensitivity threshold.

Copy link to clipboard
Copied
Thanks for sharing dogmatheque – I'll give it another go as I must have messed up my first attempt at following our instructions!
I personally care more about not blowing out levels in key areas of detail, it is all about horse-trading and there are only so many available levels/tones that the key is to allocate them to the areas that really need it the most. Blown highlights or plugged shadows can be distracting and ugly, so I may make two adjustments and blend them (one for the key areas and another for the less critical areas).

Copy link to clipboard
Copied
You can do the same with just one gradient map layer.
Set the gradient Red to Blue

Then in Blending options set "Blend If" as below (bring the white slider down and black slider up )
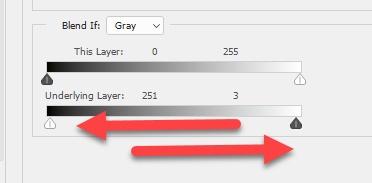
Dave
Copy link to clipboard
Copied
I like it that dogmatheque's method has independent control using a two layer method...
However I also like davescm's use of layer blend if sliders and a single layer (I have always been a fan of blend if sliders!). It is of course possible to simply preview only the shadow or the highlights in isolation by adjusting one of the underlying sliders back to it's natural position (rather than swapped).
Copy link to clipboard
Copied
Kudos davescm, smart and elegant solution!
-
- 1
- 2

Find more inspiration, events, and resources on the new Adobe Community
Explore Now
 AdChoices