

- Home
- Photoshop ecosystem
- Discussions
- Re: How to show overexposed areas in Photoshop?
- Re: How to show overexposed areas in Photoshop?
How to show overexposed areas in Photoshop?

Copy link to clipboard
Copied
This funcion is in Lightroom, but not in Photoshop. Is there a way how to see overexposed areas in Photoshop?


Explore related tutorials & articles
 37
Replies
37
37
Replies
37
Copy link to clipboard
Copied
Yes, assuming you're talking about Camera Raw... Click on the little triangles in the upper-right and left of the histogram display for highlight and shadow warnings. They're normally shown in bright red.
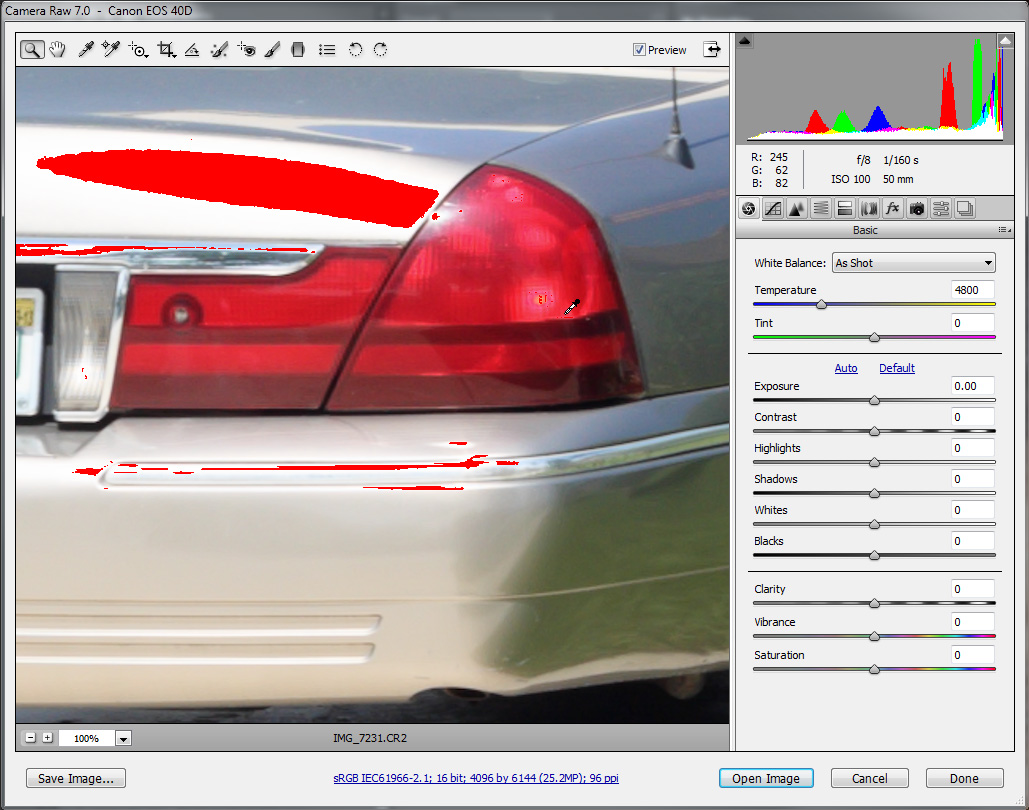
-Noel
Copy link to clipboard
Copied
No, I mean inside of Photoshop, not in Camera Raw.
Copy link to clipboard
Copied
There's really no way in a digital image in general to know whether a color channel *just* reaches the maximum value or is overexposed. Thus the concept does not apply inside Photoshop, which is why there's no special "maxed out" indication.
That said, I can see the utility in knowing what pixels are the very brightest in an image, and I can make a suggestion for a workaround: Add a Curves Adjustment layer and pull the black point way over to the right. Make that layer visible when you want a solid indication of what pixels are at or very near their brightest.
![]()
-Noel
Copy link to clipboard
Copied
Thanks Noel, I will give it a try.
Copy link to clipboard
Copied
I also found this tutorial. I hope this will work 
http://www.calvinhollywood-blog.com/2011/08/06/photoshop-tutorialstory-the-police-the-thief-and-the-...
Copy link to clipboard
Copied
By the way, folks who flirt with maximum exposure levels often make the Histogram panel visible in Photoshop (I keep it visible all the time, but I can afford that luxury as I use two monitors). They specifically watch that image operations don't push data up along the very right edge of the histogram. Note that the little triangular icon means something totally different in this histogram than the ones in Camera Raw.
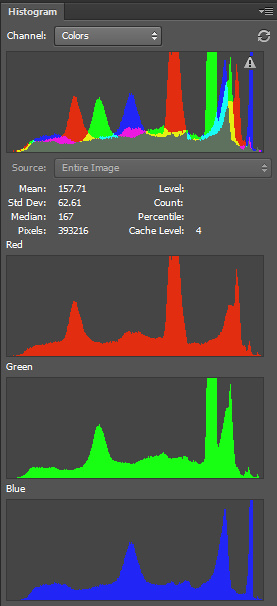
-Noel
Copy link to clipboard
Copied
Sometimes I watch histogram too, but the problem is when I'm working with an image of an product on 100% white background.

Copy link to clipboard
Copied
Can you explain the first paragraph of this post? I would assume the 255 is a good accepted indication for a... let's say overexposure.

Copy link to clipboard
Copied
Do you mean in post #25, the one immediately before yours? I think we need JJ to come along and clarify that. The comma robber has run off with his punctuation, and I'm buggered if I can work it out either.
But rule of thumb is that once a pixel, or pixels, are at value 255, that's full white, amd all three channels are fully exposed. But I think what JJ is saying, is that there might be more information in the RAW file. Even if one or two channels are at 255, there might be some detail in the other. JJ will have to clarify, but I think he is talking about having two versions of the RAW conversion and stack them as layers in a single Photoshop document. You can then mask in just the area you want.
JJ's post, is dated July 2012, and CS6 with Camera RAW PV 2012 (Process Version 2012) was released in May 2012, and I'd have thought you could get all the infor there was there to get, out of a single go with PV2012. It's local adjustments being key, but the entire update of ACR was a big improvment over the previous version, and especially in extreme highlight and shadow detail recovery.
Does that help?
Copy link to clipboard
Copied
Trevor, I have a cool expert secret tip for you: You can click the "in reply to ..." link and find out what post was being replied to.
-Noel
Copy link to clipboard
Copied
Noel Carboni wrote:
Trevor, I have a cool expert secret tip for you: You can click the "in reply to ..." link and find out what post was being replied to.
-Noel
Ahhh... Yes I can see it if I look carefully. My eyesight is right on the verge of my being allowed to drive, and is uncorrectable with glasses or contacts. All down to laser surgery in the bad old days. Until very recently I was completely unable to drive at night, but I now have glasses with an anti reflective coating that has fixed that. I used to get multiple vision of bright areas. Headlights and road signs would flare into a dozen or so. Not great for a photographer, but such is life.
Copy link to clipboard
Copied
Sure, sure, blame the eyes.
I didn't know about that link for a long time - and I could see the text just fine.
-Noel
Copy link to clipboard
Copied
Assuming you mean:
There's really no way in a digital image in general to know whether a color channel *just* reaches the maximum value or is overexposed. Thus the concept does not apply inside Photoshop, which is why there's no special "maxed out" indication.
Imagine an image containing a gradient that gradually increases in brightness until such time as one or more color channels *just* reach 255 (assuming an 8 bits/channel image).
You wouldn't call that overexposed - in fact it might even be considered perfectly exposed, in that the image was using all the available output levels.
OVERexposure could be generally described as a case where data was lost before the image reached its current state. One way to look at it might be that if there WERE channel values available above 255 that part of the image would be using them. But the perfectly exposed image would still be using value 255, even if larger channel values were available.
Hope this helps.
-Noel
Copy link to clipboard
Copied
Yes Noel, that's exactly what I was refering to.
And yes, the explanation helps. Anyways, I am probably in the same boat as the original poster, as I was looking for a way to check whether or not I reached the 255 in post processing. It seems that PS doesn't really want to help here.
I would have loved to see the areas where channels reach 255, to be more speciffic, that would actually show me some information about being able do increase the brightness/burn some areas while bringing a minimum amount of pixels to 255 - aka make the best use of the 255 levels.
Thanks for the explanation.
Copy link to clipboard
Copied
No problem. Note the several workarounds mentioned in this thread.
After all the years I've been working with Photoshop, I'm still partial to the Curves layer myself.
-Noel

Copy link to clipboard
Copied
There are a few tutorials in how to "fix" overexposed photos:
http://www.photoshopsupport.com/tutorials/jennifer/fix-underexposed.html
have you tried to open the image in Camera raw and view the overexposed areas that way?
-janelle
Copy link to clipboard
Copied
Yes, I can do that, but sometimes I do a lot of postproduction in Photoshop and I would like to see how far I can push contrast, exposure, saturation etc. I want to see where are the limits (like in Camera Raw). I dont want my images to be unprintable.

Copy link to clipboard
Copied
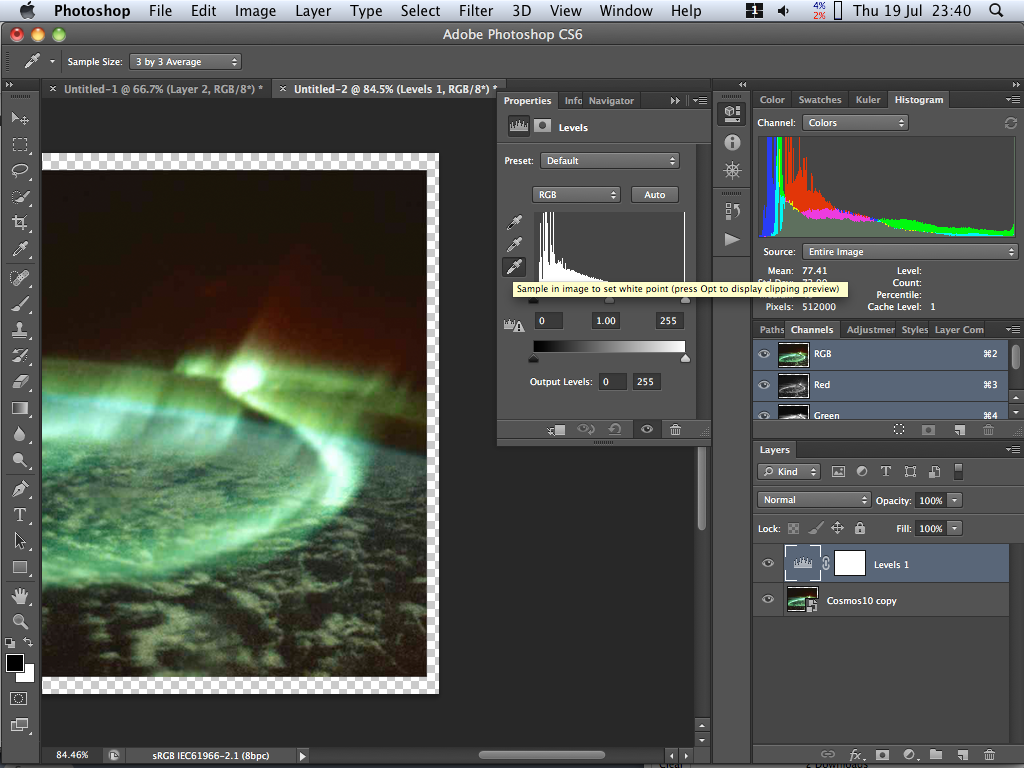
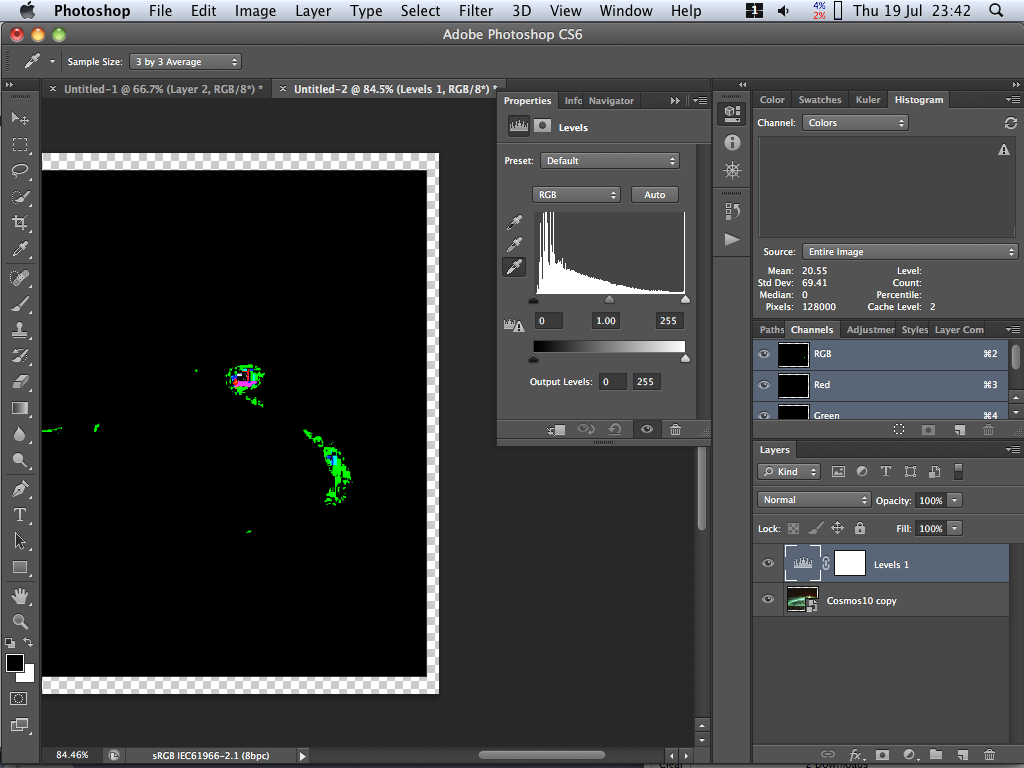
Maybe this will help... add a Levels Adjustment Layer, and without actually adjusting anything, click the white point sampler button then with the dropper over the image, pres Alt/Opt key for a display of pixels with clipped channel(s).
Copy link to clipboard
Copied
Nice tip. Thanks.
Anyway, I just tried the Calvin Hollywood method and it works great:
http://www.calvinhollywood-blog.com/2011/08/06/photoshop-tutorialstory -the-police-the-thief-and-the...
Copy link to clipboard
Copied
That Calvin Hollywood tutorial is a cool technique. But I'm worried that it can give a false sense of security... It will NOT show you when individual channels have reached max or min values, just when the overall luminance of pixels are below or above the thresholds set in the Blend If settings.
-Noel

Copy link to clipboard
Copied
Its because Calvin does not know his polices are hideing under his alt key in levels. All one need to to is use Ctrl+L hold the Alt key down and touch the black white sliders to see his police. No adjustment needs to be made nothing needs to be added. Photoshop will show you and show you activly if you move the sliders.
Copy link to clipboard
Copied
Yes, but that works only for Levels and possibly a few other adjustments, right? I sense perhaps hellboy wants a more generalized function, which the Calvin method purports to do. But it's flawed.
I think it's possible a more sophisticated version could be created that actually works on a per channel basis.
-Noel
Copy link to clipboard
Copied
BTW, is it a big problem when only individual channel is clipped?
Copy link to clipboard
Copied
I happen to think so, yes. It represents a loss of information that cannot be reclaimed.
Personally I strive to avoid such loss with only rare and specific intentional exceptions. I've gotten to where I can sense it by the unnatural look in the image that it imparts.
-Noel
-
- 1
- 2

Find more inspiration, events, and resources on the new Adobe Community
Explore Now
 AdChoices