how to soften edges?
Copy link to clipboard
Copied
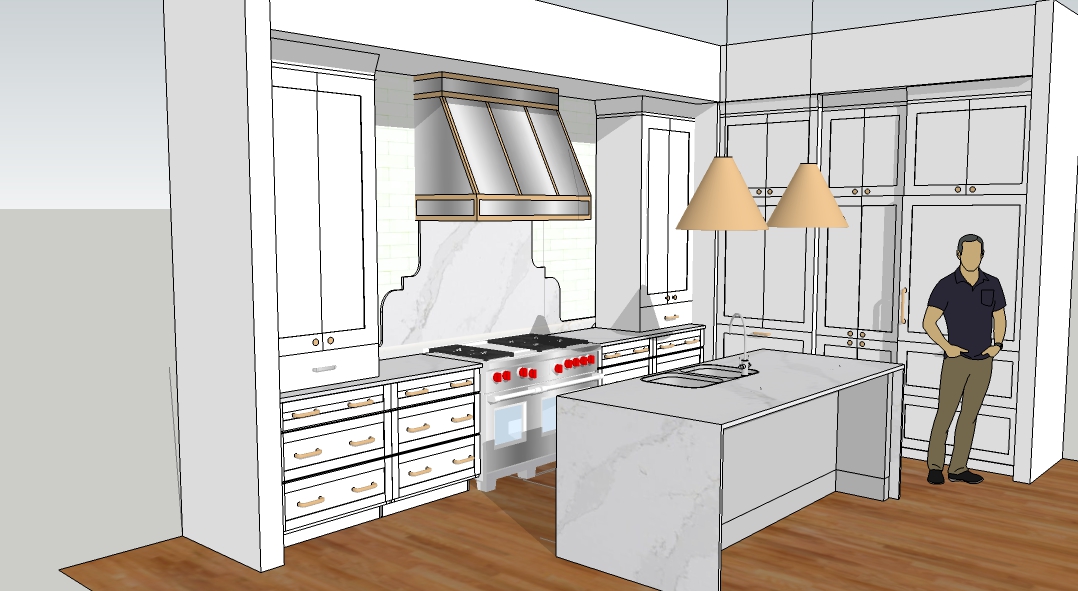
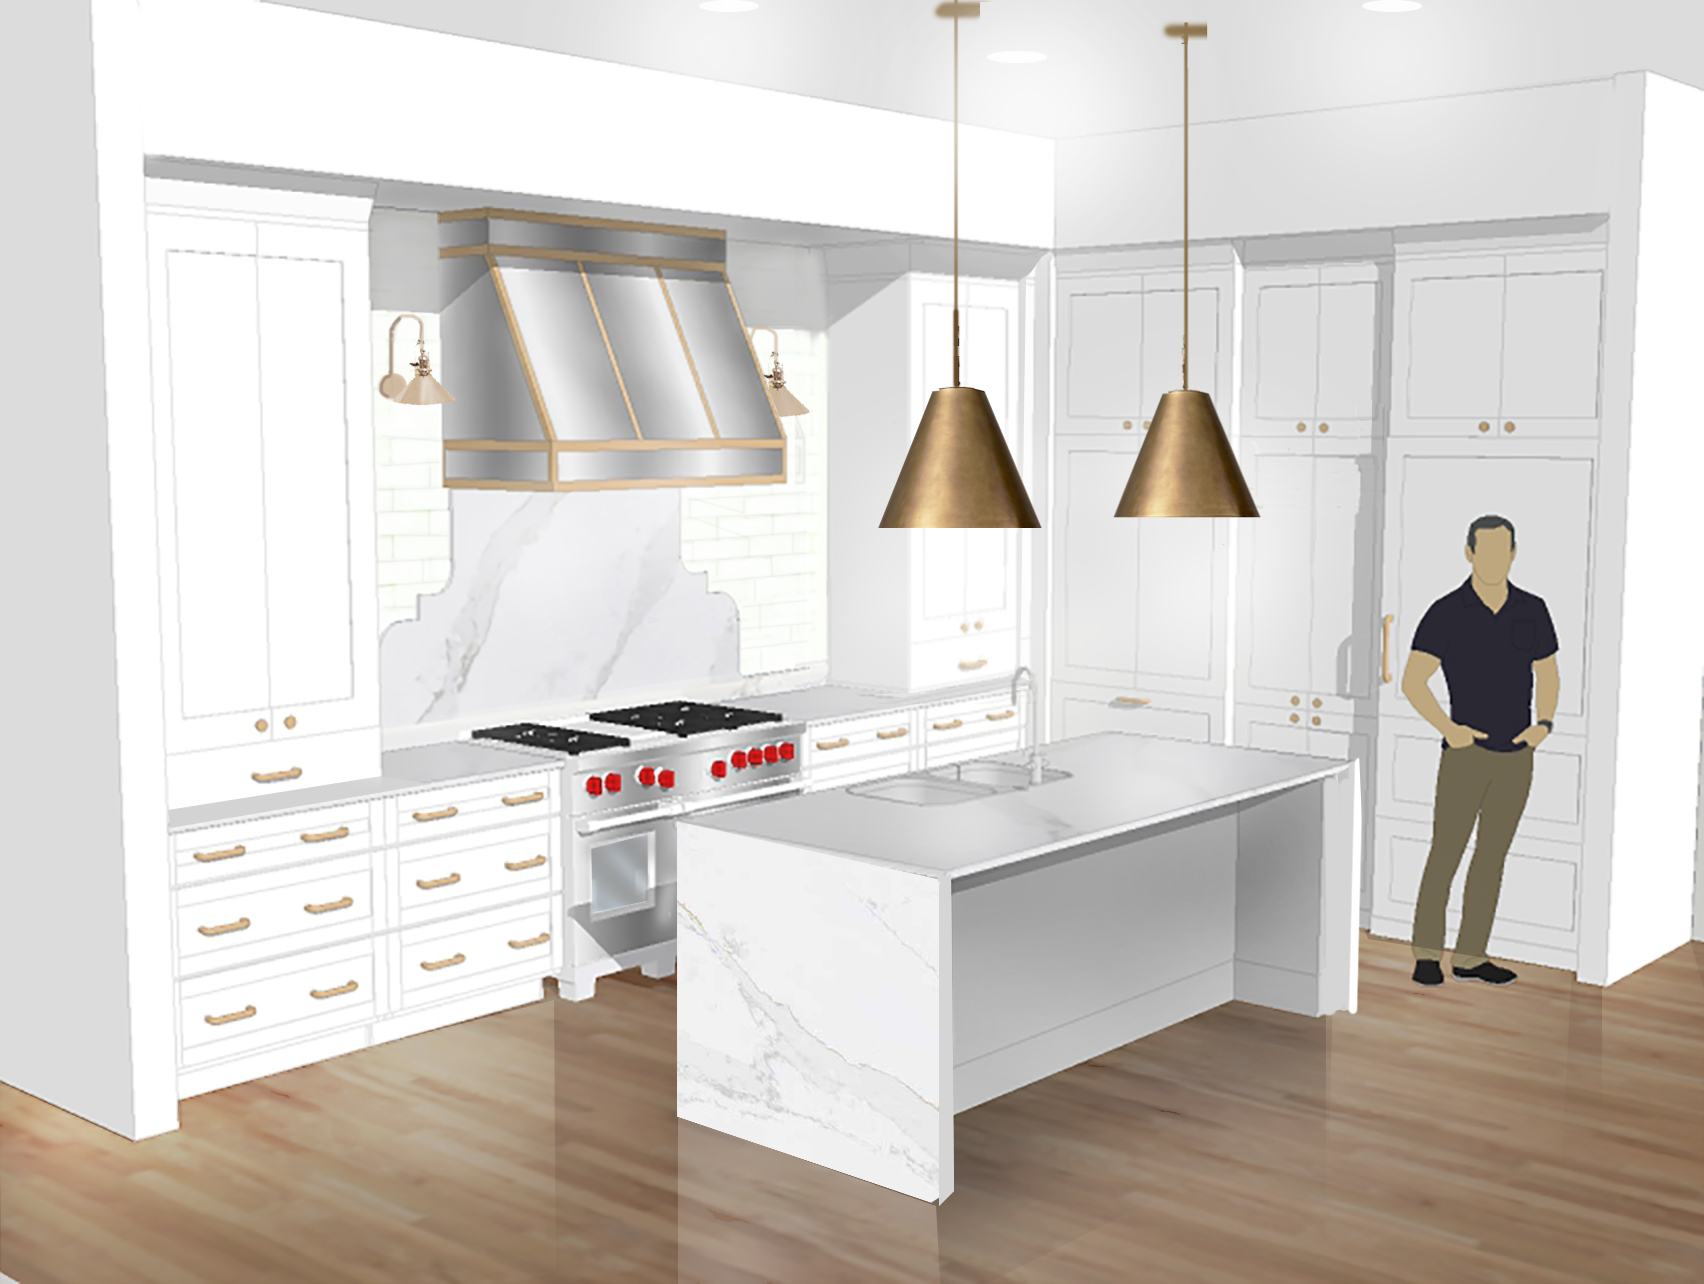
A is an image i had designed in SketchUp and B is it touched in Photoshop, edges are softened up, image is better quality. how do I get my image that currently like the quality in image A and get it to the quality in image B? Thank you!
A:
B:
Explore related tutorials & articles
Copy link to clipboard
Copied
You can use many different tools for example:
you can use Selective Colors - select Blach and adjust settings
You can use Curves (ctrl+M) and adjust settings
You can use Shadows/Hightlights and remove some blacks
or/and
Burn (O) to add some shadows - easy
Dodge (O) to add some lights - easy
You can also use new empty layer to add some black areas - Brush tool (B) and finally decrease layers opacity and use different color modes to see nice colors
The same is true with white - you can use another new layer to add some lights - changing opacity lets you adjast lightness
You can also select areas you want to improve and use Curves (ctrl+M) or Selective Color or other adjustements tools
You can select table (top) and use gradients to add depth
many. many optiopns
pawel
Copy link to clipboard
Copied
Thank you for the detailed response! I will see what I can do. Still learning photoshop:)
Copy link to clipboard
Copied
If you used scetchup rendered your image check if it can render an image more like image B do some antialiasing rendering lines.
Copy link to clipboard
Copied
How do I do that? Sorry very new to all this:)
Copy link to clipboard
Copied
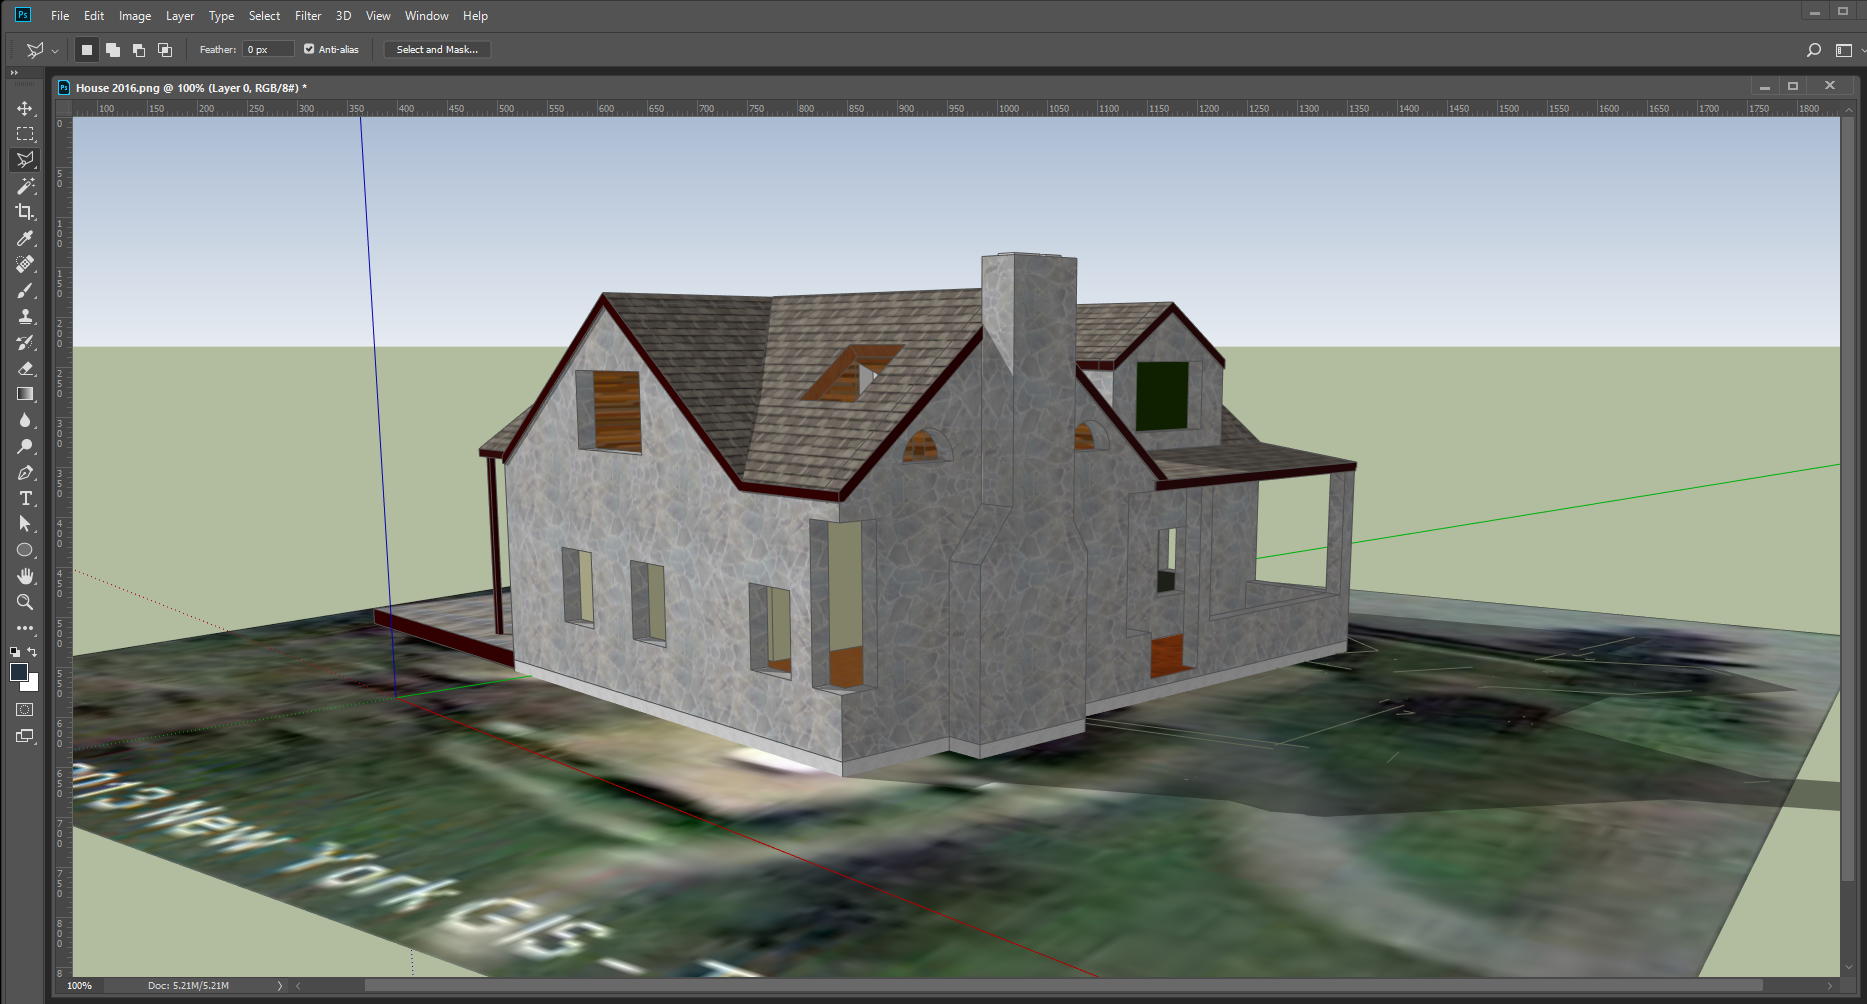
I do not know. I played around with Free Sketchup a few years ago I see there is still a free version but it is web based these days. I opened a Sketchup I created when I played with it years ago. I can move around the model of my home I made back then for google earth and Download PNG views of my model. The rendered PNG file looks very good in Photoshop. However I forgot how to use Sketch so I can not edit my model which is not grate to begin with. I find 3D to be too much work though sketchup UI was easier to create models then Photoshop 3D feature. Even the old MP4 I had sketchup render back thne was not as bad as your image A: http://www.mouseprints.net/old/dpr/House.mp4
Copy link to clipboard
Copied
I agree with JJMack. B looks like a different 3D render rather than just a tidy up in Photoshop.
Dave
Copy link to clipboard
Copied
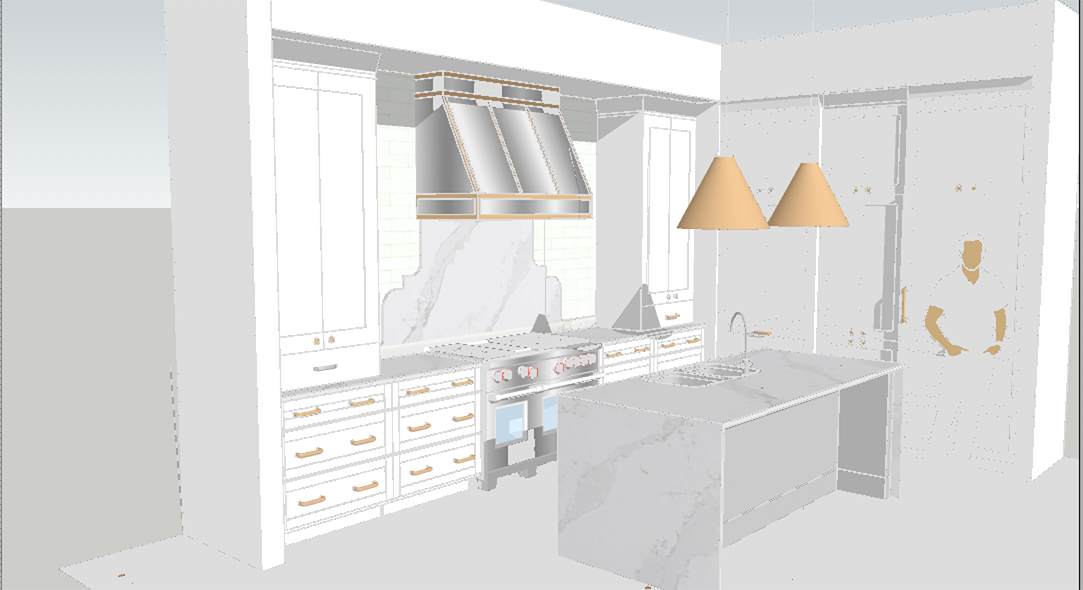
The first step, after duplicating the layer, is to eliminate the black lines. To do that make the light gray near the man your Foreground color.

Then, place a layer below the top layer and fill with the light gray. Return to the image layer and double-click the layer to bring up Layer Style. In the Blend If section adjust the top left slider like this:

The result will be as seen above. Choose the top layer and Merge down to combine the top two layers.
Then use a Mask to bring back such things as the stove range & knobs, floor and the man. Select areas, such as the counter for darkening and to add dimension. Then fuss with the lamp shade and other details.
Copy link to clipboard
Copied
When you export your 2D model from SketchUp, click on Options. The default file resolution is your screen (view) size, so if you are using a lowish resolution screen like you might have if using a small notebook computer, then one pixel line thickness is going to be a bit clunky. So uncheck Use view size and enter a reasonable size. The higher the resolution you chose, the more subtle your lines will look.
Also make sure that Anti-alias is checked, or lines will look like pencil lines in Photoshop (i.e. nasty). That is turned on by default.
Using best quality JPG compression (if that is your chosen format) is a no brainer.
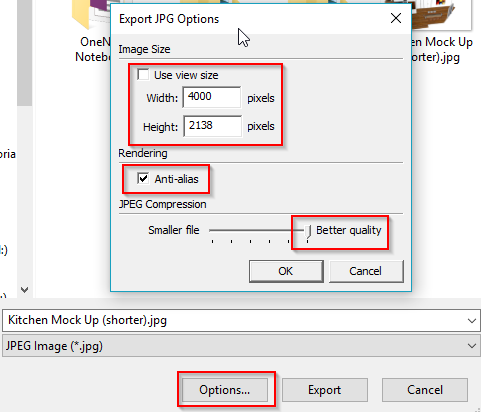
I have a feeling that this will dramatically improve your 2D exports from SketchUp
Copy link to clipboard
Copied
Very kind of you to give such detailed instructions. This is very helpful!
Find more inspiration, events, and resources on the new Adobe Community
Explore Now


