- Home
- Photoshop ecosystem
- Discussions
- Re: How would I create a fruit ninja knife effect?
- Re: How would I create a fruit ninja knife effect?
How would I create a fruit ninja knife effect?
Copy link to clipboard
Copied
How can I create this effect?

I want to create this because I want to make it look like there is a knife cutting fruit,
This is what I have already:

Every tip is welcome
Explore related tutorials & articles
Copy link to clipboard
Copied
A couple of general comments.
It would be better to show the fruit inner surface not just every fruit side on. It would also be better to start with a higher resolution image.
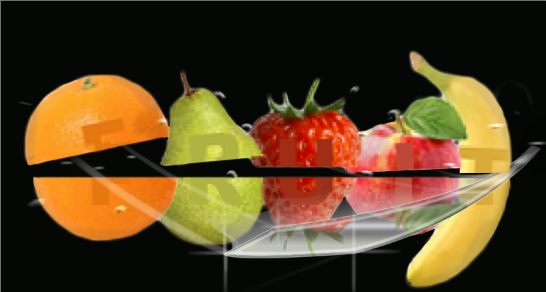
However starting with your image - I used layers to build up an example of what you could do:
Draw the sword with the pen tool set to shape and fill the shape with a gray gradient.
Then use layer styles to add a bevel edge and inner glow.
Copy the fruit - turn upside down and clip to the sword layer so that they are only visible in the sword and appear to reflect
Copy the sword and use liquify to drag the back edge and a mask to fade it - this will suggest some movement
Add some faded strokes with a white pen and some "cross" highlights with the brush
Copy the top half of your image and place it above the sword so that it appears to cut
Finally a few water droplets - just hard brush strokes on an empty layer with the layer style set to give two inner shadows (light and dark) and a radial blur using the zoom setting to suggest movement.
Here are the layers I used to give an example.
If you want detail on any particular layer let me know.

Above all - have fun !
Dave
Copy link to clipboard
Copied
Thank you very much for this explanation.
I never thought that someone would take this much time to create what I want and explain what he did.
I can really do some stuff with this advice and I'll try to use it the best way I can.
By the way, how would I make it look a bit more realistic by adding inner fruit. Should I just look for images for the inner of the fruits and reshape it a bit to make it look like it's flying towards us?
I really appreciate your time and answers!
Copy link to clipboard
Copied
...how would I make it look a bit more realistic by adding inner fruit. Should I just look for images for the inner of the fruits and reshape it a bit to make it look like it's flying towards us?
Yes, if you have an image of say the inside of an orange - warp it so that it is just visible and combine it with your image. If you look at the top image you posted, the inside of the apple is visible.
If you want to make your image look more realistic - the orange and pear in your example would be tipping slightly whereas the banana is still being cut so is OK side on.
Like I said - have fun with it. Experiment and, If you get stuck, shout out ![]() .
.
Dave
Copy link to clipboard
Copied
I'm making the insides of the fruits, what do you think of this? It takes quite some time, but I think it looks okay.

Copy link to clipboard
Copied
That will look much better. Don't forget the shadows. You can paint on a layer and set it to darken the underside and create a shadow (assuming you are lighting from above). Part of the trick of a composite is to make the various objects look as if they are lit by the same lighting.
Dave
Copy link to clipboard
Copied
Thank you very very much, you have amazing tips and you are thinking of everything.
A big thumb for you!
Copy link to clipboard
Copied
hey dave,
This is what I have now,

but I am having a problem with the pen tool.
I am trying to create the sword, but I can make the point, because the line is making some sort of s form(marked with red arrow).
How would I make it a more straight line?
Copy link to clipboard
Copied
The pen tool is excellent but initially does take a bit of practice to use.
Take a look at this page which will help explain how it works. If you still have problems shout out.
Draw with Pen tools in Photoshop
Dave
Copy link to clipboard
Copied
I had a look for some real life imagery to get an idea of what it should look like, and ended up feeling sick to my stomach after watching this.
WARNING: This goes horribly wrong so don't watch if you don't like the sight of blood.
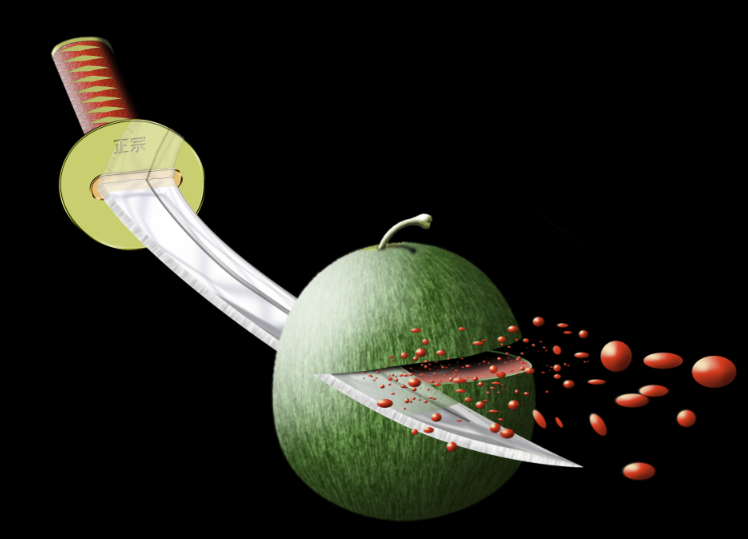
Well I had to have a go, but it took me an hour so too much to give a blow by blow account, but every pixel is 100% Photoshop illustration. I suspect I'll add it to my rarely updated flick stream at full resolution after adding some finishing touches. I don't mind explaining bits of detail if anyone wants a particular thing explaining.
Copy link to clipboard
Copied
Ouch that is nasty !!! (The video not your drawing)
Dave
Copy link to clipboard
Copied
Thanks. The video is just awful, and to be honest, I had to turn it off right after it first went wrong. My Chris often works in the Emergency department at the local hospital and gets to see farmers squashed by their tractors, forestry works squashed by trees, and sometimes accidents with chain saws, and a whole lot of road traffic accidents. We like to watch the helicopter rescue reality series, but I have to hide my eyes with my hands when it gets gory, while Chris is diagnosing the likely injuries.
I changed the illustration after adding some finishing touches. Stuff like that is so addictive, but it is all good practice.
BTW Dave (and anyone else interested in Photoshop 3D, check out S2422 A Designers Guide to Using 3D It's the very first video in the Photography & Creative Imaging. The first half will be a bit basic for the likes of you, but the second half gets into Fuse and animated characters. It is dead impressive. He also demonstrates a cool trick using Vanishing point and exporting the mesh to 3D where you can zoom in and out of a 2D image. (45 minute mark)
Copy link to clipboard
Copied
Nice finished pic that Trevor. I might have a go at a 3D fruit slice pic next week if I get a bit of time.
I have watched that Corey Barker video and added a comment to your other thread where you gave the link.
That trick with the vanishing point filter to walk into the 2D image is a real productivity killer. After watching I spent the next half hour just trying it out on different images to see what happened.![]()
Dave
Copy link to clipboard
Copied
I read that page, but I still can't figure out how to make that sharp edge, it just creates an arc.
Do you know what I'm doing wrong?

Copy link to clipboard
Copied
Hi
It does take some getting used to. See if this helps :
Draw the first part of the curve (as you just did)
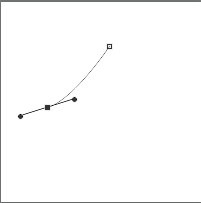
Hold down the Alt key and drag the outer curve handle back round
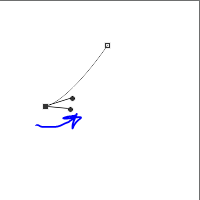
Release the Alt key and click and drag the next point:
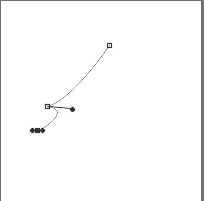
Again hold down the Alt key and drag the outer handle back:
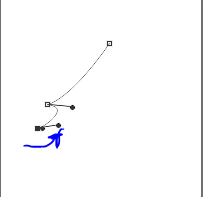
Release Alt key and click on next point:
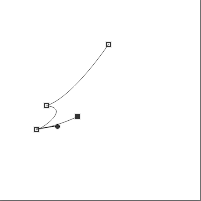
Click and drag on the next point
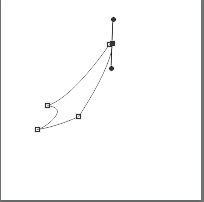
Alt click and drag down the top handle (get rid of it)
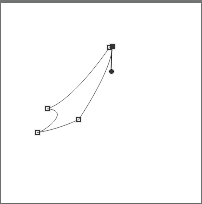
Click on the first point to close the path
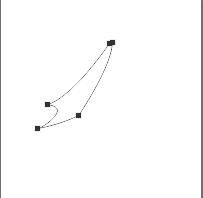
You can now go back and edit any points to adjust the curves
Hope that helps
Dave
Copy link to clipboard
Copied
Thank you very much, that helps alot.
I got a question again:

How do I get the sword to look better, yours looks a lot more shiny or something. and how did you made those lines that suggest movement?
Sorry for all these questions, but how would I make it look like the text easy is carved in the knife?
Copy link to clipboard
Copied
Hi,
Looks like you are progressing!
To give that glow I used layer styles.
So for the interior of the sword I used an inner glow as well as a white stroke round the edge
For your text use layer styles to make it look embossed
For the point highlights - I just drew them on a separate layer with a brush
Similarly for those highlight curves - just brush them onto a separate layer
Finally I duplicated the sword and used the liquify filter to stretch it round in a curve - then I reduced the opacity so it looked like a blur effect
Hope that helps
Dave
Copy link to clipboard
Copied
Hey,
I'm progressing a bit, yes.
I still have some questions ![]() sorry
sorry

As you can see the droplets aren't the way they should, I don't know how I can remove that white color and keep the shadows. I don't know how to make the shiny effects look better. I added the moving effects and I made the text EASY looking a lot better.
Copy link to clipboard
Copied
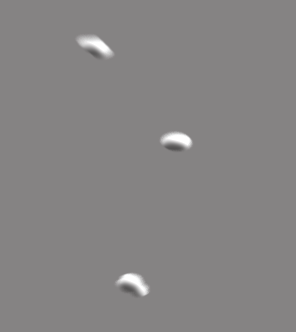
This was my water drops (ignore the gray background that is just so you can see them now - they are on a transparent layer).
They are just white brush strokes:
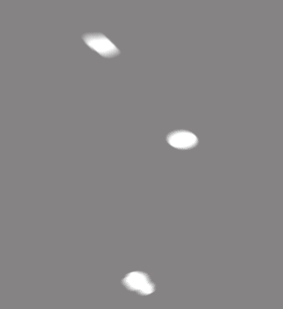
Using layer styles, add two inner shadows - one white and one black
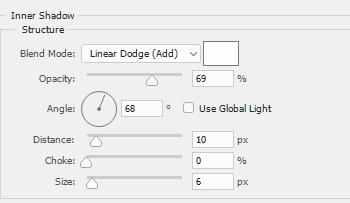
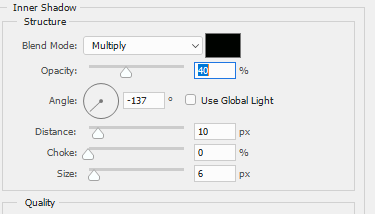
Set the layer blending mode to darken
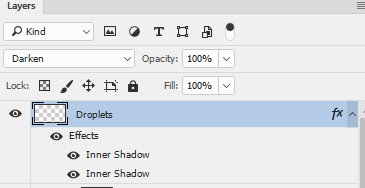
Against the temporary gray background it look like this
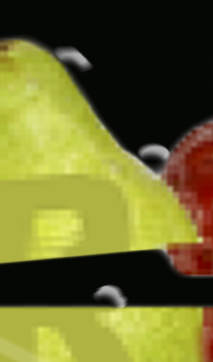
Against your image it looks like this
For the blurs and highlights fade them out with a layer mask
Hope that helps. I've just been constructing a 3D modelled version of slicing fruit which I hope to render tonight. I'll post it when done.
Dave
Copy link to clipboard
Copied
Thank you very much dave, but I still can't figure out on the highlights,
This is what I have now:

I am really looking foward to see your 3d fruit, I'm excited.
Copy link to clipboard
Copied
The highlights are just brushstrokes with a soft brush set to white and the shift key held down to keep the lines vertical and horizontal
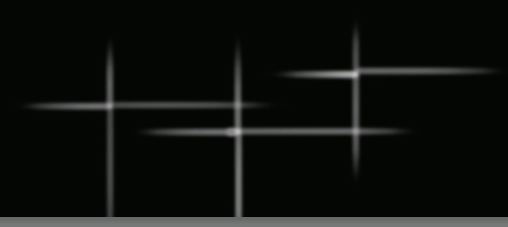
Added to yours :
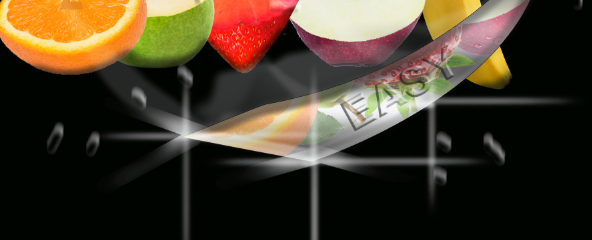
I have just finished modelling the 3D fruit and have set it away to final render. Currently estimates about 3 hours .... yawn. Will post when done
Dave
Copy link to clipboard
Copied
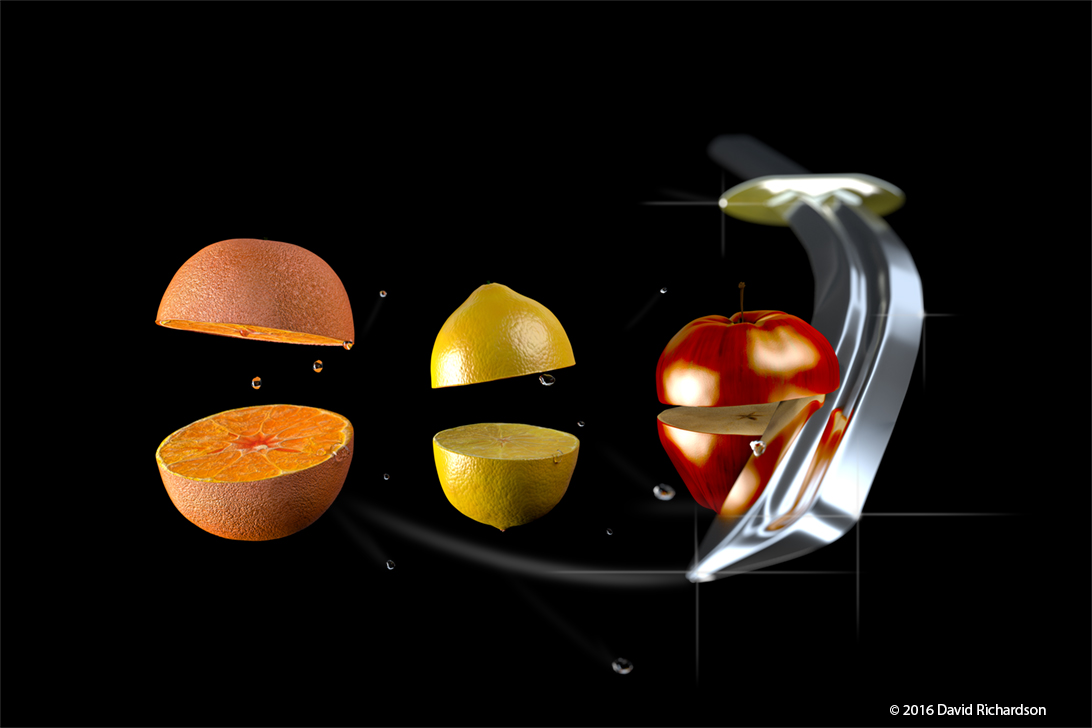
As promised earlier :
My 3D take on this theme. This was all modelled and rendered in Blender as I get much greater control over each mesh and the shading. I finished it off with a few highlights in Photoshop
(Click to view a bit bigger)
Dave
Copy link to clipboard
Copied
Damn, that looks good dave.

I can't get those shiny things to look a bit more pointy, how did you do that?
Copy link to clipboard
Copied
I can't get those shiny things to look a bit more pointy, how did you do that?
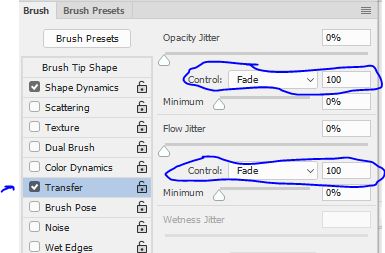
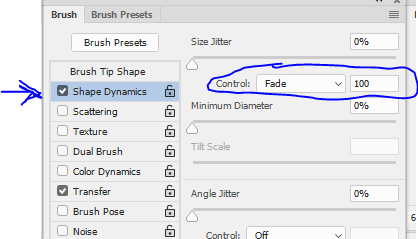
I was using a Wacom pen so as I lifted the pressure, the size and flow lessened
If you are using a mouse you could simulate this by setting the brush shape dynamics and flow to fade - see below.

Dave
Copy link to clipboard
Copied
Damn, Dave.
I would never have found that.
Thank you for all your help, I think I'm done!
I could've never done this myself, thanks for that!
This is my final result

Thanks once more.
-
- 1
- 2
