Copy link to clipboard
Copied
Please HELP!! I'm sure there is an easy way to do this but I've been here and on google for the last 3 hours!
I am a NOOB but I can't imagine this should be hard!?

 1 Correct answer
Ha! I have my screen shots ready to go, but was waiting for the shape confirmation. ![]() Similar to yours, Dave, plus one final step:
Similar to yours, Dave, plus one final step:
This would be much easier in Illustrator (and you could add the shape to your PSD file) but in Photoshop:
- Select the Elliptical shape tool. On the options bar, choose Shape and set the fill color. Draw an ellipse.
- Select the Path Selection tool, hold Alt/Opt and drag down to duplicate the ellipse.
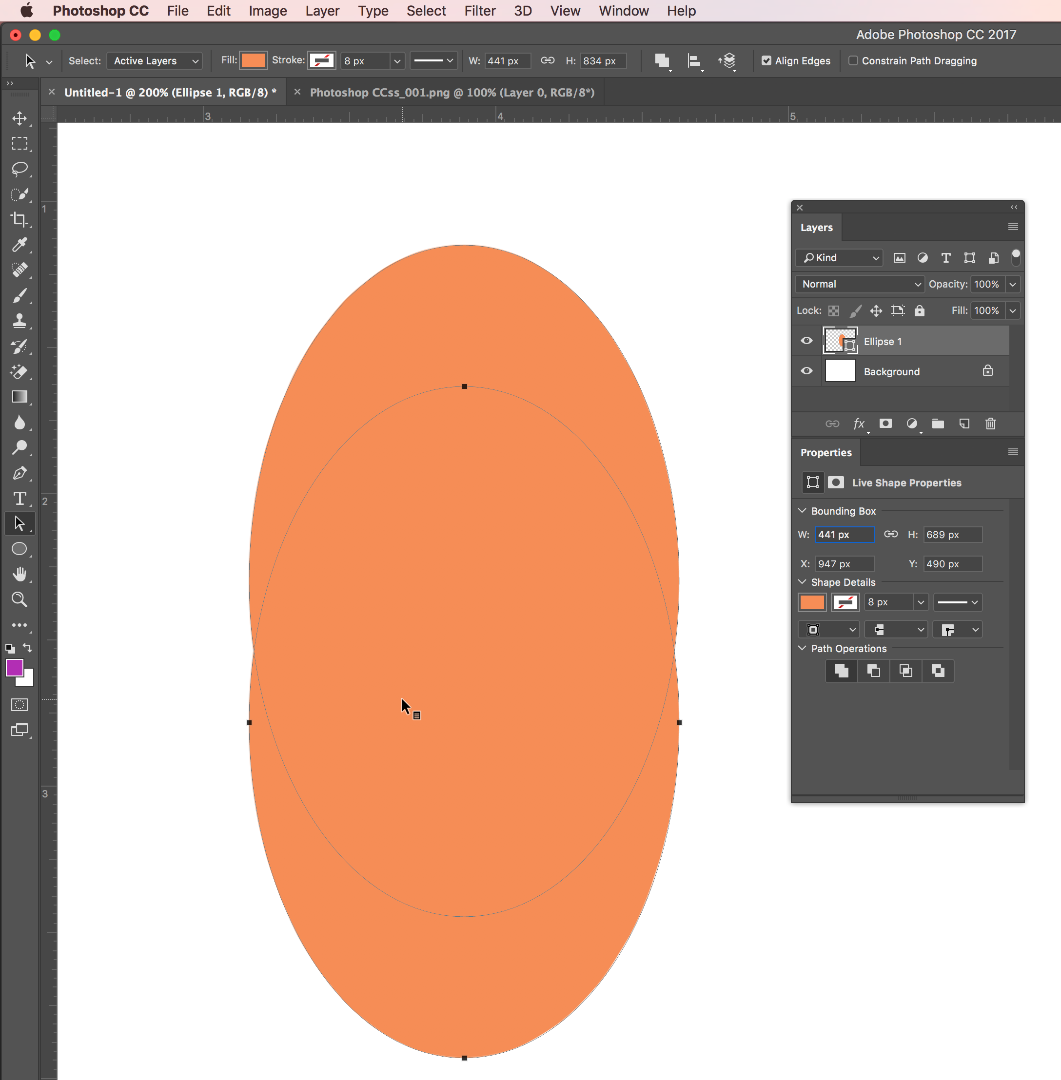
- In the Properties panel, click Subtract Front Shape.
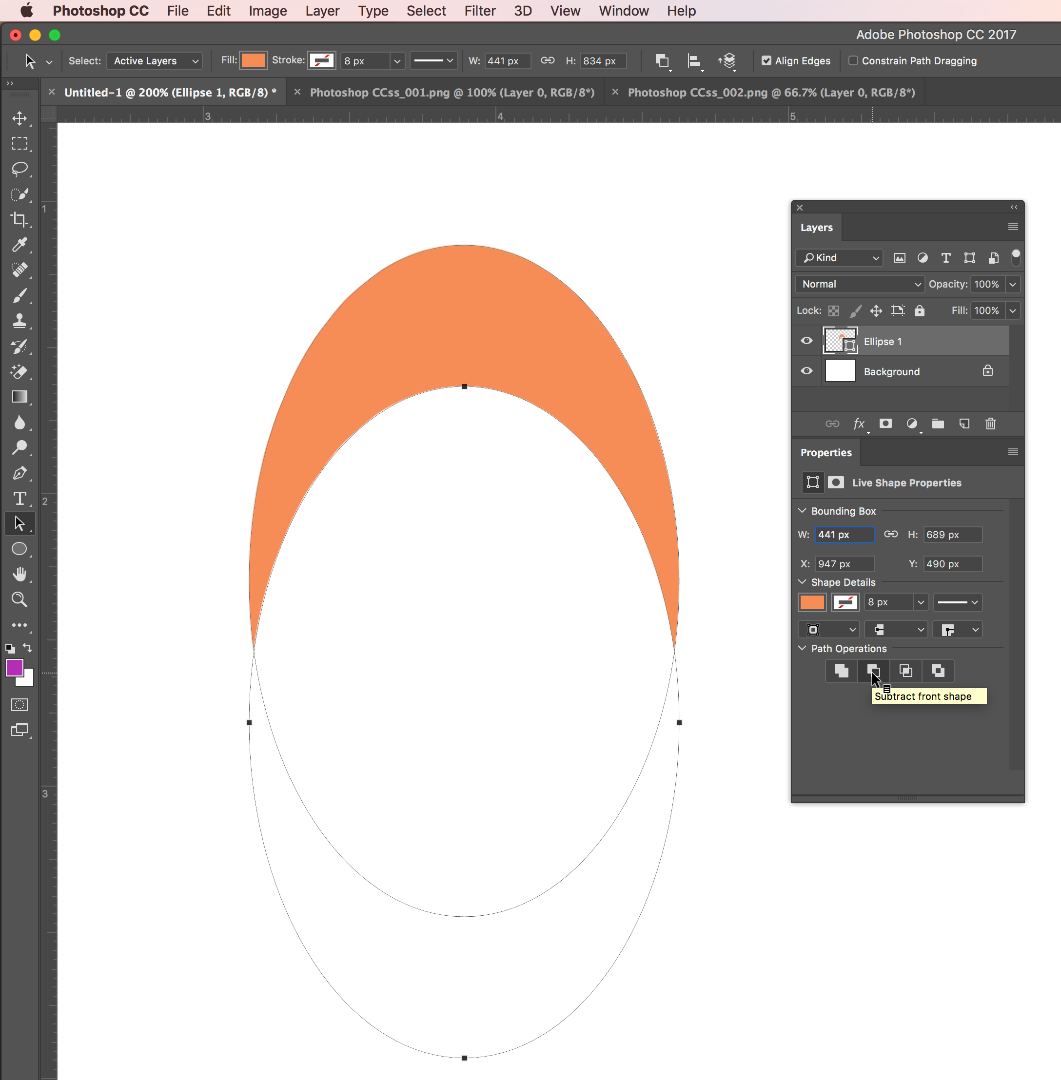
- These are still editabl
Explore related tutorials & articles
Copy link to clipboard
Copied
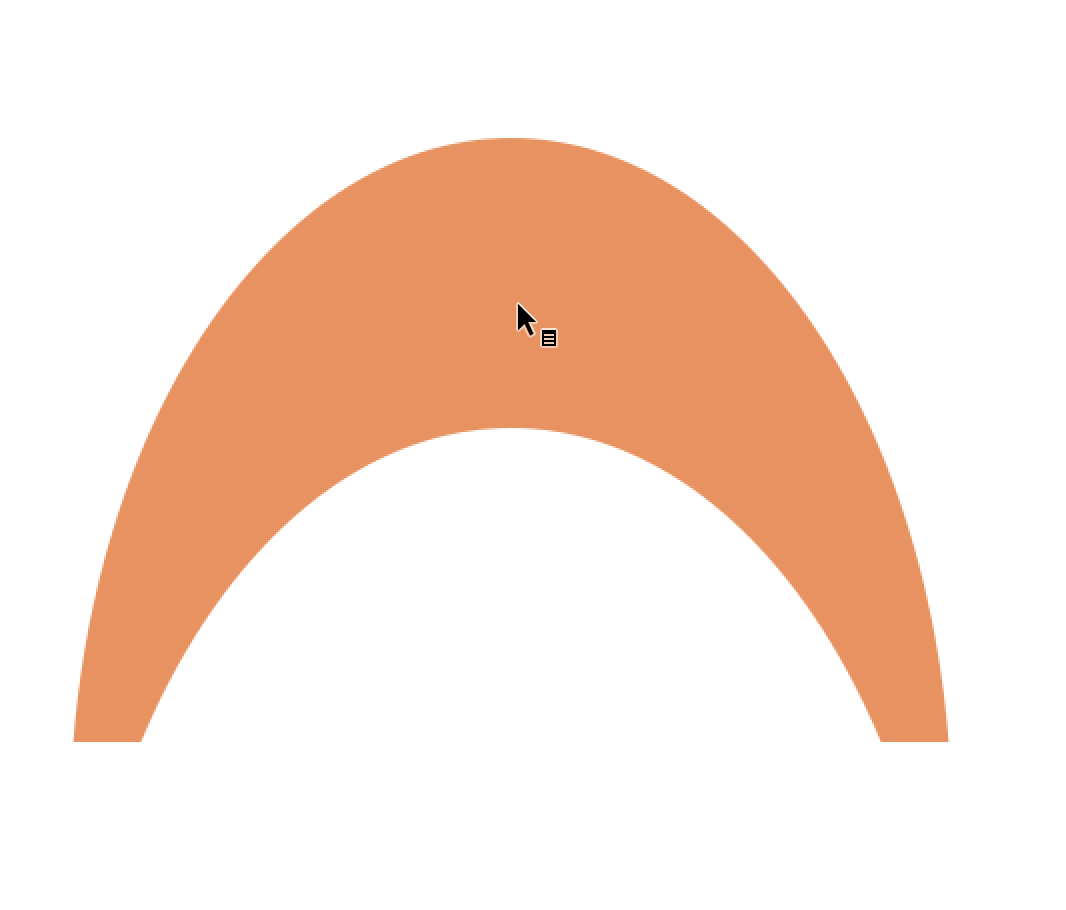
Is this the final shape?
Copy link to clipboard
Copied
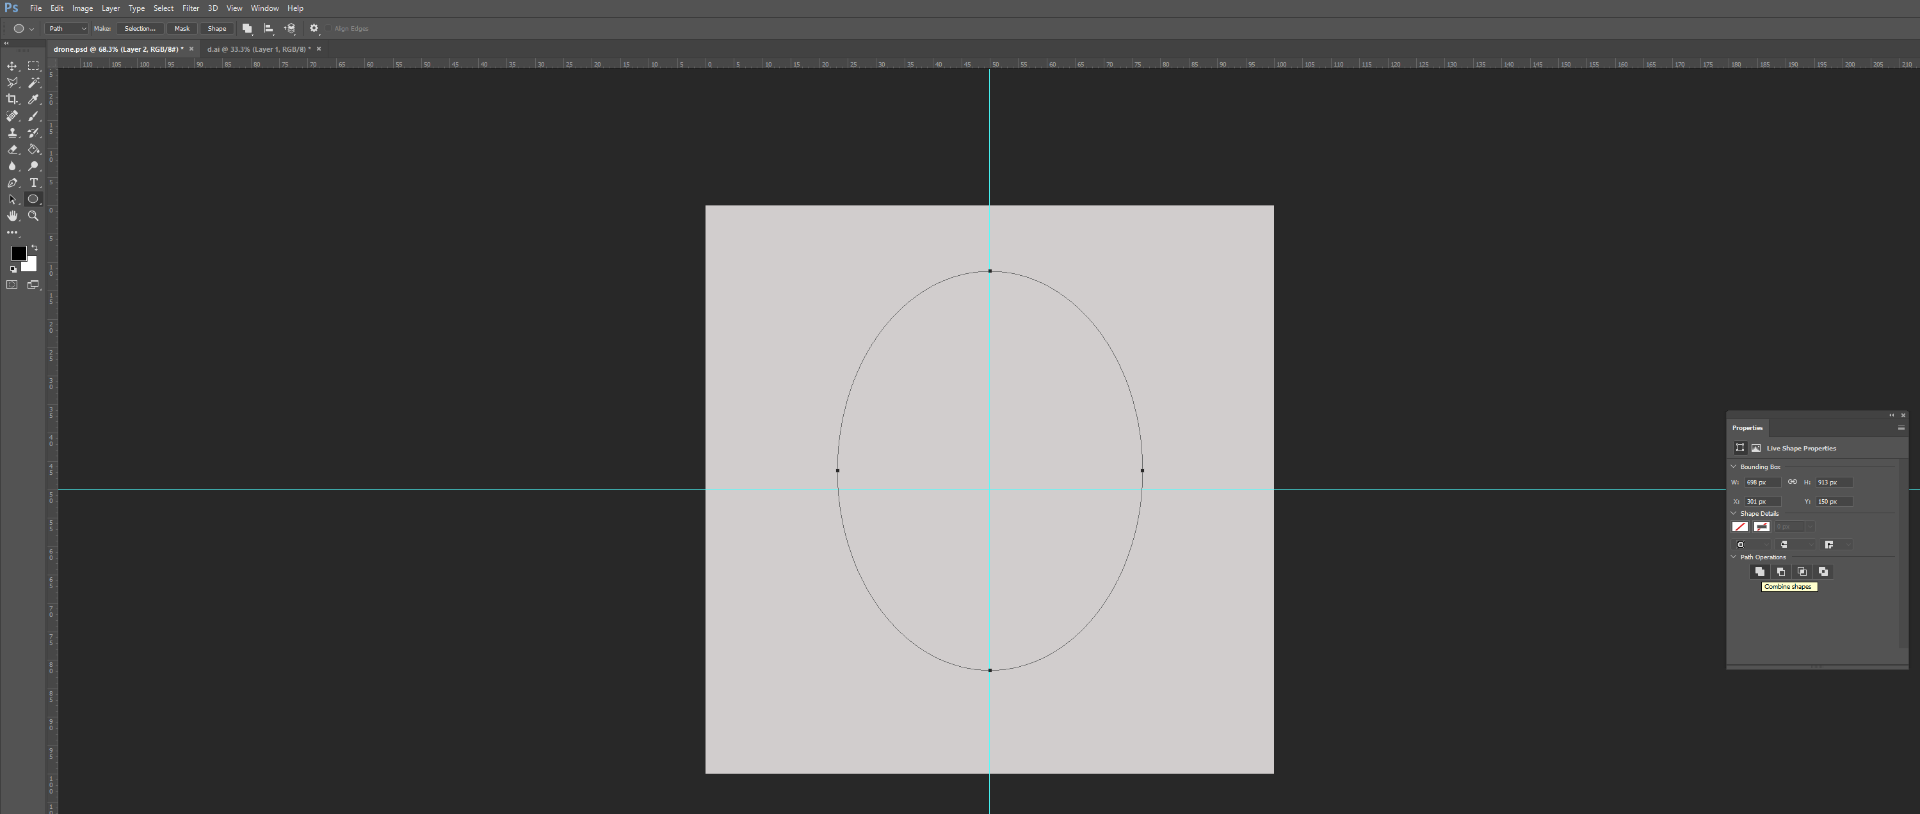
Do you mean like this ?:

If so :
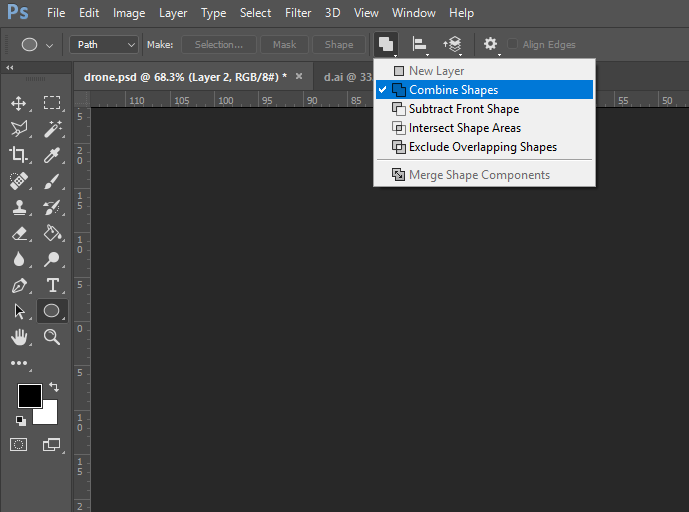
1.Set the ellipse shape tool to path, path operations to combine and draw the first ellipse

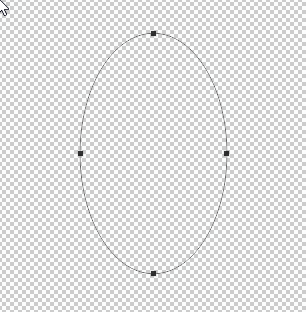

2. Draw the second ellipse and alter the path operations to subtract front shape


3. Click on Make Shape and set colour in properties

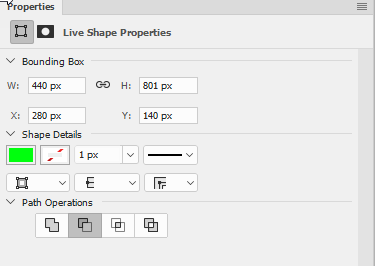


If that is not quite what you are after - please explain a bit further
Dave
Copy link to clipboard
Copied
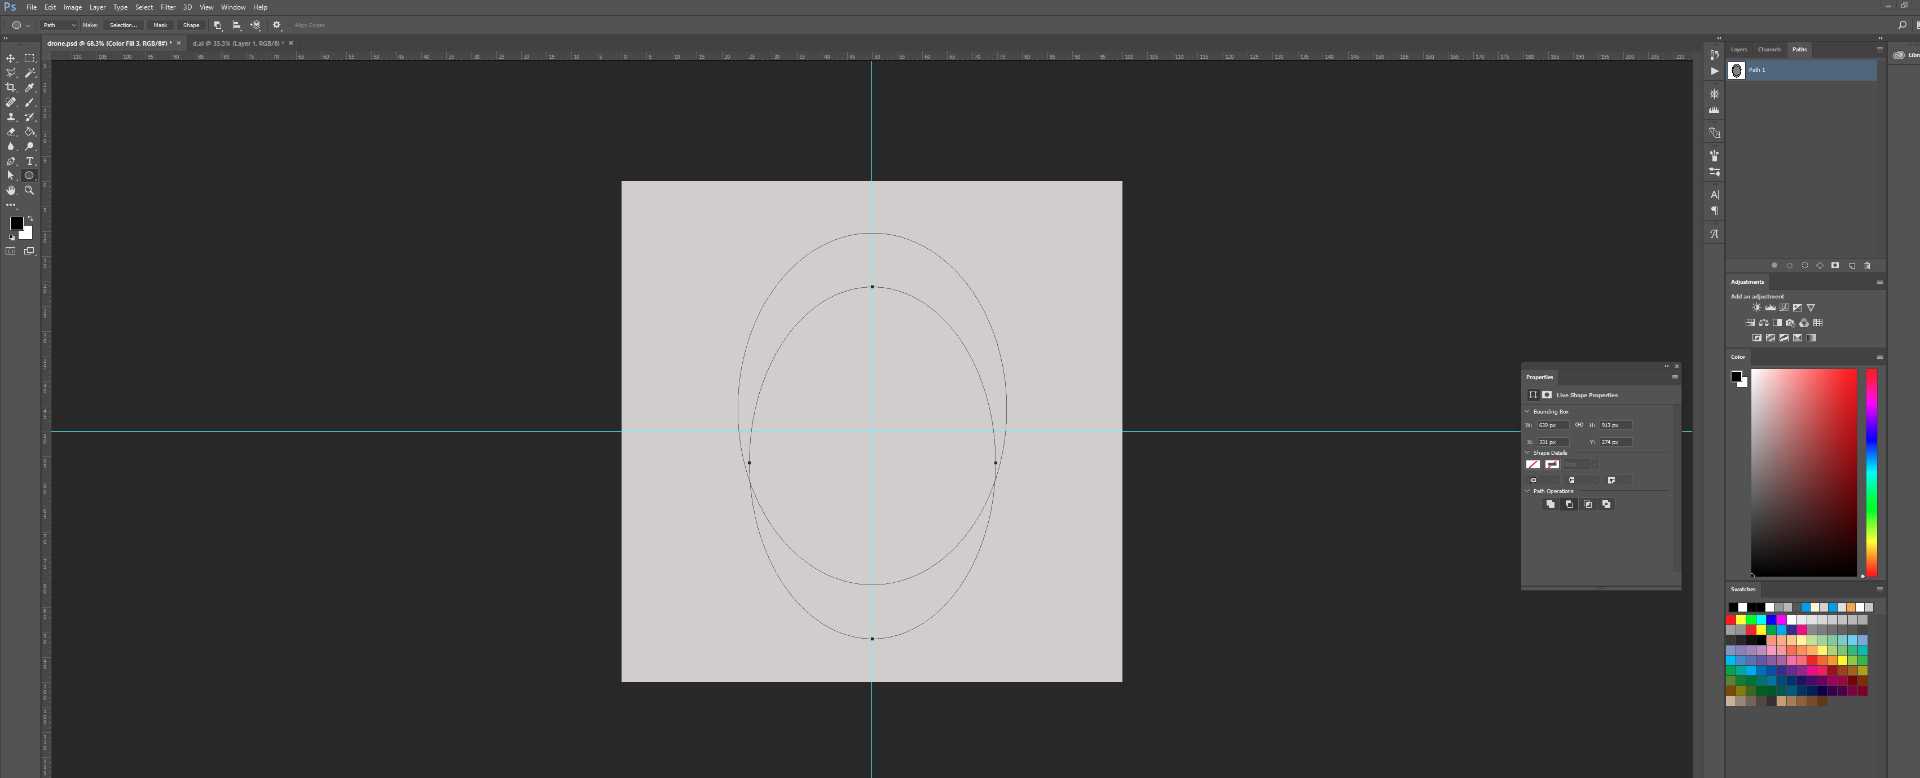
davescm - i'm missing a critical step somewhere (on a PC)...
- created a new layer (had a bunch already)
- clicked ellipse tool, chose path and combine - click in layer and made it 698 x 913
- clicked again, path and subtract - this one is 639 x 913
- moved my Y cords to where I wanted them
now what?
Copy link to clipboard
Copied
I would say set the foreground color, select the work path and then Layer > New Fill Layer > Solid Color, OK.
Copy link to clipboard
Copied
Take a couple of steps back
Before drawing the first ellipse make sure path operations in the options bar are set to combine.

Now draw the second shape and set path operations to subtract front shape

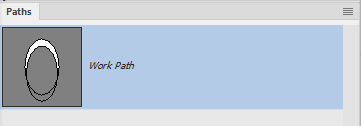
Your paths panel will look like this :

Now go to the options bar and click on Make Shape

Dave
Copy link to clipboard
Copied
OK so...
Copy link to clipboard
Copied
OK finally got it!!!!!
Thank you guys - SOOO much!!!
I'm going to get my vodka now!
Copy link to clipboard
Copied
Haha - enjoy it ![]()
Dave
Copy link to clipboard
Copied
While you are sipping on your vodka, perhaps take a moment to reflect on your opening statement:
I'm sure there is an easy way to do this but I've been here and on google for the last 3 hours! I am a NOOB but I can't imagine this should be hard!?
This is nothing easy or intuitive about drawing that shape in Photoshop. Congrats on getting through it!
~Barb
Copy link to clipboard
Copied
What I didn't tell you is that I've been "trying" for 2 days in AI & PS!!!
How can something that seems so easy be so hard!?!?
(BTW - I'm a real estate agent, our brains do not function like Artist's ![]() )
)
Here is the finished product

I'll share the file if anyone wants it.
Used on www.REODifferent.com
Copy link to clipboard
Copied
It's a drone! very cool!
And if you knew about the Pathfinder panel in illustrator it would've been a piece a cake:
- Draw the first ellipse.
- Alt/Opt drag down to duplicate.
- Click the minus front button in Windows > Pathfinder.
- Draw a rectangle to lop off the bottom
- Again on the minus front button.
- Done!
It's Photoshop that makes it so difficult, because you're trying to create vector art in a program that was designed for bitmap images. Photoshop is using the Illustrator pathfinder technology, but it's just so much more complicated than it is in Illustrator.
Copy link to clipboard
Copied
Thanks again for your help! Figured AI was a (much) better solution but I know just enough PS to get into trouble and only just downloaded AI - SOOOO much to learn!
Copy link to clipboard
Copied
Most Intro to Ai classes will cover how to draw complex shapes by combining easy ones, using Pathfinder, Shapebuilder and the Shaper tool. I cover it the first day, because it's an important way for someone who hasn't mastered the Pen tool yet to start drawing.
~Barb
Copy link to clipboard
Copied
Ha! I have my screen shots ready to go, but was waiting for the shape confirmation. ![]() Similar to yours, Dave, plus one final step:
Similar to yours, Dave, plus one final step:
This would be much easier in Illustrator (and you could add the shape to your PSD file) but in Photoshop:
- Select the Elliptical shape tool. On the options bar, choose Shape and set the fill color. Draw an ellipse.
- Select the Path Selection tool, hold Alt/Opt and drag down to duplicate the ellipse.

- In the Properties panel, click Subtract Front Shape.

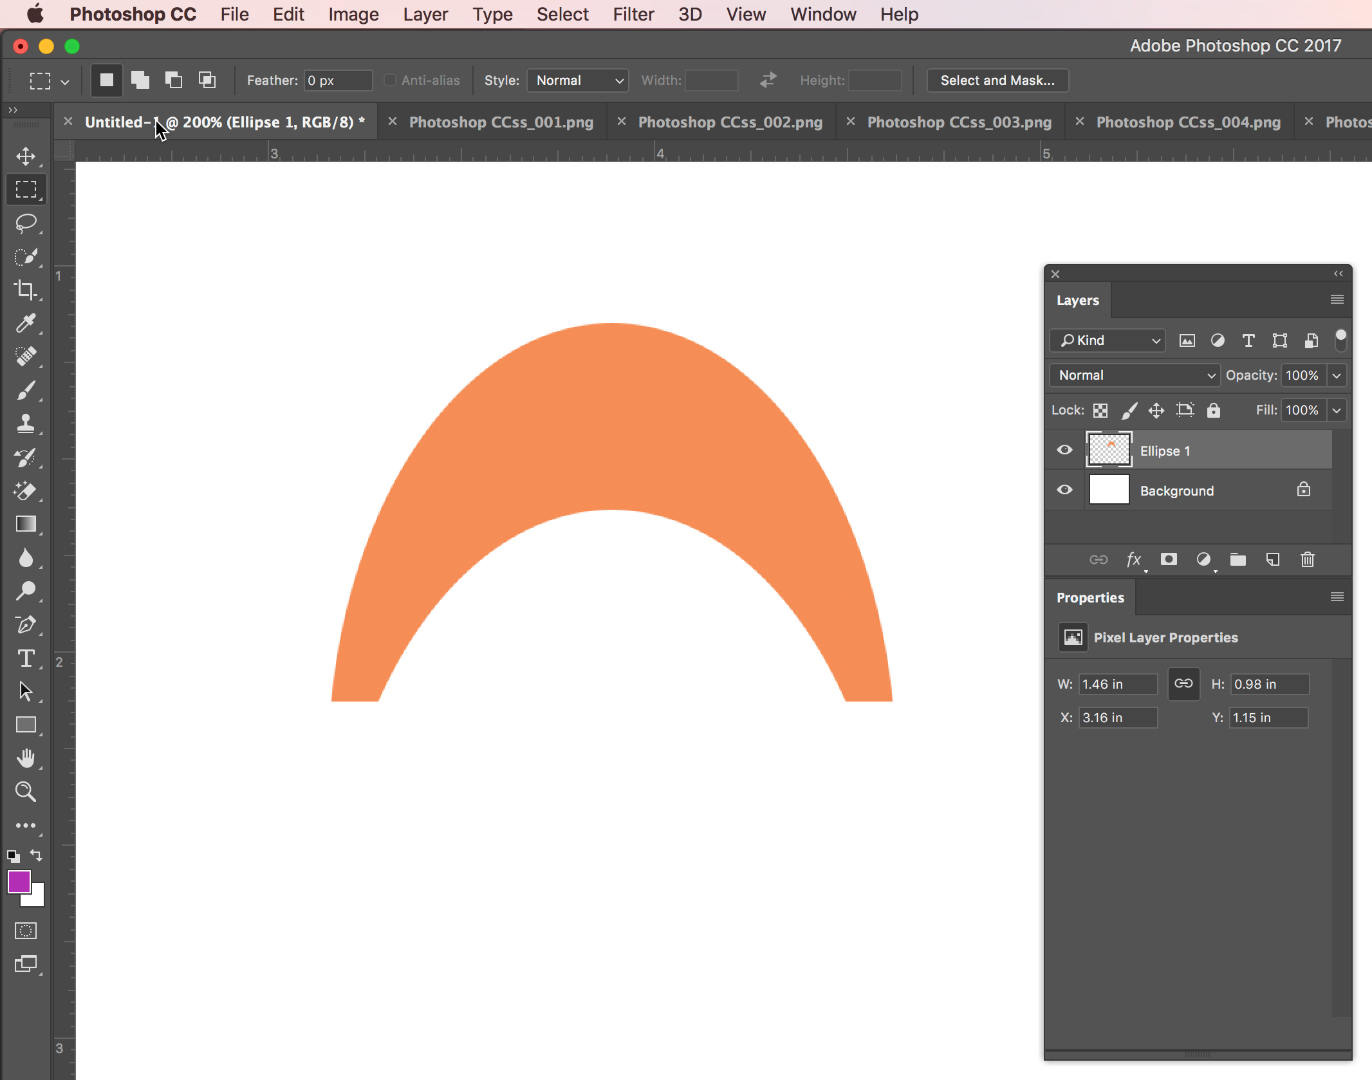
- These are still editable objects, so you can adjust either as necessary but to remove the bottom part you will have to rasterize. Layer > Rasterize > Shape.
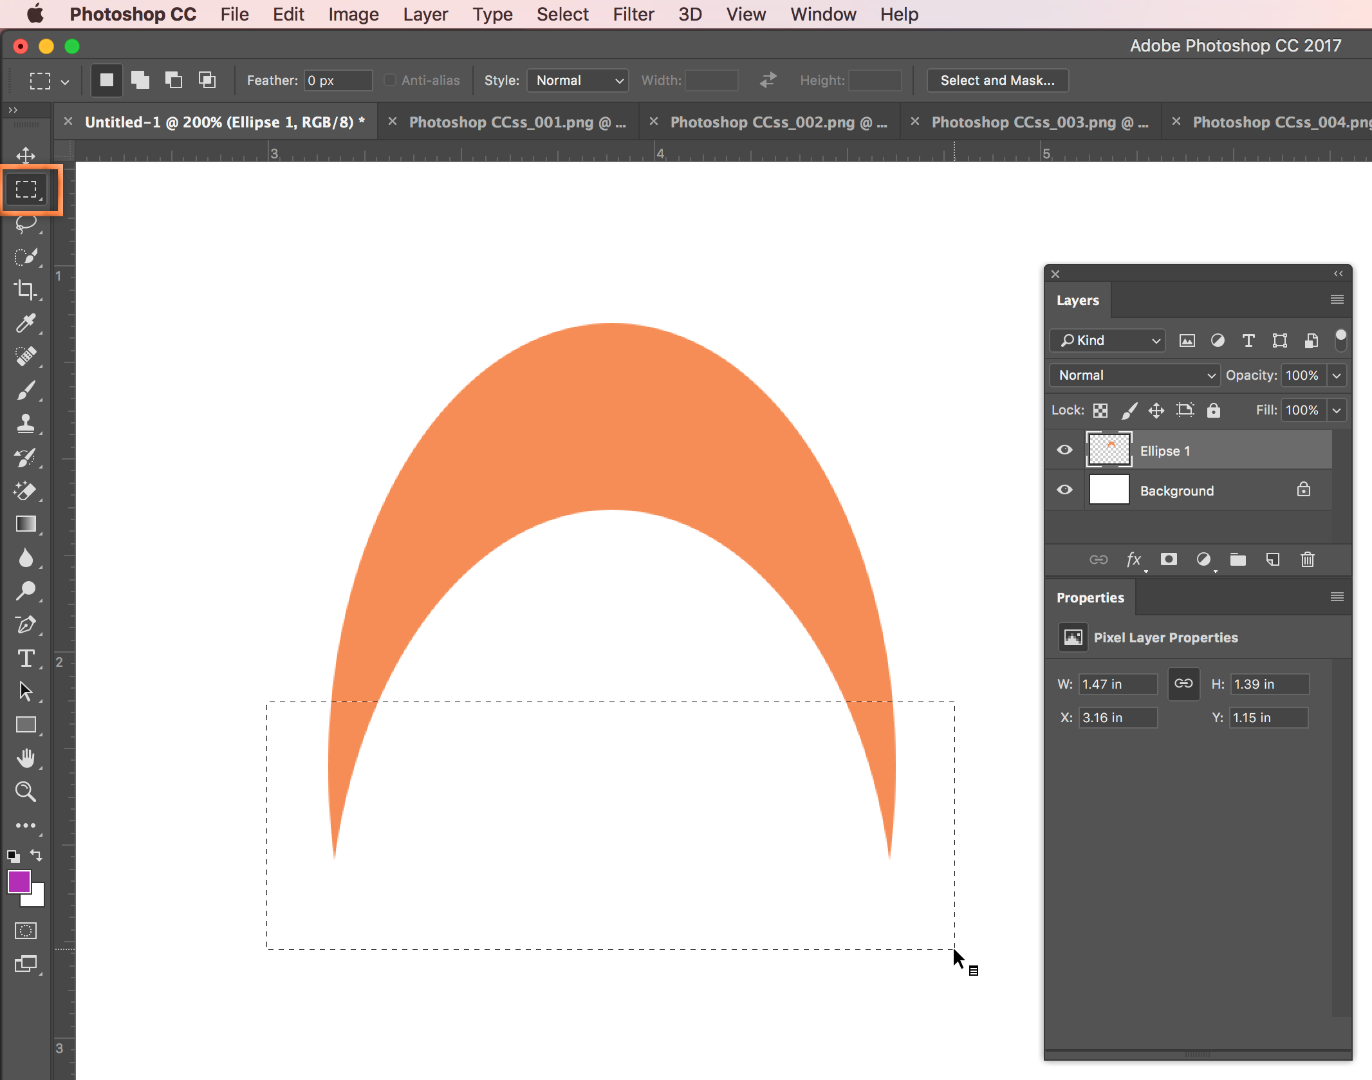
- Then you can just draw a rectangular marquee over the part you want to remove and press Delete.
Copy link to clipboard
Copied
Haha
Interesting that you used shapes and I used paths then made a single shape
For the OP the key path operation in both answers was "subtract front shape"
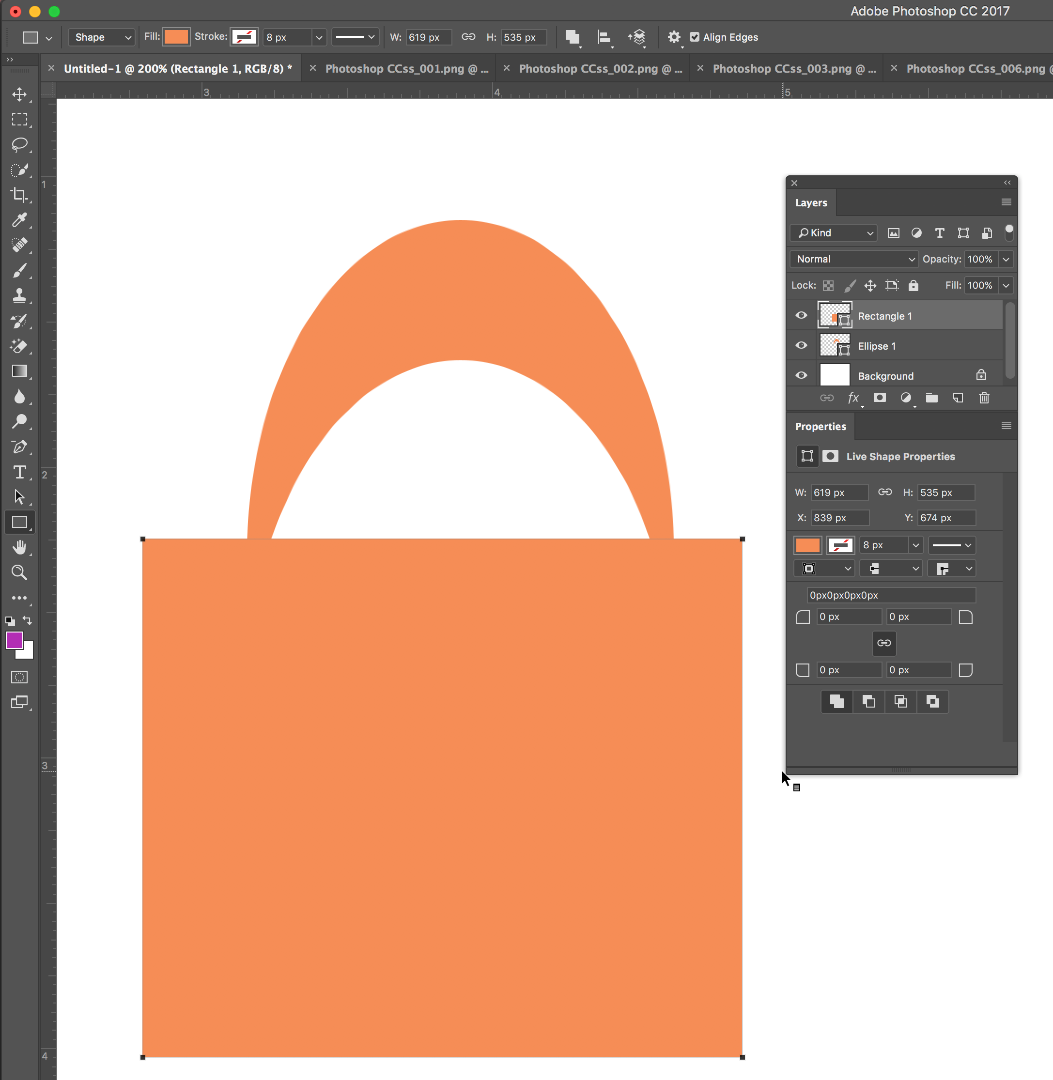
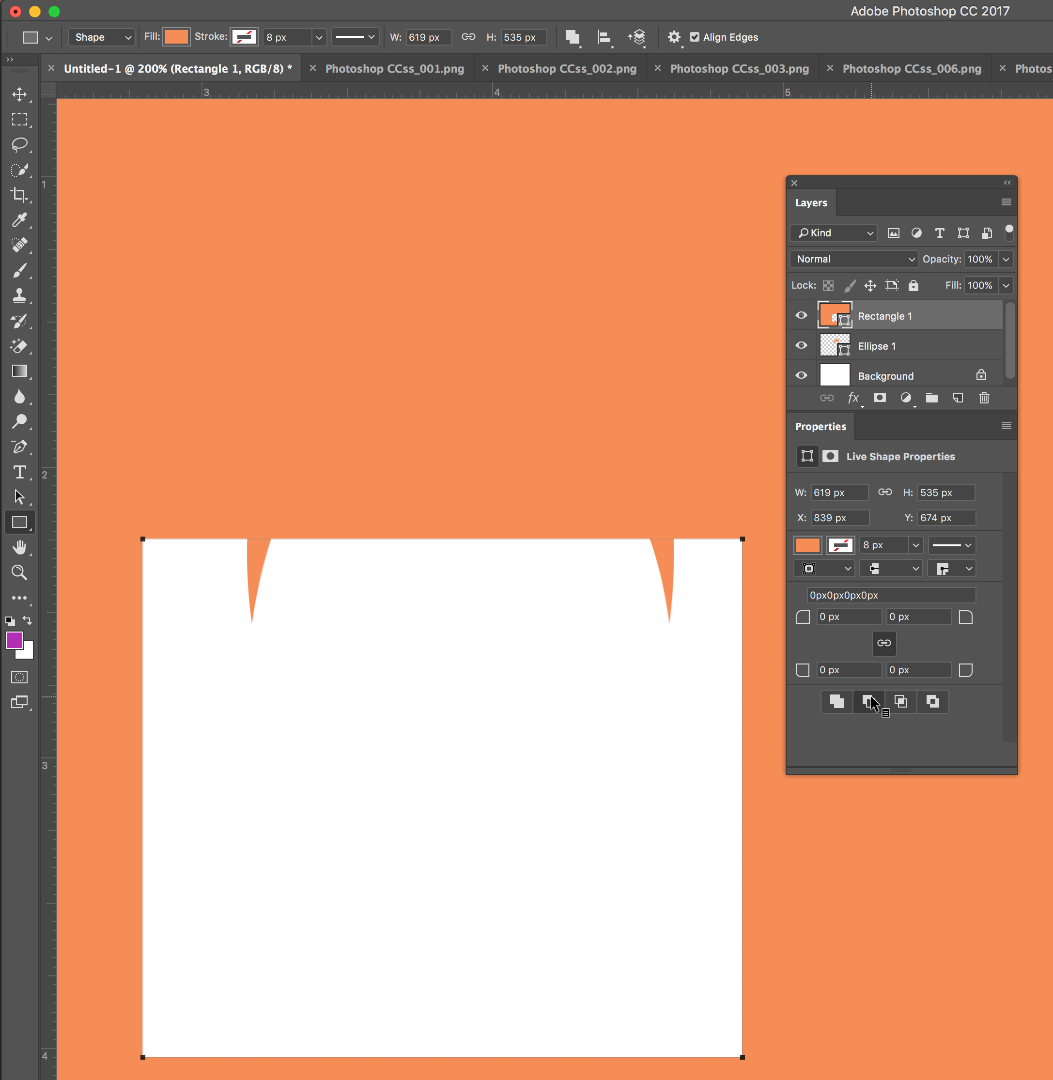
Actually no need to rasterize to remove the bottom - just use another "subtract shape" with a rectangle


Dave
Copy link to clipboard
Copied
Right? But I couldn't make it work. I'll go try it with paths...
Copy link to clipboard
Copied
4. moved my Y cords to where I wanted them
You do have to return to the Eilipse tool if you were just moving your ellipses around with the Path Selection tool to see this option.
Find more inspiration, events, and resources on the new Adobe Community
Explore Now