• Global community
    • Language:
      • Deutsch
      • English
      • Español
      • Français
      • Português
  • 日本語コミュニティ
    Dedicated community for Japanese speakers
  • 한국 커뮤니티
    Dedicated community for Korean speakers
Exit
0

Isolating dark brown hair from a black background.

New Here ,
Jan 28, 2019 Jan 28, 2019

Copy link to clipboard

Copied

Im having issues isolating dark brown hair from a black background. I've tried 3-4 techniques at this point but Im having issues with the hair blending into the black background making it impossible to properly select the models hair. Select and mask is impossible to use on Photoshop CC as he can't detect the difference between the hair and the background. New photography at this point is impossible so I have to remove this background. Anyone have any pointers on how to get this done well and quickly?

Thanks!

Image2.png

Views

3.9K

Translate

Translate

Report

Report
Community guidelines
Be kind and respectful, give credit to the original source of content, and search for duplicates before posting. Learn more
community guidelines
Adobe
Adobe Employee ,
Jan 28, 2019 Jan 28, 2019

Copy link to clipboard

Copied

Hi Joannac,

Could you please check these two tutorials and see if it helps?

Cutting Hair using Dis-Saturation method - PART 1 - YouTube

Select and Mask Subjects in Photoshop - YouTube

Regards,
Sahil

Votes

Translate

Translate

Report

Report
Community guidelines
Be kind and respectful, give credit to the original source of content, and search for duplicates before posting. Learn more
community guidelines
Community Expert ,
Jan 28, 2019 Jan 28, 2019

Copy link to clipboard

Copied

Well that is about as difficult as it gets. Do you know what background it is to be used against? A dark to mid shade background with "busy" features will require less work than a bright smooth white and on the latter you may need to resort to painting in manually some lost edge hair.

I would start with the red channel and see what can be extracted from there - then combine it with other techniques as required.

Dave

Votes

Translate

Translate

Report

Report
Community guidelines
Be kind and respectful, give credit to the original source of content, and search for duplicates before posting. Learn more
community guidelines
Community Expert ,
Jan 28, 2019 Jan 28, 2019

Copy link to clipboard

Copied

assign-pro-photo-lab-applyimage.jpg

Which gets one something like this as a start point after a few apply image steps and curves:

chops.jpg

The rest probably comes down to more manual work...

Brief Description:

  • Duplicate file
  • Assign Pro Photo RGB ICC profile (optionally increase vibrance or saturation)
  • Convert to Lab mode
  • Target the “a” channel and use apply image to increase contrast as a start point, before making further refinements to the mask
  • Apply this mask channel data to the original file, again possibly making refinements and perhaps “faking” the hair edges where necessary (when done correctly nobody will know what the original looked like anyway so be pragmatic)

P.S. Depending on CMYK profiles with different GCR, you may find the CMY vs. the K channel to possibly provide the required contrast to help in making a mask.

Good luck! I can describe the rationale behind this method if it is not obvious.

Votes

Translate

Translate

Report

Report
Community guidelines
Be kind and respectful, give credit to the original source of content, and search for duplicates before posting. Learn more
community guidelines
Community Expert ,
Jan 29, 2019 Jan 29, 2019

Copy link to clipboard

Copied

Like Dave says. It is such a difficult selection, you are just not going to get a good, acceptable result.  You'll either have those horrible ropey looking artefacts on the periphery, or you'll remove so much of the hair it will be obvious.  The only way to save this sort of situation is by painting hair back in.

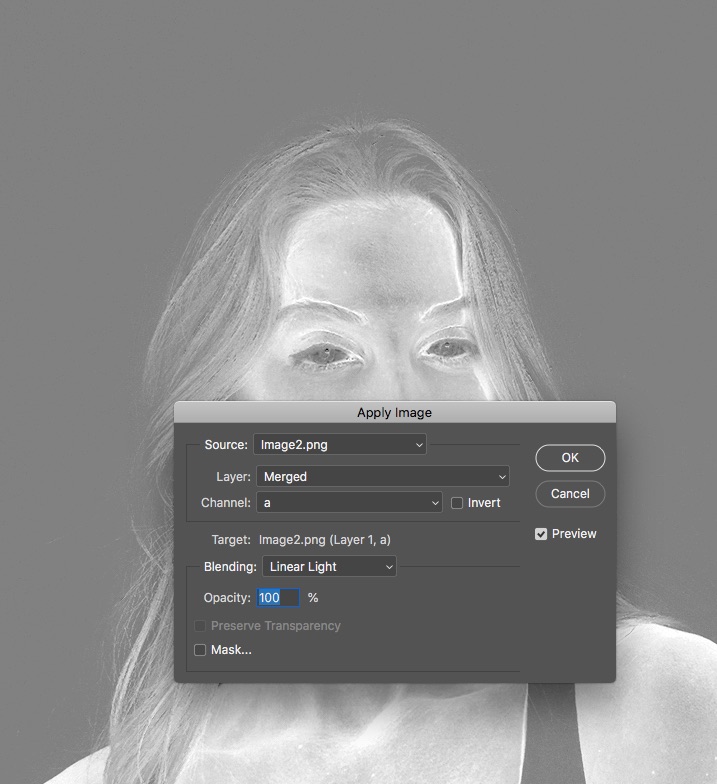
This was as close to an edited original as I could get, with a view to making a selection.  This was with Calculations and levels

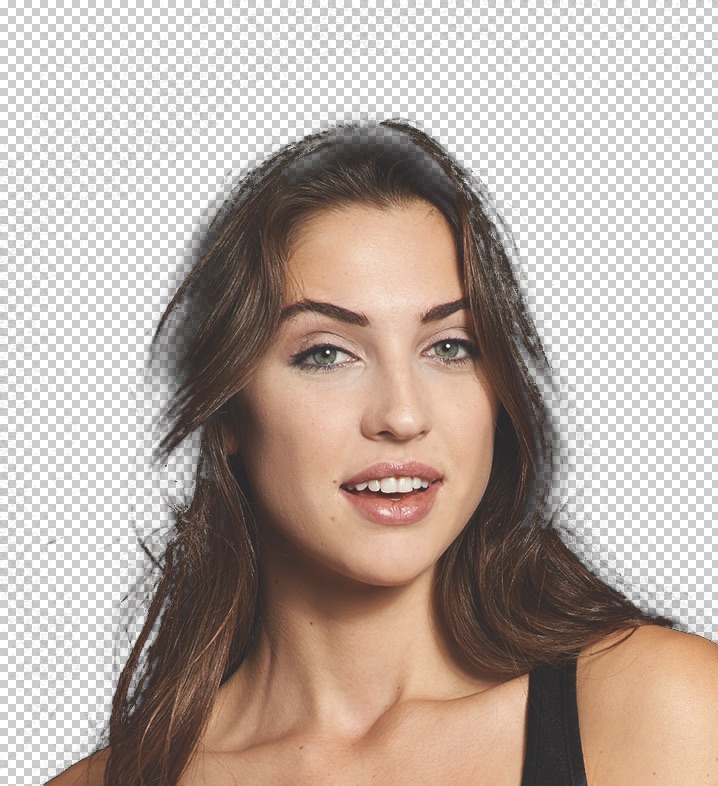
Select & Mask gave me this using the above layer to make the selection, and adding a layer mask to the original with that selection in place.  It has that thick ropey look in a couple of places, and hair is missing.  Not acceptable.

This is the start of the process of adding new hair.  I'd expect to spend 30 minutes to do a proper job.  I use the Hair and Skin brushes by Castrochew, as well as one pixel fully hard brushes set to Fade, on layers set to 50% opacity or less.

Votes

Translate

Translate

Report

Report
Community guidelines
Be kind and respectful, give credit to the original source of content, and search for duplicates before posting. Learn more
community guidelines
Community Expert ,
Jan 29, 2019 Jan 29, 2019

Copy link to clipboard

Copied

Trevor.Dennis​, that’s brilliant!

Votes

Translate

Translate

Report

Report
Community guidelines
Be kind and respectful, give credit to the original source of content, and search for duplicates before posting. Learn more
community guidelines
Community Expert ,
Jan 29, 2019 Jan 29, 2019

Copy link to clipboard

Copied

Before anyone runs the risk of getting a hernia trying to lift the subject from the deep black background, perhaps we should consider that, at present, we are coping with an 8 bit PNG tile. It forces us to create shape when none is evident.

Maybe, just maybe, a raw file exists that can be brought into Photoshop as a 16 bit image that, with gentle coaxing, will reveal the authentic shape of the model's hair. It would allow us to create a more natural mask and hold brushwork to a minimum.

In short, don't overlook the potential of a 16 bit starting point.  

Votes

Translate

Translate

Report

Report
Community guidelines
Be kind and respectful, give credit to the original source of content, and search for duplicates before posting. Learn more
community guidelines
Community Expert ,
Jan 29, 2019 Jan 29, 2019

Copy link to clipboard

Copied

LATEST

Yes, excellent job, Trevor. But I go with Norman's very timely reminder. Go back to the source to get the best possible data to work with.

Votes

Translate

Translate

Report

Report
Community guidelines
Be kind and respectful, give credit to the original source of content, and search for duplicates before posting. Learn more
community guidelines