- Home
- Photoshop ecosystem
- Discussions
- Re: Layers: so simple yet so lost.
- Re: Layers: so simple yet so lost.
Layers: so simple yet so lost.
Copy link to clipboard
Copied
Just off phone with Adobe support and even they weren't able to help, maybe you can?
I shoot portraits and retouch them.
Goal: To do a workflow that, in the end, allows me to go back to each and every individual layer/adjustment and either redo or delete.
Confusion: the correct way to create layers / adjustments and move forward, while being able to move back.
Here's my workflow:
Start with retouching subject's face: I like to break apart each feature of the face I am working on (eyes/nose/hair/skin, etc) into separate layers so that if needed I can delete or readjust what I just did.
1. Duplicate background
2. Name it "Skin"...retouch skin to remove blemishes, use Patch tool
3. Next create next new layer by duplicating the "Skin" layer, now I'll retouch subject's hair using the cloning tool, naming this layer "Hair"
Now comes my confusion:
4. Create next new layer to retouch eyes, duplicate "Hair" layer, name it "Eyes"...use clone tool to remove veins, but now want to remove all the redness...so I add a ew Adjustment Layer - Saturation, decrease it, create a Mask on the Eyes layer, and paint in a less red eye.
5. NOW...I want to go and retouch my subject's Ear...WHERE DOES THAT NEW LAYER COME FROM (DUPLICATE) AND WHERE DOES IT SIT AMONGST ALL THE LAYERS?
You see the "Eyes" layer has above it a Saturation adjustment, it sits atop all the other layers. If I create a new layer from below the Eye layer the work I do on it is not visible, b/c its not on top. So how do I continue to build my layers if the Ear Adjustment Layer is preventing me?
If I make a Stamp Visible layer, can I continue to go to the first layers and make adjustments?
In short what is the appropriate workflow for Layers and Adjustments?
Thanks!
Message was edited by: Darren Trentacosta
Explore related tutorials & articles
Copy link to clipboard
Copied
It appears that in CC 2017 that the Patch tool doesn't allow for Content Aware and Sample All Layers, only the Spot Tool can do that...ugh!


Copy link to clipboard
Copied
Hi
The patch tool does include content aware & sample all layers - just change "Normal" to "Content Aware"

Dave
Copy link to clipboard
Copied
wow do I feel stupid!...thanks...:)
Copy link to clipboard
Copied
You need to increase the value in the Structure field. All the way to 7 works OK.

I probably wouldn't use the Patch tool on a single hair like that, but there are a few tricks you can use.
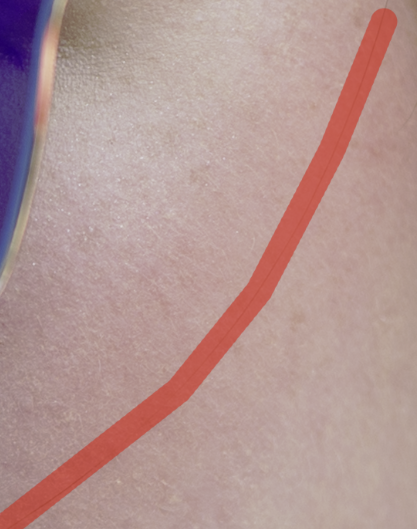
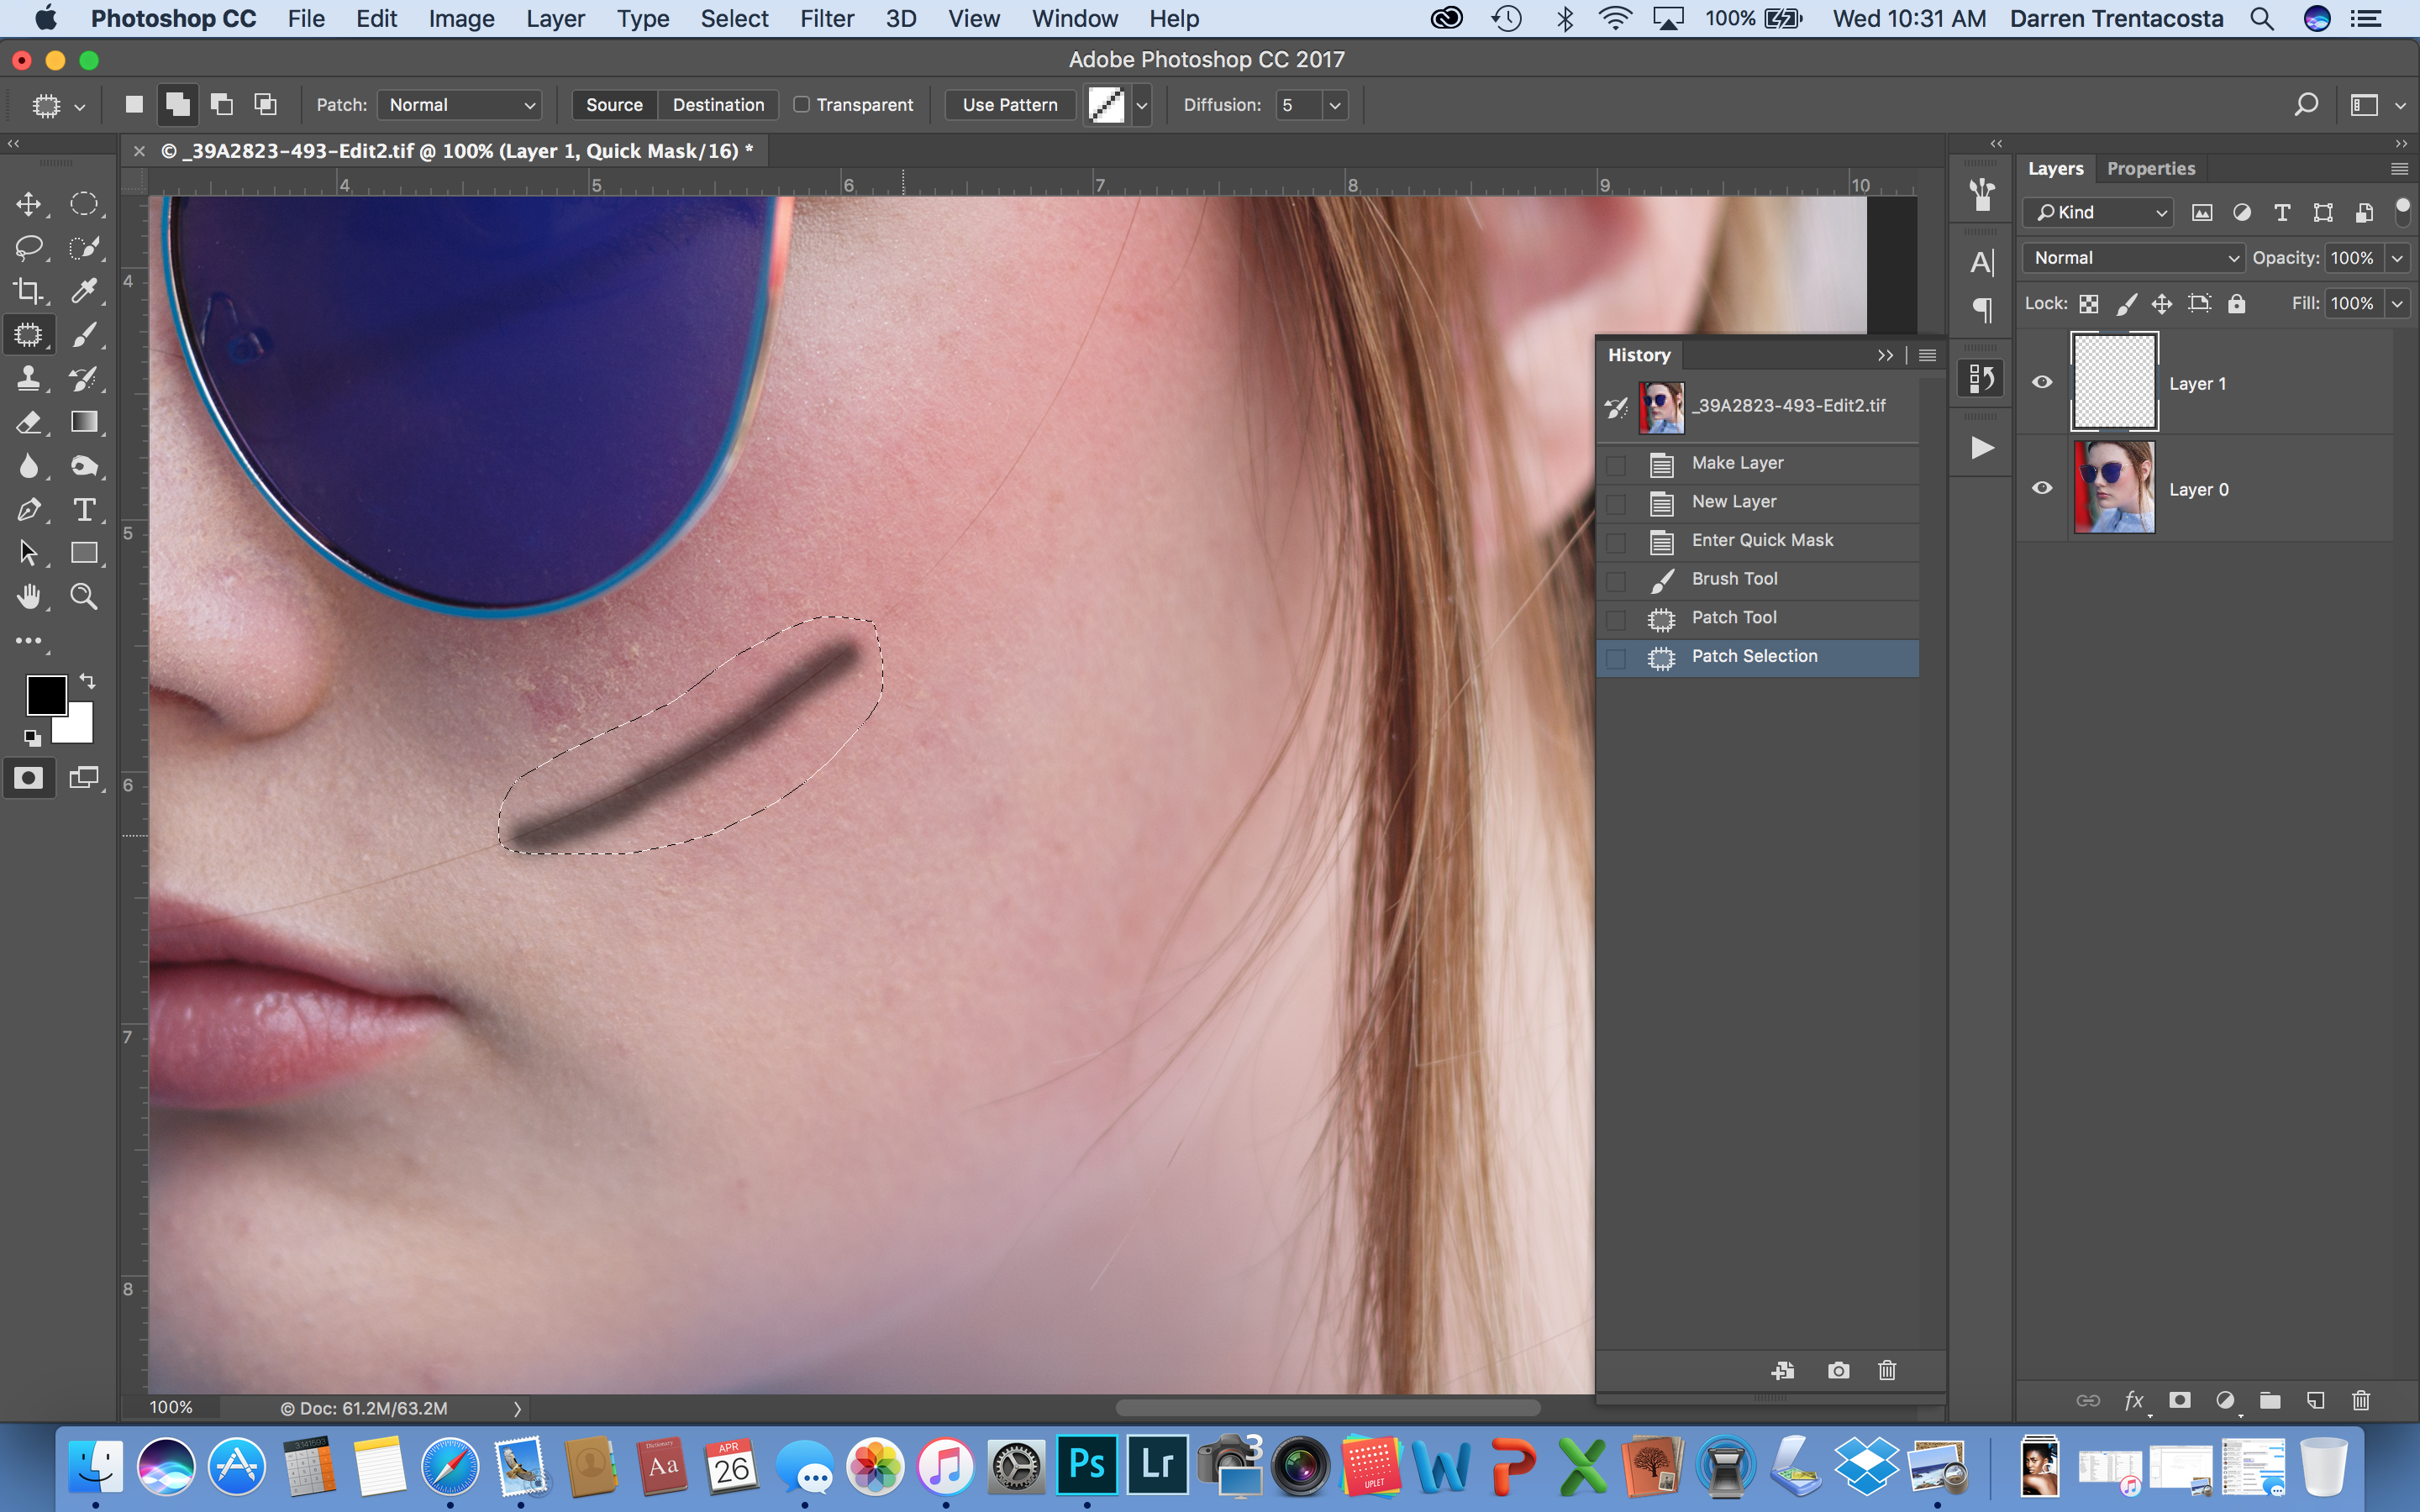
You can make the selection before selecting the Patch tool, so if you go into Quick Mask by hitting the Q key, you can paint over the hair with black. Rather than do this freehand, click at one end, and hold down the Shift key while clicking along the hair to form a number od straight lines. Then hit Q again to come out of Quick Mask, select the Patch tool and make the edit.

Another approach is to use the Patch tool like the Polygonal Lasso tool by holding down the Alt key and clicking to form a number of straight lines. This lets you get nice and tight around awkward objects.

Copy link to clipboard
Copied
Trevor, do you do Youtube videos?...you seem to have a lot of cleaver techniques I've never seen before.
Copy link to clipboard
Copied
Hi Trevor and Dave,
I hope I followed your suggestions correctly, see below. Both seem to not work.
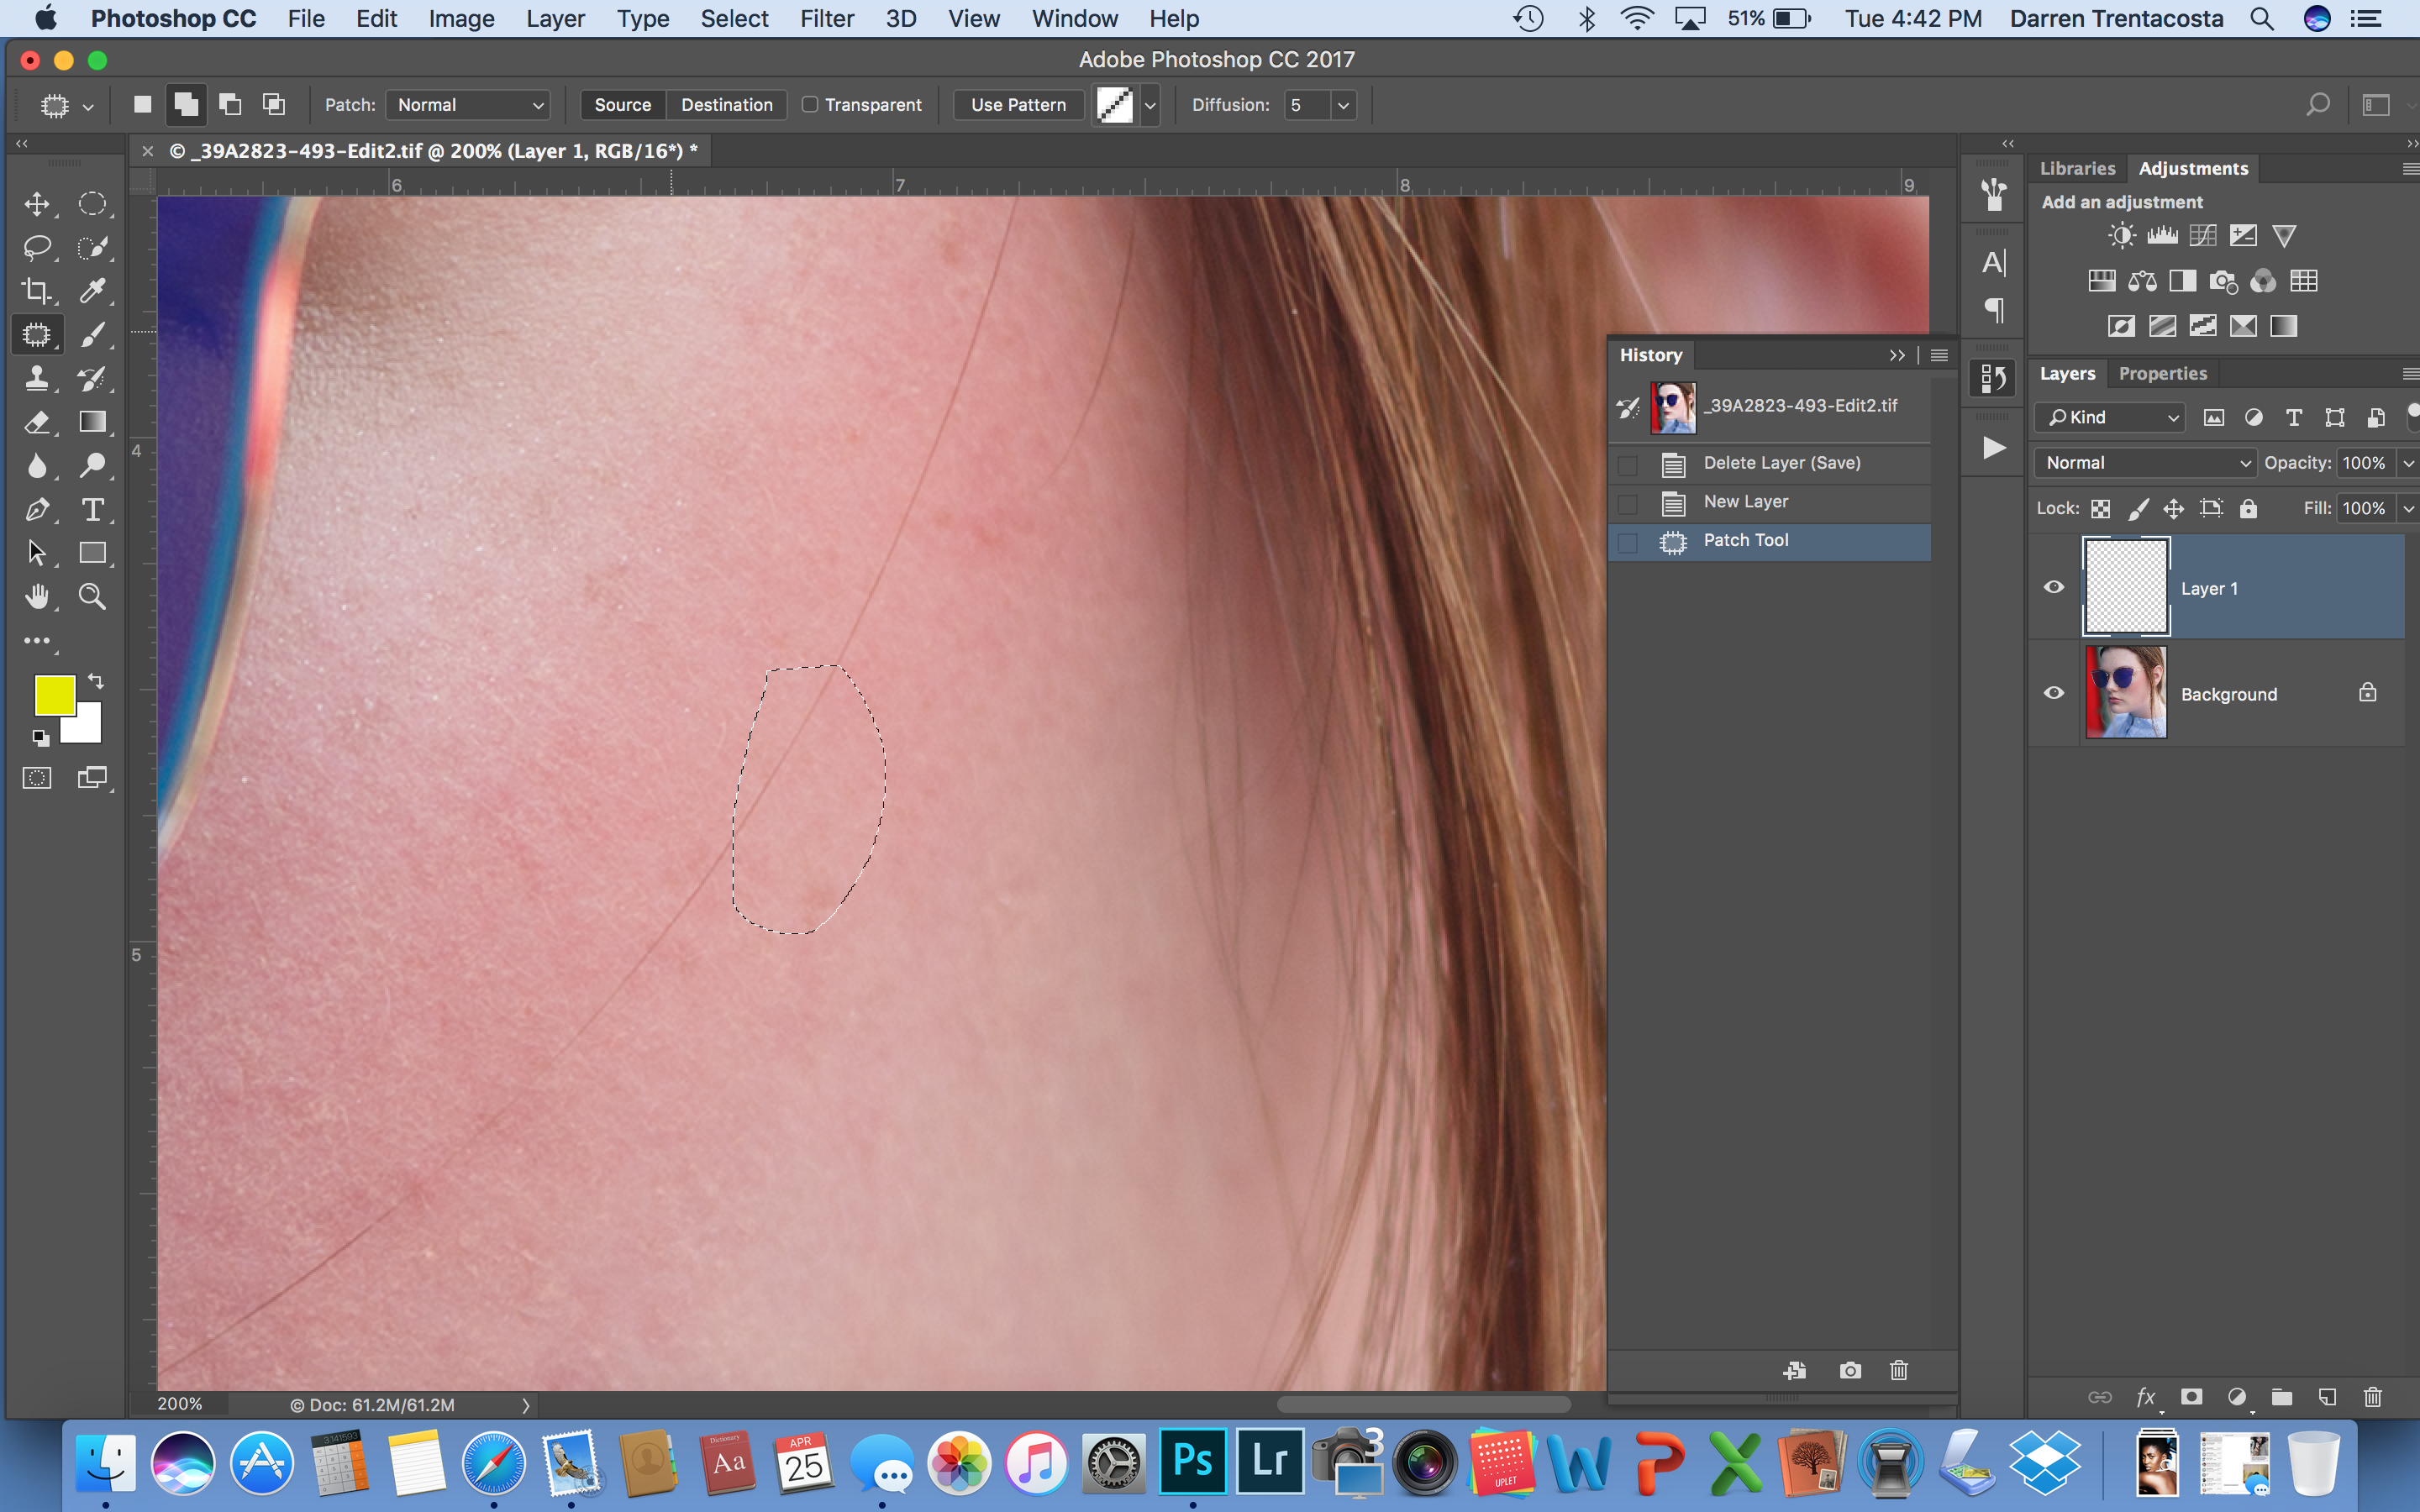
First Photo shows me using my own standard way...but without the use of a Blank Layer.
Duplicate background, Commd J
Grab Patch Tool
Circle and drag to new area.
You can see this seems the best way b/c the blending is pretty seamless...
Problem is that its not a Blank Layer.
2nd Photo is the suggestion using a Blank Layer, Content Aware, Structure and Color set to same as yours, and all Layers selected.
For some reason its more blotchy...not evenly blended...is there a reason why?
Lastly had no success in trying the Quick Mask mode to remove the hair...not sure if I understand where to go with the Patch tool after I make the Quick Mask. I made my mask, then grabbed the Quick Mask tool and wasn't sure what to do, so I circled the mask, and dragged it but as you can see below, it did nothing.


Copy link to clipboard
Copied
Creo que no está usted realizando un flujo de trabajo apropiado para el retoque facial. Utilizando el proceso de "Separación de Frecuencias" podrá realizar una edición mucho más precisa sobre tonalidades y texturas de manera separada.
Copy link to clipboard
Copied
Gracioso que sugiere que porque yo uso la separación de frecuencia, pero todavía tengo problemas de apilar el orden de las capas una vez que la separación de frecuencia completa. Cosas como liquify, balance de color, etc ...
-
- 1
- 2
Find more inspiration, events, and resources on the new Adobe Community
Explore Now