Lines in patterns in Photoshop
Copy link to clipboard
Copied
Hi-
Would anyone know what is causing these faint lines to appear in the pattern? (see top row of ducks) I created the patterns in Illustrator for an invitation & the lines are not there, not matter how much I zoom in. When I open them in Photoshop to save as a JPG the lines are there. Even if I export as a JPG from Illustrator and open in PS...lines! Some are cross hair looking so I am not sure if this is from the pattern tool. I have them in the polka dot pattern that is part of this invite too so it's not just the shape. I thought maybe if I change from a hex pattern to offset brick it would help, but it isn't.
Thanks,
Lauren
Explore related tutorials & articles
Copy link to clipboard
Copied
in illustrator saving as JPG dialog box, Choose Art optimized from the Anti-aliasing options

Copy link to clipboard
Copied
Thanks. I tried that and it didn't work. I also tried exporting as a PSD file and still no luck. I ended up unchecking the "anti-alias" when opening the AI file in PS & that seemed to do the trick.
Copy link to clipboard
Copied
I'd prefer to define the pattern in Photoshop starting with a single duck, or the shape of your choice. It's almost a mathematical process.
You need the grid turn on with a suitable spacing. (Tip: a quick way to alter grid spacing is to adjust the image resolution with Resample turned off. Increasing the resolution also increases the grid spacing. This is just a wee bit quicker than going into Preferences).
Lay down your first object, be it raster or vector shape, and start Free Transform. Nudge the centre handle to coincide with a grid intersection and OK it.
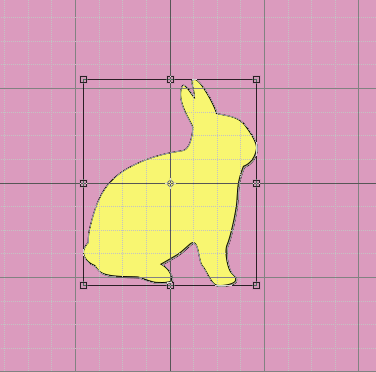
Copy the shape and repeat that a couple of times moving each one so that its FT centre handle coincides with the relevant grid intersection.
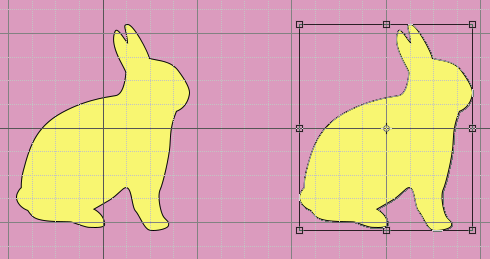
With three objects, merge the layers. Copy and move this time using the centre handle.

With three rows, merge into a single layer, and drag out some guides to form your pattern box
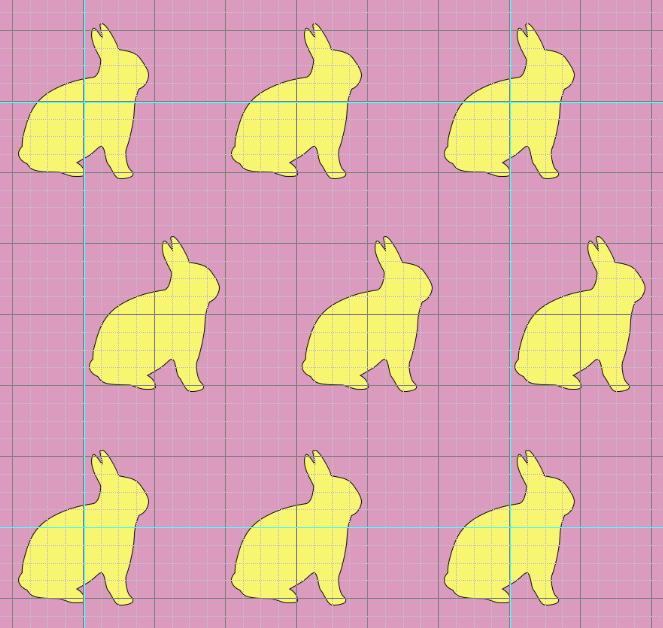
You can now make a selection that snaps to the guides, and copy to a new layer

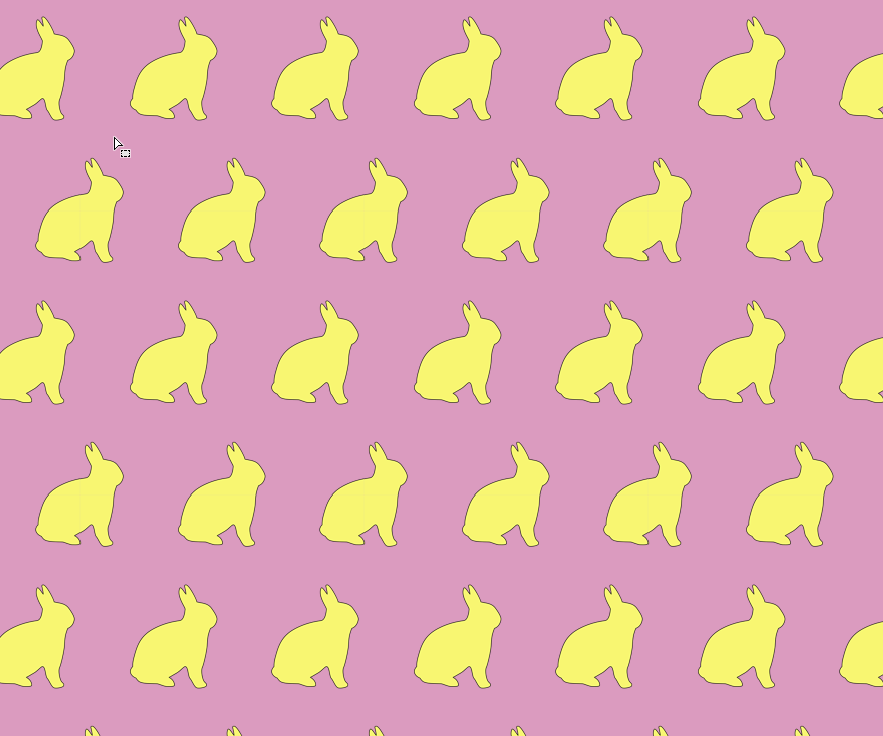
You now have a perfectly reaping pattern. Note you will need to rasterize if you used shape layers. Trim the image with it set to transparent pixels (having turned off the other layers, and define your pattern.

Copy link to clipboard
Copied
Trevor, sadly sometimes one has to deal with what they have, rather than recreate the wheel.
Lauren, the problem with turning off anti-aliasing is that all other curved or angled art will probably look like garbage, however the pattern tile errors will be removed!
There IS a way to have your cake and eat it… This also works for flattened PDF art that has atomic region stitching errors when rasterized.
The key is that the image is rasterized with TRANSPARENCY. This does not work with flattened images, it requires transparent pixels.
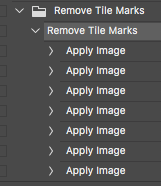
Simply apply the image to itself in normal blend mode 100% opacity at least 5 times, I like at least 7 for safety. Easy to put into an action. Sounds crazy, but it works! This was driving me mad, how can doing nothing result in something? Well it is not really doing “nothing” as it IS affecting anti-aliased edges…
Copy link to clipboard
Copied
I can't believe I finally found an advice that worked!
Copy link to clipboard
Copied
Could you explain what you mean by "apply the image to itself in normal blend mode 100% opacity"? Do you mean to copy and paste it ontop of itself?
Copy link to clipboard
Copied
Trevor, you do realize your pattern shows an obvious anti-aliased line at the pattern's edges?
Sigh, I wish Photoshop would have a wrap-around mode like Krita, Illusatrator, or PhotoLine have. Makes it infinitely easier to create seamless patterns.
Copy link to clipboard
Copied
rayek.elfin wrote
Trevor, you do realize your pattern shows an obvious anti-aliased line at the pattern's edges?
I think that is to do with the way I defined the pattern using stroked shapes. I can't test right now (see my 'broken computer' thread) but I thinking is if I used solid shapes with no stroke, it would not show that outline. Hmmm, much as I hate using Photoshop on a laptop, here you go. Solid yellow shape with no stroke. 100% zoom.

Copy link to clipboard
Copied
Perhaps the selection marquee was set to anti-aliased? Not sure.
Trevor.Dennis wrote
rayek.elfin wrote
Trevor, you do realize your pattern shows an obvious anti-aliased line at the pattern's edges?
I think that is to do with the way I defined the pattern using stroked shapes. I can't test right now (see my 'broken computer' thread) but I thinking is if I used solid shapes with no stroke, it would not show that outline. Hmmm, much as I hate using Photoshop on a laptop, here you go. Solid yellow shape with no stroke. 100% zoom.
Copy link to clipboard
Copied
Even the default pattern fills provide in Illustrator have this issue (one would expect that these are created correctly). Even a simple chess board pattern has this issue.
You could work on a copy in Illustrator and rasterize the fill pattern before rasterizing the entire art if this helps, or just use the apply image trick that I mentioned.
x7 applications of apply image to the same transparent layer will not add x7 layers worth of info, so no need to worry… what it will do is fill in the antialiased edges to be solid as they should be.
Copy link to clipboard
Copied
Stephen_A_Marsh wrote
x7 applications of apply image to the same transparent layer will not add x7 layers worth of info, so no need to worry… what it will do is fill in the antialiased edges to be solid as they should be.
That method affects ALL the anti-aliased edges of the artwork, and results in growing edges, as well as in terribly jaggy looking edges.
Not a method I would suggest anyone ought to use to solve this issue.
As long as the patterned rectangle/artboard is set to full pixels (no decimals) the export works fine.
If you need to work with existing patterns that create seams when exported for screen work, a quick fix is to export the pattern without any anti-aliasing at a 4 up to 8 times larger size than needed for screenwork, and use photoshop to scale it down to the required size. This will anti-alias the edges again, and leave the outside edge alone.
Copy link to clipboard
Copied
The anti-aliasing will only “grow” where it crosses transparency. If an anti-aliased edge is next to pixel content, there is no change!
So it will depend on the image whether the multiple apply image normal mode 100% opacity method is workable or not.
I agree that exporting out an aliased image at a large resolution then resampling down to the required resolution is another viable method with it’s own pros/cons. I was forced to use this method for a long time with raster exports from Acrobat Pro as it did not anti-alias vectors!
In the image below, the technique is 100% valid and does not lead to any visual errors, as the transparency is being flattened to white as the original Illustrator design intended.
A screenshot of a simple test file, original vectors containing tiled fill and other elements, rasterized to 300ppi, zoom 200%:
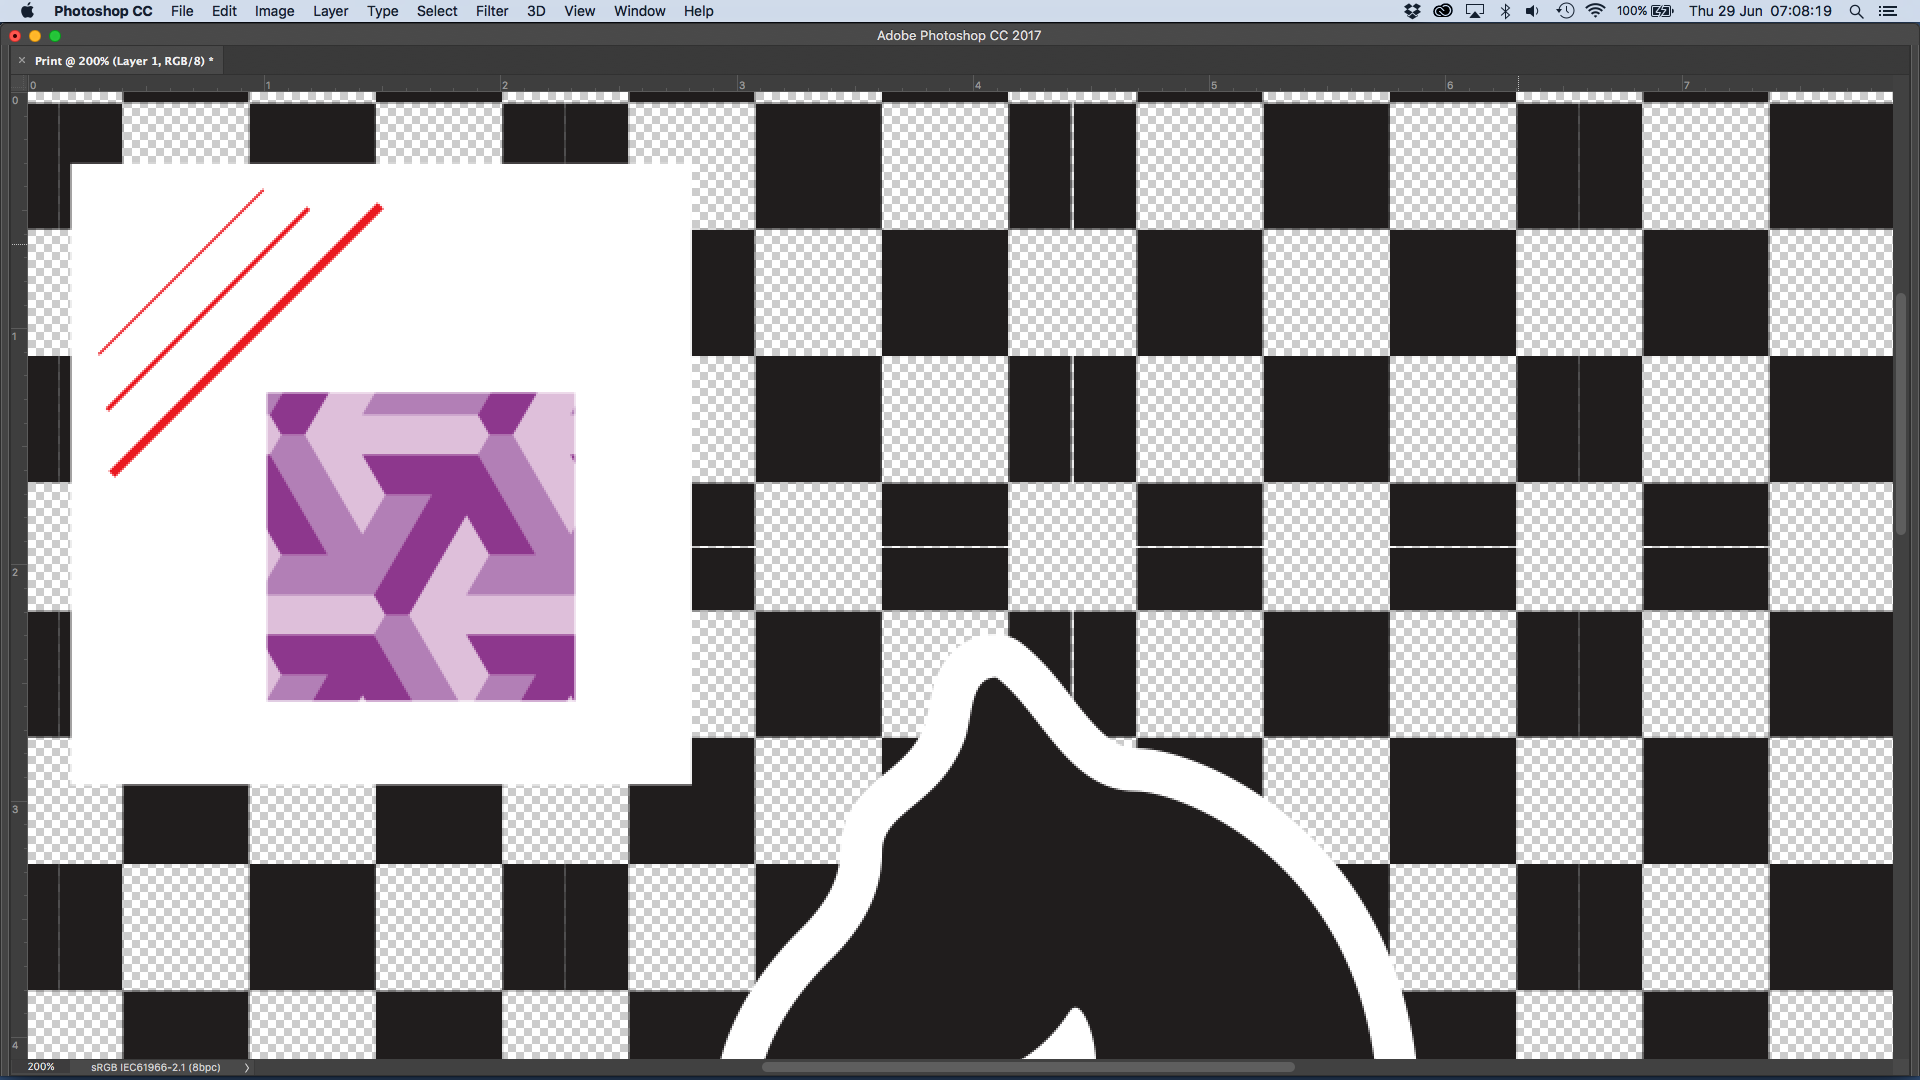
Compare to the screenshot below which has had apply image 100% normal blend applied 14 times:

Copy link to clipboard
Copied
Blimey. This is starting to take me back to (the mid nineties) the very heated discussions on Usenet between Timo Autiokari, Charles Pontin, and our own Chris Cox. That went on for months, and was never resolved. I've just had a thought. Dag Fosse would have loved to have been involved in that argument discussion. Dag, if you see this, Google Timo Autiokari. There are some interesting pages about gama, linear vs non linear and monitor calibration.
Copy link to clipboard
Copied
rayek.elfin wrote
Sigh, I wish Photoshop would have a wrap-around mode like Krita, Illusatrator, or PhotoLine have. Makes it infinitely easier to create seamless patterns.
You do know about the Offset filter?
Photoshop Offset Filter – Making Seamless Textures | DesignBash
Copy link to clipboard
Copied
Trevor.Dennis wrote
rayek.elfin wrote
Sigh, I wish Photoshop would have a wrap-around mode like Krita, Illusatrator, or PhotoLine have. Makes it infinitely easier to create seamless patterns.
You do know about the Offset filter?
Photoshop Offset Filter – Making Seamless Textures | DesignBash
I do, of course - the offset filter is ancient 😉
After working with applications such as Krita with a dynamic "wrap around" mode (simply activated with the "W" key), Photoshop seems desperately old-fashioned in regards to seamless texture (painting) workflow. For example, in Krita, once that mode is active, painting over the edge automatically creates a seamless stroke that appears on the opposite side.
Photoshop users have been clamouring for ages now about a seamless "wrap around" mode. Ah well.
Copy link to clipboard
Copied
I will have to try that. Thank you Trevor.
Copy link to clipboard
Copied
Hi Stephen,
Thank you. I did try it & it worked. ![]() I just don't know how large the files will get if I apply 7x. Does it increase file size? Ultimately, I am flattening to a JPG for customers. The patterns are backgrounds for the most part.
I just don't know how large the files will get if I apply 7x. Does it increase file size? Ultimately, I am flattening to a JPG for customers. The patterns are backgrounds for the most part.
On my end...I did a test print of my saved file w/ the unchecked box and I didn't see any issues with the visual. Going forward I will save my pattern as a hi-res JPG & then apply to the graphics.
Take care,
Lauren
Copy link to clipboard
Copied
I'm glad you have all your ducks in a row! (I've been waiting all week to say that!)
Copy link to clipboard
Copied
LOL! Semaphoric! Marking this one as "helpful".
Copy link to clipboard
Copied
Rayek, what would your solution be please?
Copy link to clipboard
Copied
The reason for those seams is very, very simple: you are not working pixel-precise, and Illustrator (or Photoshop during import) is then forced to render a decimal pixel along those edges - which results in anti-aliased seams which are (very) noticeable in a pattern.
The solution is to use exact pixel dimensions in your clipping masks. And the exported artboard or pattern size must be pixel-precise as well. NO DECIMALS!
Steps:
0) create an artboard at exactly the pattern's size. For example, 128x128px size. Or create a new file with these dimensions.
1) create an invisible rectangle at exact non-decimal pixel dimensions. For example, 128x128px. Align this rectangle to the artboard. Use the input fields to make absolutely certain the rectangle is positioned at 0 and 0 (x/y) and the width and height are 128px.
2) Create your first pattern object. Drag this to the swatches to create a pattern.
3) Assign this pattern to the rectangle you drew earlier.
4) double-click on the pattern swatch, and design away. When finished, return to the canvas.
5) drag the asset to the Asset Exporter, and choose your settings. Export.
If you kept the artboard and rectangle at exact pixel sizes, you should no longer have any seams.


