• Global community
    • Language:
      • Deutsch
      • English
      • Español
      • Français
      • Português
  • 日本語コミュニティ
    Dedicated community for Japanese speakers
  • 한국 커뮤니티
    Dedicated community for Korean speakers
Exit
0

Mask Issue: Can't reveal second layer by drawing with paint brush...

New Here ,
Jul 27, 2018 Jul 27, 2018

Copy link to clipboard

Copied

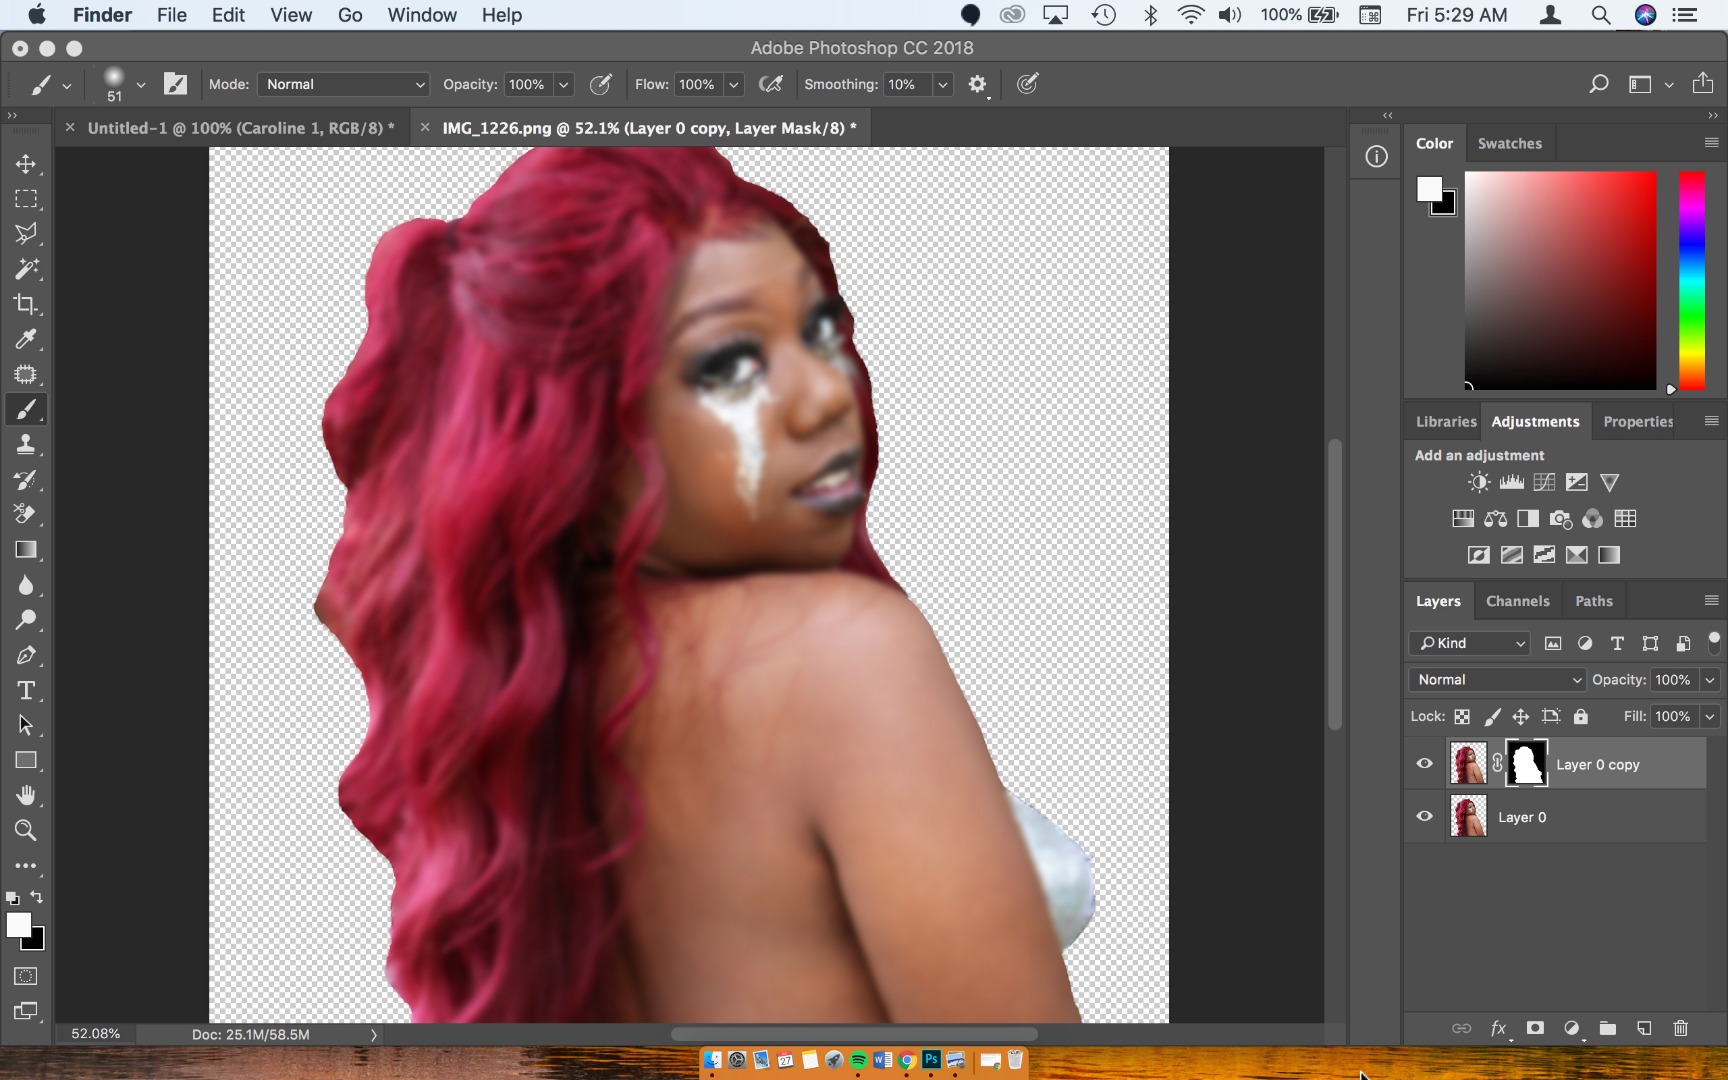
So I'm trying to create a BLUR effect on this png file and when I try to reveal the bottom layer by drawing on top of it with the paintbrush nothing happens. I just want to create a glow effect on the image that's it. And I saw how to do it on youtube following these steps. Photoshop CS6 - How to soften an image - YouTube

If someone can quickly tell me what I might be doing wrong I'd really appreciate it. I'm in a bit of a time crunch.
troubleshoot.jpg

Views

470

Translate

Translate

Report

Report
Community guidelines
Be kind and respectful, give credit to the original source of content, and search for duplicates before posting. Learn more
community guidelines
Adobe
Community Expert ,
Jul 27, 2018 Jul 27, 2018

Copy link to clipboard

Copied

Fill the Layer Mask with Black before painting on it, at current it seems to represent the layer’s transparency.

Votes

Translate

Translate

Report

Report
Community guidelines
Be kind and respectful, give credit to the original source of content, and search for duplicates before posting. Learn more
community guidelines
New Here ,
Jul 27, 2018 Jul 27, 2018

Copy link to clipboard

Copied

How exactly do I "FILL" it with black?

Votes

Translate

Translate

Report

Report
Community guidelines
Be kind and respectful, give credit to the original source of content, and search for duplicates before posting. Learn more
community guidelines
Guest
Jul 27, 2018 Jul 27, 2018

Copy link to clipboard

Copied

Just click Option Backspace

Votes

Translate

Translate

Report

Report
Community guidelines
Be kind and respectful, give credit to the original source of content, and search for duplicates before posting. Learn more
community guidelines
New Here ,
Jul 27, 2018 Jul 27, 2018

Copy link to clipboard

Copied

I did that and still nothing happens when I try to unblur certain parts of the layer.

Could you give me a step by step or direct me to a video that could show me how to do this. I followed the video i listed to a T. And for some reason I cant get past the paintbrush part where he starts to unblur the eyes and mouth of the subject.

Votes

Translate

Translate

Report

Report
Community guidelines
Be kind and respectful, give credit to the original source of content, and search for duplicates before posting. Learn more
community guidelines
Community Expert ,
Jul 27, 2018 Jul 27, 2018

Copy link to clipboard

Copied

I did that and still nothing happens when I try to unblur certain parts of the layer.

Please post a screenshot including the Layers Panel and Options Bar.

Black on the Layer Mask hides, white reveals; so paint accordingly.

Votes

Translate

Translate

Report

Report
Community guidelines
Be kind and respectful, give credit to the original source of content, and search for duplicates before posting. Learn more
community guidelines
New Here ,
Jul 27, 2018 Jul 27, 2018

Copy link to clipboard

Copied

Ok so I figured it out. Thank you. It looks like I need to have both of the color boxes black in order for is to start revealing the bottom layer.

Votes

Translate

Translate

Report

Report
Community guidelines
Be kind and respectful, give credit to the original source of content, and search for duplicates before posting. Learn more
community guidelines
Community Expert ,
Jul 27, 2018 Jul 27, 2018

Copy link to clipboard

Copied

LATEST

Hi

When you paint on a mask with white it shows the layer and when you paint with black it hides the layer.

With the brush selected you can set the foreground and background to black and white by clicking here (the brush paints with the forground colour)
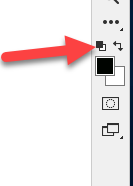
To reverse them (i.e. to swap foreground and background colours) just press X on your keyboard

Dave

Votes

Translate

Translate

Report

Report
Community guidelines
Be kind and respectful, give credit to the original source of content, and search for duplicates before posting. Learn more
community guidelines
Community Expert ,
Jul 27, 2018 Jul 27, 2018

Copy link to clipboard

Copied

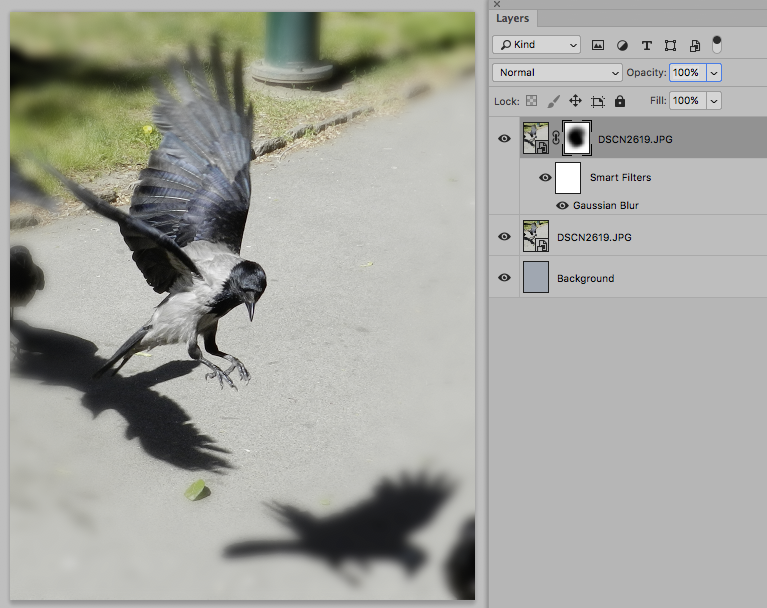
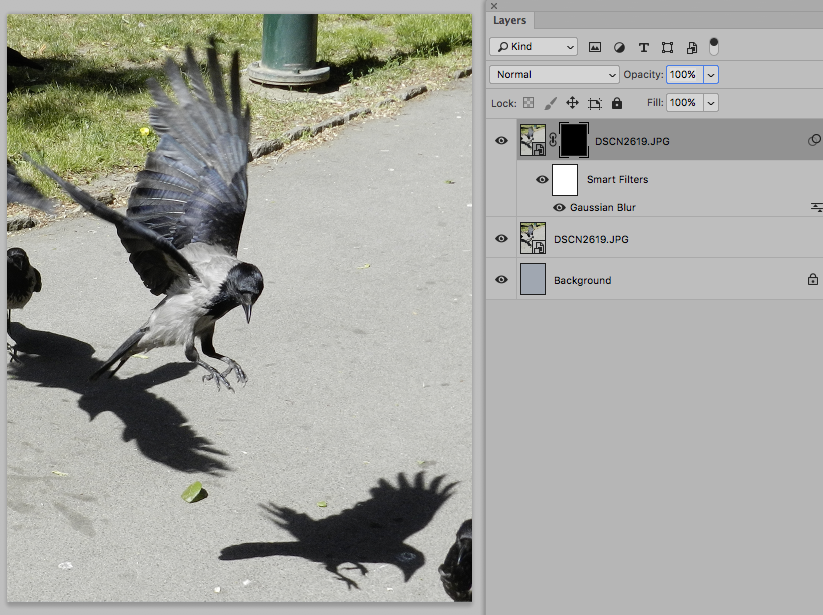
The technique presented in the video seems needlessly destructive.

Applying the Filter to a Smart Object allows for continued edibility of both the Filter settings and the content.

And one would not even need to duplicate the Layer but could work on the Smart Filter Mask.
crowsGaussianBlurSmartObjectLayerMask1.pngcrowsGaussianBlurSmartObjectLayerMask2.png

Votes

Translate

Translate

Report

Report
Community guidelines
Be kind and respectful, give credit to the original source of content, and search for duplicates before posting. Learn more
community guidelines
New Here ,
Jul 27, 2018 Jul 27, 2018

Copy link to clipboard

Copied

Thanks for your imput but I dont know how to use smart filters just yet. I cant even figure out what I'm doing wrong in the video.

Votes

Translate

Translate

Report

Report
Community guidelines
Be kind and respectful, give credit to the original source of content, and search for duplicates before posting. Learn more
community guidelines
Guest
Jul 27, 2018 Jul 27, 2018

Copy link to clipboard

Copied

Hi

Open your image and make a copy then turn off the original, right click on the copied layer and select Convert to Smart Object, then add the blur
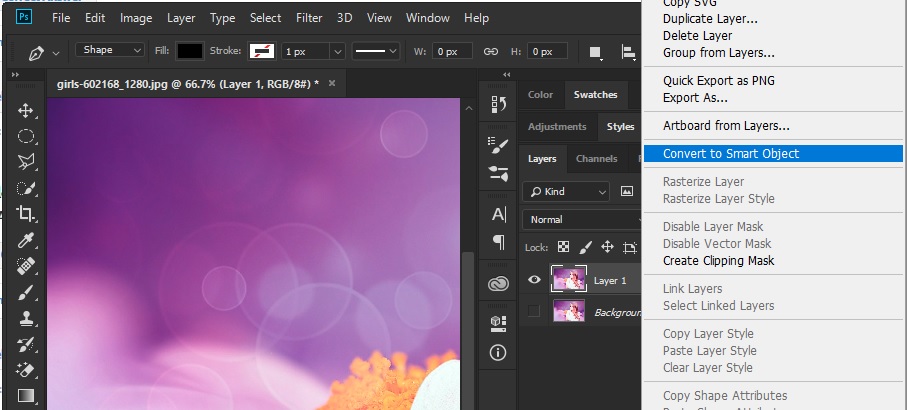
image1.jpg

Make sure the foreground color is set to black and select the Mask for the Smart Object and paint away what you don't want blurred, if you make a mistake just change the foreground color to white and paint it back in
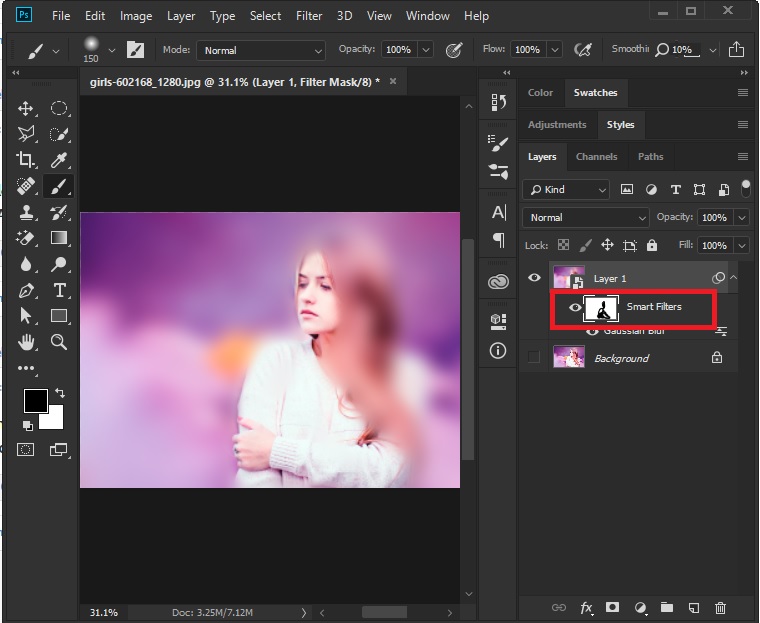
image2.jpg

Votes

Translate

Translate

Report

Report
Community guidelines
Be kind and respectful, give credit to the original source of content, and search for duplicates before posting. Learn more
community guidelines