- Home
- Photoshop ecosystem
- Discussions
- Re: Mask Transparent Glass in Photoshop now!
- Re: Mask Transparent Glass in Photoshop now!
Mask Transparent Glass in Photoshop now!
Copy link to clipboard
Copied
Easily mask transparent glass in Photoshop
Have you ever wondered how to make something look like it's behind glass in Photoshop?
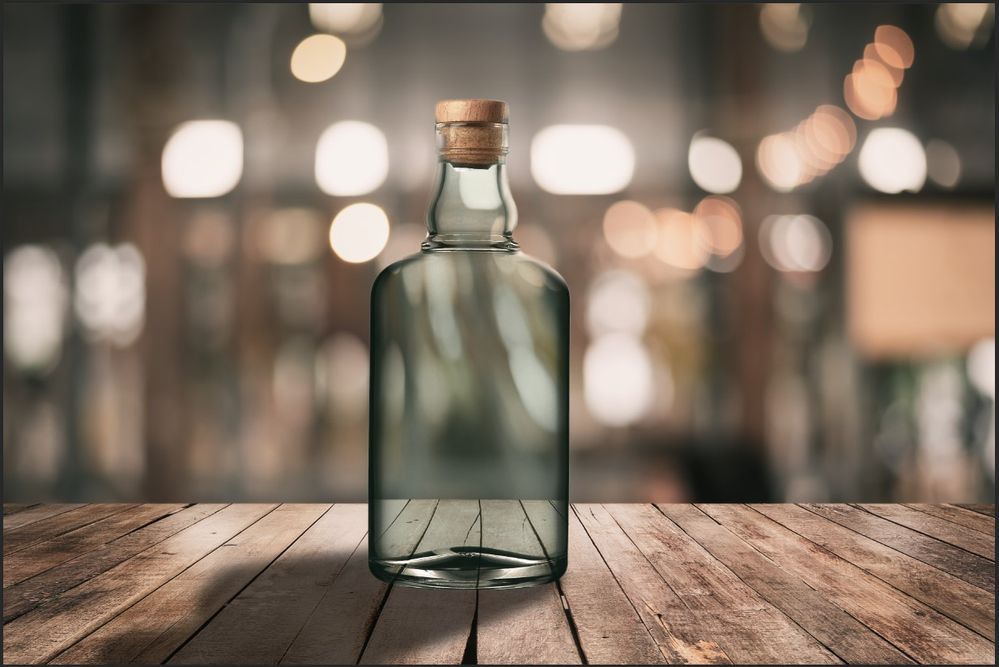
In this post, you will learn how to extract glass objects, and blend transparent glass with any background in Photoshop using blend modes. You can download this PSD (Photoshop Document) and open it in Photoshop to follow along with the tutorial.
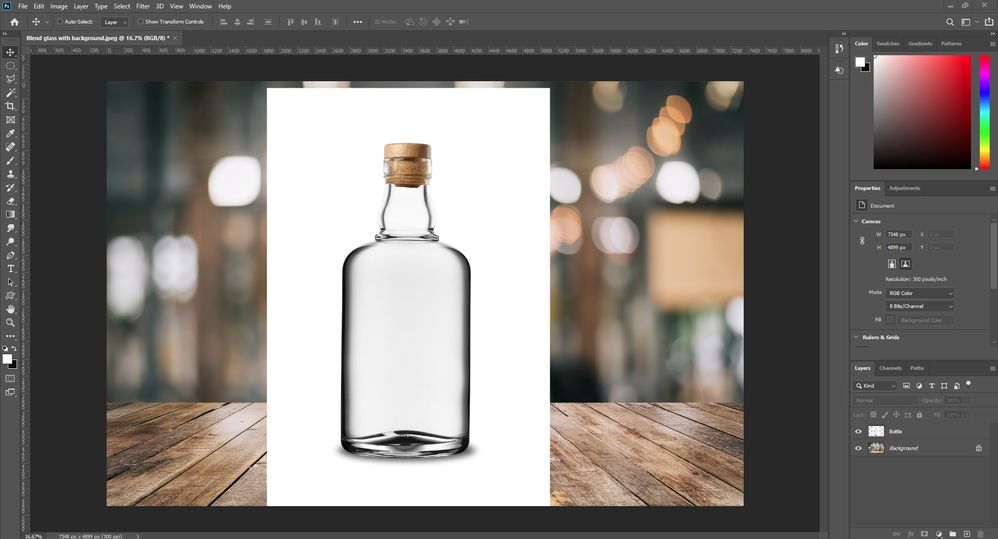
❶ Convert the bottle into a smart object
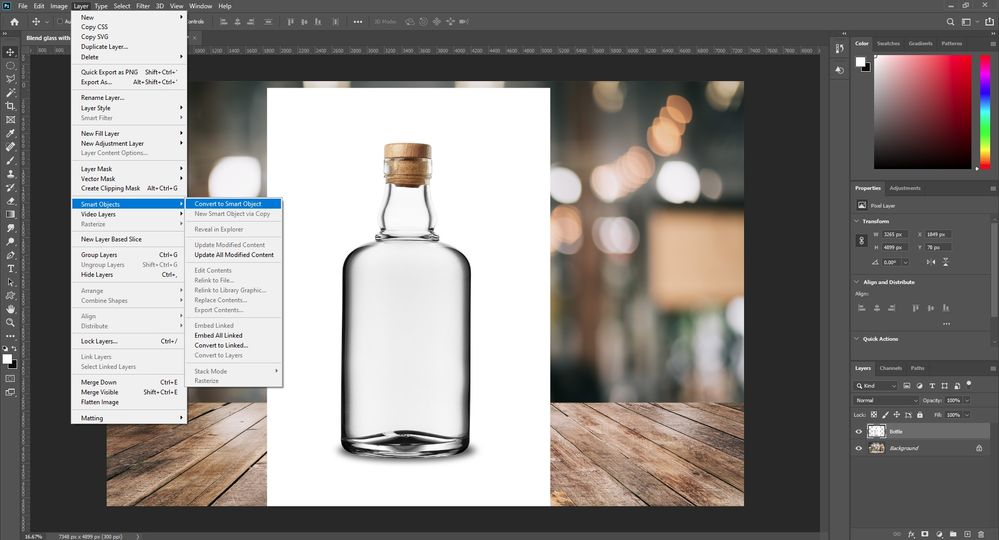
Converting the Bottle layer into a smart object allows you to work Non-Destructively, which means that you can always go back later and adjust the transformations, filters, and adjustments after you have applied them.
- Click on the Bottle layer to highlight it
- Go to Layer > Smart Objects > Convert to Smart Object
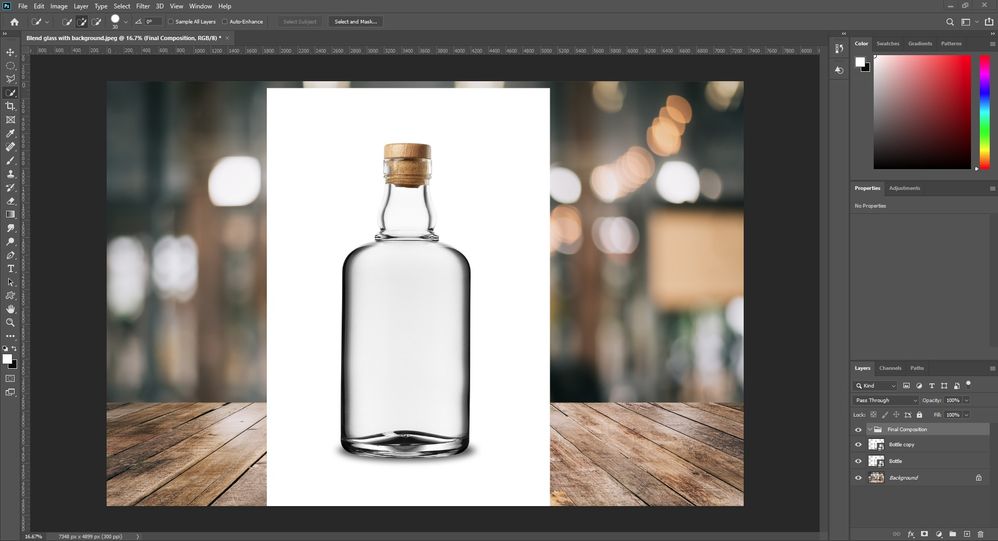
❷ Create a duplicate layer
- Ensure you have the bottle layer selected
- Press CTRL+J (Windows) or CMD+J (MAC) to make a copy of the layer
- Now you have a duplicate bottle layer named Bottle Copy to work on so that you can keep the original bottle layer intact
- Highlight the Bottle Copy layer and press CTRL+G (Windows) or CMD+G (macOS) to create a Group Layer
- Double click Group Layer’s name to rename it and type Final Composition
❸ Create a mask to blend the bottle with the background
- Make sure the Bottle Copy Layer is highlighted
- Choose the Quick Selection Tool
- Select the area outside of the bottle
- If the initial selection contains unwanted areas, you can remove them by pressing the Alt/Option key and clicking on the areas to subtract them from the selection
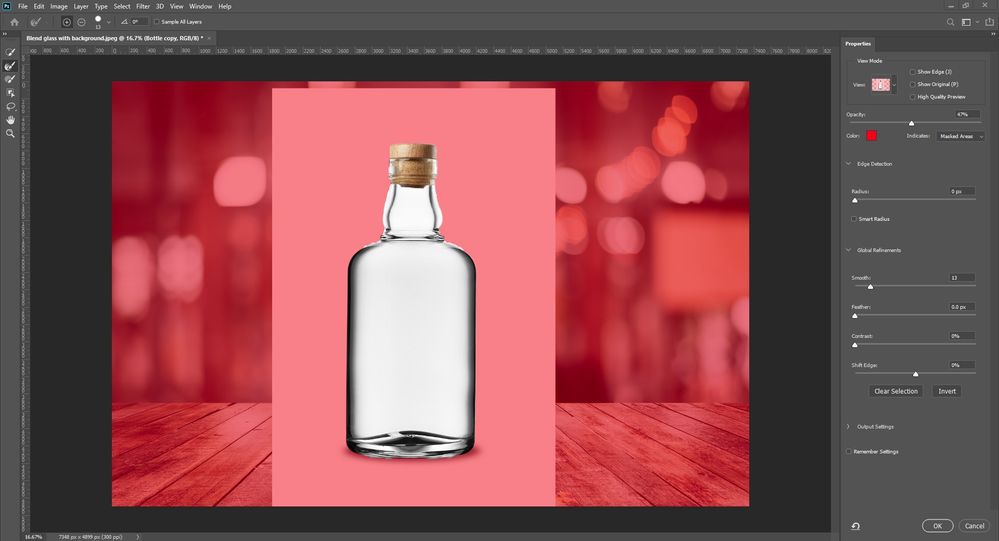
- Once your selection is complete, click on Select and Mask at the top to open the Select and Mask window
- You can refine the selection by increasing the smoothness to 10-15 and clicking OK
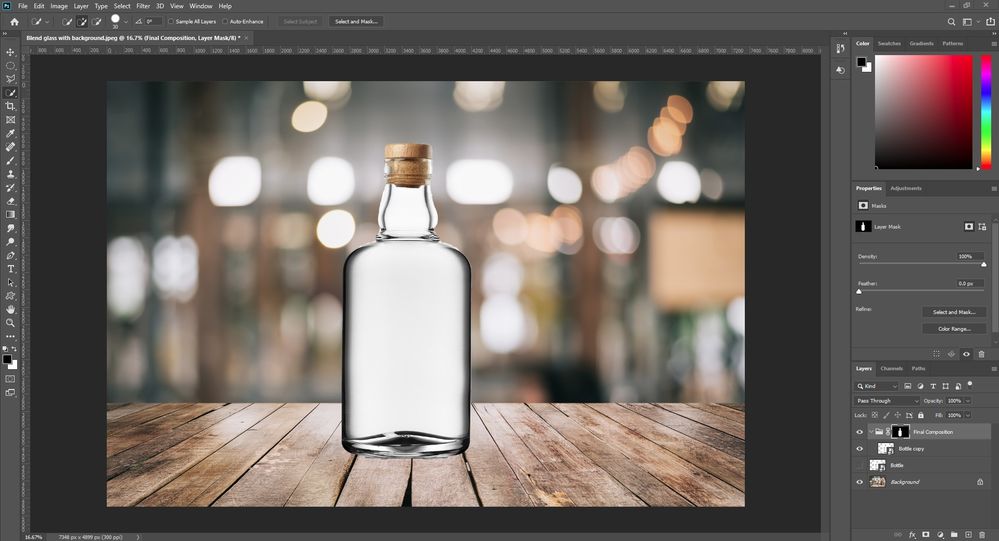
- Next, highlight the group layer (Final Composition)
- Click on the Layer Mask button on the bottom of the Layers panel to create a mask
- In the properties panel, set feathering somewhere between 1 and 5 to refine the selection further
❹ Make the bottle look transparent
- Rename the Bottle Copy Layer to Dark Value since we will be using a layer blending mode to remove the white from the bottle
- Select the Dark Value layer
- Go to Image > Adjustments and choose Black & White
- Without touching the setting, click OK
- This will turn the bottle into black & white
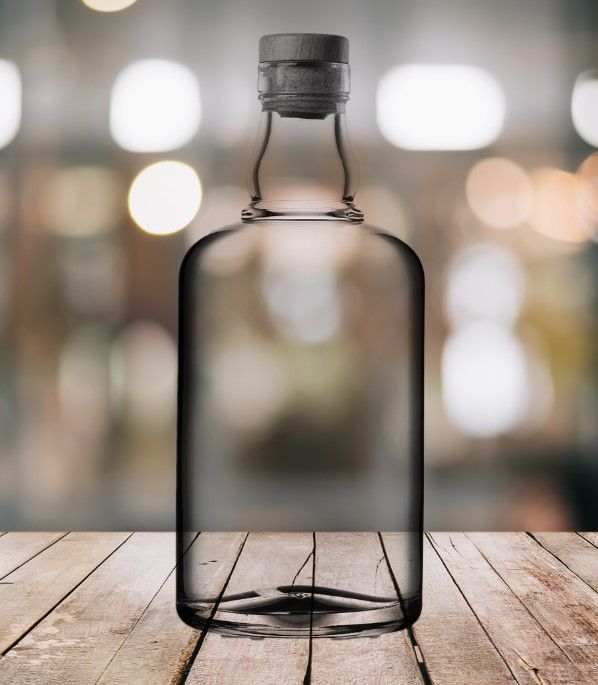
- Now, change the Layer Blending mode to Multiply
- The bottle should now look transparent
❺ Make additional adjustments
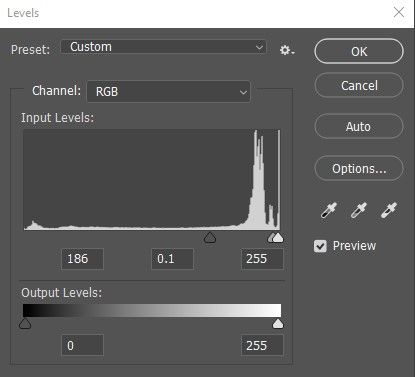
- Go to Image > Adjustments > Levels and move the middle slider slightly to the right to increase the contrast
Now we have Luminosity in the bottle, but we’re still missing Hue & Saturation. Let’s add them to the mix:
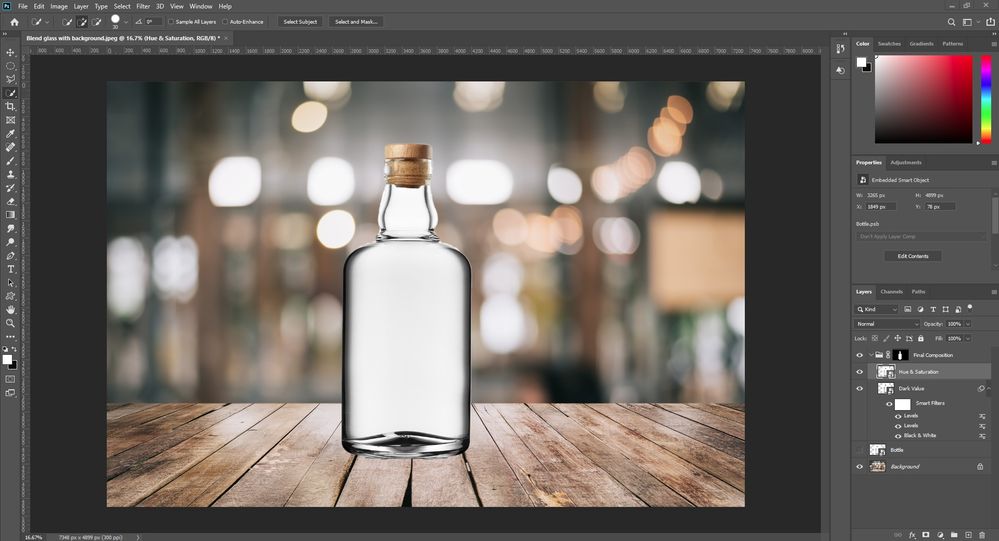
- Create a copy of the layer named Bottle
- Rename the layer Hue & Saturation
- Drag it to the Final Composition Group
Note: Make sure to put the Hue & Saturation layer above the Dark Value layer and turn on the Hue & Saturation layer by clicking the Eye icon - Highlight the Hue & Saturation layer
- Choose Color from the Blending Mode drop-down menu
In the last steps, we brought back some color to the bottle. Now, we will bring the specular highlights back:
- Make a copy of the Dark Value layer
- Choose Screen from the blending mode menu
- Go to Image > Adjustments and choose Levels
- Decrease the brightness by Sliding the left & middle sliders to the right side as shown below
❻ Fix the cork
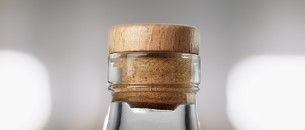
When we edited the bottle to blend it with the background, the cork became darker. Now we will bring back the original luminosity to the cork.
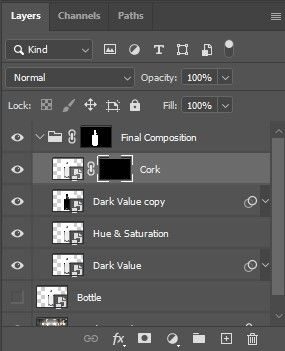
- Make a copy of the original layer named Bottle
- Rename the new layer "Cork"
- Drag the Cork layer into the Final Composition group and move it to the top of the layer stack
- Hold the Alt/Opt key and click on the Layer mask button to create a black mask on the Cork layer
- Use the brush tool to paint over the Cork with white to reveal the original cork
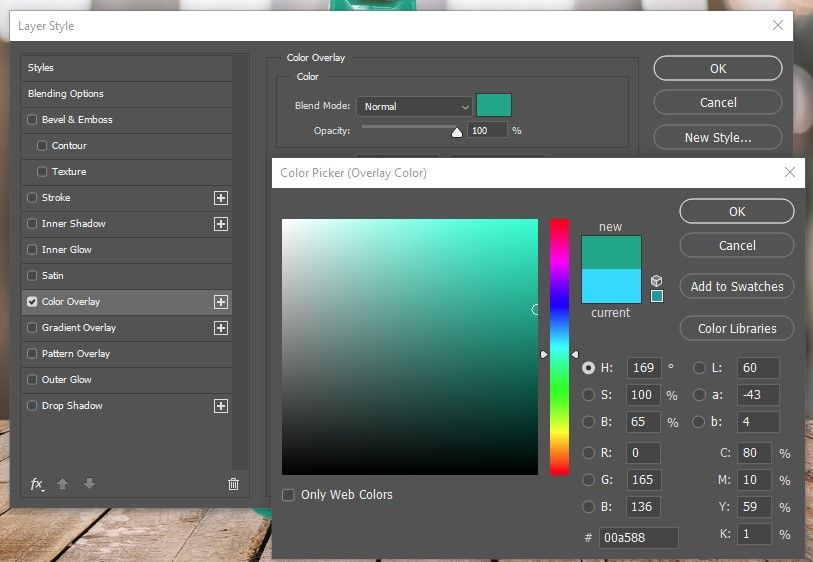
- Add a tint to match the color of the bottle with the background
- Right Click or Ctrl Click the Hue & Saturation layer to open the layer menu
- Choose Blending Options
- Go to Color Overlay and click on the Color to choose a color from the Color Picker dialog
- Decrease the Opacity of the Hue & Saturation layer to blend the tint
❼ Add specular highlights to the bottle
- Create a new layer in the Final Composition Group
- Name the new layer Specular Highlights
- Use the Brush tool to add a few brush strokes to the bottle’s neck
- Click on Filter > Blur > Gaussian Blur to feather the edges of the strokes
- Select the Specular Highlights layer and change the Layer Blending mode to Color Dodge
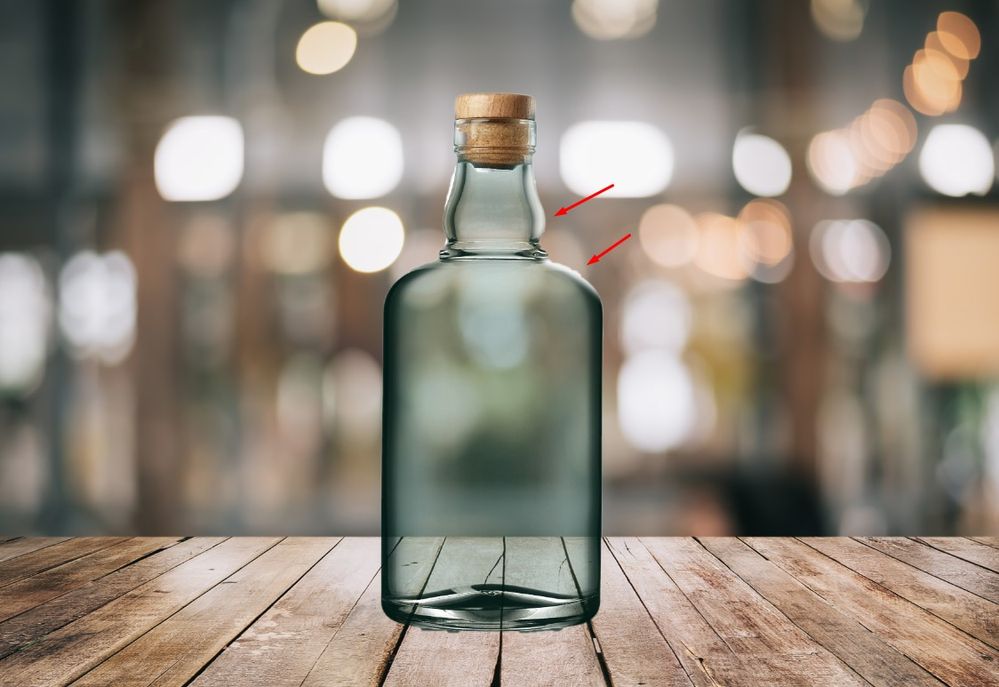
❽ Add Distortion
Since the inside of the bottle is not realistic yet, we need to add some distortion
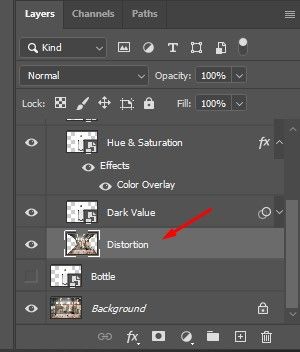
- Create a copy of the background layer
- Name the layer Distortion
- Drag the Distortion layer into the Final Composition group and put it at the bottom of the stack
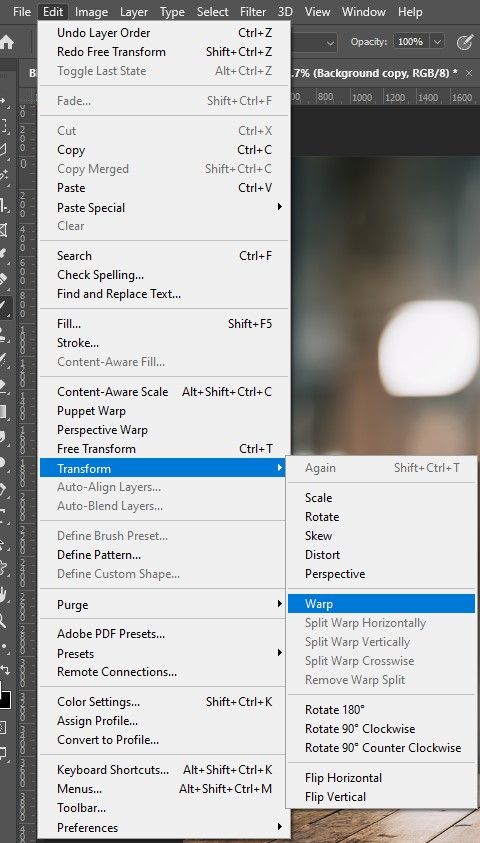
- Go to Edit > Transform and choose Warp
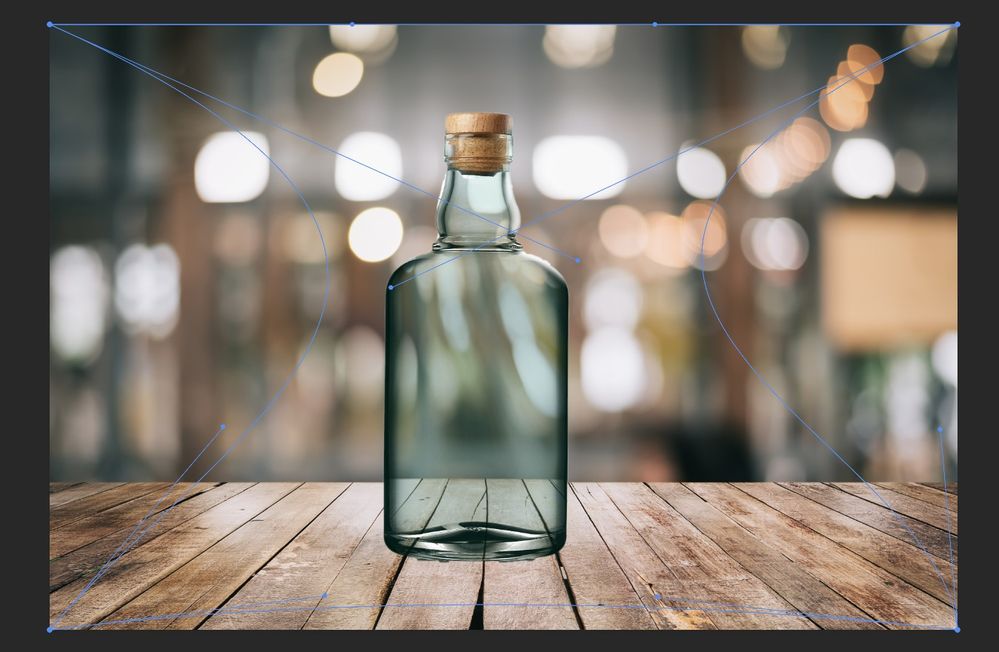
- Distort the background by holding the blue dots from each of the sides, as shown below, then hit Enter/Return to confirm the transformation
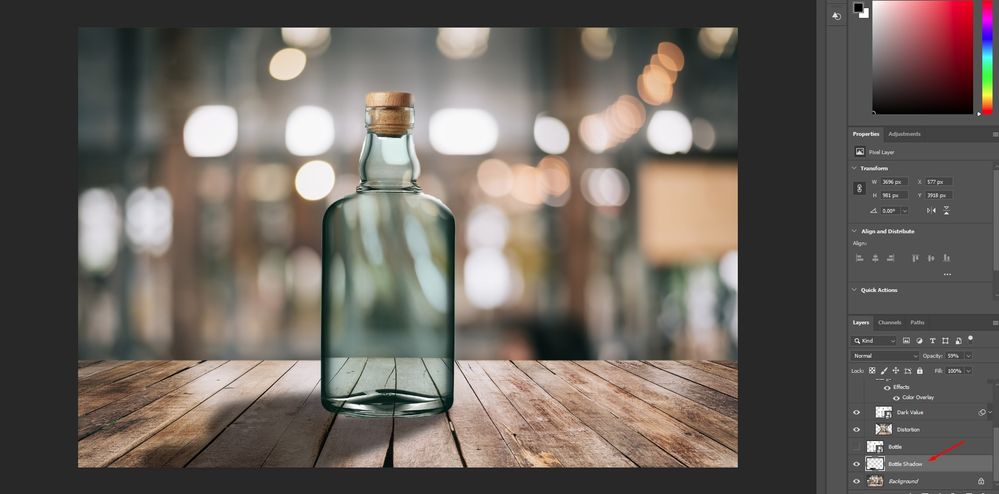
❾ Add Shadow
- Create a new layer above the original Background layer, and paint Black under the bottle using the Brush Tool
- Enhance the scene by adding a Tint to the whole image, to add a color tint click on the Adjustment Layer button on the layers panel and choose Color Lookup
- Drag the Color Lookup 1 layer outside of the Final Composition group and put it on top of the layer stack
- Open the Properties panel by going to Window > Properties
- Choose a good-looking tint from the 3DLUT File drop-down menu
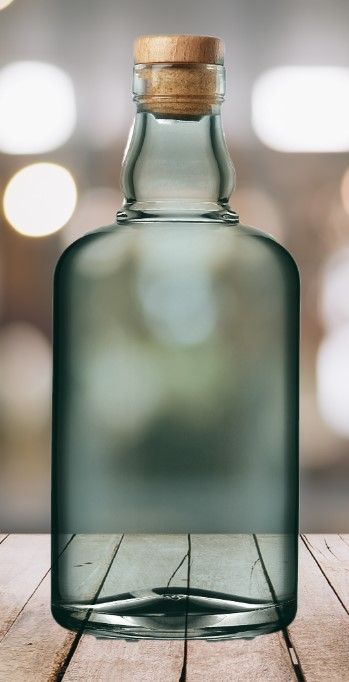
- After decreasing the opacity of the Color Lookup 1 layer, the final image should blend well
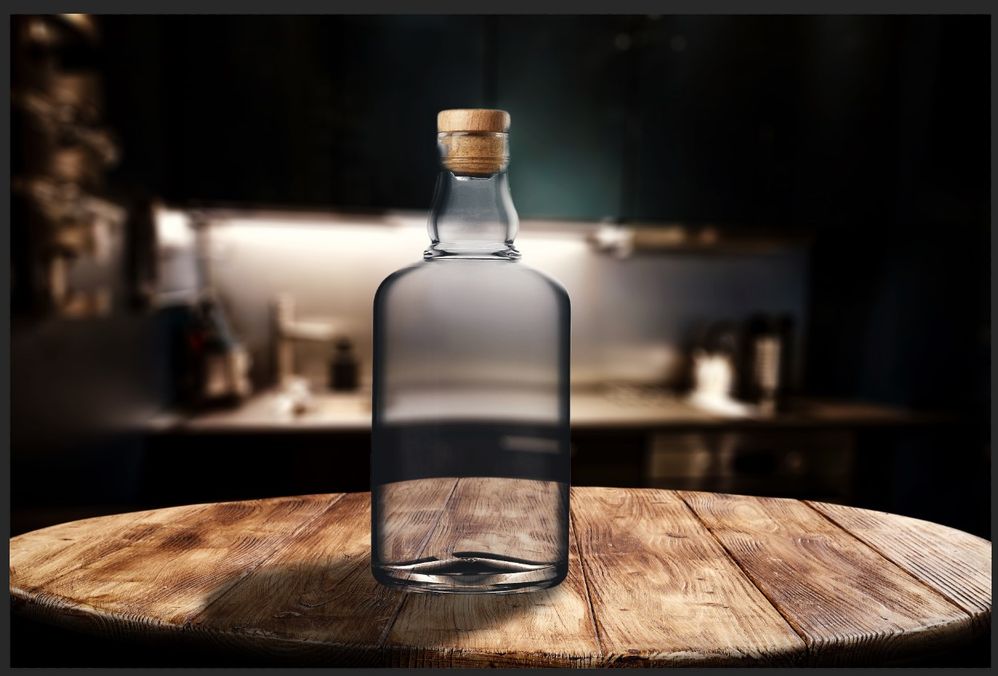
And this is how the bottle looks on a different background
Related links:
Work with Smart Objects in Photoshop
How to use Layer Masks in Photoshop?
Adjustment Fill Layers in Photoshop
Levels Adjustments in Photoshop
Layer Blending modes in Photoshop
Explore related tutorials & articles
Copy link to clipboard
Copied
this is four clicks to make in Adobe Dimesnion but its nice that Photoshop can do it too
Copy link to clipboard
Copied
Great dear, I will edit my store's that is [website link removed by moderator] images using this method of yours thankyou
Copy link to clipboard
Copied
- Hold the Alt/Opt key and click on the Layer mask button to create a black mask on the Cork layer
Use the brush tool to paint over the Cork with black to reveal the original cork.
To make visible parts in a layer mask (and already full black) we must paint with white.
"White shows, black hides."
Copy link to clipboard
Copied
I fixed the typo, thanks.
Copy link to clipboard
Copied
Thanks
Copy link to clipboard
Copied
If you don't mind me going off at a tangent, I love that we can click on your screen shots and see them as high res images. I found it far more difficult to add images to posts after the forum software was changed, so I would greatly appreciate a rund down on your method. Did you have to save each file to a local drive and upload, or were you able to paste them into the add image window?
Thanks.
Copy link to clipboard
Copied
Hi Trevor,
I agree this is quite a lengthy task as compared to the old forums, we've raised a few feature requests regarding this. I had to manually upload all the images here, I took screenshots while editing and then added each image separately.
Regards,
Sahil
Copy link to clipboard
Copied
Hi Sahil,
I actually had been looking for something like that for a long time. And now here is this great challenge in my PS-experience start-up phase! Thank you for that!
Hans-Günter
Copy link to clipboard
Copied
Hi Hans,
Glad to know I came up with something that would help you with your Photoshop learning phase 🙂
Please let me know if you need any help with the process.
Regards,
Sahil
Copy link to clipboard
Copied
This needs to be a video. It's unclear the whole time which layer I should copy and which layer should take precedence over the others. This would be good maybe for someone who's done this process before, but not a novice.
Copy link to clipboard
Copied
@elsieb64211074 wrote:
It's unclear the whole time which layer I should copy and which layer should take precedence over the others.
Please tell us the step number and the command you are on so we can better assist. For instance, if you are in Step 2, it's the Bottle layer you need to select and copy.
~~~~~~~~~~~~~~~~~~~~~~~~~~~~~~~~~~~~~~~~~~~~~~~~~~~~~~~~~~~~~~~~~~~
- Ensure you have the bottle layer selected
- Press CTRL+J (Windows) or CMD+J (MAC) to make a copy of the layer
~~~~~~~~~~~~~~~~~~~~~~~~~~~~~~~~~~~~~~~~~~~~~~~~~~~~~~~~~~~~
You can also post a screen shot so we can see where you are having trouble.
Jane
