

- Home
- Photoshop ecosystem
- Discussions
- Re: Need help please. I am stumped with this leopa...
- Re: Need help please. I am stumped with this leopa...

Copy link to clipboard
Copied
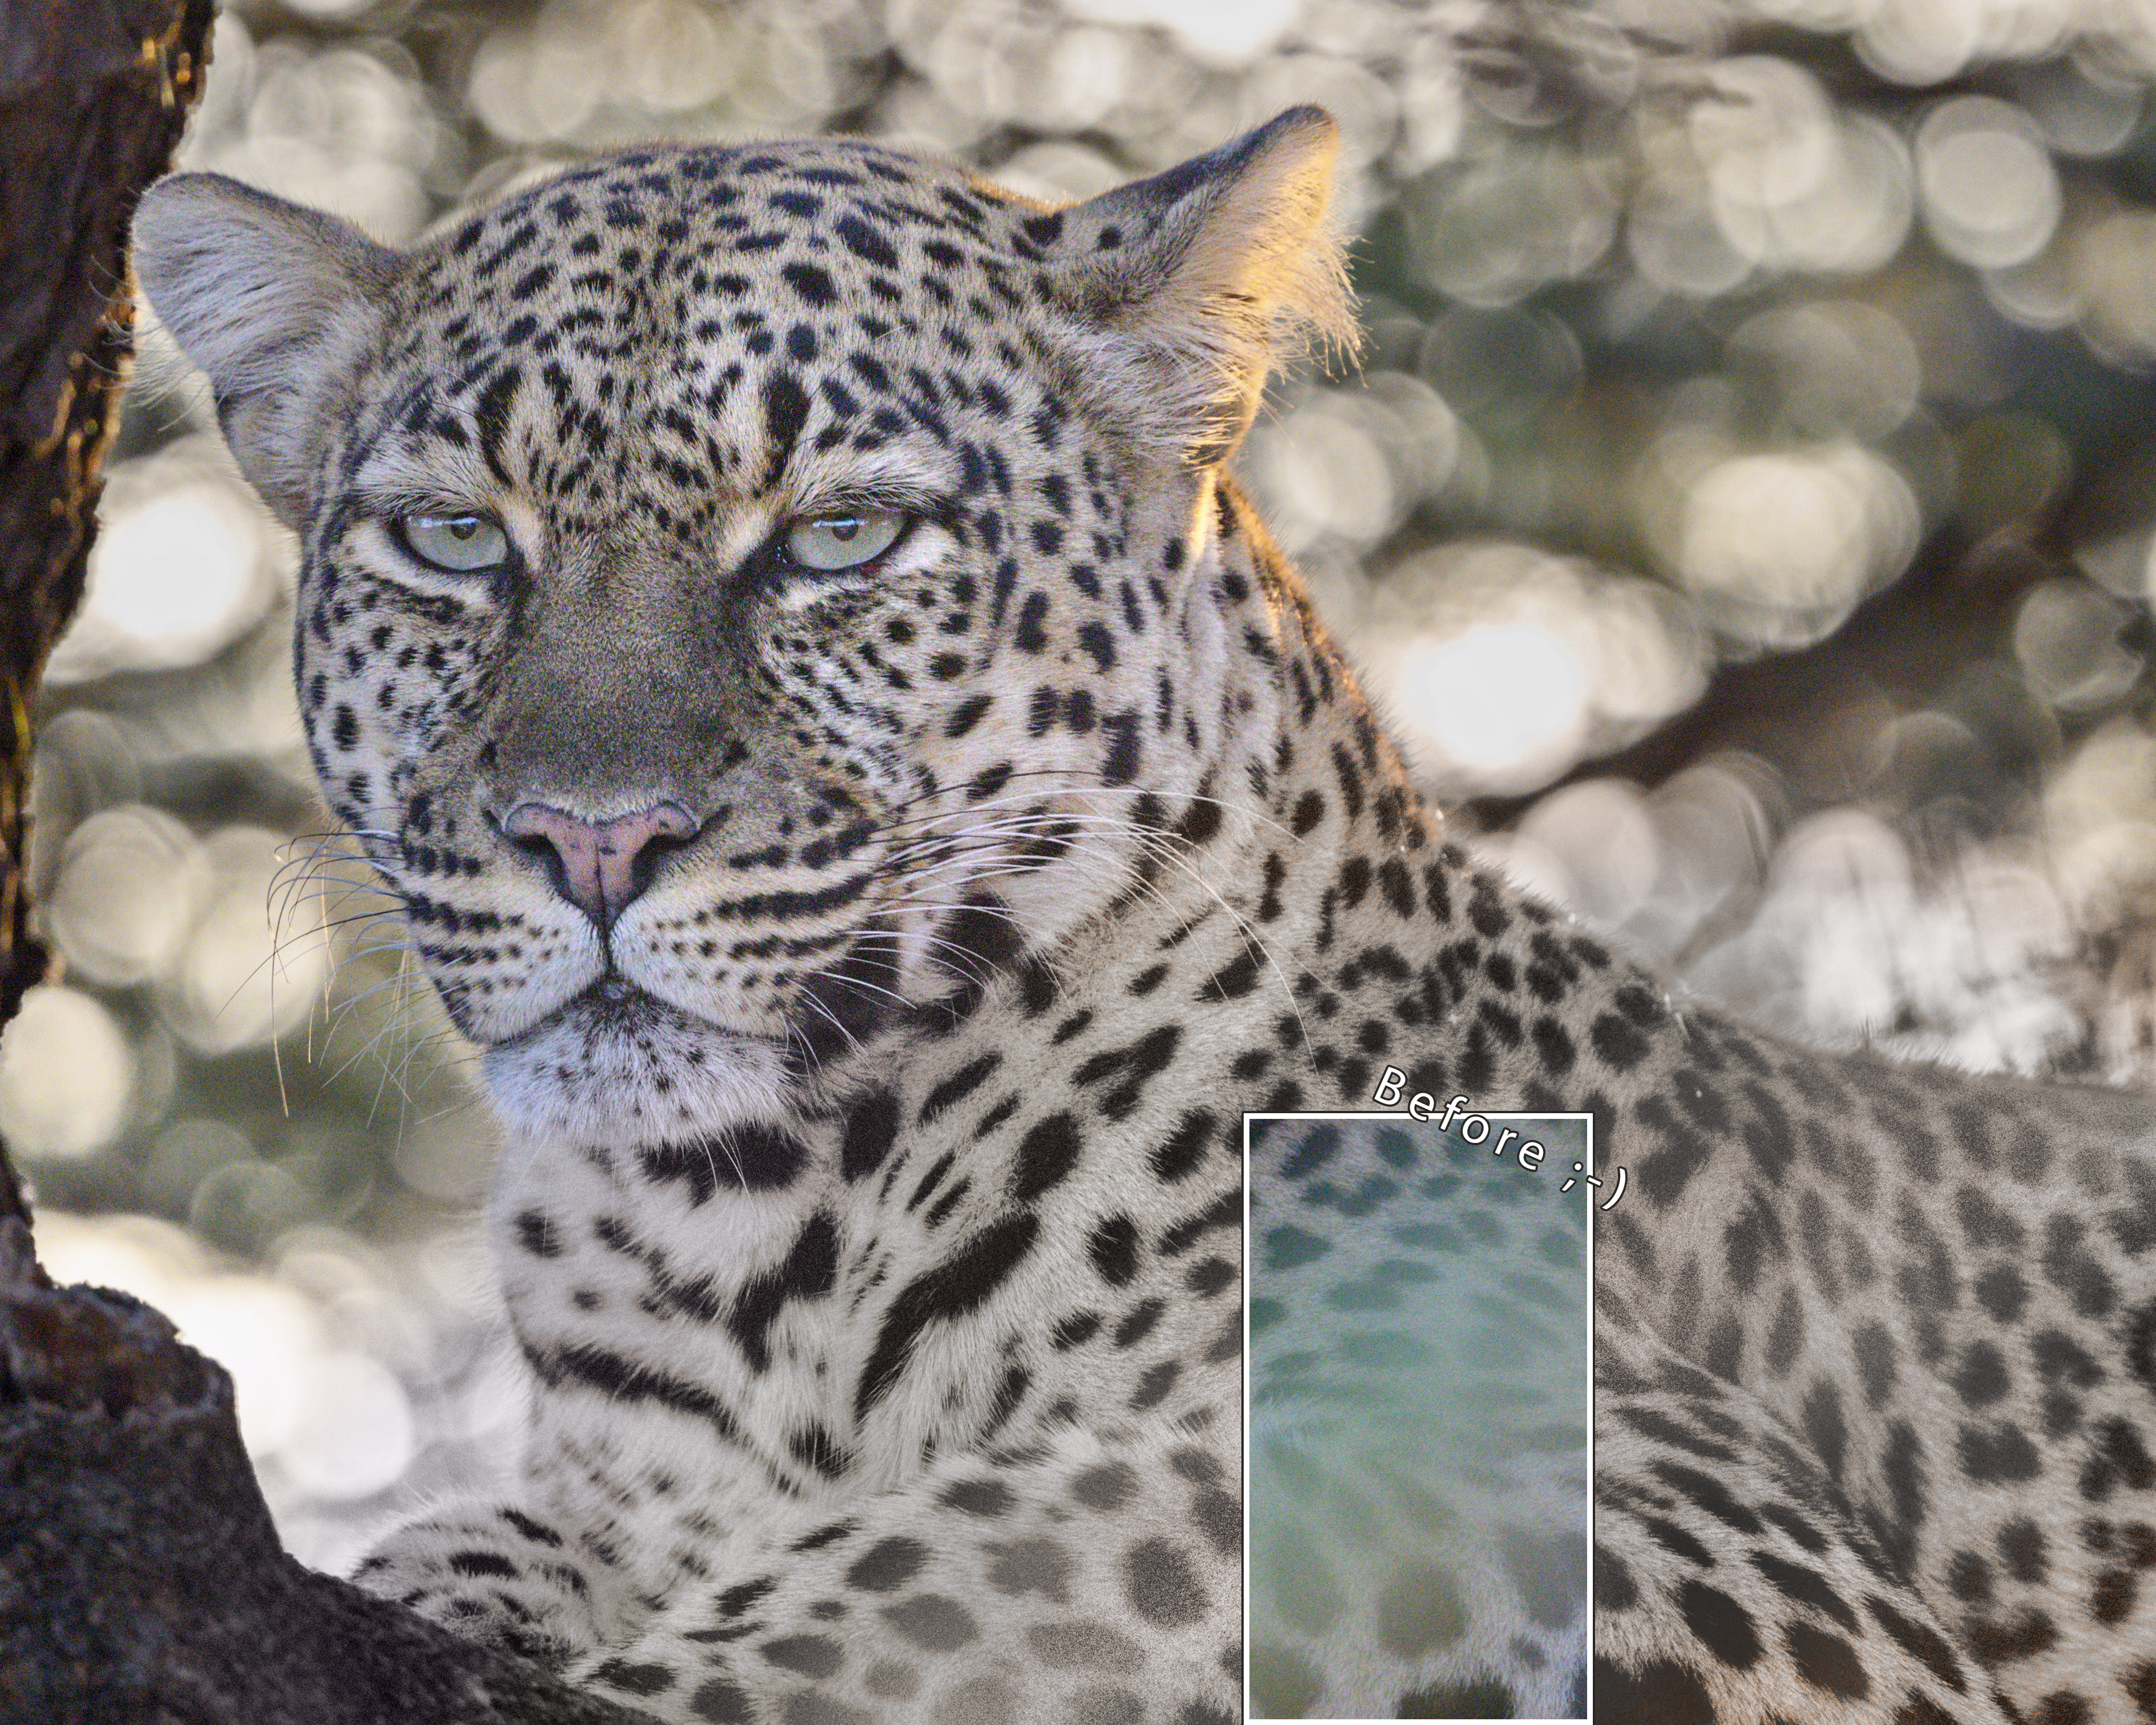
Look at the attached JPG of a leopard (the original FYI was a RAW file). You can see there was grass close to the camera which impacted the image as it created a greenish tint on the animal's back. Is there an easy way to remove it so the fur is a consistent color and contrast?


 1 Correct answer

Possible, yes. Quick and/or Easy? Depends.
Sample attached of where you can get using these techniques:*
- Make a mask of the area with lower contrast (=where the grass is)
- Use contrast/brightness adjustment layers to equalize the contrast**
- Use selective color to bring the colors closer together
If all else fails pick the desired color from the good part of the fur and paint it on a fresh new layer set to hue.
(definitely not the way to go, it's not professional)
* Took about 10 minutes of work and
...Explore related tutorials & articles
 14
Replies
14
14
Replies
14
Copy link to clipboard
Copied
No, there is no easy and fast solution. You can try to paint the colour, but as I have seen, it also impacted the focus, which will be much more difficult to address.
And as you have hit Actions and Scripting: there is no automatic removal, except to try content aware options.
I however cannot say, that it is disturbing, as the face is the eye catcher. You could try to desaturate green in Lightroom to weaken the greenish appearance.

Copy link to clipboard
Copied
Here's my quick try:

Copy link to clipboard
Copied
Leslie,
Can you tell me what you did? I still see the darkened spots but the greenish area appears untouched.
Thanks for any help!
Curtis
Copy link to clipboard
Copied
Yes I see now I didn't get all the green out, but I can. I was just doing it in a hurry. Here's what I did:
-Duplicate the layer (always leave an original untouched version)
-Image>Auto Tone, Image>Auto Contrast
-Layer>Duplicate Layer
-Then on this dupe layer, I selected around the greenish area with the Lasso Tool.
-With the Magic Wand selected, choose "Refine Edge" from the menu above and feather it
-Edit>Copy>Paste
Now you have the greenish area by itself. I played around with Hue/Saturation to desaturate it, then used the Dodge Tool very lightly because the white area was darker than the rest of the image, then I used the Burn Tool lightly to darken the spots. I see now that there's still some greenish hue at the top, but my method can take care of it. At the end, merge the top two layers leaving the original bottom layer untouched in case you need to refer to it later.
Also, before I began, I did Edit>Auto Tone on the whole image and dodged abd sharpened the eyes a bit.
Copy link to clipboard
Copied
Leslie,
Thank you so much for your help! I have several images that were impacted similarly and will give this a try!!!!
Curtis
Copy link to clipboard
Copied
You're welcome! A shot like this one is worth some effort.
Copy link to clipboard
Copied
I tried what you posted and, as I am not experienced enough in Photoshop, I have a couple of questions.
After selecting the greenish area with the lasso tool you say select the magic wand and choose Refine Edge from the menu above, I can't seem to find that.....Then you say edit-copy-paste. Is that on a new adjustment layer with hue/saturation?
Sorry for all the questions...
Curtis
Copy link to clipboard
Copied
Here, at the top menu bar - it appears if the Magic Wand is selected:

.................................
Here is how I did the desturation: Image>Adjustments>Hue/Saturation (as you can see, I didn't select far enough over into the green, but it can be done):

-edit- here it is showing more of the desaturated area:

Copy link to clipboard
Copied
Thanks again. FYI I am on version 24.4 of Photoshop and selecting the Magic Wand tool show a different option than what you show... that threw me!!!
I do appreciate your help!
Curtis
Copy link to clipboard
Copied
Possible, yes. Quick and/or Easy? Depends.
Sample attached of where you can get using these techniques:*
- Make a mask of the area with lower contrast (=where the grass is)
- Use contrast/brightness adjustment layers to equalize the contrast**
- Use selective color to bring the colors closer together
If all else fails pick the desired color from the good part of the fur and paint it on a fresh new layer set to hue.
(definitely not the way to go, it's not professional)
* Took about 10 minutes of work and 15 years of learning***
** The Unsharp mask filter can help you recover some of the contrast as well.
*** I'm not saying it's amazaballs, but that's what it took for me
Copy link to clipboard
Copied
Ooh! Another worthwhile approach is to look at your channels (red, green, blue) and with a feathered lasso make selections of low contrast areas and balance those out using brightness/contrast or exposure/gamma adjustments.
That way you only have to worry about the problem on grayscale level.
The quality of the result will depend on the accuracy of your work.
It works really well if you want omgbbq quality but takes time and accuracy.
Copy link to clipboard
Copied
Thank you sooo much for taking the time to help me! Much apreciated!

Copy link to clipboard
Copied

I went basic/simple approach.
Select a sample of the fur, paint an area over the green hue and change the layer blend mode to Hue.
Then adjust with Levels and brightness/contrast to match the existing - using the color Hue layer as a mask. (you could clip this too).
Then make a separate layer for adjusting the spots. Selections were tough due to the lack of contrast.
Copy link to clipboard
Copied
Thanks Kevin. I appreciate your efforts and helping me learn!

 AdChoices