 Adobe Community
- Home
- Photoshop ecosystem
- Discussions
- Re: Need help with making interior shots look nice...
- Re: Need help with making interior shots look nice...

Copy link to clipboard
Copied
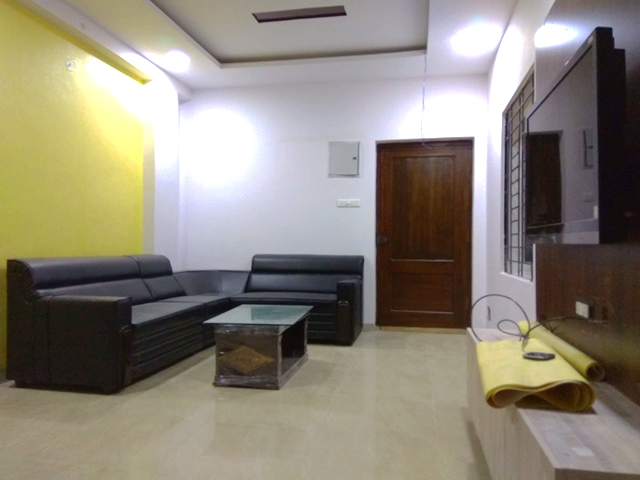
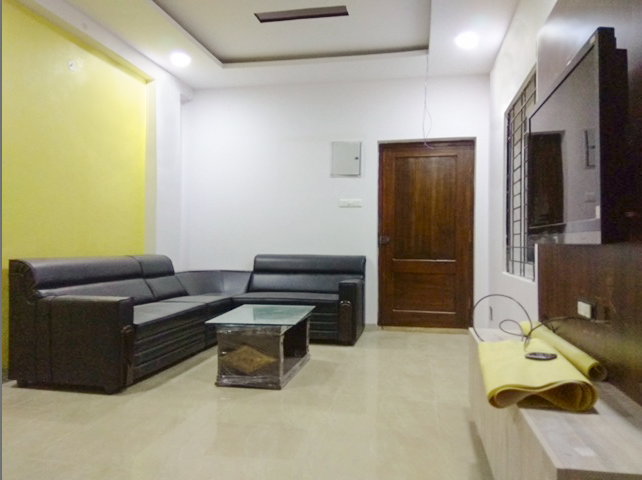
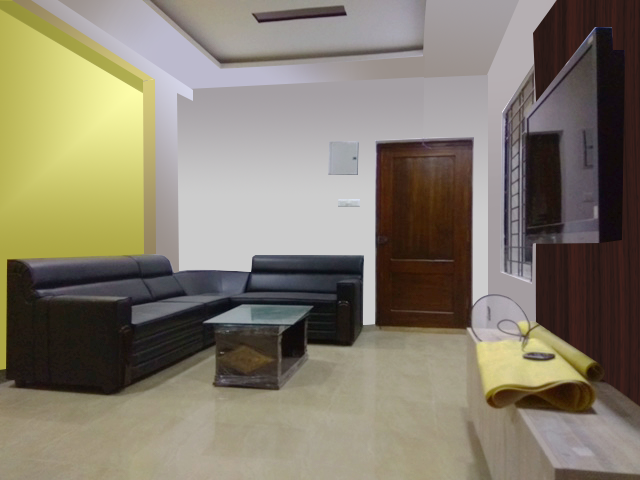
I have a client who gave me some pictures to use in a commercial. Unfortunately the pictures aren't very good and I want to make them look nicer but I don't know much about photoshop. I tried to improve the picture based on a tutorial I found and I am happy with it for the most part but there are these bright glare spots I want to get rid of. Any advice?
Before:

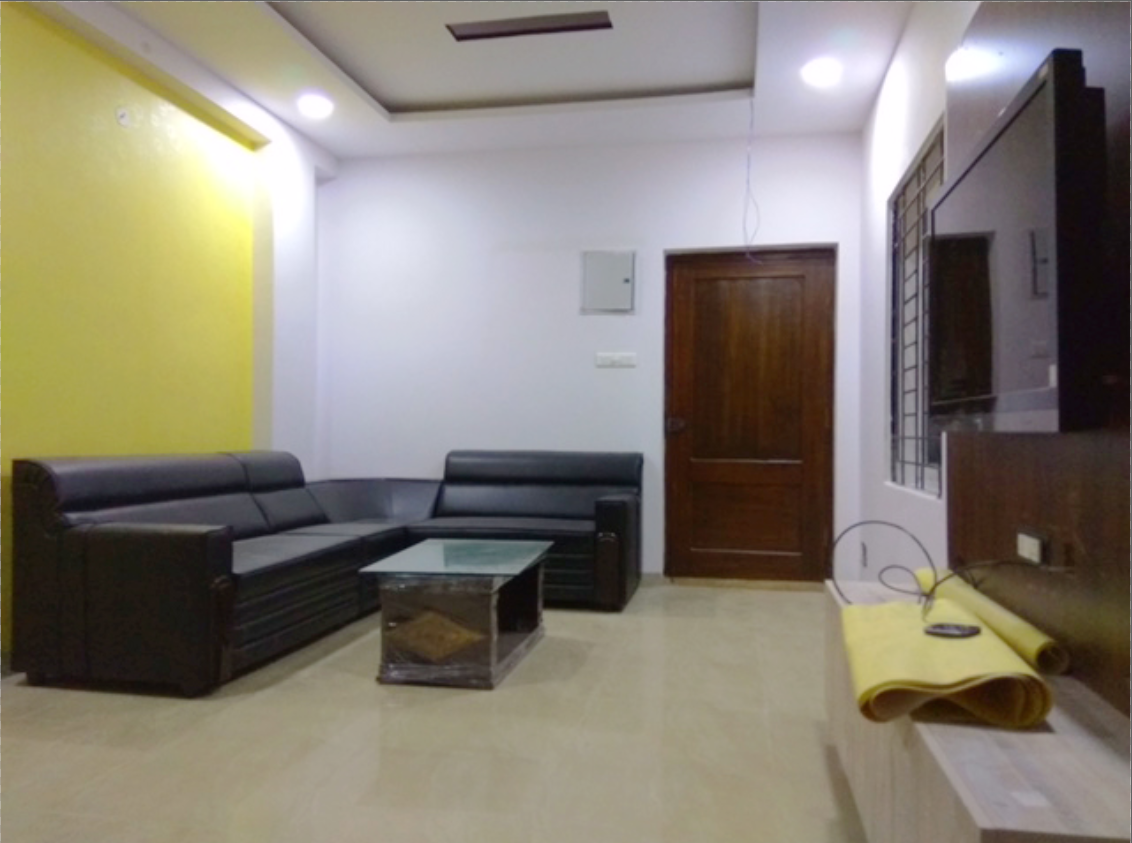
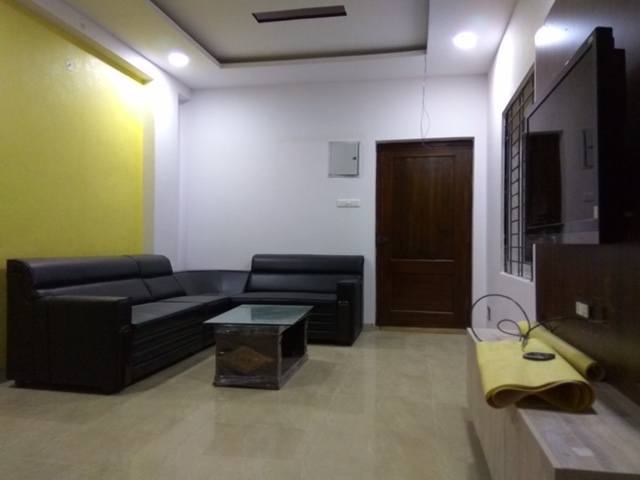
After:


 1 Correct answer

There are many ways to do things in Photoshop. One way which would be fairly fast, would be to put the original image and the retouched image on separate layers.
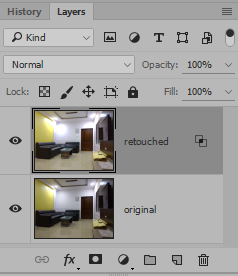
Then double-click the right side of the top layer (retouched) to open Layer Style.
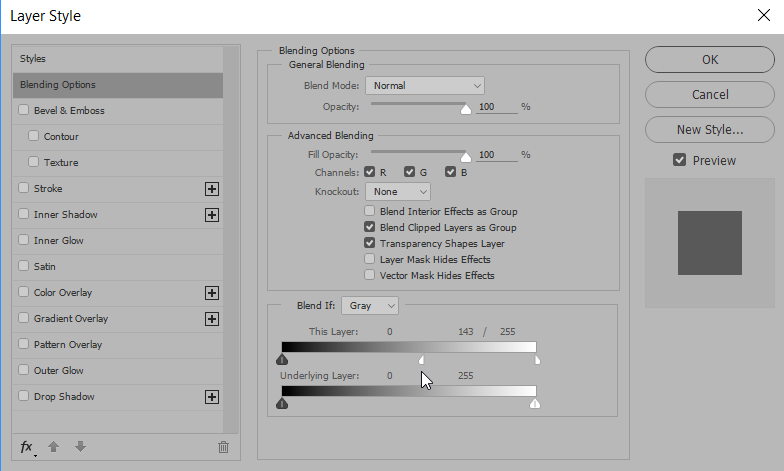
Move the white point slider of This Layer to the left. Hold down Alt or Option as you drag one side of the white point slider in order to split the two sides of the white point slider so that you have a smoother transition. That will hide the bright glaring
...Explore related tutorials & articles
 22
Replies
22
22
Replies
22
Copy link to clipboard
Copied
There are many ways to do things in Photoshop. One way which would be fairly fast, would be to put the original image and the retouched image on separate layers.

Then double-click the right side of the top layer (retouched) to open Layer Style.
Move the white point slider of This Layer to the left. Hold down Alt or Option as you drag one side of the white point slider in order to split the two sides of the white point slider so that you have a smoother transition. That will hide the bright glaring spots on the retouched layer and let the lighter areas of the original show.

Copy link to clipboard
Copied
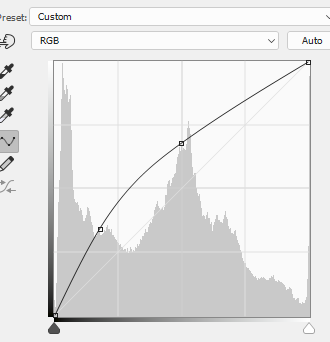
Use a curves adjustment layer to lift the centre and lower areas.
The add a new layer and get the clone stamp tool set to 30% opacity.
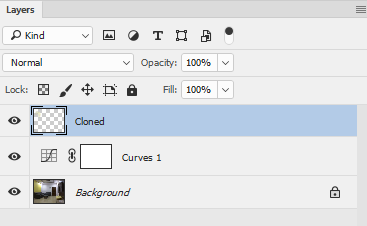
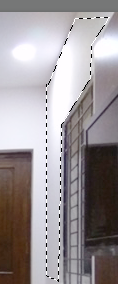
Put a selection marquee round each section in turn and clone from the darker to the blown out areas. You are not trying to eliminate them - just put a bit of detail back in
Finally I balanced the colour in the camera raw filter
Dave
Copy link to clipboard
Copied
I like your results dave but I am a bit confused by your steps. I don't know how to get the marquee as tight as you show in your example. I also tried using the clone stamp tool but didn't see any results.
Copy link to clipboard
Copied
Hi ,
I used the polygonal lasso

to put a tight selection around each area then used the clone stamp tool within it. The selection meant I did not have to worry about overspill when cloning right into the corners.
Dave

Copy link to clipboard
Copied
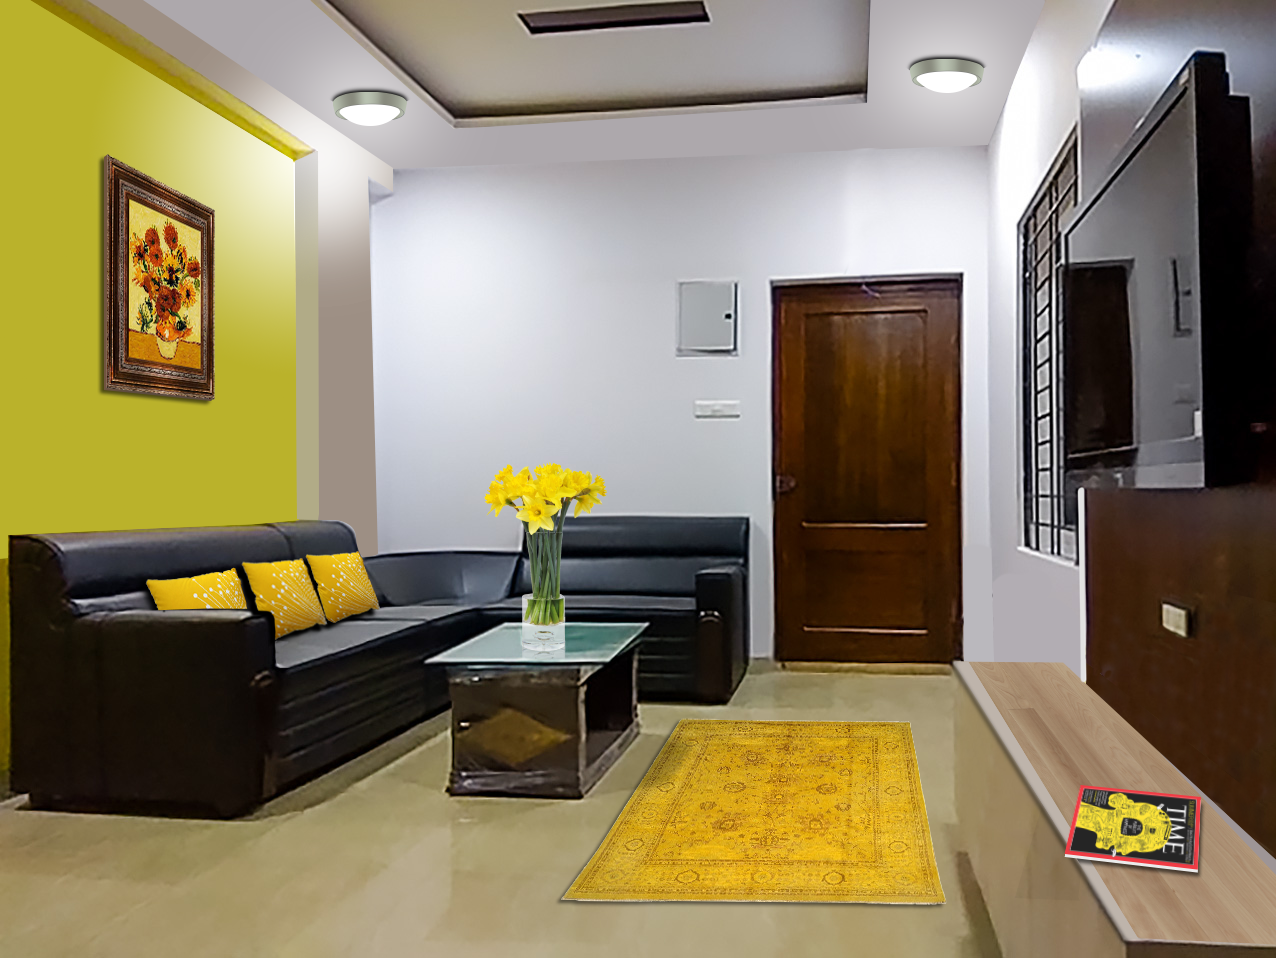
I really wish people wouldn't get hung up on trying to fix what can't be fixed, when it is so easy to recreate as an illustration using Photoshop. I wasn't going to go crazy with such a tiny image to work with, but with a full size picture you could rebuild the flat surfaces, and add a bit of texture if needed. Composite on some light fittings and make them glow, and find some Walnut or Cherry wood texture for the wall panel. Note a lot of so called hardwood textures are stained pine with a coarse grain that looks totally unreal, but the real thing is out there.
That's my two cents worth. Rebuilding from scratch can be done with most things including portraits and skin tone and texture, and it is a lot more satisfying than struggling hopelessly bad photographs.
Copy link to clipboard
Copied
you can get a nice boost to the saturation here with L*a*b mode. I think Trevor has shown how to overcome the problems with the image , so I have not replicated that , but here's a before and after with just saturation boosting.


Copy link to clipboard
Copied
Thank you everyone for you help by the way. I will probably try out all the methods for practice.
Copy link to clipboard
Copied
Seeing as this thread is still alive, would you mind uploading a bigger version of the image? 2000 pixels would be nice.
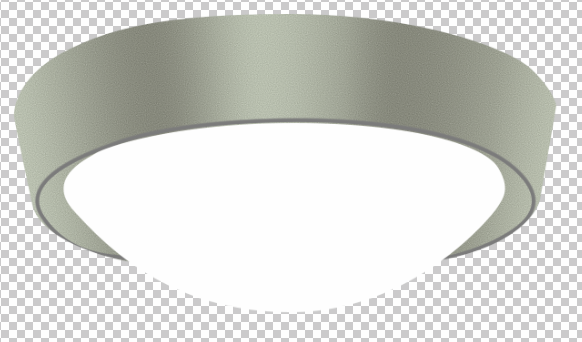
This is a ceiling light that might have been behind that blown out area. 100% Photoshop illustration.
Copy link to clipboard
Copied
I actually went with Barbara's method since the client wants this as quickly as possible and hers was the simplest. I appreciate your help though and I will close this thread.

Copy link to clipboard
Copied
Wow, that's a pretty bad photograph. Too bad that can't be shot again!
I'll share my approach here. Decent results in about 10 minutes.
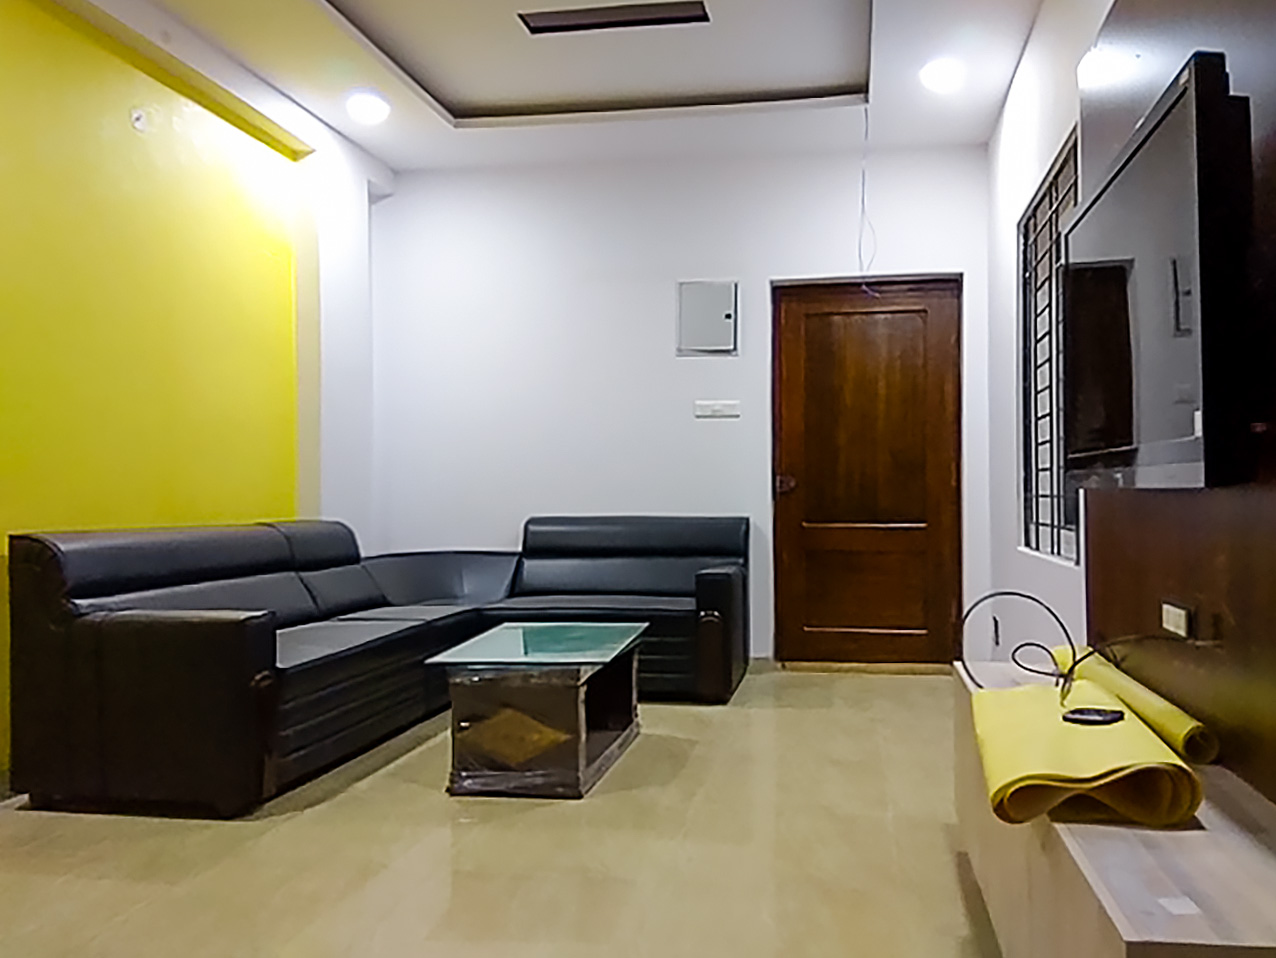
The photo is pitifully small, so I started by seeing if it could be enlarged at all. I used the 10% method - enlarge by 10% repeatedly. Be very careful to not over enlarge. You simply can't make a 3x2 into a 12x8.
Next I used several passes of both Smart Sharpen and Unsharp Masks. Use the lowest size of sharpening possible to minimize the sharpening artifacts on edges.
After this, I headed into the Camera Raw filter. First, I raised the shadows to about 40 and also dropped the highlights a bit (not much). Next, I used the Tone Curve to add back in a bit of contrast, careful to only darken the darkest of shadows, while boosting everything else.
Next up was dealing with those color casts...The HSL tab tackled this well. The main culprits were Purples and Magentas, but Blues and Reds played a role, too. The saturation was lowered the Purples and Magentas quite drastically, and the hues shifted towards the Blue. Blues were shifted a bit green, as well. Red saturation was lowered a bit.
A radial filter and gradient over the upper-right corner and tv lowered the global saturation some, so the tv would appear a more clean black. The black point was pulled down, and color temp lowered just a pinch.
Just a tad bit more sharpening (masked) while still in the CR filter, and also some noise reduction. That's about all there. Hit "OK"
Back in Photoshop, a few more corrections. A smack of rotation with the Crop tool was called for, and a hint of perspective correction in Free Transform.
Any edges with outstanding sharpening artifacts, a light touch with the Blur tool should take care of.
That's about all.

Copy link to clipboard
Copied
well... if it's to be used in a commercial, then it really does require to be reshot professionally no matter what the client is trying to sell?
not only is it badly lit, it's poorly framed and unless they're selling whatever's rolled up on the right on the table, it's a pointless shot, literally. even a magazine on the table would give it some interest....
Copy link to clipboard
Copied
leslie wand wrote:
well... if it's to be used in a commercial, then it really does require to be reshot professionally no matter what the client is trying to sell?
not only is it badly lit, it's poorly framed and unless they're selling whatever's rolled up on the right on the table, it's a pointless shot, literally. even a magazine on the table would give it some interest....
That's the best advice from this thread so far. I said it was unfixable, but it is actually worse than unfixable. If the client took the shot, then you are doing them a disservice even trying to make it better. Say to them very nicely, "How about we try shooting it again? If you want your customers to think of you as professional, you need to give them your very best work."
If your client is a man, then ask him to bring his wife/SO along to dress the set. Get rid of that roll of whatever it is. In fact well done Benjamin for doing a nice job of upressing the image.

Copy link to clipboard
Copied
Hi
Wisely said and done Trevor. 
Pierre
Copy link to clipboard
Copied
trevor - a work of art indeed, no need for reshoot at all 😉
maybe they should get you to do their banners as well!
Copy link to clipboard
Copied
This is actually one of the better photos the client sent us. Most of the others are even worse. The client is across the world and I just received this project and was told to have it done asap. Apparently this was supposed to be done last month but no one did it and now the client told my boss who is telling me to just do the project. I already said that the materials were awful but I guess no one cares.
Copy link to clipboard
Copied
crazysnake wrote:
This is actually one of the better photos the client sent us. Most of the others are even worse. The client is across the world and I just received this project and was told to have it done asap. Apparently this was supposed to be done last month but no one did it and now the client told my boss who is telling me to just do the project. I already said that the materials were awful but I guess no one cares.
They never care...until they see the final results. 
Copy link to clipboard
Copied
Wow that does look a lot nicer. I am very inexperienced with photoshop however so I don't know where to begin to do something like that. My boss didn't even want me to touch up the photos because of the time constraint but I insisted because of the extremely poor quality.
Copy link to clipboard
Copied
Own up Trevor, you found where the original location was, had Chris paint and decorate it and then took some more photographs 
Copy link to clipboard
Copied
Nice Trevor
You could almost walk in and have a look round 

Dave
Copy link to clipboard
Copied
davescm wrote:
Nice Trevor
You could almost walk in and have a look round
Dave
ROTFL! Outstanding Dave. Is that After Effects? It didn't take you long to work it all out.
Terri, I'll have you know Chris asks my advice about what clothes go together, and I am a proper bloke that never reads instructions, and can't see things on shelves, when they are right in front of me.
Benajmain, how did you upress the image? I know it has lots of squarish lines that will tend not to show jaggies, but there are plenty of diagonals, and the quality is remarkably good. Never mind. I just read your post again. That's surprising. Chris Cox and Jeff Schewe both got involved ion a thread about upsizing a few years ago, and Chris said that the 10% method made no difference, and that none of the after market upressing plug-ins did a better job than Preserve Details.
Here you go:
Re: What are the best practices for upsizing an image?
Jeff's article 'The Art of the Up-Res' seems to fallen off the edge of the planet, unless someone knows where to find it. He has a couple of related articles still out there though
Copy link to clipboard
Copied
Hi Trevor
100% Photoshop 
I used the Vanishing Point Filter to set the perspective grids. Then checked the "Return 3D layer to Photoshop" option in that filter. Then in 3D some quick camera animation with key-frames.
Dave
Copy link to clipboard
Copied
Trevor.Dennis wrote:
Benajmain, how did you upress the image? I know it has lots of squarish lines that will tend not to show jaggies, but there are plenty of diagonals, and the quality is remarkably good. Never mind. I just read your post again. That's surprising. Chris Cox and Jeff Schewe both got involved ion a thread about upsizing a few years ago, and Chris said that the 10% method made no difference, and that none of the after market upressing plug-ins did a better job than Preserve Details.
Here you go:
Re: What are the best practices for upsizing an image?
Jeff's article 'The Art of the Up-Res' seems to fallen off the edge of the planet, unless someone knows where to find it. He has a couple of related articles still out there though
Good read, Trevor. How you upres does depend on the image. Actually, upon testing, using the 10% method does lead to slightly less detail in the floor of the OP's image. So it's good to try several methods to find the best result.
In all fairness, the enlargement process is more than the upres itself. In fact, much of the final result will fall upon the sharpening approach, and exactly how you execute the process.

 AdChoices