 Adobe Community
- Home
- Photoshop ecosystem
- Discussions
- Re: Newbee Q: outlines of silhouetted figures (in ...
- Re: Newbee Q: outlines of silhouetted figures (in ...

Copy link to clipboard
Copied
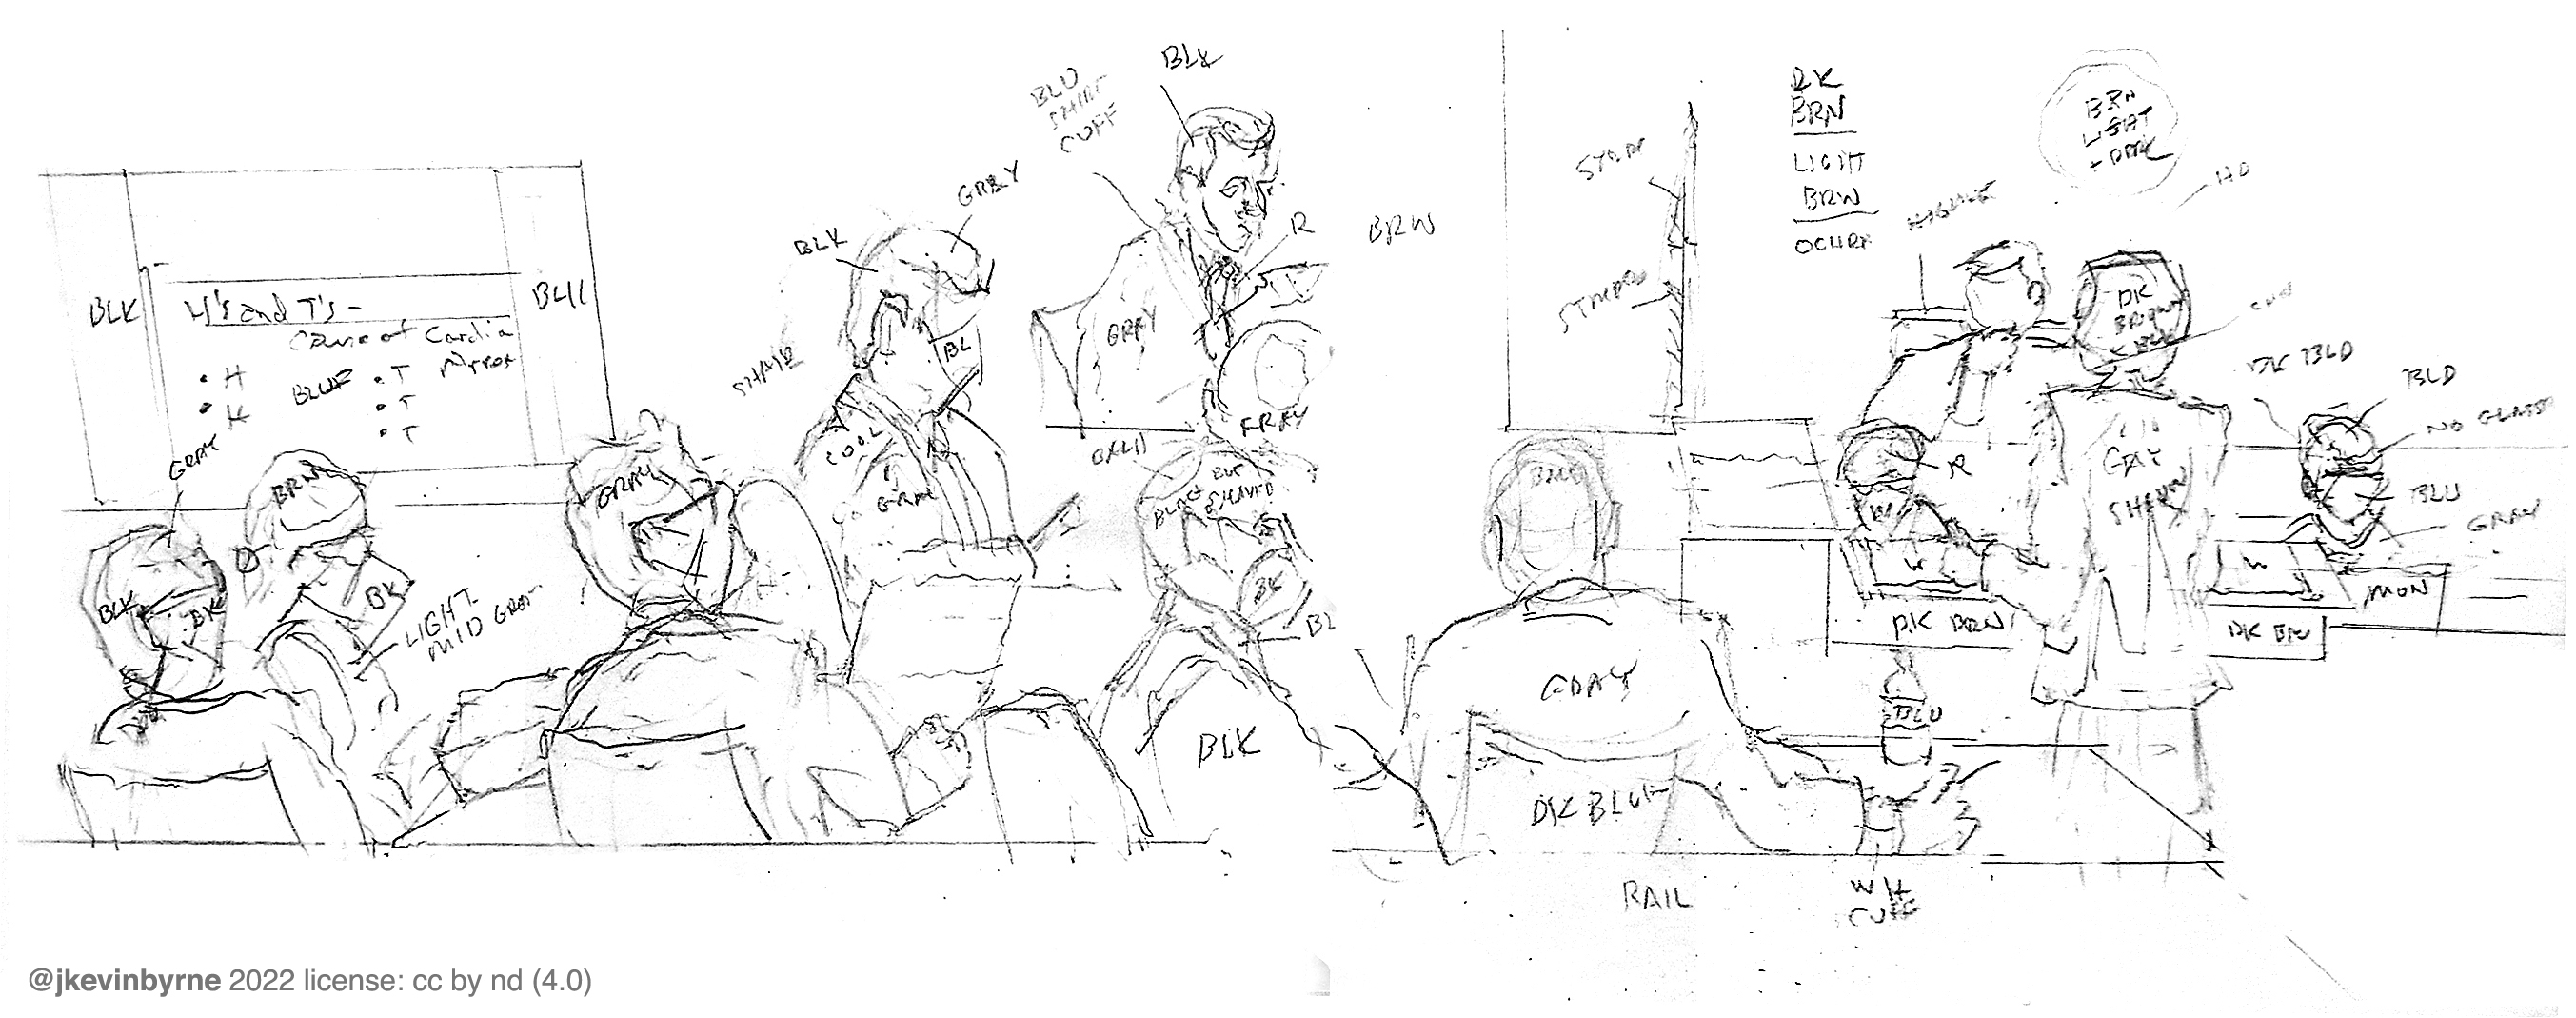
I have an analog drawing with outlines of silhouetted figures (in a crowded courtroom). Attached is my base sketch.
A Phosho scenario I’m inquiring about…
Once scanned I create a half dozen layers with each figure in its own layer, most at different distances from the artist’s viewpoint, since the space actually – “in theory” – depicts 3D.
To my question: is there a way to do use (say) Frame Animation with layers so it can be made to elevate the viewpoint? Not quite trye animation, rather step by visualization as if I was a drone!
My goal is to enable me to rise above the courtroom to simulate a more bird’s eye view? I am trying to envision a new drawing that declutters the overlap of figures.
Software in iPad called Mental Canvas seems to permit this, but I do not need animation per se. I’m hoping to do this natively (perhaps with simple use of Frame Animation?) of layers in Phosho.
Have yet to find a YouTube-style tutorial on this issue, perhaps y’all know of one.
Thx., cheers, Kevin


 1 Correct answer

Do you mean something like this?

Here's what I did:
- Opened your image in Photoshop
- Used the Lasso tool to select each subject (one at a time)
- Added a layer mask from the selection in the Layers panel
- Repeated steps 2 & 3 until all the sections had a layer mask
- Saved the PSD
- Created a New Composition from footage (that's a box you can click to open the PSD as a composition) in After Effects
- Made each layer a 3D by clicking the cube for that layer
- Used the orbit tool and the pan tool to move the
Explore related tutorials & articles
 7
Replies
7
7
Replies
7
Copy link to clipboard
Copied
Do you mean something like this?
Here's what I did:
- Opened your image in Photoshop
- Used the Lasso tool to select each subject (one at a time)
- Added a layer mask from the selection in the Layers panel
- Repeated steps 2 & 3 until all the sections had a layer mask
- Saved the PSD
- Created a New Composition from footage (that's a box you can click to open the PSD as a composition) in After Effects
- Made each layer a 3D by clicking the cube for that layer
- Used the orbit tool and the pan tool to move the virtual camera so that it looked down on the layers
- Used the selection tool to move the various layers in 3D
Copy link to clipboard
Copied
Copy link to clipboard
Copied
Thx M!, ...
Copy link to clipboard
Copied
Follow-up for Myra –
Filenames attached…
Myra-Files-PanoCourtBirdsEyeTest
ColorCourtPanoNew
ColorCourtPano-in-AE-Question
Myra-Files-PanoCourtBirdsEyeTest
Using your AE file I explored Orbit, dong this screen capture that works well as bird’s eye.
What was noteworthy to me was how you had managed to space each layer distant from the one before and after it such that the bird’s eye looked “properly naturalistic” by way of increasing the modest spacing of the planes of each layer.
ColorCourtPanoNew
I created my own test of a (new) color version as .psd per yours steps 1-5, screen snap above.
ColorCourtPano-in-AE-Question
I then opened the .psd in AE (2022) per your step 6. This is my screen snap of my own Orbit induced bird’s eye. Not at all as good as yours!
My question: what had you done in your own test effort – either in Photoshop layers or in AE – to generate your “optimal-naturalistic-planar” spacing? Caveat: I understand it may be rather technical, pls. know that AE is much less familiar to me than Photoshop.
Thx!, cheers, Kevin
Copy link to clipboard
Copied
Hi Kevin,
I spaced them based on where they appeared to be in the 2D drawing. There are clues you can use such as does a person obscure another person, about how wide would the judge's stand be, where would a person stand if they were in front of it, and how much space would there be if someone was seated in front of someone else, etc. In other words, the spacing decisions were just educated guesses based on where it looked like they would have been.
I hope that helps. 🙂
Copy link to clipboard
Copied
Thx again, Myra!
Closing the loop, here is how featured it in my blog at Medium,
(Figure 4.)
Cheers, Kevin

Copy link to clipboard
Copied
Interesting blog post. Thanks for sharing! 🙂

 AdChoices