Copy link to clipboard
Copied
Hello, I'm new to Photoshop so any advice appreciated
My dad scanned in about ~1800 pages of photos from my grandmother's albums I’d like to separate for uploading to google photos. Unfortunately he didnt scan them in at super high resolution but it took him a week to do and isn't something I'll be able to redo.
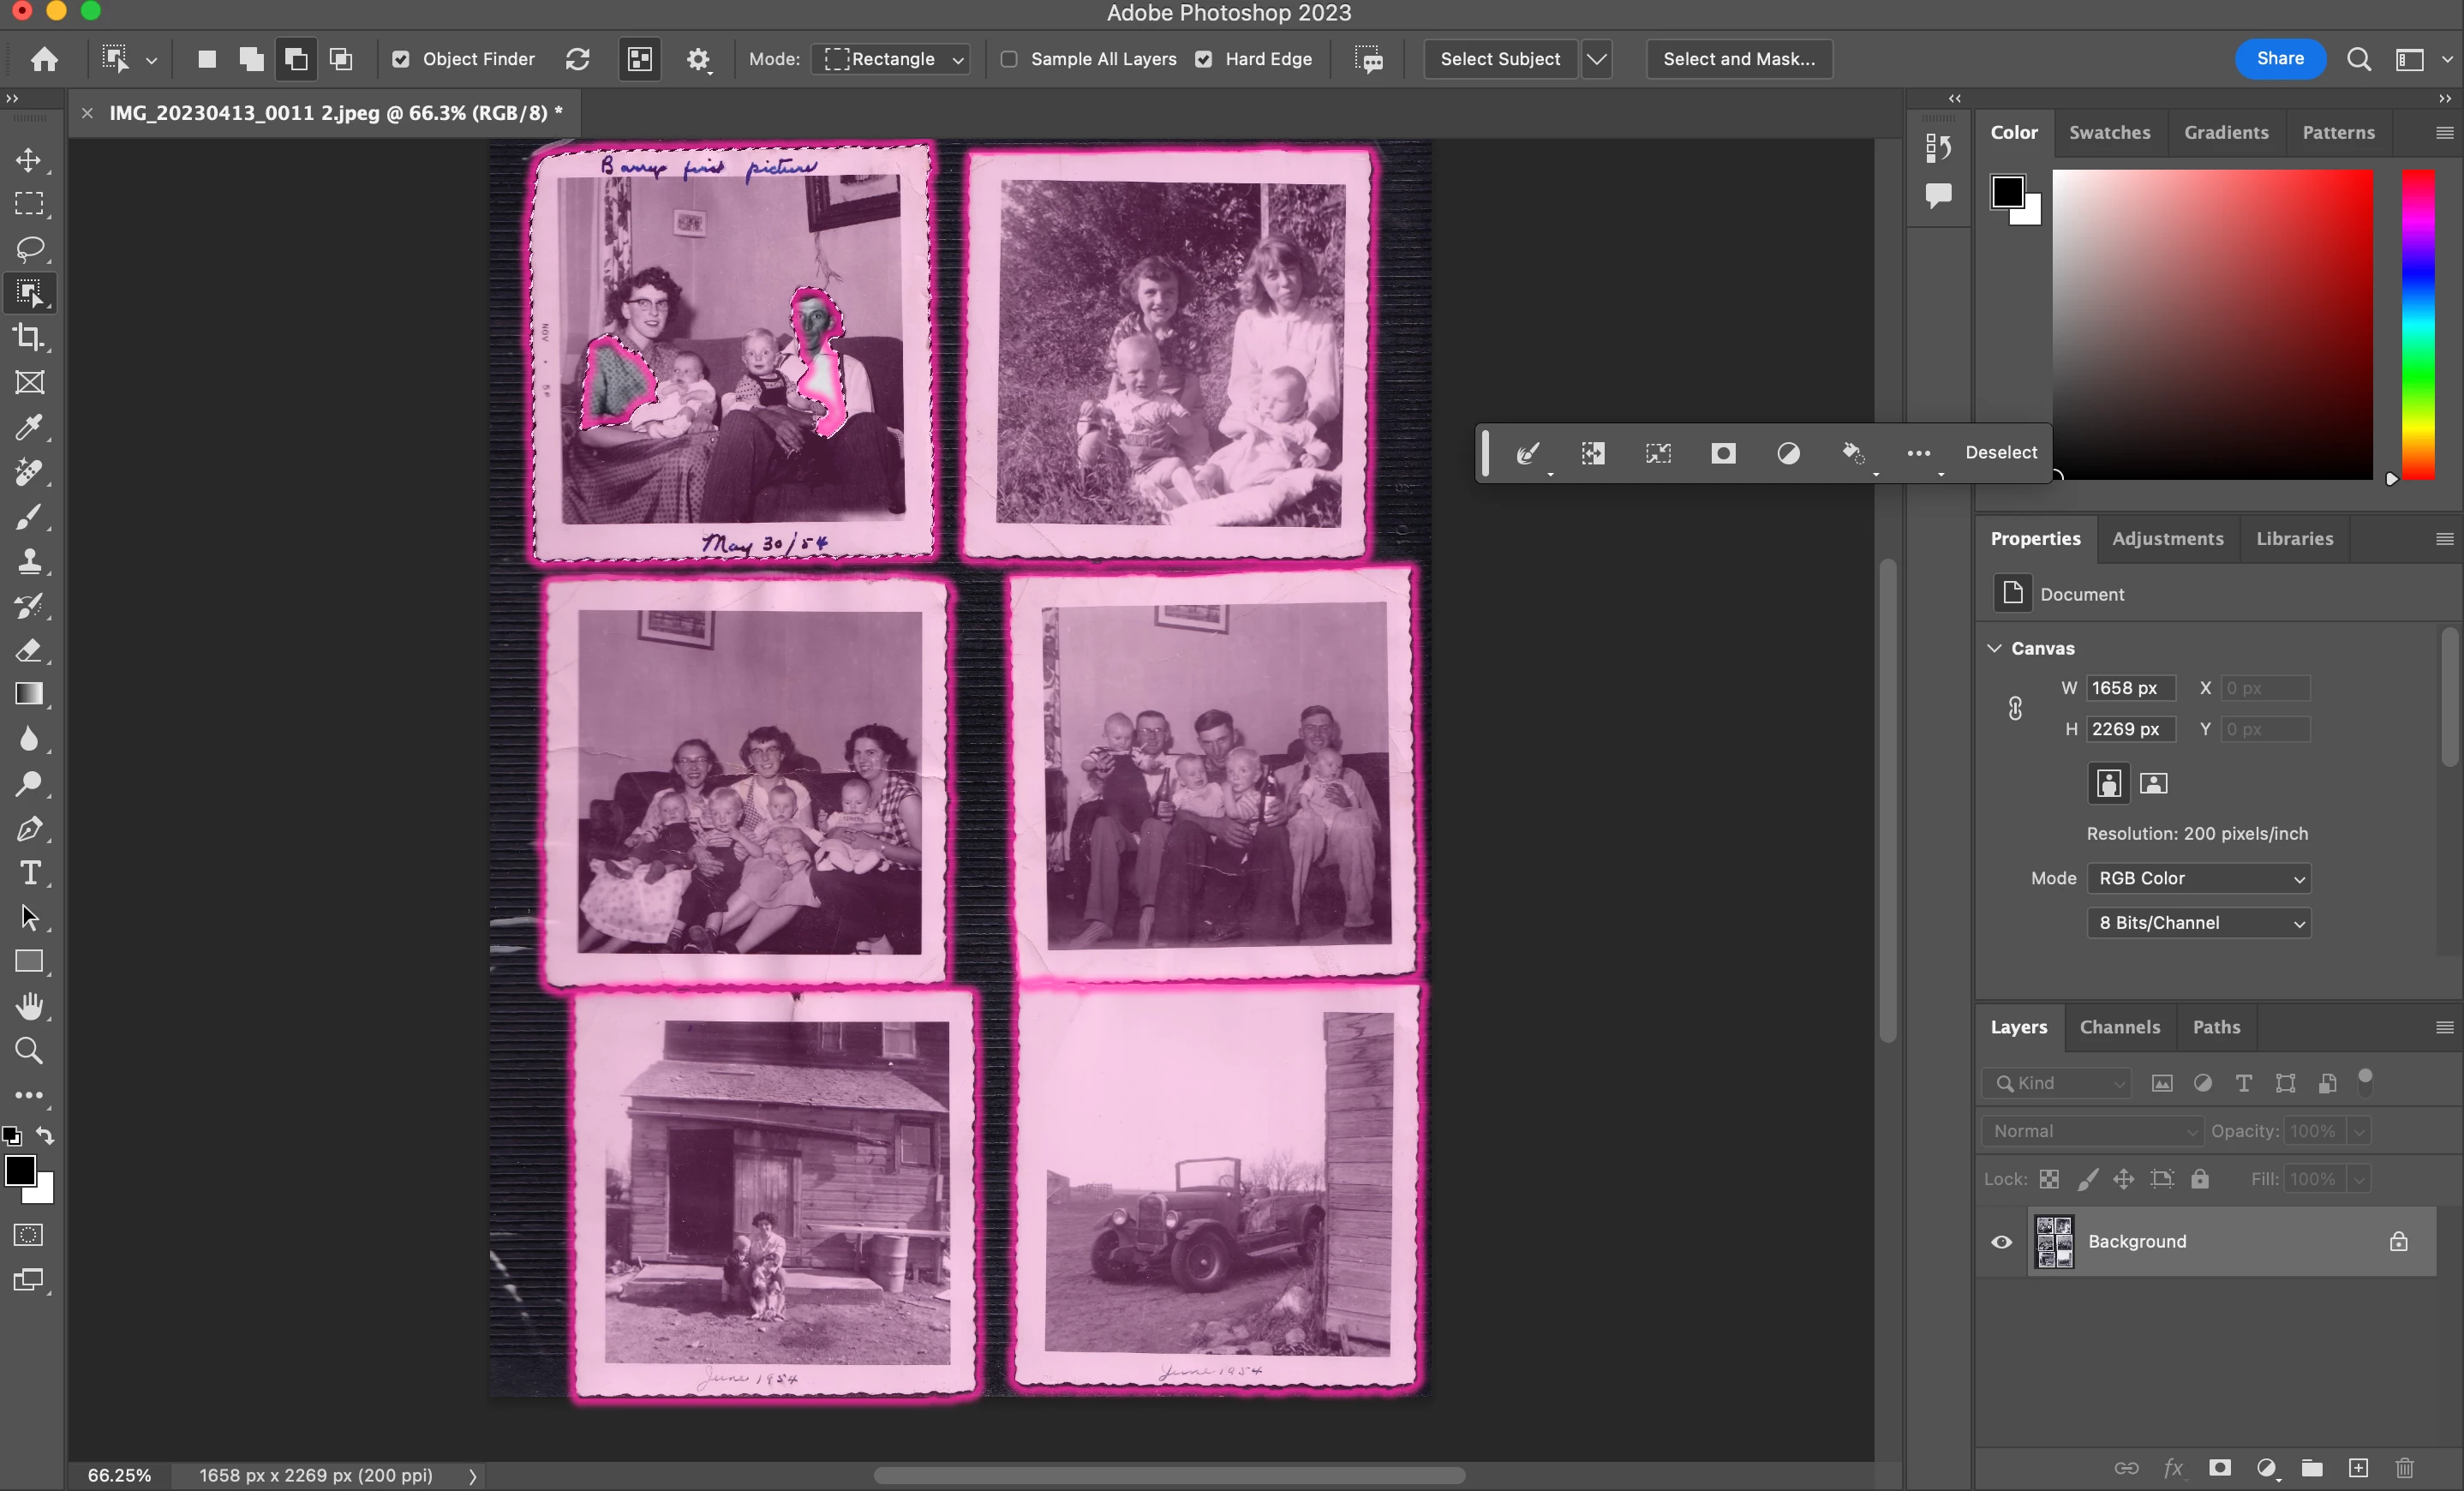
The majority look like this with 4-6 photos per page with this textured background. Some of the albums are black background and some are white but nearly all are textured like this.
Have tried the Automate > Crop and Straighten feature but I think the background of the photos breaks it and it doesn’t work.. It also doesnt work when I remove the textured background.
Interestingly, the object selection tool is able to outline all of these just fine. Using the object selection tool, I'm looking for a way to:
a) merge selections (note in the top left it incorrectly made a few selections that should all be apart of the same selction, and
b) save all these selections as individual images. I'll have to go back and straigthen all of them which is another task I'll have to figure out how to do.
If anyone has advice on a better way to do this alltogether I'm all ears.
Thanks!
Danny
Because the Object Selection tool works well, try this:
1. Click one of the pictures with the Object Selection tool to select it.
2. Choose Layer > New > Layer via Cut. The selection is now isolated on its own layer.
After you do steps 1 and 2 to each photo on the sheet, the scan document should now have each image on its own layer.
3. Delete the Background layer, which should be empty at this point.
4. Choose File > Export > Layers to Files, set options, and click Run. Now you have a folder whe
...Copy link to clipboard
Copied
I guess you want to save each selection as channel then crop > export > undo or use channel to create selection then use selection to duplicate on new layer each and every channel or selection and finally export all layers with trim or similar to save each individual image.
Lets try first with scripters because they may know where to download such script, I think one of Community Experts who passed away has developed script that is using saved alpha channels, not sure in which way but it may help. Probably @Stephen Marsh or @c.pfaffenbichler knows what I am talking about.
For part where you are asking how to add to selection below, on screenshot is an answer, look at Options bar and click on second icon from the left.
Copy link to clipboard
Copied
Because the Object Selection tool works well, try this:
1. Click one of the pictures with the Object Selection tool to select it.
2. Choose Layer > New > Layer via Cut. The selection is now isolated on its own layer.
After you do steps 1 and 2 to each photo on the sheet, the scan document should now have each image on its own layer.
3. Delete the Background layer, which should be empty at this point.
4. Choose File > Export > Layers to Files, set options, and click Run. Now you have a folder where each layer is a separate file.
You can now rename, edit, and organize each of those images individually.
There should be some potential to automate some or most of those steps as a Photoshop action or script, so that you don’t have to do so much clicking.
@Danny31090439xtzp wrote:
I'll have to go back and straigthen all of them which is another task I'll have to figure out how to do.
When the Crop tool is selected, there’s a Straighten tool in the options bar that you can drag across anything in the image that should be perfectly horizontal or vertical. When you stop dragging, Photoshop straightens the image by rotating it by the angle you dragged with the Straighten tool.
Copy link to clipboard
Copied
This is great and what I'll plan to do.
I find that after separating each image to it's own layer and exporting as you indicated with File > Export > Layers to Files, it saves that image with a large empty transparent full sheet around it (see pic). This is after ensuring its the only layer.
What I've been doing is re-opening it, running the crop and straigten function. Exporting as PNG, then moving onto the next one. Each of these requires a click unfortunately but it is what it is. I'd love to run a batch script for Automate > crop and straighten photos but interstingly its not an option for me in the default actions (second pic).
Copy link to clipboard
Copied
Crop and Straighten Photos isn’t listed as an action because the Batch dialog box doesn’t list commands, it lists only actions that are already available in the action Set you have selected. The Set you selected is Default Actions (the ones that come with Photoshop as examples). If you look in the Actions panel, Default Actions has no Crop and Straighten Photos action, so that’s why it isn’t listed when you call up that set in the Batch panel.
To use Crop and Straighten Photos available in the Batch dialog box, there must be an action set containing an action that includes Crop and Straigten Photos. All you have to do is create one, and it takes only a few seconds. In the Actions panel, create your own set, then create a new action within that set. That action needs to contain only one step, the Crop and Straighten Photos command. To add it, just open the Actions panel menu (click the panel menu button at the top right corner of the panel), choose Insert Menu Item, and choose File > Automate > Crop and Straighten Photos.
When that’s done, the action is ready to use. In my example, I would go back to the Batch dialog box, choose “Some actions I made” from the Set menu, and make sure the selected Action is “Cut out scans”.
It does take a small investment of time to set up the action, but once set up, the investment pays off in a lot of saved time through the Batch dialog box.
Copy link to clipboard
Copied
@Danny31090439xtzp wrote:
a) merge selections (note in the top left it incorrectly made a few selections that should all be apart of the same selction, and
With a selection active, you can toggle in/out of Quick Mask mode using the Q key shortcut or the toolbar. You can then refine the selection as a temporary channel before returning it to a selection.
If the selection isn't critical, you can also create paths and delete the paths that aren't required.
Copy link to clipboard
Copied
Please provide a sample image.
And I am not sure what you mean by »a) merge selections (note in the top left it incorrectly made a few selections that should all be apart of the same selction,« – please post screenshots including all pertinent Panels to illustrate.
Copy link to clipboard
Copied
Sorry that was a bit unclear. In the original screenshot in the post, the top left image you'll note that photoshop has outlined the photo but also the woman's shoulder and the man's face & body. I'm just looking for a way to select all of these and merge them into a single selection.
Here are a couple of my sample images with what I have to work with.
Copy link to clipboard
Copied
Thanks. After playing around with those samples, here are a some more ideas.
When a selection tool (not just Object Selection) misses some areas, you can always add them in by putting the tool into Add mode and then dragging to include the missed areas. Although there is an Add button in the options bar when a selection tool is active, the power user way to do it it is to hold down Shift.
So, for example, if you click the Object Selection tool on a photo and it misses parts of people, Shift-drag the tool over the missing areas and it should add them to the existing selection. When you release Shift, the tool goes back to its normal “create a new selection ” mode. (The opposite is the Subtract button on the options bar, which you can do on the fly by holding down the Alt or Option key while dragging. Use this if a selection tool initially selected too much and you want to tell it what to leave out.)
Another thing to try is that the Object Selection tool has two modes (click or drag), so for example, if you were clicking a photo to select it, try dragging around it instead. Except that when I tried it, it seemed to miss some spots both ways, so I ended up having to Shift-add the missed parts anyway. So it’s probably easier just to click, and then Shift-drag to pick up any missed areas.
Or, you can try a different tool. The Quick Selection tool seems to works well, but it takes more dragging to cover all the areas. It seems like the Object Selection tool will still take the fewest steps.
I think you’re right that Crop and Straighten photos is being misled by the background, for two reasons. One is that the background is not solid black, there’s some texture in there. Also, Crop and Straighten photos works best when there is enough space between photos, but many of the photos touch each other and probably get interpreted as a single photo.
Copy link to clipboard
Copied
I was going to suggest the Photo Restoration Neural Filter, but I tried it on one of your images and it wreaked havoc! That's the first time I have seen a Neural filter fail so badly.
I digitized and restored all of my dad's transparencies about 30 years ago, and it was a labour of love I never want to have to do again. It would be orders of magnitude easier now — I'd have been using the first Windows Photoshop version — but even so it would be a nightmare project so I wish you luck.
Copy link to clipboard
Copied
Hmm …
I think it might be more efficient to select each image in turn and then run a Script that creates a new image clipped to that Selection and saves it to the desired destination.
What are the naming conventions or would you need an name entry-dialog?
Are you trying to keep to white frames or do you want to clip the the images themselves?
Another option for semi-automation would be creating a path with the Pen Tool (in these cases with six subPathItems with exactly four pathPoints each) and then running a script that creates new images for those six areas, one advantage being that this could address the rotation (by averaging the angles of the opposing sides).
Copy link to clipboard
Copied
Try this little known Photoshop feature: File > Automate > Crop and Straighten images. If multiple photos were scanned together as one file, this will separate each of the photos as an individual image, accessible from a separate document tab in Photoshop. See this video for more: https://www.youtube.com/watch?v=tyg6fM0gAlg
Find more inspiration, events, and resources on the new Adobe Community
Explore Now