Inspiring
January 25, 2019
Answered

Perspective Warp Guidance - Grids and straighten buildings

  • January 25, 2019
  • 3 replies
  • 3260 views

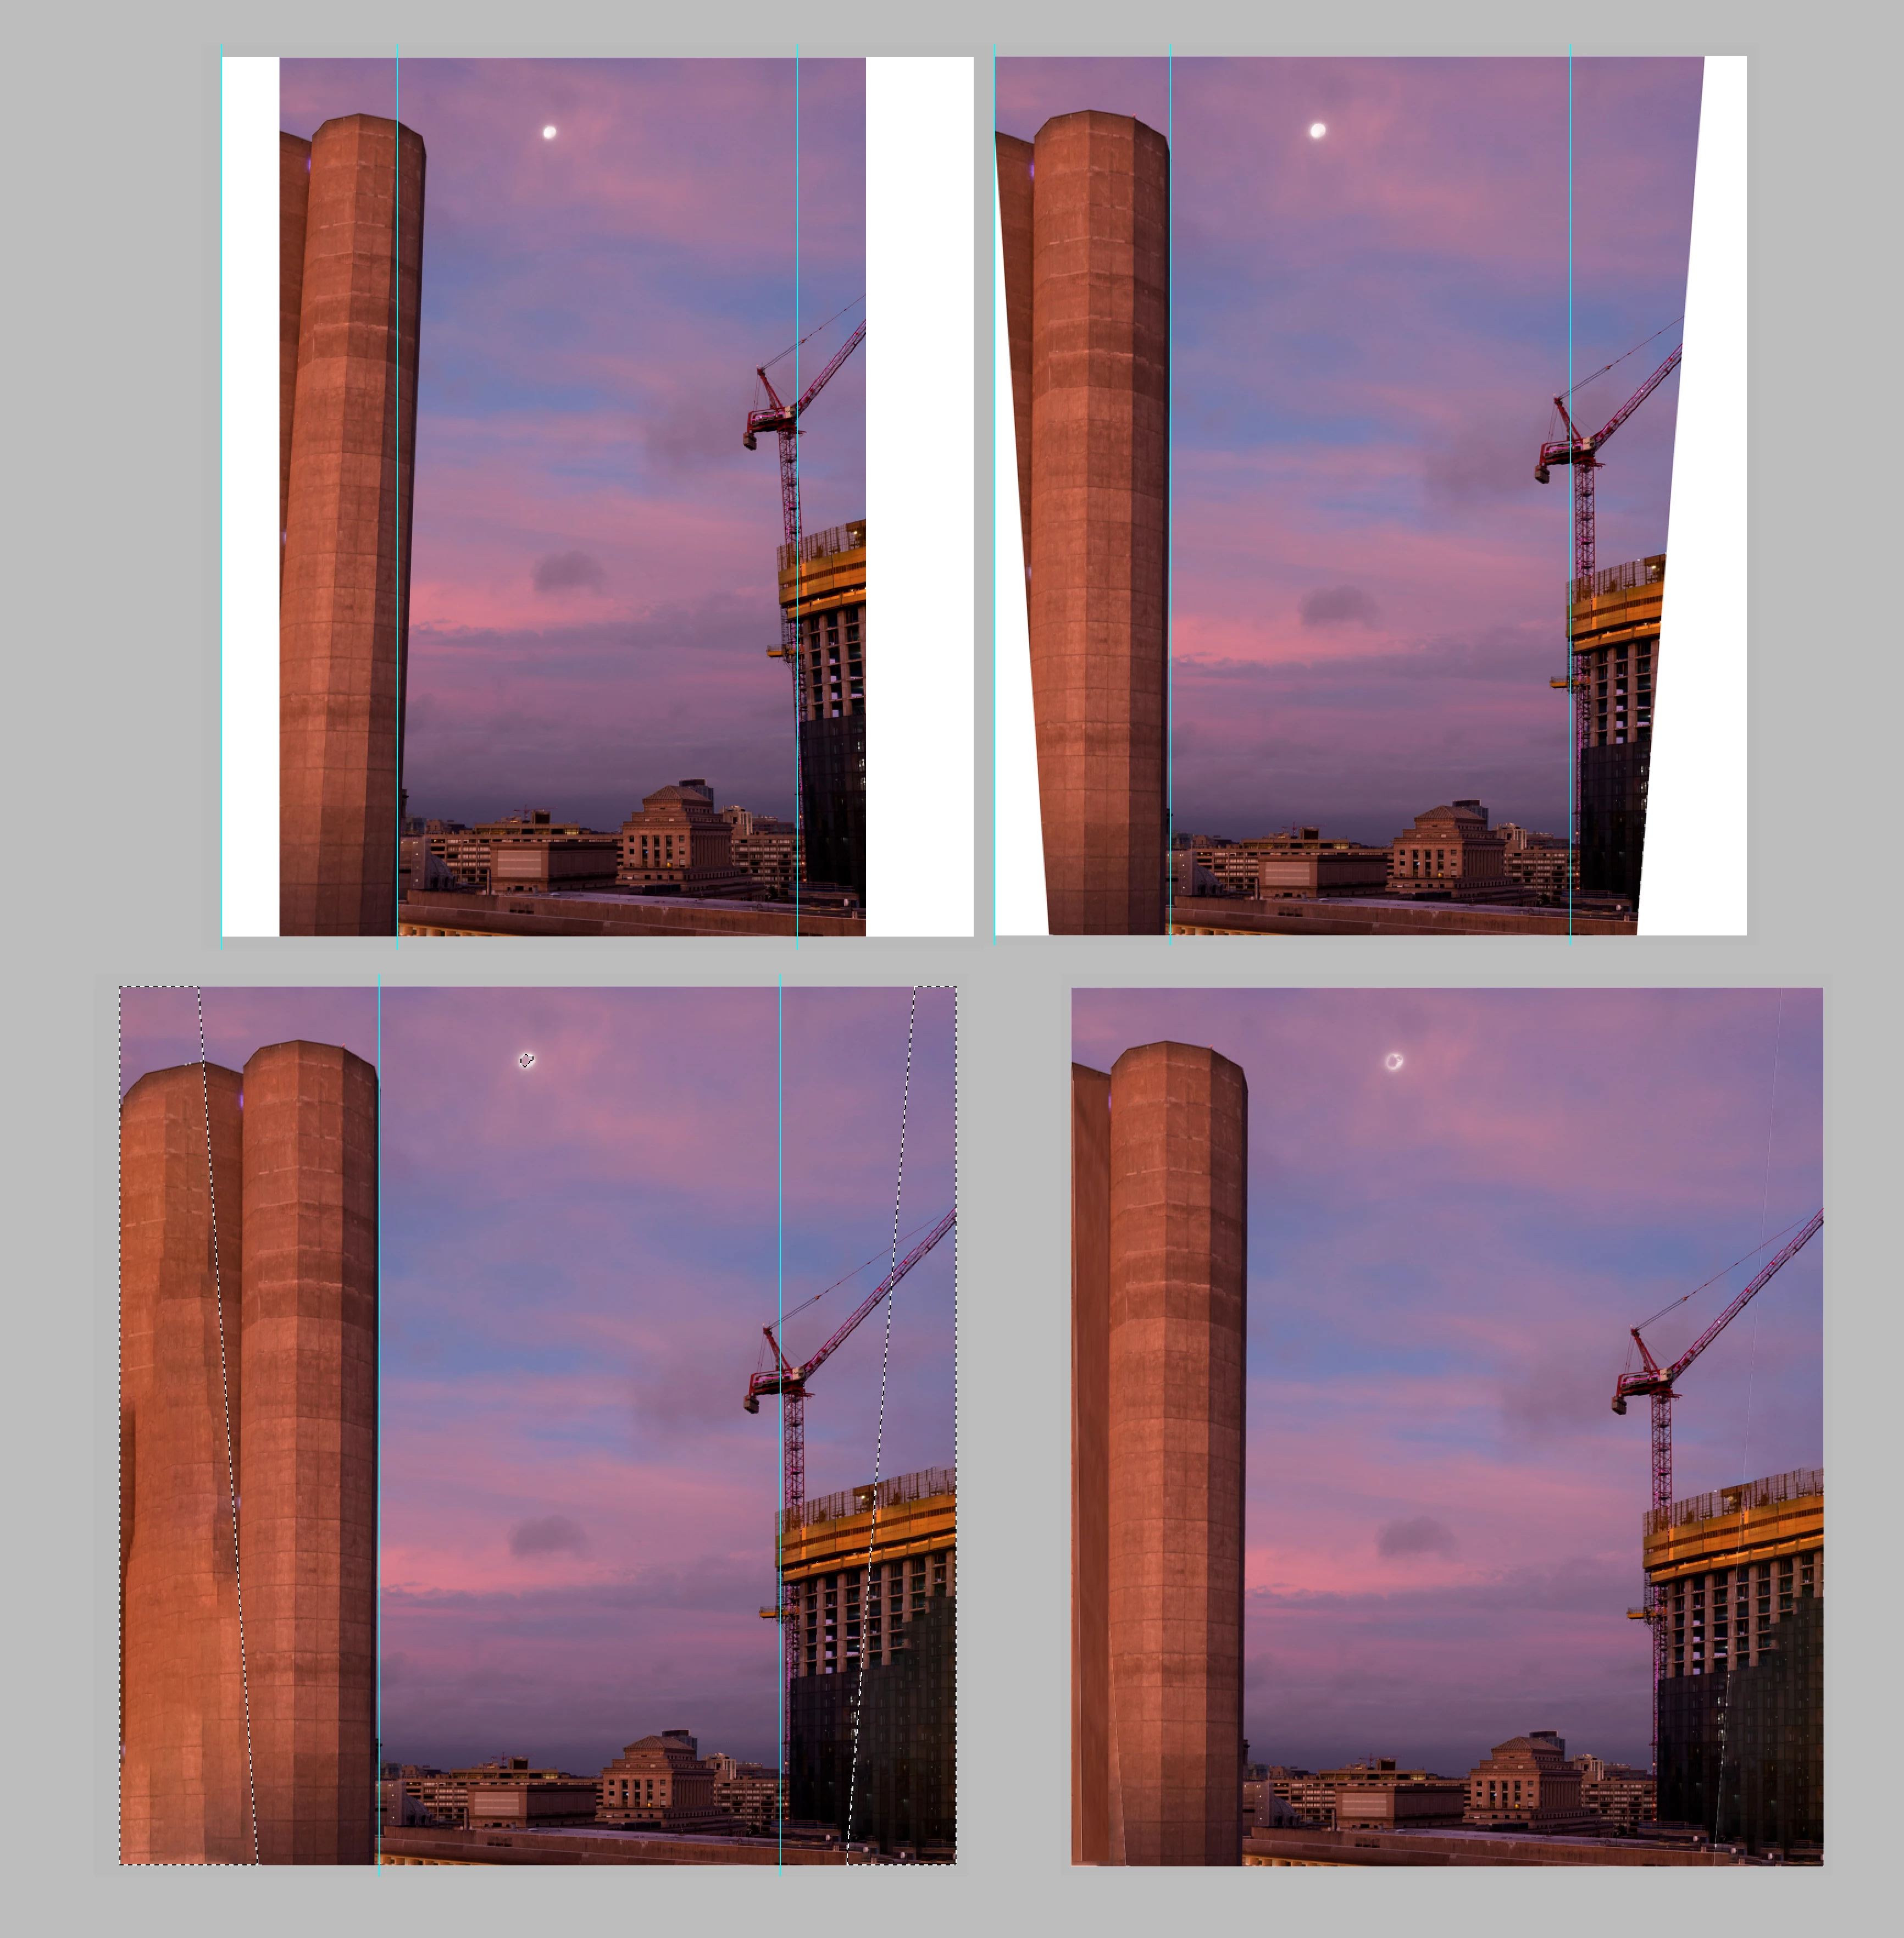
I have an image with two buildings on the vertical edges of the frame are leaning in and buildings between them, which are at a much lower height that I want to 'protect'. When I create the grids by following the instructions laid out in Greg Benz​'s video with the sea stack, I'm unable to get the grids to snap together the way I want.

I tried to do Transform -> Perspective, which works beautifully, but the lower buildings between the two buildings get squashed a bit.

So I have a few questions:

  1. How could I do the Transform -> Perspective and keep the lower buildings from being affected?
  2. When doing Perspective Warp, is there a way to get the grids to snap to each other and maintain their rectangular shape?
    1. It seems that an edge will snap to an existing edge, but in a shape I don't want.

Note I don't want the sky between the two edge buildings to be affected so I need to protect this area as well.

I was thinking to approach the problem as a three sided building, which I believe makes sense. However for this to work I think the grids should connect.

Thanks for any help and/or guidance.

David

This topic has been closed for replies.
Correct answer Norman Sanders

Consider this:

Fig 1. Widen the canvas

Fig 2. Drag out reference lines from the Ruler. Then Edit > Transform > Distort to straighten the keystone effect

Fig 3. Select the white area and then Edit > Contact Aware Fill

Fig 4, Crop in on the left, select a portion of the outer unit and create a common tone with Edit > Transform of a section for its entire length.

Not shown: If the original file proportion is important, you may Content Aware Fill with sky

NOTE: Often, this type of transform has a tendency to make items in the image slightly squat. If that is apparent to you, you may elongate the entire final image with Edit > Transform Distort after addition a bit of height or length to the canvas.

3 replies

Trevor.Dennis
Community Expert
Community Expert
January 26, 2019

Perspective Warp only makes sense when you have two adjacent plains to manipulate, and that is not the case here.  So I would simply use Free Transform, and drag the corner handles while holding down the Ctrl key.

Note I have diagonal lines for Free Transform, because I made the layer a Smart Object.  This lets you edit the Transform to make fine adjustments, while keeping the handles at the corners of the original image.  This is a big advantage when using Free Transform.

The disadvantage of this approach is that you can't use Content Aware Fill to fix the missing corner, because Smart Objects are not directly editable.    I don't actually know of a workaround for this, other than rasterising the SO.

DaBrownCOAuthor
Inspiring
January 27, 2019

Is there a way to keep the buildings in the middle from getting squished by perhaps using a mask? Trevor.Dennis your Content aware fill looks really nice. I like how you've maintained more of the left tower. Did you restrict the sampling area to a pretty tight portion? In studying this more, I understand how you approached this. It looks like you widened the base rather than narrowing the top of the tower. I like that approach!

I followed norman.sanders​ instructions and am pretty pleased with the results. Not perfect, but the lower buildings are less squished now.

Thanks all!

DaBrownCOAuthor
Inspiring
January 27, 2019

Everything in the scene should share the same vanishing point, so correcting the verticals for the larger, nearer objects, should do the same for the smaller, far away objects/buildings. 

When making composites, I usually make selections of near-field objects, and copy to new layers.  Composited objects then go on layers beneath the copied foreground layers, and overlap behind them.  Or I might clip an introduced object to the copied layer layers to prevent it overflowing.  or Ctrl click to load as a selection, and layer masks.   The important thing is putting things on separate layer, as this produces lots of options, and makes life easier going forward from that stage.

I increased the Canvas width as the Free Transform was going to leave triangular gaps at the bottom corners.  You might be away that CC2019 introduced a new Content Aware Fill accessed from the Edit menu.  I'm finding it a lot more effective, but this sort of image AI is not going to be perfect.


I'm fairly new to Photoshop so I'm still working to wrap my head around how to use different layers and mask portions of them prior to combining into a composite. I know it will come with practice though.

Norman Sanders
Norman SandersCorrect answer
Legend
January 26, 2019

Consider this:

Fig 1. Widen the canvas

Fig 2. Drag out reference lines from the Ruler. Then Edit > Transform > Distort to straighten the keystone effect

Fig 3. Select the white area and then Edit > Contact Aware Fill

Fig 4, Crop in on the left, select a portion of the outer unit and create a common tone with Edit > Transform of a section for its entire length.

Not shown: If the original file proportion is important, you may Content Aware Fill with sky

NOTE: Often, this type of transform has a tendency to make items in the image slightly squat. If that is apparent to you, you may elongate the entire final image with Edit > Transform Distort after addition a bit of height or length to the canvas.

Jeff Arola
Community Expert
Community Expert
January 26, 2019

Can you post a sample image?

What version of photoshop are you using?

Do you have a link to the video?

DaBrownCOAuthor
Inspiring
January 26, 2019

Hi,

I'm using PS 20.0.2.

Image attached: I'm probably good with the image the way it is, but would

like to have the perspective correction to compare and more importantly to

know how to do it in the future.

Here is the link to the video: https://youtu.be/XNWf_IjaX0g

Thanks,

On Fri, Jan 25, 2019 at 11:20 PM Jeff Arola <forums_noreply@adobe.com>

Jeff Arola
Community Expert
Community Expert
January 26, 2019

Unfortunately, the adobe forums don't accept email attachments.

You have to use the Insert Image button on the forum.