Copy link to clipboard
Copied
It would be a God send if this photo could be restored.
I have only this scanned photo that was sent to me to 'fix'.
Is it possible to reclaim this image? I don't know where to start in removing the obvious stain across the four women.
Let me know if there is a possibly method at restoration.
Thanks!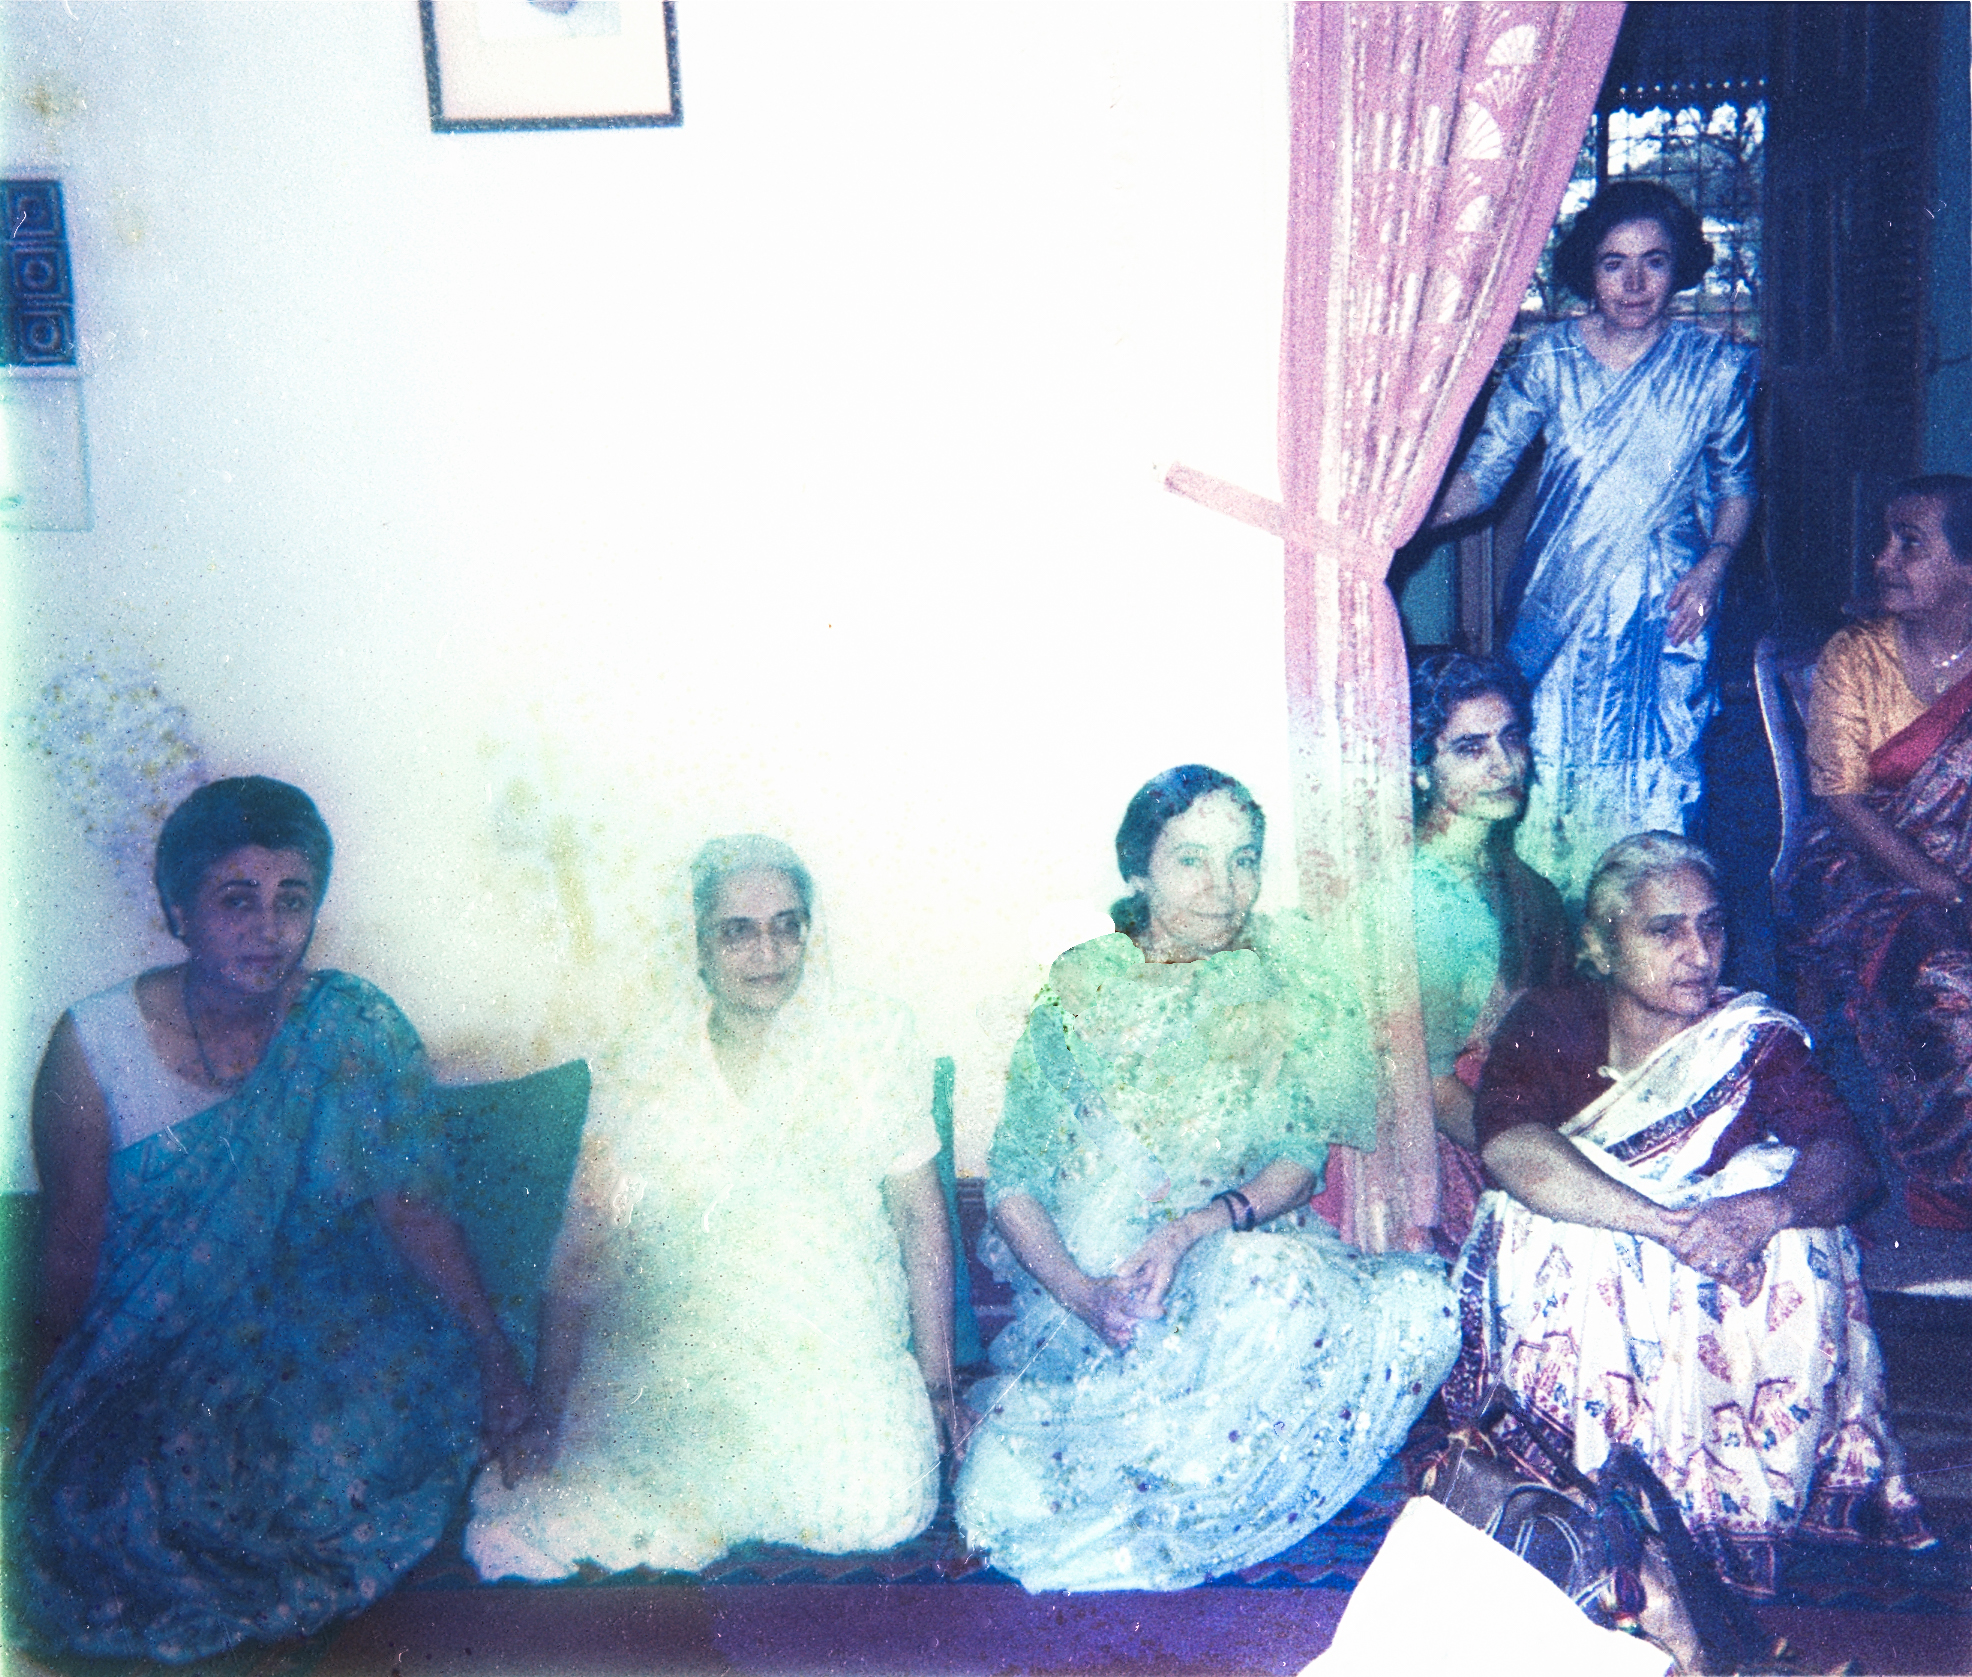
 1 Correct answer
The image appears to contain traces of digital image editing.
Do you have access to the original?
In any case the damage seems to be varied and addressing it would likely necessitate using both touch-up (Clone Stamp Tool, Healing Brush Tool, …) and Adjustments (Curves etc.) and even plain painting.
Explore related tutorials & articles
Copy link to clipboard
Copied
The image appears to contain traces of digital image editing.
Do you have access to the original?
In any case the damage seems to be varied and addressing it would likely necessitate using both touch-up (Clone Stamp Tool, Healing Brush Tool, …) and Adjustments (Curves etc.) and even plain painting.
Copy link to clipboard
Copied
Lots of manual labor. I'd start by recovering more natural colors with a global adjustment and take it from there with clone and paint operations.
Mylenium
Copy link to clipboard
Copied
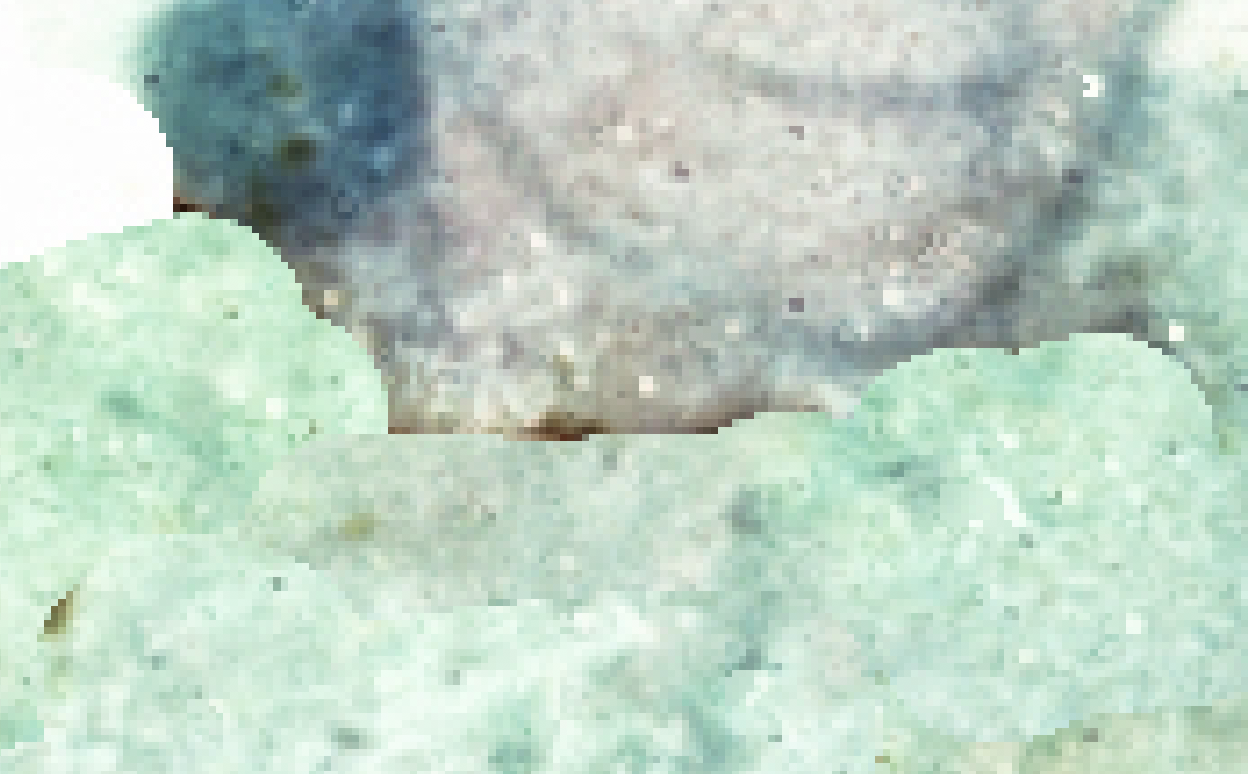
This region for example appears to have been edited already.
Copy link to clipboard
Copied
If you needed some guidance on how to restore it these courses on Linkedin might help https://linkedin-learning.pxf.io/NJQJ2
Copy link to clipboard
Copied
Hello
I now have access to the Linkedin Photoshop courses on restoration.
I now have the original negative. The fellow who sent it to me stated, "I use Silverfast HDR 8 to edit these files because I scanned them with Silverfast 8"
How to I open this image in Photoshop CS6? I have inserted the image file here.
Let me know.
Thanks!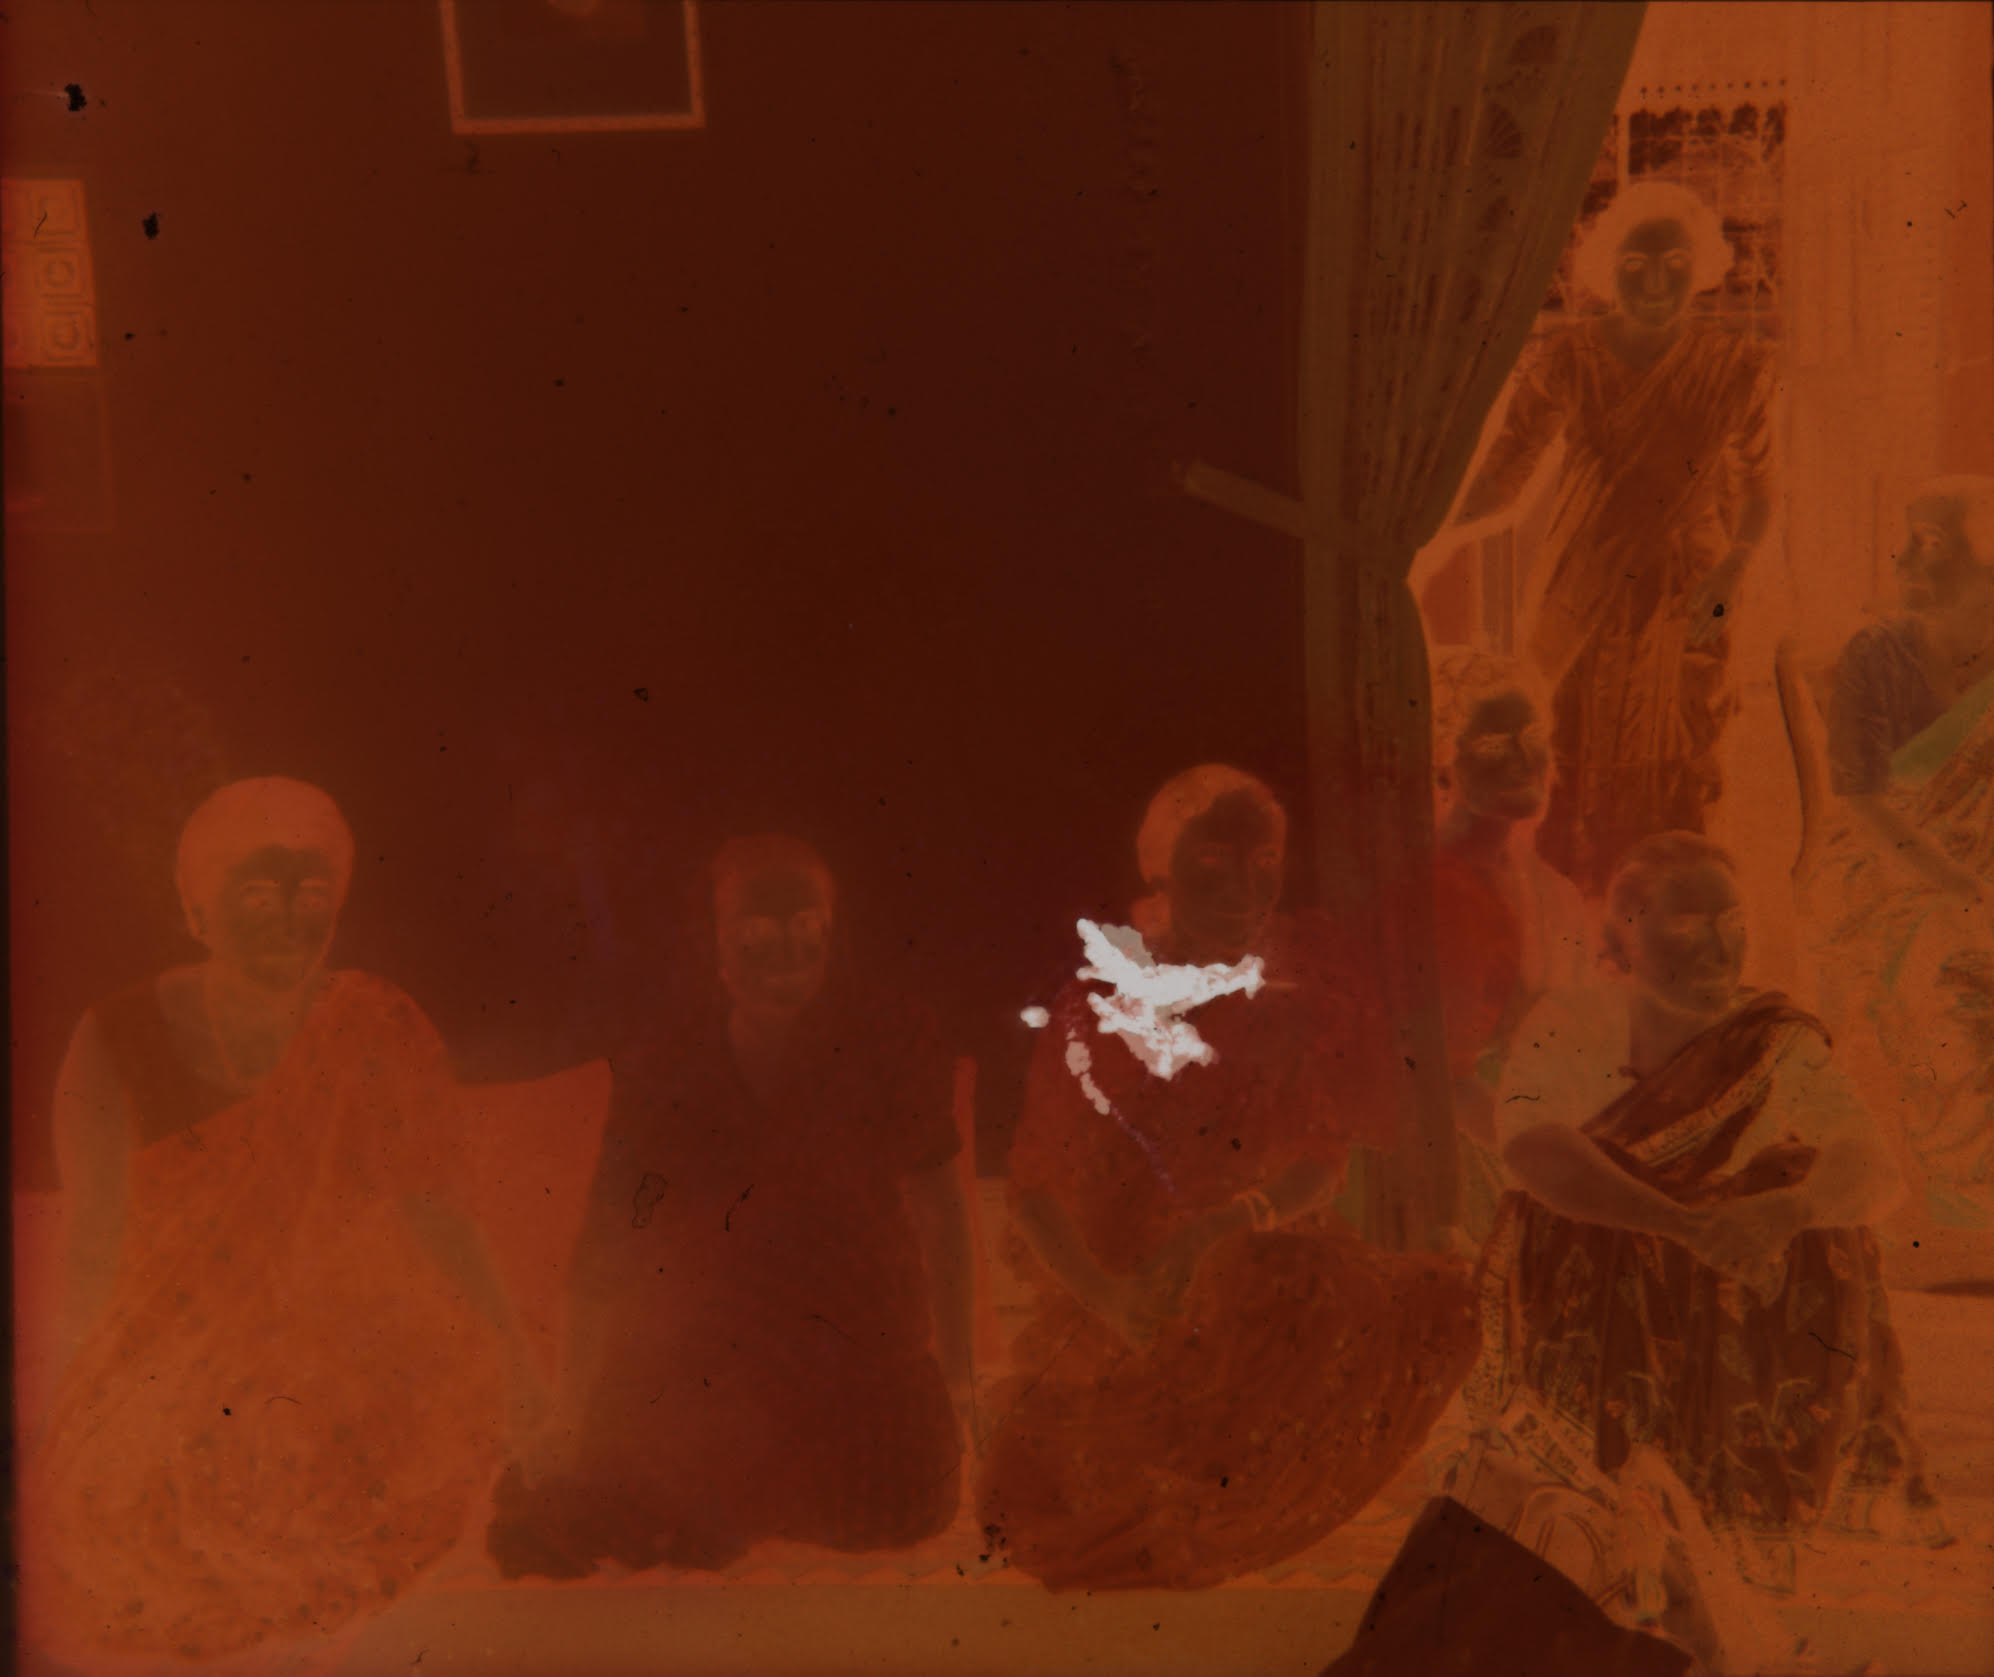
Copy link to clipboard
Copied
Hi there
The scan is not very good, it is full of horrible JPG file compression artefacts and this makes it very difficult to restore. You simply "open file" and "invert" the image from the image menu, "image/adjustments/invert"
Copy link to clipboard
Copied
Can you get the image without lossy compression and in 16bit? (If it was scanned in 16bit, just converting it to 16bit is naturally not good enough.)
Copy link to clipboard
Copied
lol no, you need to get that directly from the guy who scanned it! He needs to scan to TIFF and high bit colour or 16BIt colour and also at a better resolution.
Copy link to clipboard
Copied
The inversion of the RGB image in #5 delivers garbage. The information is
almost completely in the red channel, which can be converted to grayscale
and inverted. This results in a somewhat reasonable B/W image. Or one
can try the channel mixer.
Professionally, the film has to be scanned by a filmscanner, which takes
automatically the orange "carrier layer" (in the film) into account, delivering
a positive RGB image.
Considering the very bad quality, scanning by 16 Bits per channel would be
absolutely useless, in my humble opinion.
More about:
Best regards -- Gernot Hoffmann
Copy link to clipboard
Copied
Considering the very bad quality, scanning by 16 Bits per channel would be
absolutely useless, in my humble opinion.
Considering the fairly steep color corrections necessary to address the damages I would still recommend scanning at 16bit.
Copy link to clipboard
Copied
For steep color corrections 16 bpc would indeed be better than 8bpc,
but this concerns the working space. The data acquisition would not
benefit from a higher color resolution, because the colors are anyway
very wrong – like measuring the length of an old brick by a micrometer
gauge (Mikrometerschraube, Bügelmeßschraube) instead of a folding
rule (Zollstock).
Best regards --Gernot Hoffmann
Copy link to clipboard
Copied
If you do indeed have the negative then we have provided all the information you need to get a better scan. Higher-resolution and high bit colour. If you are able to do that you should get a better image to work from. Everything you need to help you have been covered ![]()
Copy link to clipboard
Copied
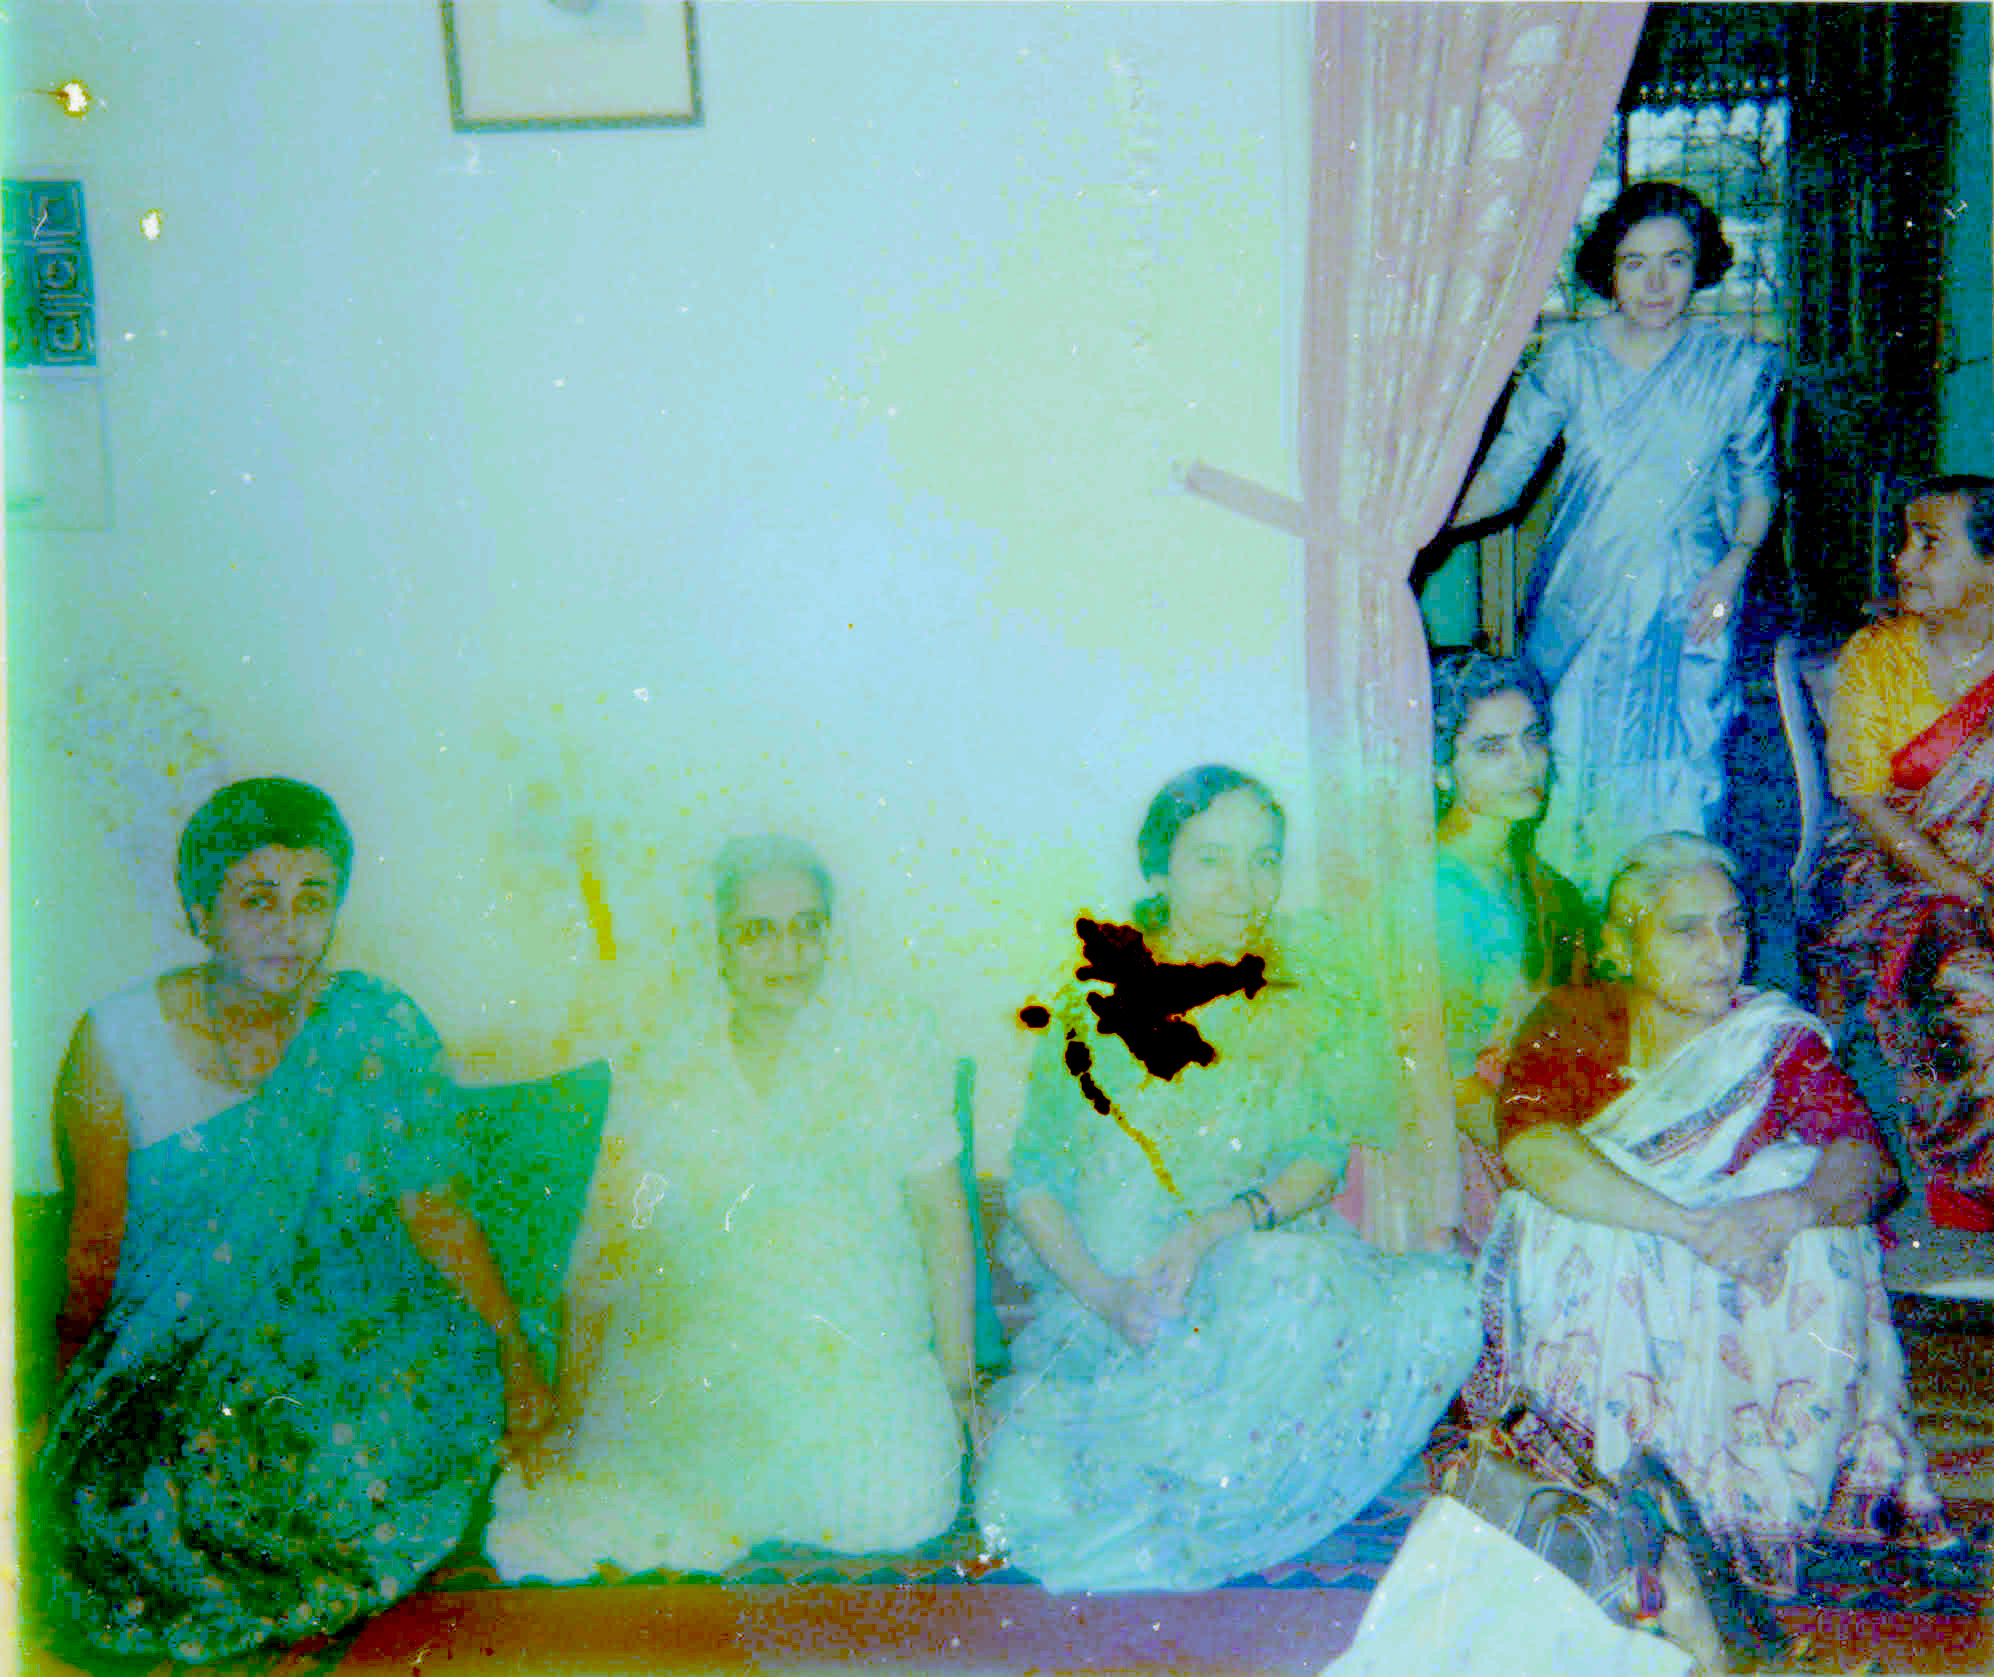
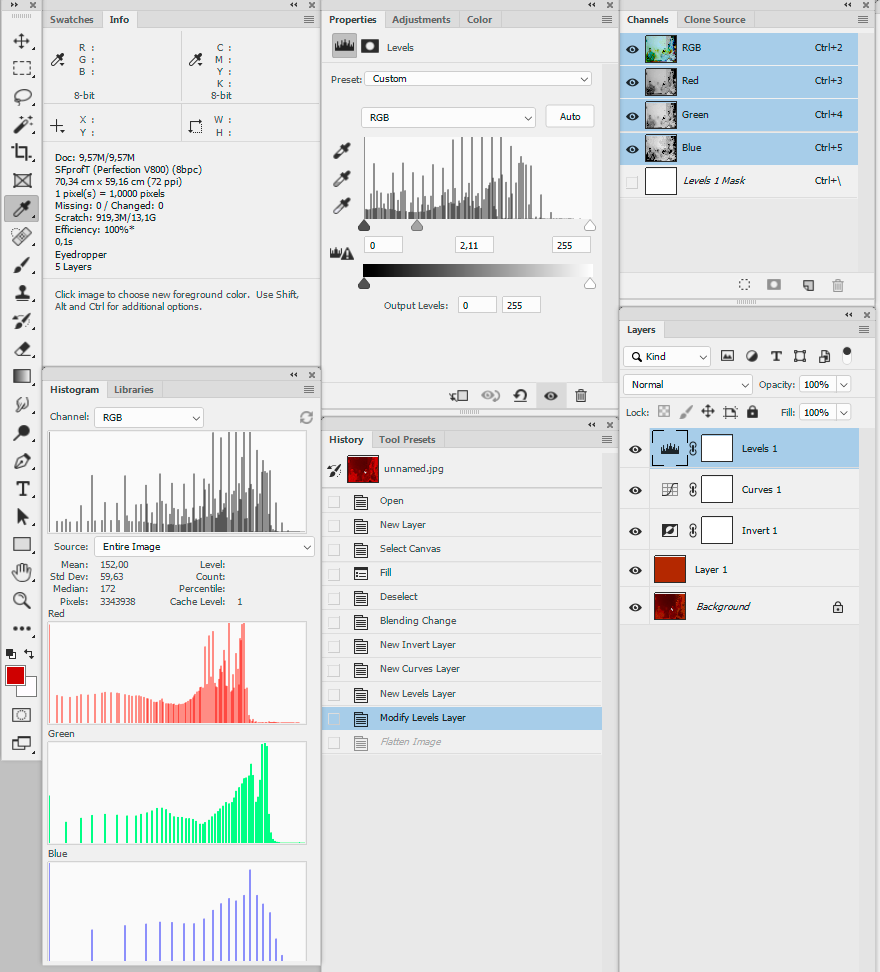
Using the method described here – Re: Colour Film Negatives – I was able to get reasonably good colors from the negative you posted.
The method involves sampling the color of the film base and filling a new layer with it.
A lot of retouching is needed, with the spot healing brush, clone stamp, and possibly Content aware fill.
The scanner used seems to be an Epson V800, which is one of the best "Prosumer" flatbed scanners, and probably good enough for your requirements.
I suggest that you rescan the negative as a 16-bit tiff, making sure to capture all the shadow detail, as well as highlight detail.
The scan you posted has clipped shadows.
The screenshot below outlines the steps taken.
And the histogram illustrates what happens to image quality when you edit a jpg.
Copy link to clipboard
Copied
The comments are incredibly helpful.
The fellow who owns the negative that he emailed as attachment stated:
"Here is the original raw scan with infrared information built in. I use Silverfast HDR 8 to edit these files because I scanned them with Silverfast 8."
I did have expectation until I inverted in Camera Raw noticing the compression artifacts.
I will email the fellow stating that with the 'JPG file compression artifacts it is impossible to restore this image.' And request that he scan at '16-bit tiff, making sure to capture all the shadow detail, as well as highlight detail' at 9600dpi.
Thanks for helping out on the start of this project - acquiring a workable scan.
Copy link to clipboard
Copied
Epson (as well as other scanner manufacturers) claim that their scanners can scan at very high resolutions, like 9600 ppi.
Tests have shown (as well as my personal experience) that the true resolution of these scanners is around 2200 ppi.
So I suggest that you request a scan in 2400 ppi. 9600 will produce a huge file with no gain in quality.
Copy link to clipboard
Copied
Hello
I requested the uncompressed 16 bit tiff from the owner. I doubt that will be accomplished. I now will need to work on this less than ideal photo.
What is the most challenging is how to approach reclaiming the face from this group especially these two subjects, included here.
I don't mind spending hour to restore if that is the duty however I wonder if there is another method ofther than using the clone tool / hardness 4%/ opacity 30%.
If I am able to collect a reasonable facial tone for the subjects than I could see making additional corrections with the brush tool.
If there is a better method please let me know.
Thanks!
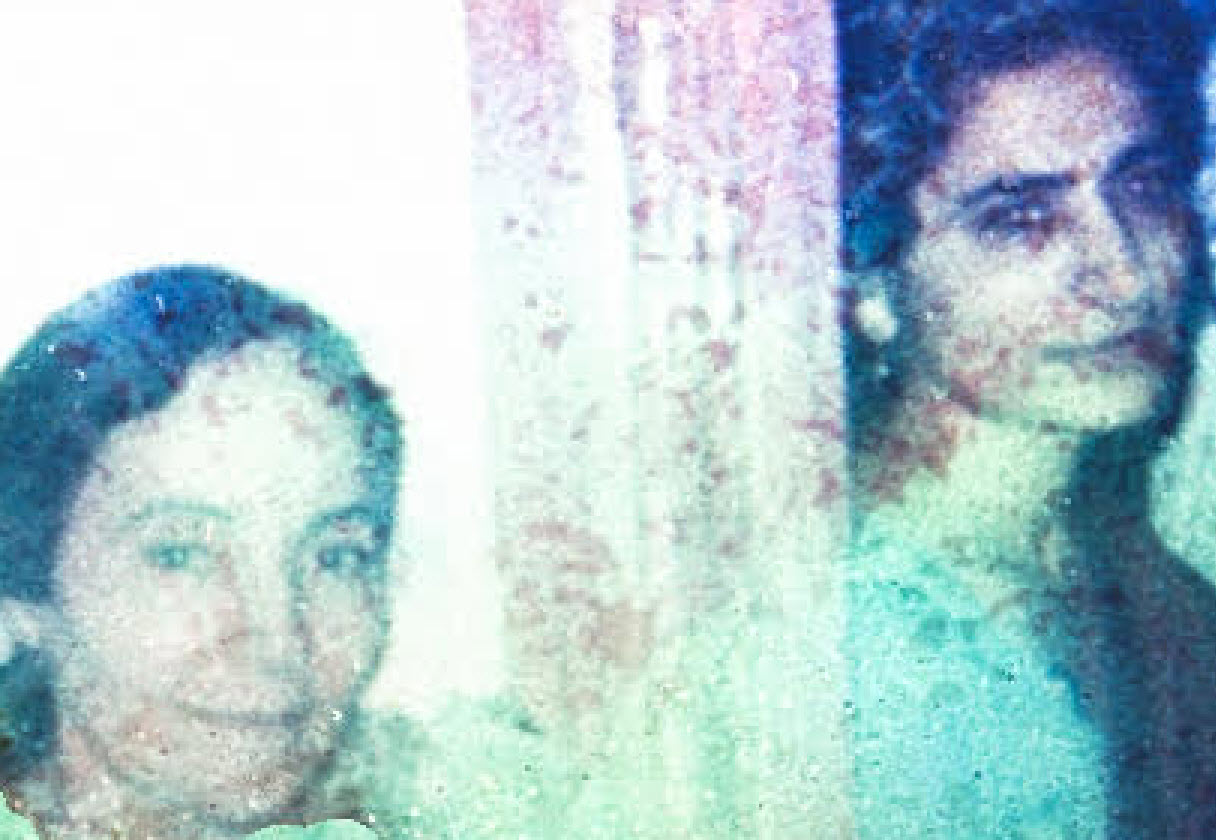
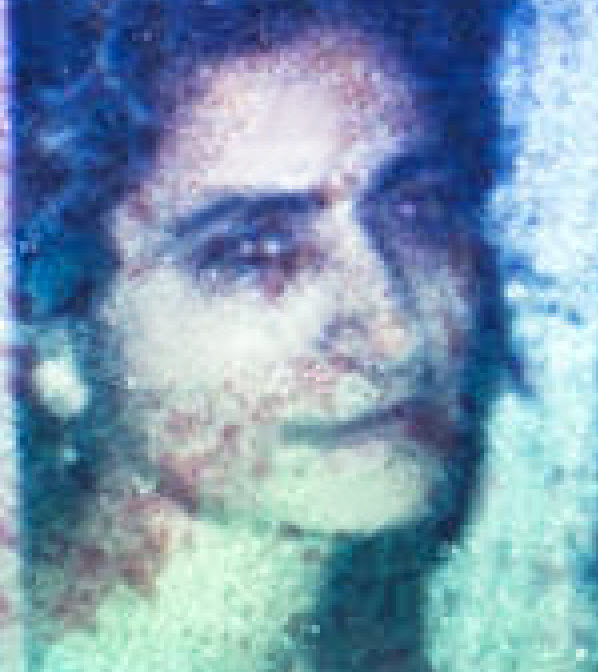
Close up the extend of the damage is - formidable.
Copy link to clipboard
Copied
Hello Ezad, The photo is so dim and damaged that the repair will end up looking more like
a painting of the ladies. This is after about 8 hours of careful work with the smudge tool, air brushwork and redrawing all of the defining lines of the features and outside of the face. I did a quick repaint of this and put it into the filter of posterize and did not try others that might have worked better. Perhaps you can get an idea of coloring. So sad it is close to a total loss. Do not
give up - at least make a crosshatch (filter) sketch of it and color it. Best wishes, JH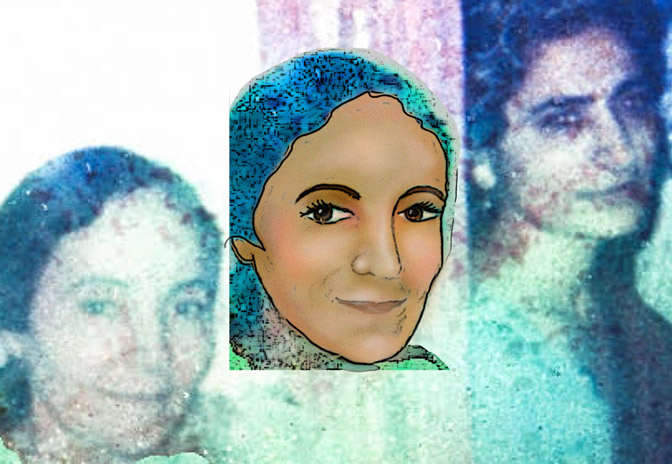
Copy link to clipboard
Copied
With gratitude the effort and your comment on this damage. The range of impossible possibilities to reconsturct the faces is what I needed to understand. I needed an idea of what work could be done and what that work would yield. At least I have a starting point if I can sustain inspiration to nibble away with the various tools. Thank you.
Copy link to clipboard
Copied
qua dep
Copy link to clipboard
Copied
Lots of manual labor. I'd start by recovering more natural colors with a global adjustment and take it from there with clone and paint operations.


