Participant
September 26, 2023
Answered

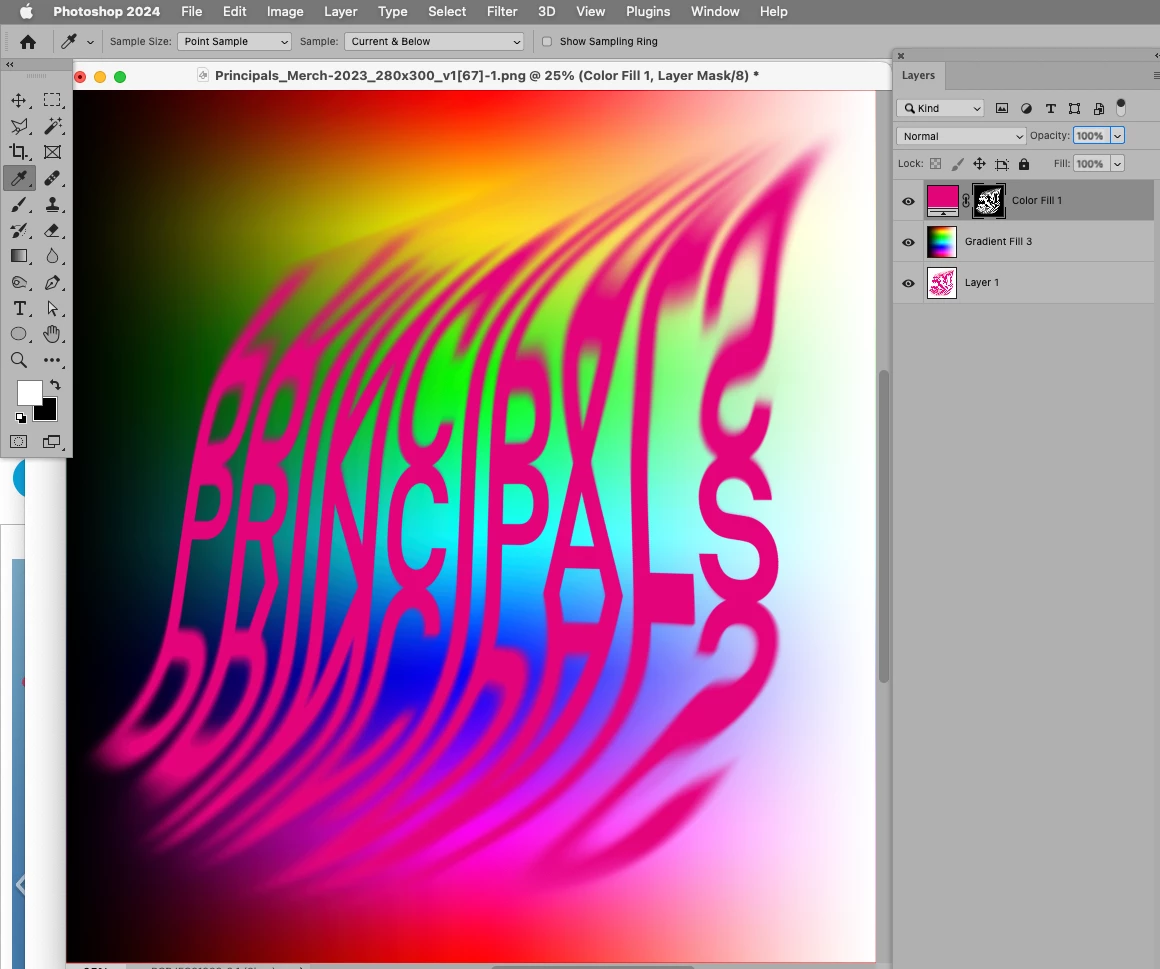
Please help make background transparent even through the faded coloured areas

  • September 26, 2023
  • 3 replies
  • 1025 views

Is it possible for someone to explain how to extract the colour from this image so it has a transparent background in photoshop please? The faded areas need to be able to placed onto any colour background without the white behind it.

This topic has been closed for replies.
Correct answer c.pfaffenbichler

In this case the green Channel seems practically ideal. 

Load it as a Selection by cmd-clicking the Channel in the Channels Panel, invert the Selection (cmd-I) and create a Solid Color Layer (Layer > New Fill Layer > Solid Color). 

3 replies

Participant
September 27, 2023

Hello, There is probably a better and easier way to do this than the way I have solved this problem for several years, but I will try to explain the method that I have used to work around this issue, and maybe someone will chime in and tell us both the best way to accomplish this. I'm in my late 60s and have piddled around with Photoshop for a while with very little guidance, so I can assure you there is probably a better way.


First, is your faded text in a layer over the white background? If so, you have a simple solution; otherwise, it will be a bit more complicated. 


If the white color is the background layer, and the text is a separate layer, from your layers menu, you can select the background layer and remove the color or turn off the view of the background, leaving your text layer intact. Then, if you wish, you can add a new layer with a new color. To turn off the view of any layer, click on the eye symbol to toggle it off or on in the layers menu.


By now, someone who is a pro is probably laughing, but I am more of a do-it-yourself type and definitely not a pro. I am probably more of a beginner with a few extra skills that I have picked up or made up along the way. 


The other option is to use the select tool to select all of the white areas by doing additive selections around and in between the text and deleting it, which will make the image transparent. The problem here is that the faded area of your text will probably still have white sections, which you could adjust the transparency of with a lot of patience.


However, another option might work. Once you select all of the white, you can invert your selection so that you only have the purple color selected (you will need to do a little additive selection to grab the lighter faded purple colors). It will be a tedious job, but maybe some of the newer tools will make it easier. Once you have the purple color selected, (be sure to zoom in to grab the pixels and prevent making ragged edges), then you can copy and paste that text to a transparent canvas.  


Probably the easiest and most logical solution would be to recreate your text, remove the background, and have only the text in one of your layers and your various colors as separate layers that you can turn on or off before exporting each view as a final image.


I'm looking forward to seeing what an expert says, and I hope they aren't laughing too hard.  


Good Luck!


Participant
September 27, 2023

Thank you so much Terry, 


Trevor Dennis has the exact outcome I needed. 

c.pfaffenbichler
Community Expert
c.pfaffenbichlerCommunity ExpertCorrect answer
Community Expert
September 26, 2023

In this case the green Channel seems practically ideal. 

Load it as a Selection by cmd-clicking the Channel in the Channels Panel, invert the Selection (cmd-I) and create a Solid Color Layer (Layer > New Fill Layer > Solid Color). 

Participant
September 27, 2023

thank you so much, how do I make the layer of the magenta text with the fading its own layer with a transparent background though?

Trevor.Dennis
Community Expert
Community Expert
September 27, 2023

Select the pink graphic layer, and Ctrl click the green channel icon which will load it as a selection.


Add a layeer mask to the pink graphic layer, which will actually hide the graphic, so use Ctrl i to invert the mask.

Job done.

My green highlight is the Add Layer Mask icon.

Trevor.Dennis
Community Expert
Community Expert
September 26, 2023

It's always worth trying blend modes


Blend If in Layer Styles would work quite well in that situation.  Drag the whites slider in to the left, and hold down Alt/Opt to split the two parts of the slider to feater the transition.  I am not normally a fan of Blend If, but it's dowing a decent job here.


Participant
September 27, 2023

I wish your reply were visible to me before I made mine. I'm not sure why it wasn't, but I'm new to the board, so forgive me, please. This is very helpful. Thank you.