- Home
- Photoshop ecosystem
- Discussions
- Re: Problem changing arm and hand fill color on Tu...
- Re: Problem changing arm and hand fill color on Tu...
Problem changing arm and hand fill color on Tull puppet
Copy link to clipboard
Copied
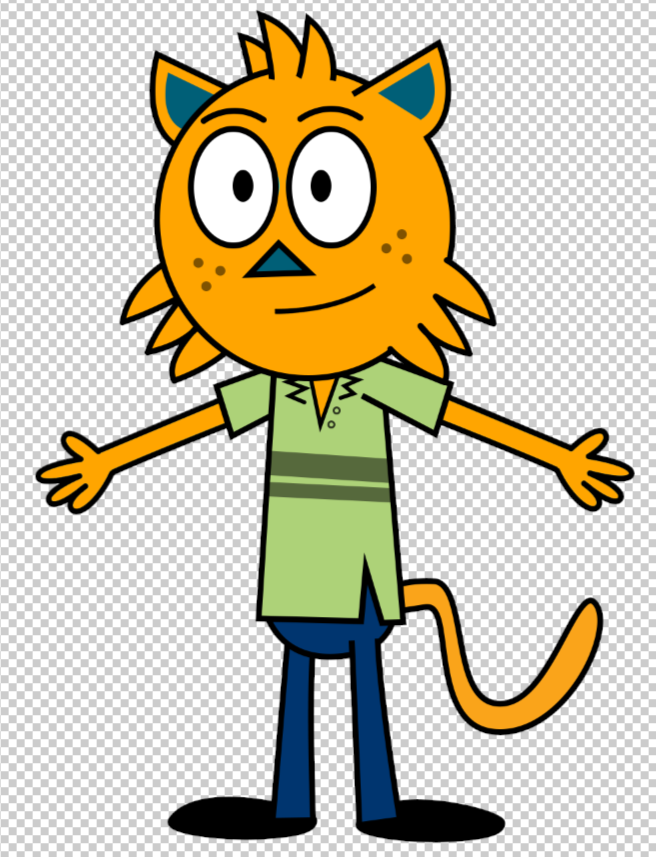
TheOriginalGC an Adobe Community Professional said maybe I should try to look for an answer here. I am working with the free puppet Tull and I decided I wanted to change the color of Tull to Orange (FFA500). Had no problem doing that on the tail and head, see attachments. But when I got to the arms and hands (the layer called Shape 10 as an example) the fill options are greyed out. I have searched forums, youtube, etc but can't seem to find how to edit the color of the arms and hands for Tull. Any help would be greatly appreciate.
Explore related tutorials & articles
Copy link to clipboard
Copied
I do not understand well what you want to ask. From screenshot is clear that selected layer is pixel based layer while layer above is shape layer. Shape layer will accept color change using double click on layer's thumbnail then select color in color picker while for pixel based layer you can use Layer > Layer Style > Color Overlay to recolor layer content.
Copy link to clipboard
Copied
Copy link to clipboard
Copied
Adding to what Bojan has told you, Shape a pixel layers are fundamentally different. A pixel layer is like a photograph. Every pixel can be a different colour. A shape layer is a vector and enclosed within a workpath.
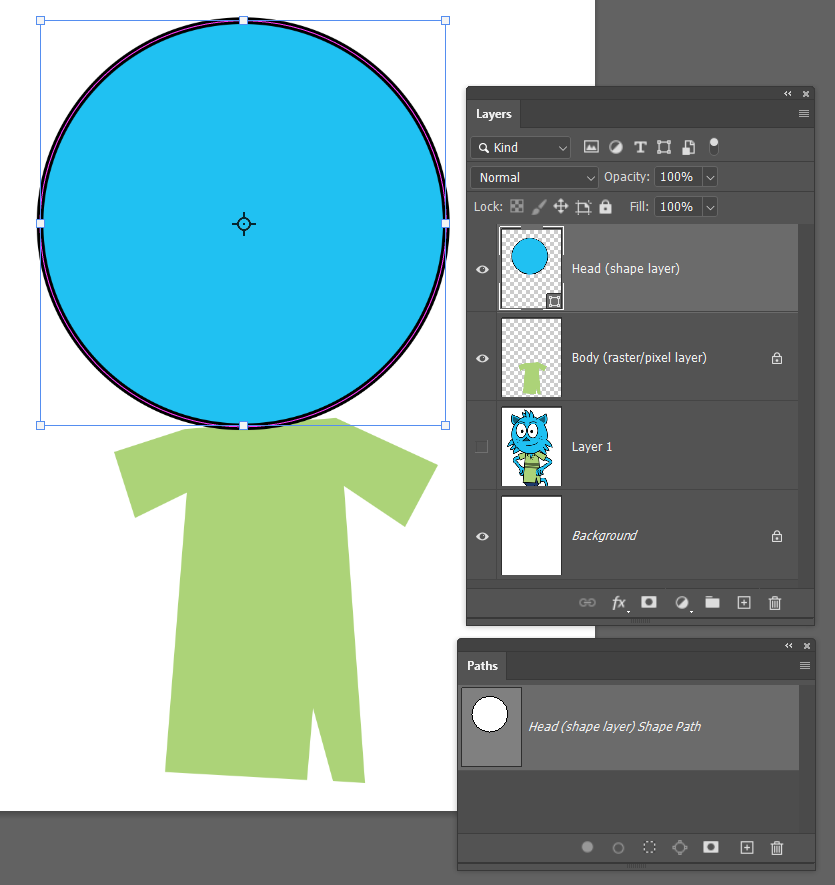
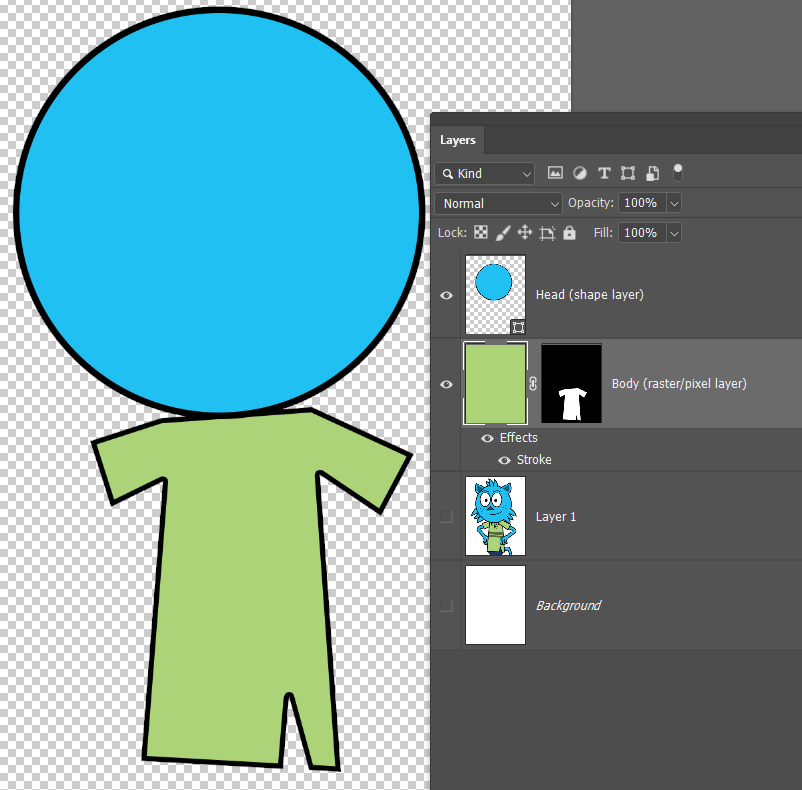
In the quick mock up below the head layer has a small square icon in its bottom right corner showing it to be a shape layer. Note it is represented in the Paths panel. The body is an ordinary raster/pixel layer.
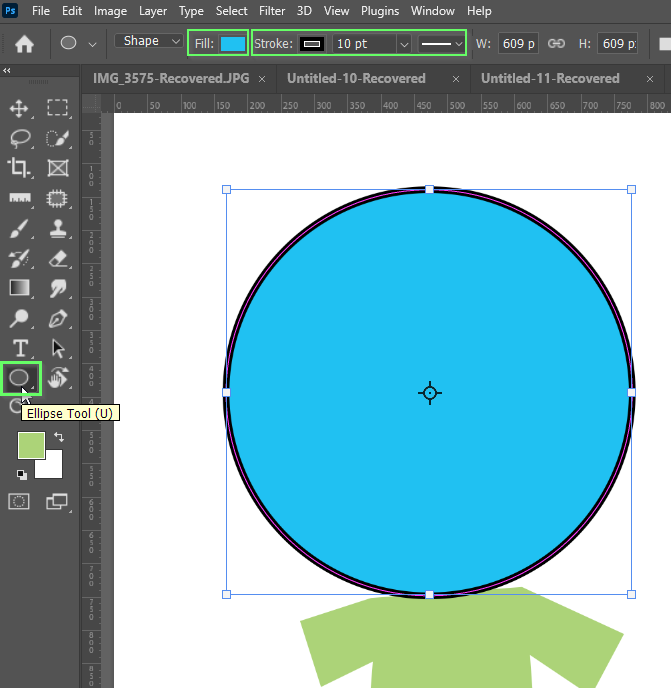
To change the colour of a shape layer we must select it and also select any of the shape tools in thhe Toolbar. It's color options will then appear in the Options bar at the top of the screen. Note we can also give a shape a stroke, which in this case is coloured black and 10 points thick.
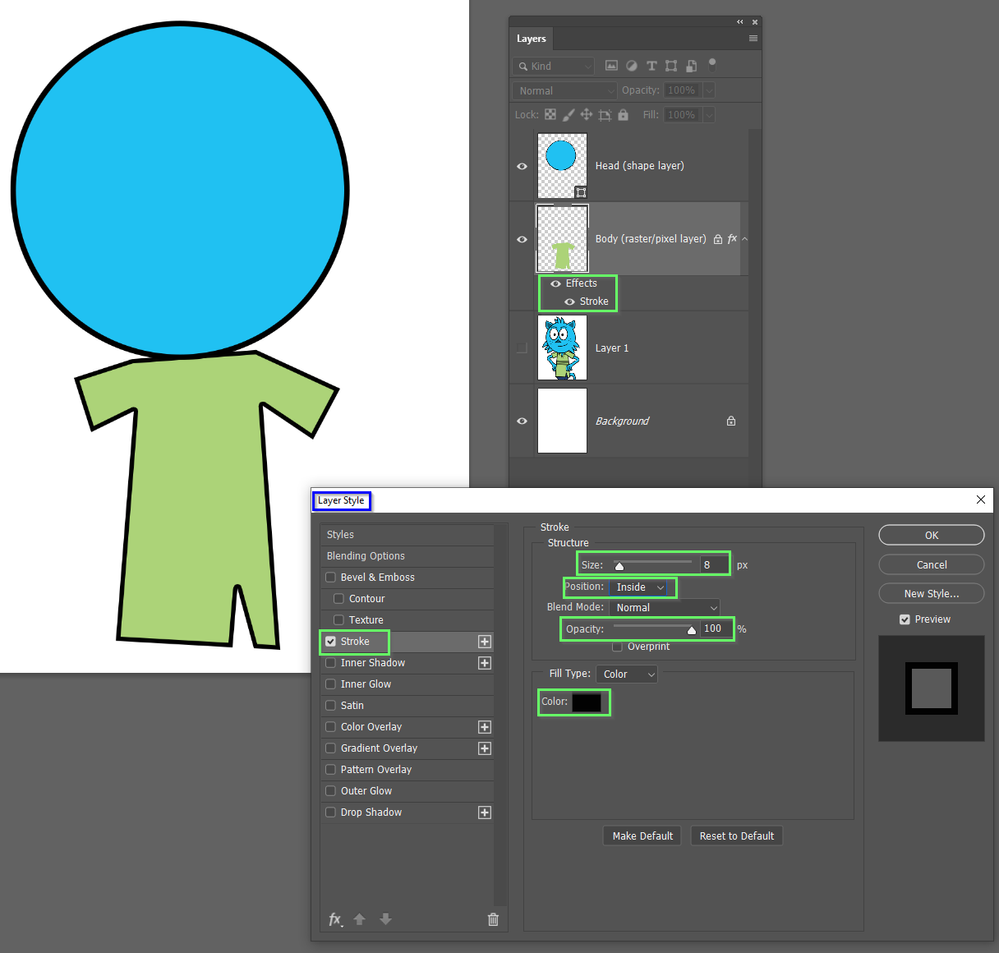
We can give the body layer a stroke by double clicking the layer to open the Layer Style panel and chosing Stroke. We have options to change color, stroke thickness (in pixels) whether the stroke is applied to the inside, outside or centre, and it's opacity.
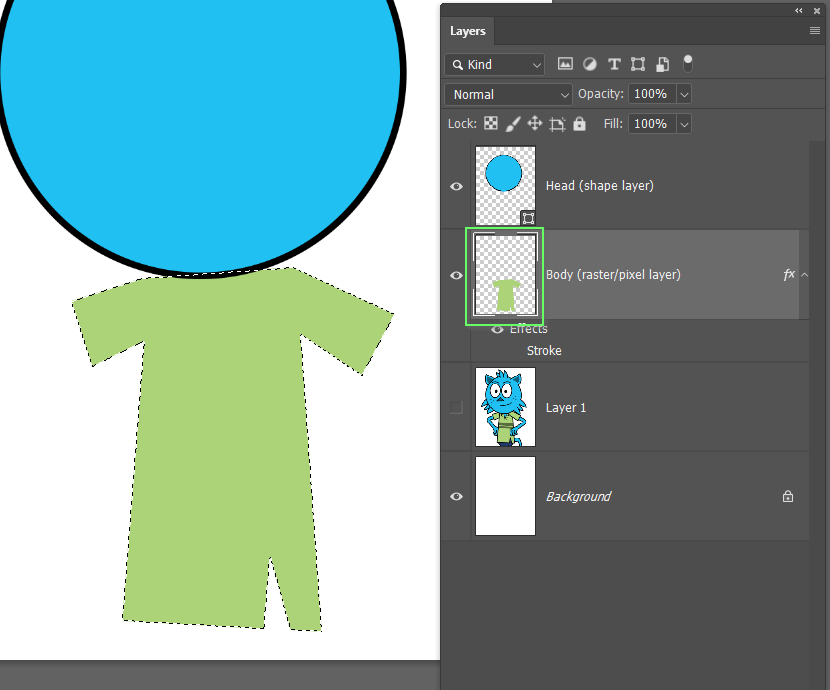
We can't just fill the body layer with a new colour because it won't be restrained to the shape of the body. There are several ways to restrain the fill
1) We can Ctrl/Cmd click the layer's icon to select its outline
2) we can lock the layers opacity by clicking is Transparency icon at the top of the layers panel. You will see a padlock icon on the layer after doing this
3) add a layer mask that is constrained to the body outline. The entire layer will be filled with colour, but only the pixels coloured white in the layer mask will be visible
It sounds like you are at the start of your journey learning Photoshop. Many of this forum's regular posters have been using Photoshop for many years, but we still love using it, and we are still learning new things, so good luck to you on your journey, and please come and ask for help any time you need it.
Copy link to clipboard
Copied
Thanks Trevor for the great mock up. I see what your talking about and that was very helpful. I was able to add fill and stroke on the arm and hand. The arm looks decent but the hand is a train wreck. it makes the fingers a bit puffy and the wrist still gets the line through it. I probably need to tweak it futher by trying the other options there. I wondering if it's possible to merge the arm and hand without affecting the rigging once it syncs back over with character animator. I am new to this and your help is very appreciated.
Copy link to clipboard
Copied
Can you show us a screen shot of your full workspace showing the layers panel? Make it full resolution — unfortunately the forum software has a problem with images at the moment, and it is possible that the only way to show us a decent sized screen shot is to save it to disk, and drag the JPG file to the Drag & drop here window at the bottom of the reply window.
It might be helpful to see a fully zoomed in screen shot of the hand and fingers.
Copy link to clipboard
Copied
I was able to color it by selecting each individual layer and using the paint bucket tool. It seems that it sync'd up okay with Character Animator also. I think, I'll have to do some testing. Thansk Bojan and Trevor for the information you provided. It made me explore around and try a few different things. So hopefully that will work well. See the attachement. 🙂
Copy link to clipboard
Copied
Hey, that's great!
Try the layer style > stroke with inside, outside and centre with different line thicknesses. That might help you finesse the fingers (but they look OK to me).
Copy link to clipboard
Copied
I did get the fingers worked out also. I'm very pleased with the outcome. Maybe at some point I'll be able to make my own puppet. Thanks again Trevor for your help. I'm new to the community and look forward to learning more.
Find more inspiration, events, and resources on the new Adobe Community
Explore Now
