Copy link to clipboard
Copied
I have been using this tutorial for quite some time to swap faces in Photoshop
Swap Faces In Photoshop - YouTube
I have never had any trouble with it until recently. I know that there is a newer tutorial but this one
still works for me. I am using Photoshop CC 2018 and just updated it yesterday. While part of the
problem is with Auto Blend, all of a sudden I am having trouble with the steps leading up to it.
I have three layers. First layer is the "face", second layer is the "body" and the third layer is a copy
of the "body" layer. I position my "face" layer in the right spot, then "control click" (on PC), contract
it five pixels, then go to the body layer and hit backspace. As in the tutorial, it deletes the pixels in
the selected area but also there is some pixels being deleted in the hair area and other places that
were not selected. I have never had this happened before. I was wondering if you can tell what is
wrong without a screenshot. If not, I will make one up. (I have tried contracting between 2 and 20
pixels but I still get transparent areas around the picture even though it wasn't selected.
Then when I do auto blend, more than half the face is transparent. I have tried all the different
methods of auto blend and all options. The layers are in normal blend and I haven't changed any
settings that I know of. I have done this a hundred times with no problem until the recent updates.
So to sum up
1. Hitting "backspace" or "delete", deletes pixels in the selected area but also pixels not in the
selected area.
2. Auto blend doesn't seem to work. I don't know if this problem is related to the problem above.
Thanks.
 1 Correct answer
Hi Billy,
From the looks of it, you have a feather applied to your selection tool. The lasso perhaps.
Check the tool options bar at the top and set the feather to 0 if you do not want the soft feathered edge which can extend beyond the selection line.
Note: The "marching ants"/selection boundary display is displaying the point in your selection when the transparency of the selection reaches 50% or higher. In a feathered selection, the outer edge of the selection gradually drops from 100% -> 0% sel
...Explore related tutorials & articles
Copy link to clipboard
Copied
I usually do pictures with my grandchildren but I don't want to put their pics on the net so I grabbed some from
Google to show what I am talking about.
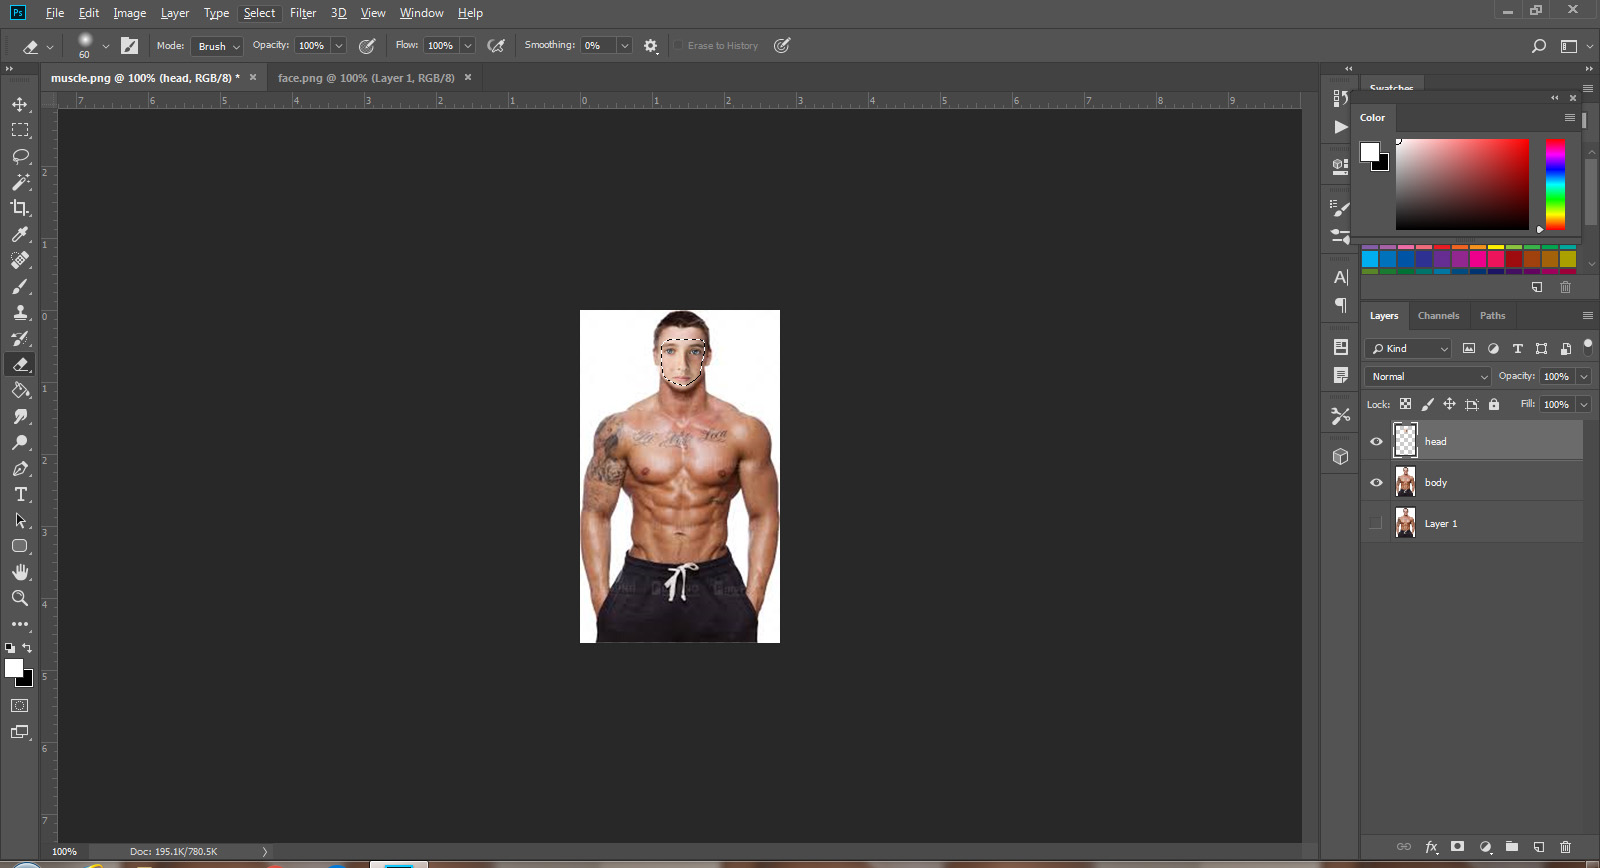
The first one is the setup before I hit backspace.
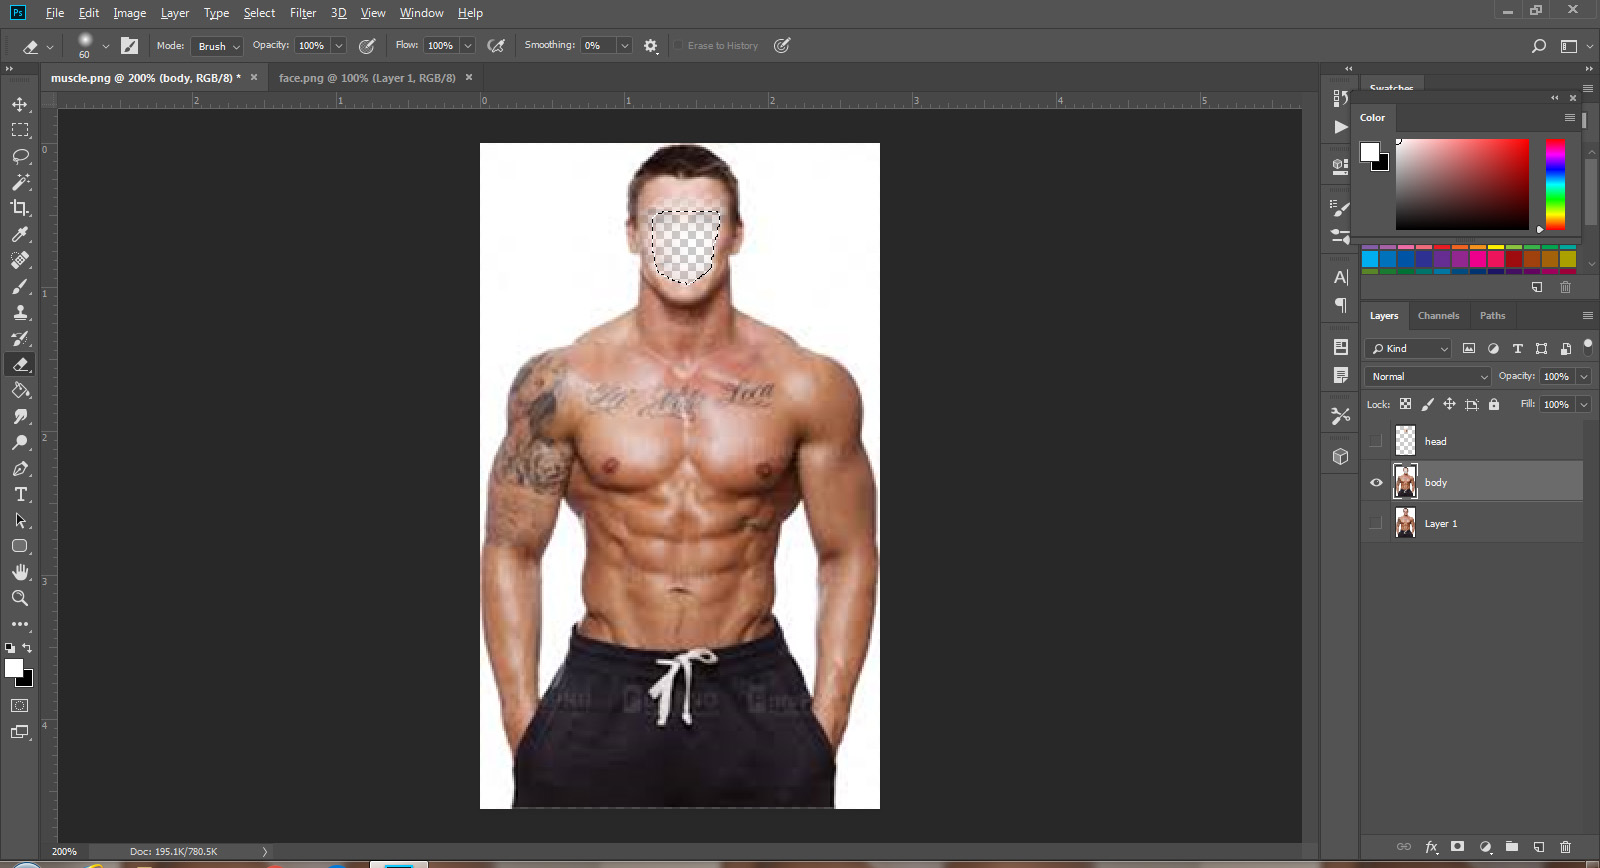
The second one is after hitting backspace. I put the view at 200 percent so that you can
see that the transparent area is above the selected area as well. Usually this area is higher.
I tried it by contracting everywhere from 2 pixels to 10. Same result.
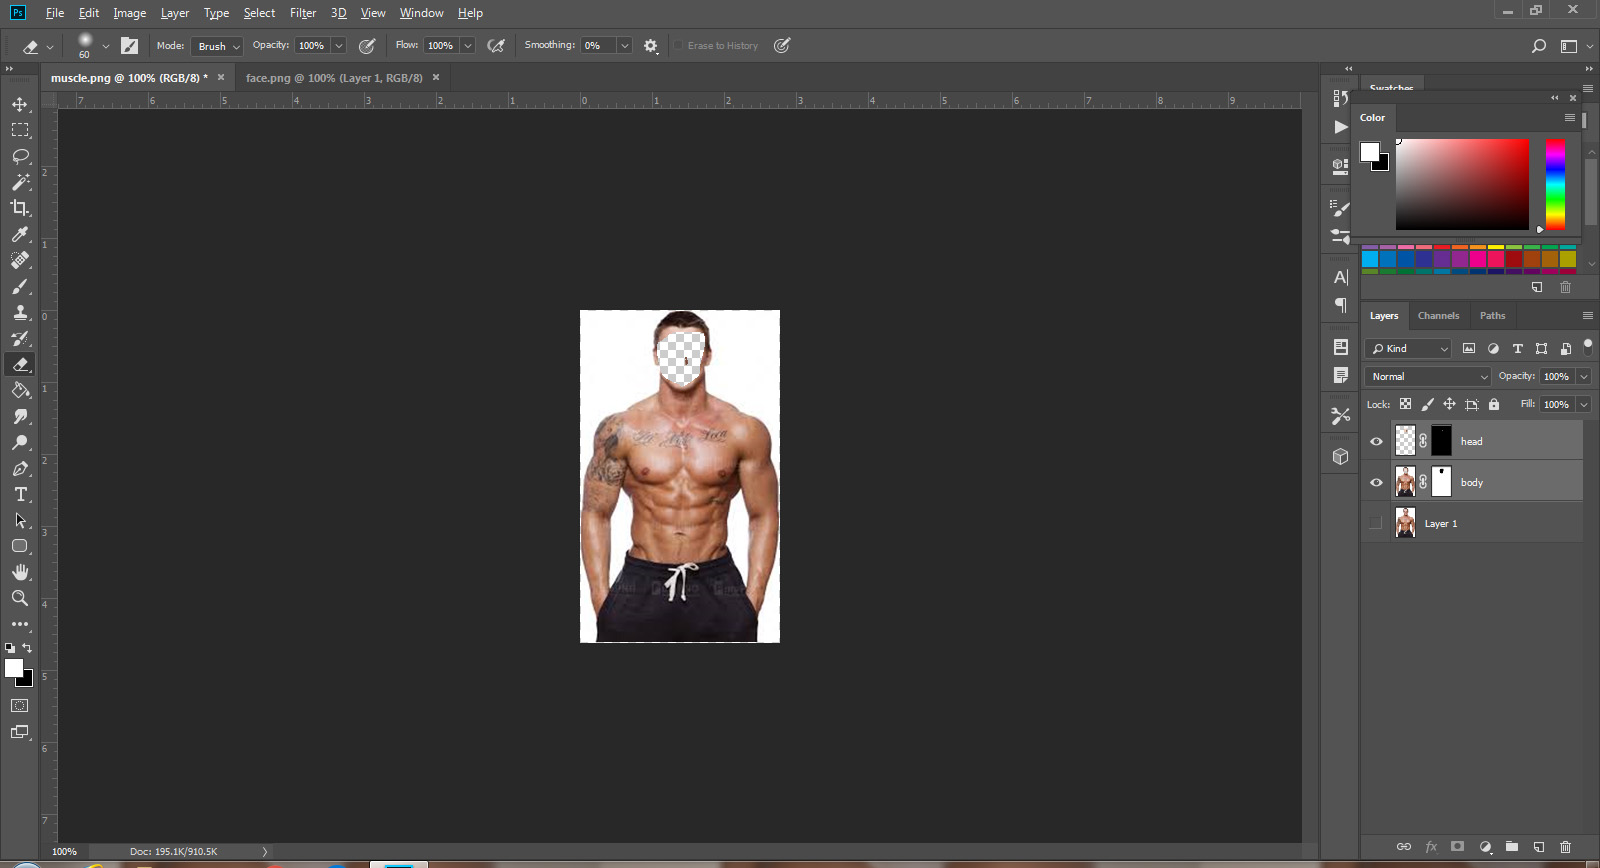
The third picture is after auto blend without content aware checked.
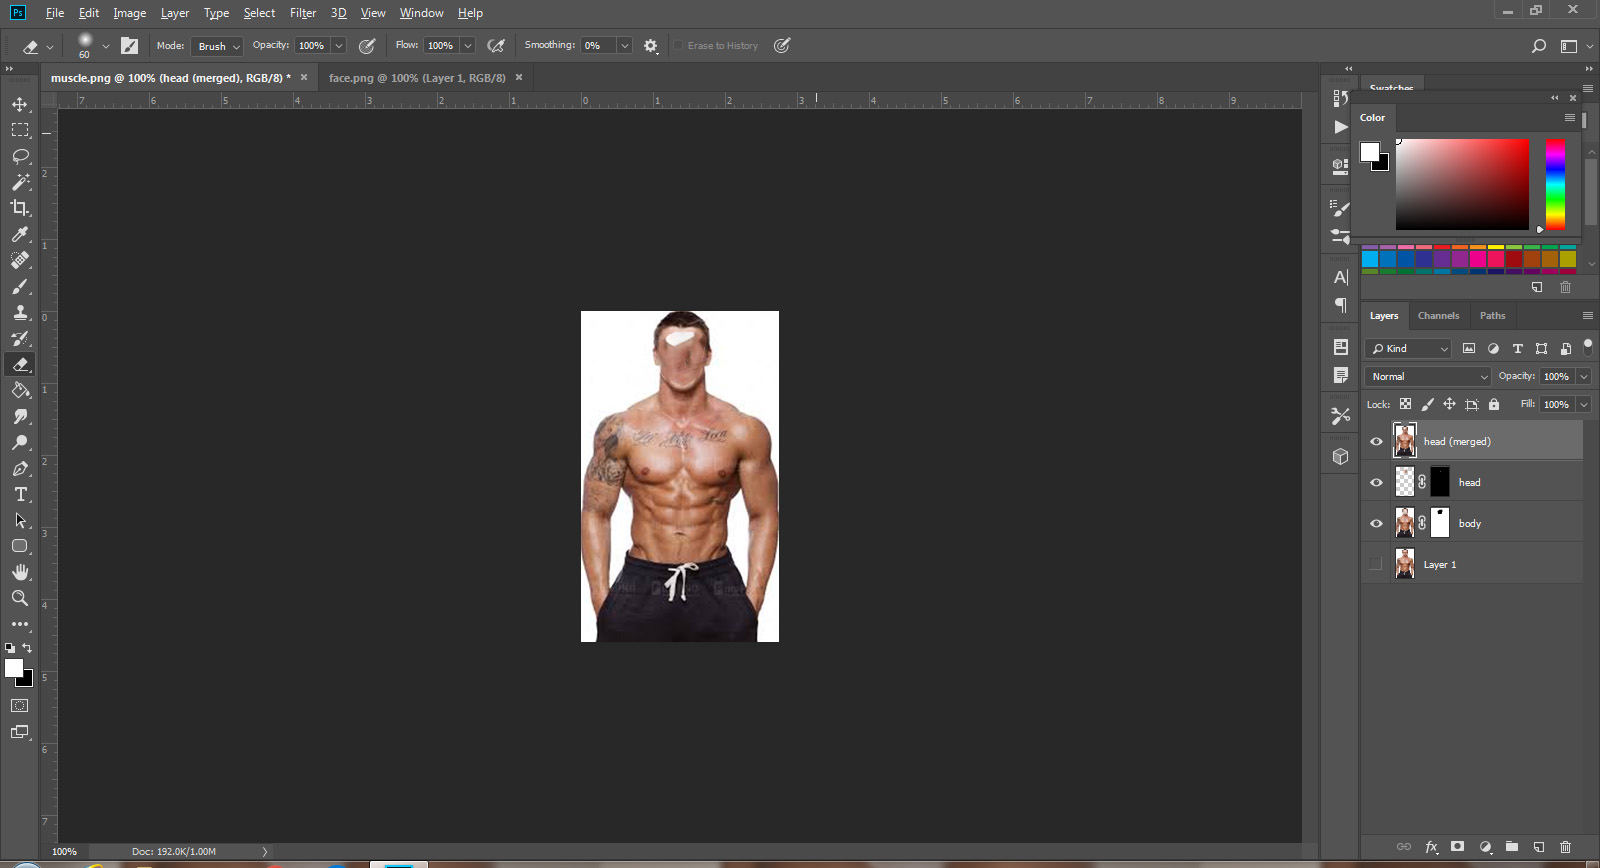
The fourth picture is after auto blend with content aware checked.
As I said in my first post, I have been doing this for over two years and never had this happen.
I just wonder if something has changed.
Copy link to clipboard
Copied
second image after hitting "backspace" . Transparent area is outside selected area. Usually it is higher
and separate.
Copy link to clipboard
Copied
Here is the third image after auto blend. 
Copy link to clipboard
Copied
Last one. Auto blend with content aware checked.
I do not usually use content aware and it works great
Copy link to clipboard
Copied
Hi Billy,
From the looks of it, you have a feather applied to your selection tool. The lasso perhaps.
Check the tool options bar at the top and set the feather to 0 if you do not want the soft feathered edge which can extend beyond the selection line.
Note: The "marching ants"/selection boundary display is displaying the point in your selection when the transparency of the selection reaches 50% or higher. In a feathered selection, the outer edge of the selection gradually drops from 100% -> 0% selection. Parts that are selected with less than 50% transparency will not be within the marching ants boundaries but are still selected if only partially.
Let us know if you have further trouble.
Regards,
Pete
Find more inspiration, events, and resources on the new Adobe Community
Explore Now