
How to select objects in Photoshop the easy way: 🔎 Quick Tip

Did you know Photoshop can isolate and select objects in an image for you? You don't have to follow a slow and difficult selection process when compositing. You can easily select a car, animal, person, or other object in seconds and shorten your workflow significantly. Follow the steps below, or watch the video and follow along.
❶ Choose the Object Selection tool
Select the Object Selection tool in the application toolbar. If you don't see it, you can long click on the selection tool that is showing, (either the Quick Selection Tool or the Magic Wand Tool) and choose it from there.
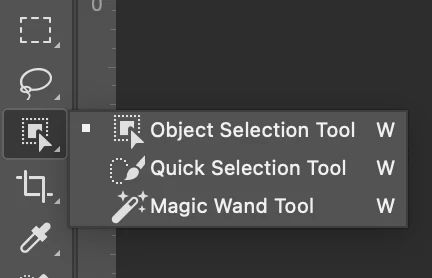
If you don't see the tool in your toolbar at all, you can make it visible again using instructions found here: Find missing tools in Photoshop. You can also access the Object Selection Tool from the toolbar in the Select And Mask workspace.
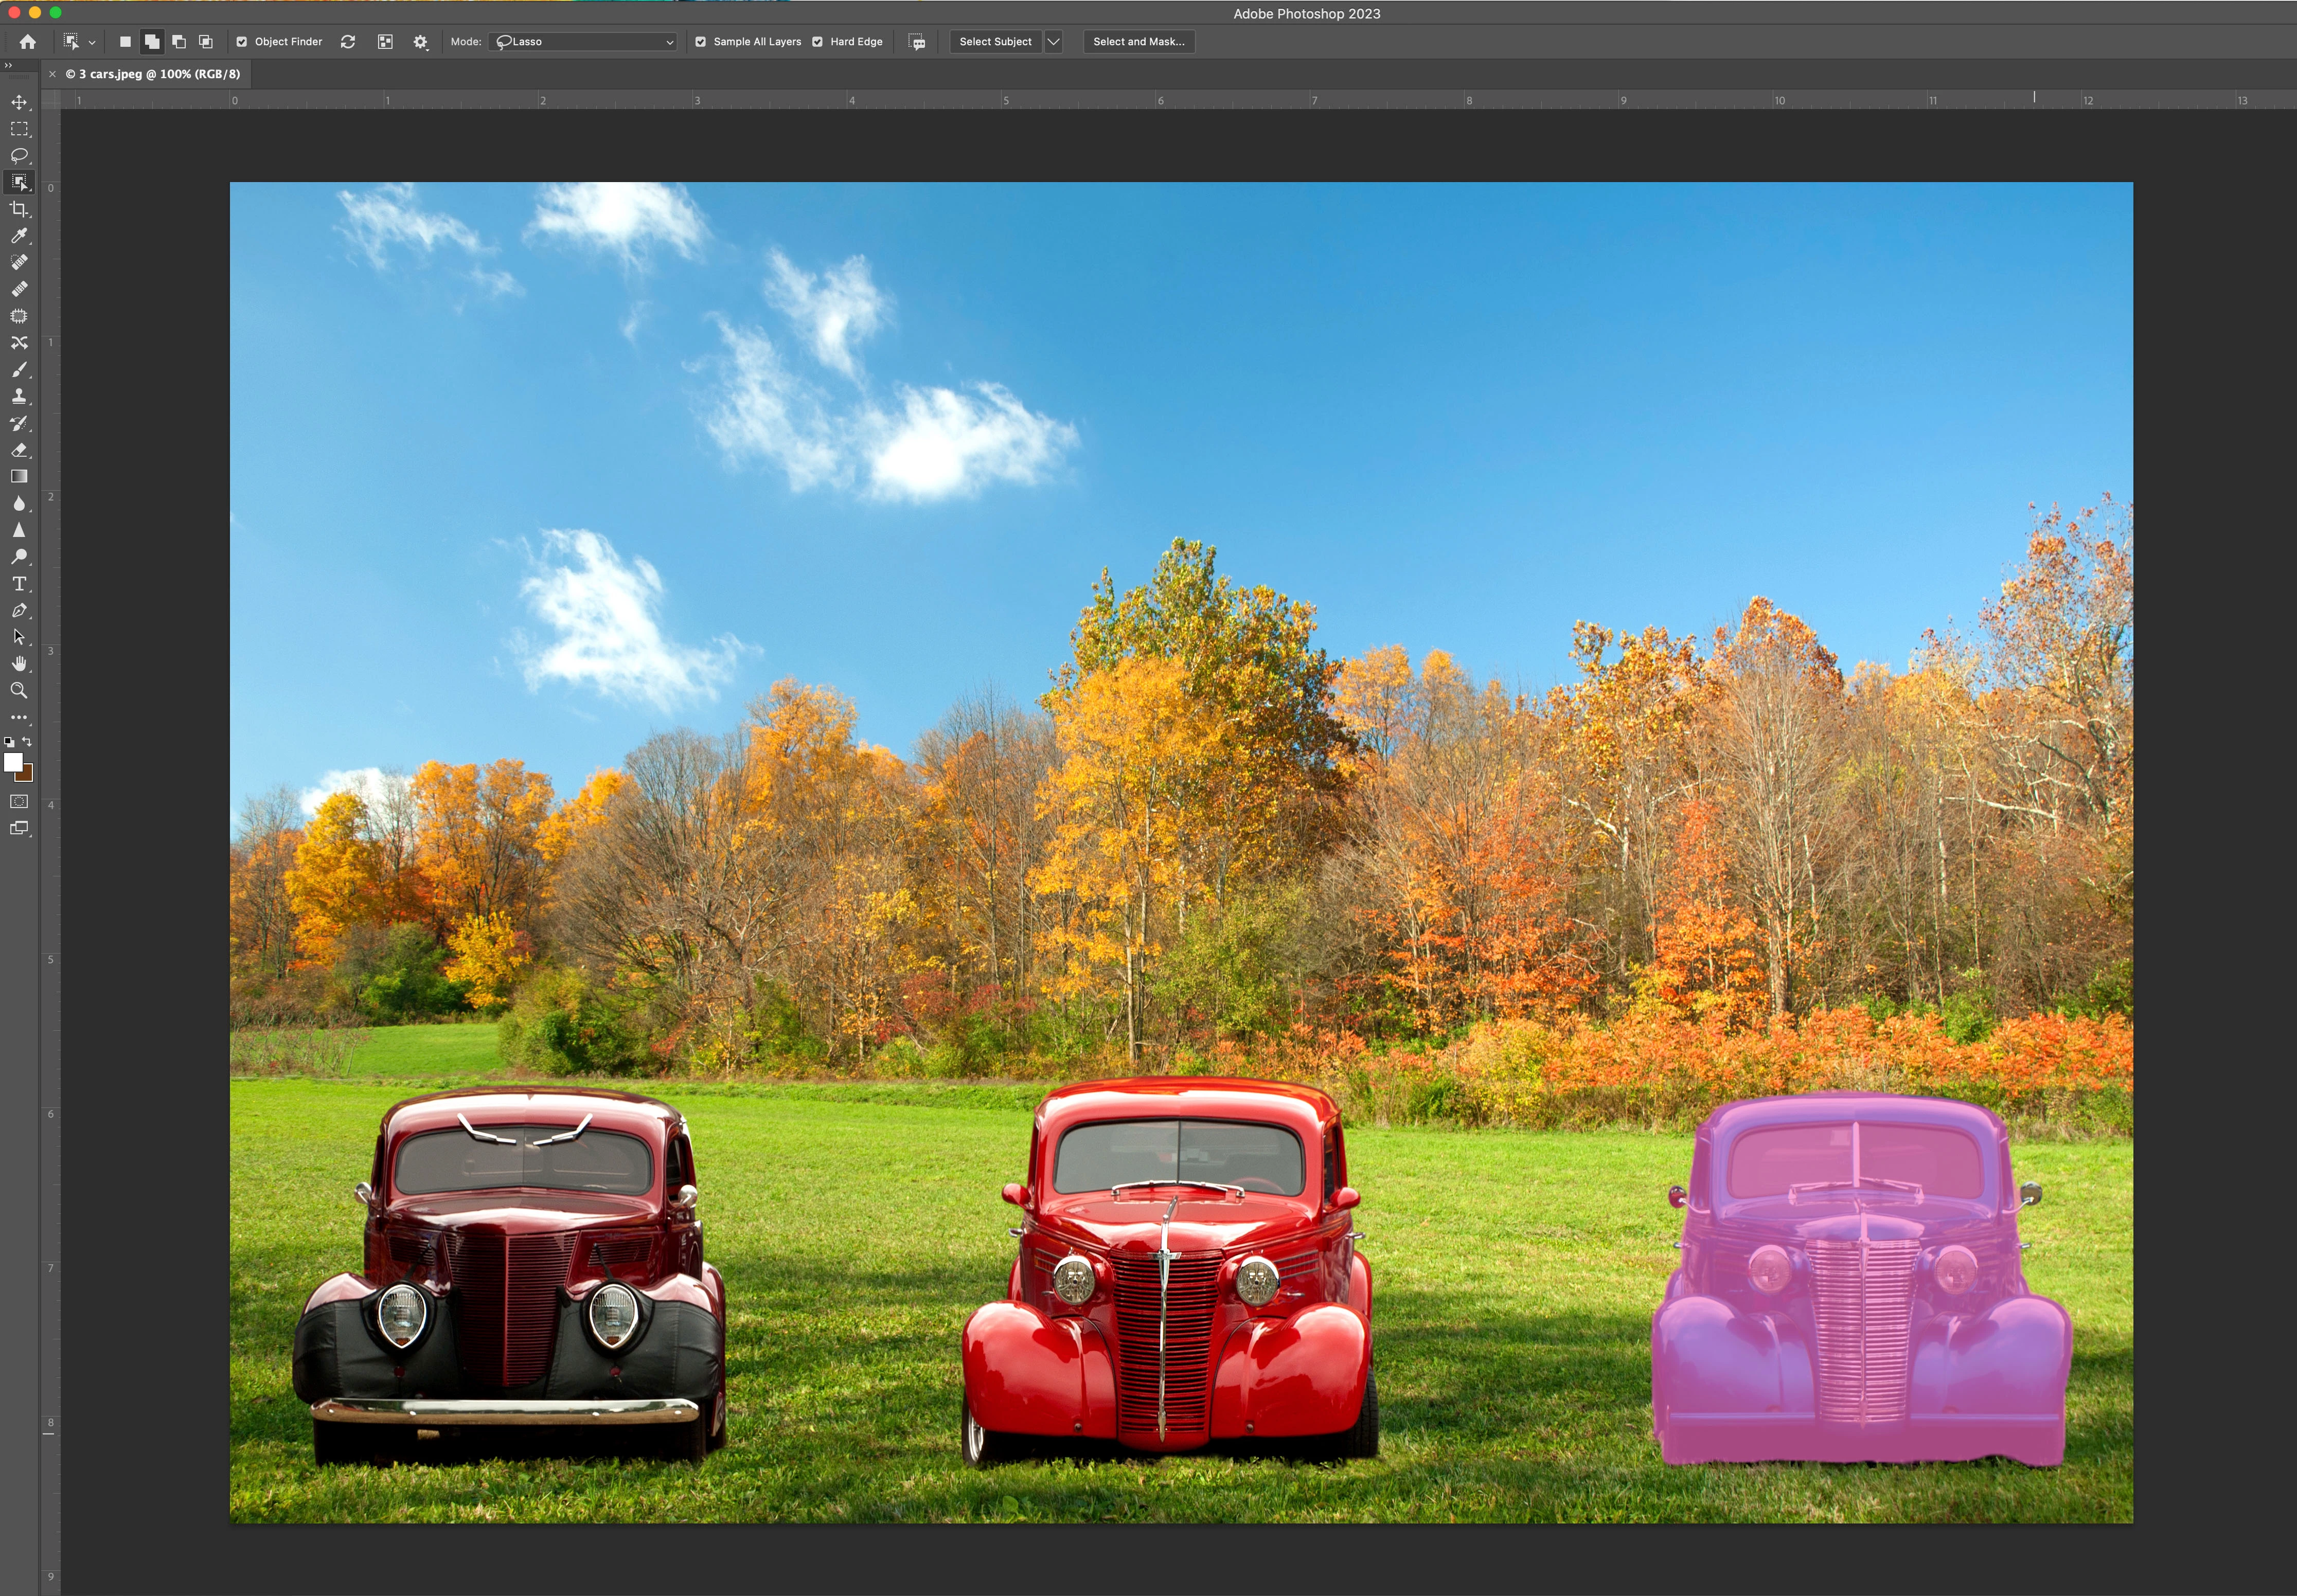
❷ Choose object selection options
In the options bar at the top of the app, you can choose object selection options:

Object Finder: Ensure Object Finder is enabled if you want Photoshop to automatically look for objects.
Mode: Choose whether you prefer to make a general selection with the Lasso Tool or the Rectangle Tool if the Object Finder is not checked.
Sample All Layers: Enable the Sample All Layers option if you want to create a selection based on all the layers. If you only want to sample the currently selected layer, then uncheck the option.
Hard Edge: Enable the Hard Edge option if you want to select hard boundary edges.
❸ Hover and select
Now, just hover the pointer over an object in the image and Photoshop will automatically highlight objects as you pass over them. Once the object you want to select is highlighted, click to make the selection.
If you chose to turn off the Object Finder, then you can select an object by dragging a rectangle around the object (if you chose the Rectangle tool in the options), or by making a rough selection around the object (if you chose the Lasso Tool in the options). Photoshop will make a more precise selection for you automatically.
Note: This is done with the Object tool chosen in the toolbar. Do not click on the Rectangle Tool or the Lasso tool in the main toolbar. The selection you made in the options determines the method of selection. All you need to do is make a rough selection, and Photoshop does the rest.
❹ Add or subtract from the Selection (Optional)
Once you make a selection, you might still want to add to or subtract from the selection. You can use the selection options found in the options bar, New, Add To, Subtract From, and Intersect With and select the area to add or subtract to make it perfect.
To add to the selection:
- Select Add to in the selection options or hold down the Ctrl (Windows) or Shift (macOS) key
- Hover over and click on the missing object or make a selection around it
To remove areas from the selection:
- Select Subtract From in the selection options or hold down the Alt (Windows) or Option (macOS) key
- Hover over and click on the section you want to remove, or draw an exact rectangle or lasso around the area you want to subtract.
- As an alternative, you can Enable Object Subtract from the additional options (gear icon in the options bar). Object Subtract is like inverting Object Selection. It is useful for removing the background regions inside the current object selection.
❺ Additional Edge Refinement (Optional)
If you want to refine the edges more, view the selection against different backgrounds, or view it as a mask, click Select and Mask in the options bar. For more information on how to use the Select and Mask workspace, see Select And Mask workspace.
Now What?
If you want to see more Object Selection and Automasking in action, watch here: Hover Automasking.
To learn more about making selections, you can visit Make selections in your composites.
Once you make a selection, here are a few things you can do next:
Copy the Selection and paste it into a new layer Move, copy, and delete selected pixels
Move or Delete the Selection Move, copy, and delete selected pixels
Use the selection to create a mask Add a layer mask
Edit the selection Use Adjustment layers
Select the inverse of the selection using the shortcut Ctrl I (Win) or Cmd I (Mac) or Select>Inverse from the menu.
Related links
Learn different ways to make selections
Save selections and alpha channel masks
Convert paths to selection borders
