Copy link to clipboard
Copied
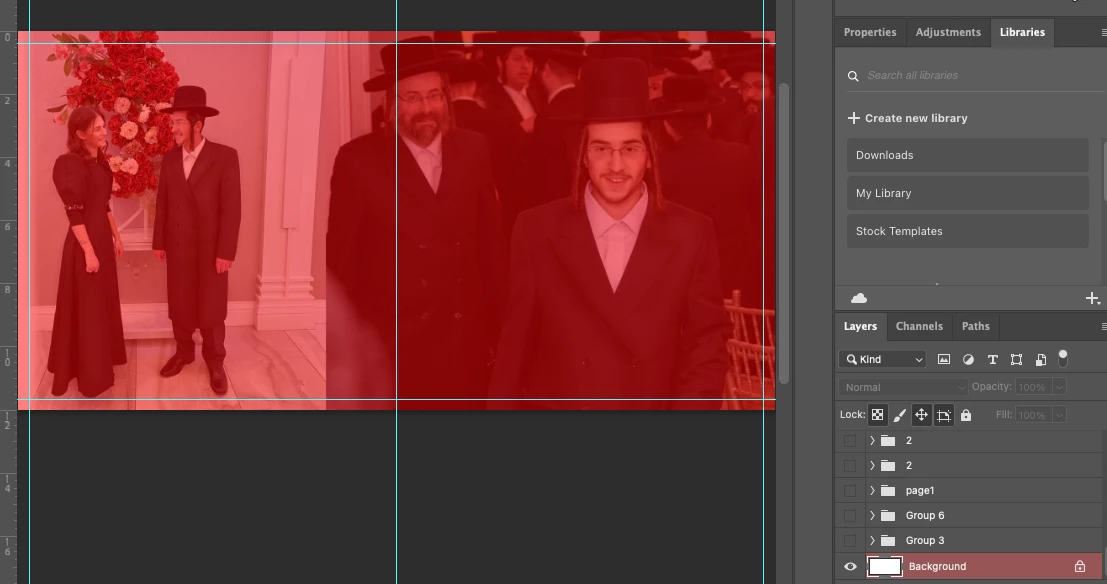
I'm not sure what happened with my photoshop I probably pressed something and the entire workplace became masked. I can not undoe the mask. I can make layers visible or unvisible but it keeps staying under the mask.
{Title edited by Moderator}
The red highlight on the layer in the Layers panel is the clue:
You have accidentally switched on QuickMask.
To turn it off, do any of the following:
Choose Select > Edit in QuickMask Mode to deselect the command.
or
Press the Q key. This is probably how you got into it, by accidentally pressing Q.
or
Click the QuickMask icon in the Tools panel, which is the second from the bottom and should currently be highlighted.
HI, Was chatting with adobe agent and this is the solution:
Okay, so as I could check that you have entered in the edit in quick mask mode, so you could enable and disable it by pressing (Q) on your keyboard.
Copy link to clipboard
Copied
Hi there,
We're sorry about the trouble with Photoshop.
Which version of Photoshop are you using? Would you mind sharing your workflow? Did you give any overlay to any of the Layer masks? You can enable/disable the overlay while masking using the backslash (\) key.
Try opening a different file or creating a new one and checking if those have similar issues.
You may also right-click on your layer mask thumbnail in the layers panel and see your Mask Options.
The Defaults, as shown, are Color RGB 255, 0, 0, and Opacity 50%.
We are looking forward to hear from you soon. We're here to help, just need some more info.
Regards,
Ranjisha
Copy link to clipboard
Copied
The red highlight on the layer in the Layers panel is the clue:
You have accidentally switched on QuickMask.
To turn it off, do any of the following:
Choose Select > Edit in QuickMask Mode to deselect the command.
or
Press the Q key. This is probably how you got into it, by accidentally pressing Q.
or
Click the QuickMask icon in the Tools panel, which is the second from the bottom and should currently be highlighted.
Copy link to clipboard
Copied
HI, Was chatting with adobe agent and this is the solution:
Okay, so as I could check that you have entered in the edit in quick mask mode, so you could enable and disable it by pressing (Q) on your keyboard.
Copy link to clipboard
Copied
In my case, I had an Alpha layer toggled on that needed to be toggled off before applying the generative fill to the RGB layers.
Copy link to clipboard
Copied
Stop messing around with PS. I've been using this program for 20+ years and Adobe contiues to add things that are NOT NEEDED. I'll tell you what, how about makeing the scale options stay on the last selections. EVERY TIME YOU bring an object into PS it is set at % rather than the last measurment. Furthermore, this should be a global choice. YOU WASTE SO MUCH OF MY TIME CHANING THE SCALE MEASURMENT. And don't even get me started with the color picker and fonts. YOU CANNOT EVEN SELECT THE COLOR IN YOUR LIBRARY.... WTF!!!!! I guess you are too busy making sure an ugly blue share button is blinding me every day ... all day!!!!
Copy link to clipboard
Copied
@nathanw51574665 , what are your actual problems?
Your ranting seems to indicate that the unit values for placed objects change when placing a new one – I don’t seem to be able to reproduce that so please read this (in particular the section titled "Supply pertinent information for more timely and effective answers”):
Copy link to clipboard
Copied
I can help you with the blue share button:
Preferences > Interface, checkmark "Neutral Color Mode" and click the OK button and it should look like the example below. Also keep in mind this is a user-user forum, always be patient. We can get you through.