 Adobe Community
- Home
- Photoshop ecosystem
- Discussions
- Re: Remove Banding caused by scanner
- Re: Remove Banding caused by scanner
Copy link to clipboard
Copied
Hi there,
I wondered if anyone could help me. I have a number of images that have been sent to me that need cleaning up - especially the removal of a sort of colour banding across the image that I think might have been caused during the original scanning.
I have enclosed an image to give you some idea of the problem. Can this be solved with some action or something?
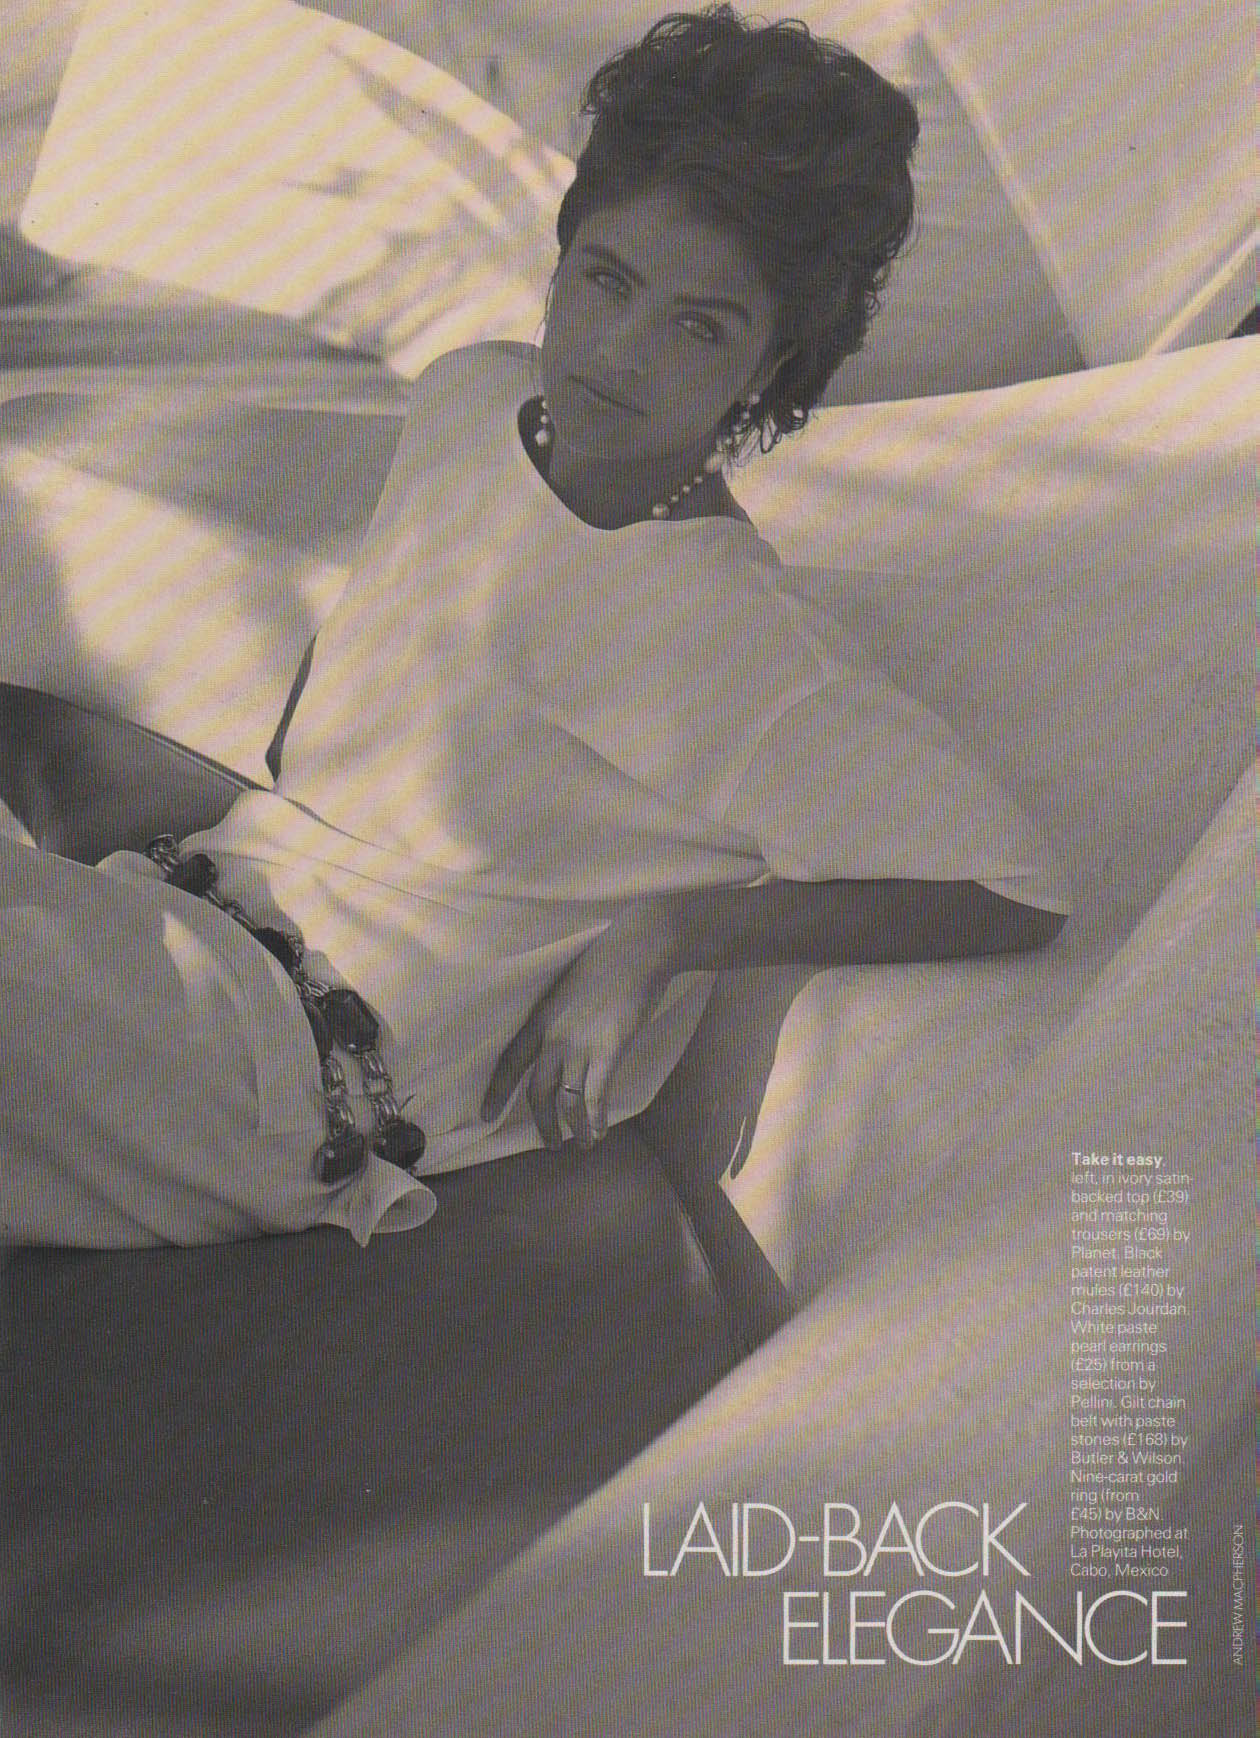
Any help would be greatly appreciated.
Kind Regards
 1 Correct answer
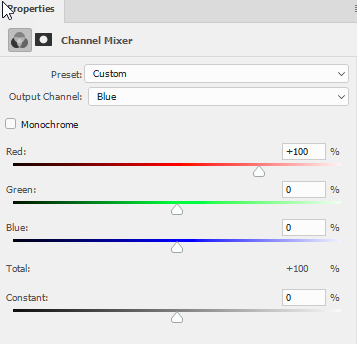
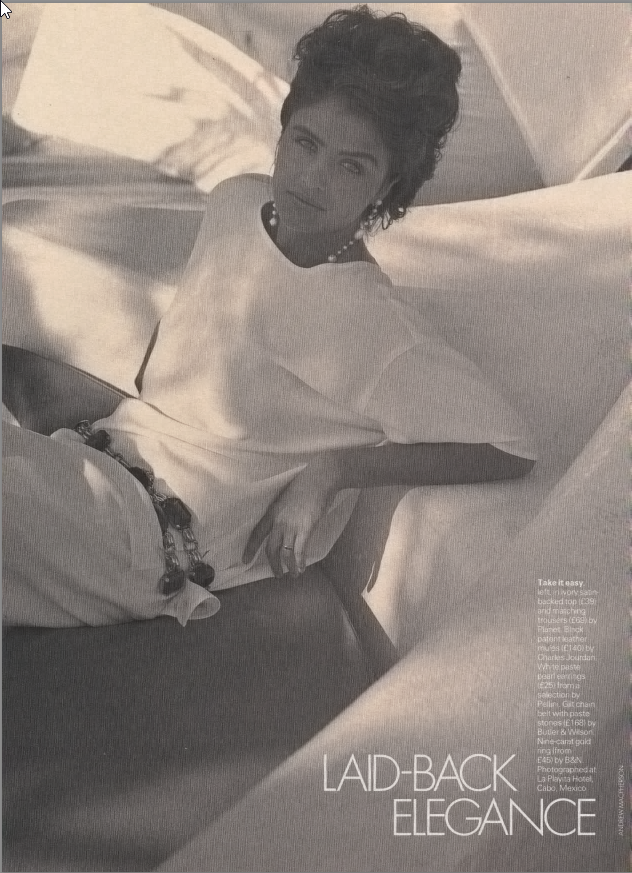
On that particular example the red channel does not show the coloured moire patterning.
So I set the channel mixer to 100% red 0% green and 0% blue for all three channels. This gave a black and white version without the tint.
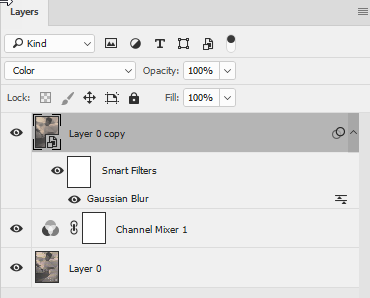
Then I duplicated the original and applied a Gaussian blur to blur the patterning. Then set that layer to color blending mode
Dave
Explore related tutorials & articles
Copy link to clipboard
Copied
On that particular example the red channel does not show the coloured moire patterning.
So I set the channel mixer to 100% red 0% green and 0% blue for all three channels. This gave a black and white version without the tint.
Then I duplicated the original and applied a Gaussian blur to blur the patterning. Then set that layer to color blending mode


Dave
Copy link to clipboard
Copied
Thanks so much, Dave. That is exactly what I am looking for. Much appreciated your time and advice.
Best Wishes
Copy link to clipboard
Copied
You're welcome ![]()
Dave
Copy link to clipboard
Copied
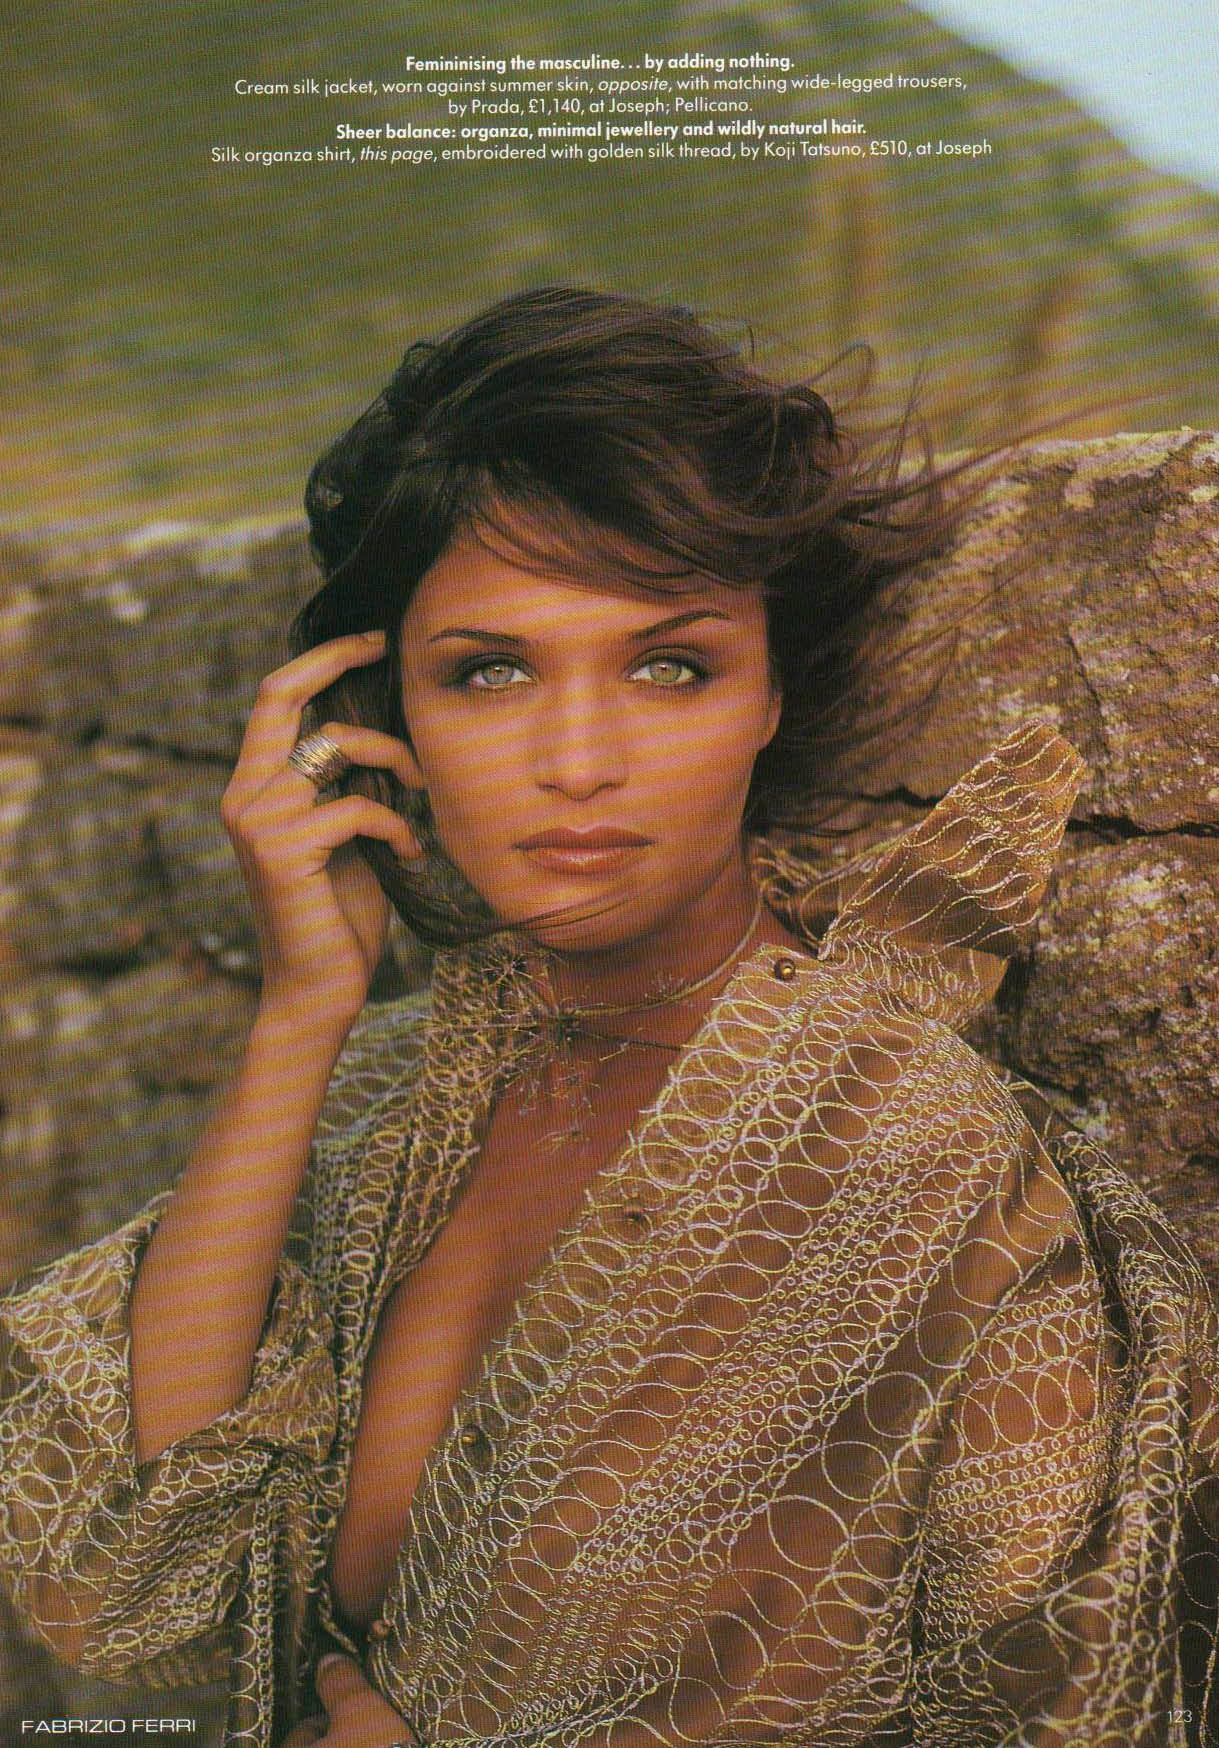
One final (quick question). If the image had a good deal more colour (as in the image below), would I still follow the same process that you outlined? Could I still retain most of the colour or is that lost as a result of the channel mixing?
Copy link to clipboard
Copied
The same basic technique yes but I retained some of the old channel info rather than 100% red in each then added a curve to bring down the brightness of the red areas which lightened considerably when the input from the original blue channel was reduced. Then a bit of masking to restore those areas which did not need treatment and I got the following.
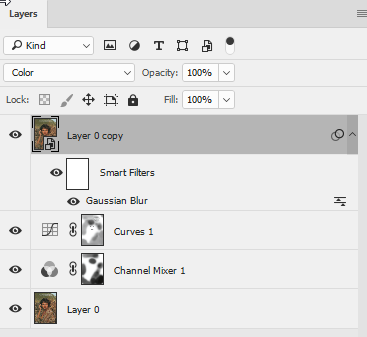
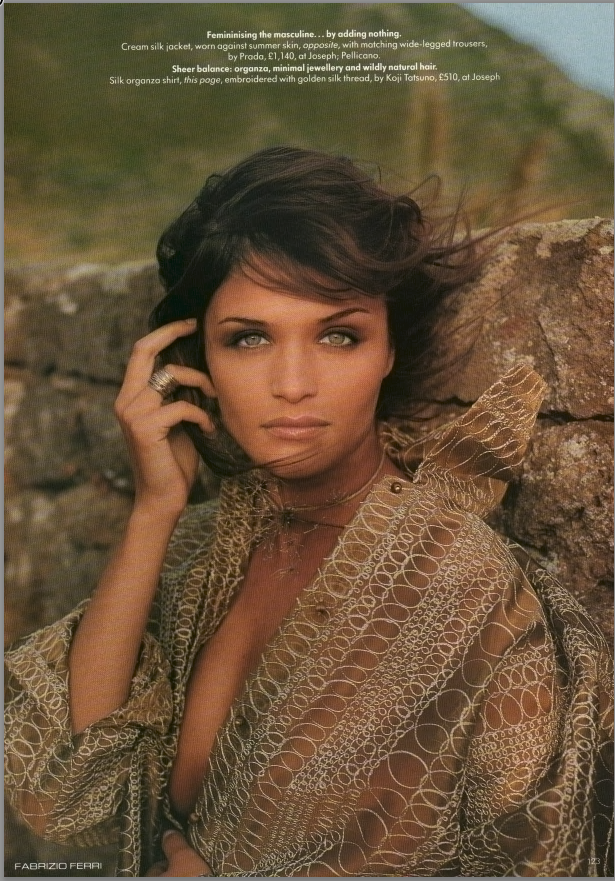
Dave
Copy link to clipboard
Copied
Thanks, again. It's very informative.
All the best.
Copy link to clipboard
Copied
Exercise in Moire reduction aside, that still leaves the print screen. The best way is to go to the photographer and ask for use of the original which you should be able to do at the same time as gaining permission for use of his images.
https://www.fabrizioferri.com/
Dave
Copy link to clipboard
Copied
Hello, Dave.
It's been a long time since I've revisted this thread but I find it hard to follow exactly the steps you took (especially on the second image) - despite that you even shared the layer process. I work as an editorial assistant but I'm not technically savvy at PS.
I don't suppose there is any way at all that you could make a short screen recording for this method. I would be very greatly in your debt.