

- Home
- Photoshop ecosystem
- Discussions
- Re: Remove minor subpaths - Subtract small selecti...
- Re: Remove minor subpaths - Subtract small selecti...

Copy link to clipboard
Copied
Hello everyone,
I have an image where I selected the green screen using color range. Sometimes I have greens inside my object so they will be deleted, and I try to avoid that.
So I created a layer mask (in the same way it can be a selection).
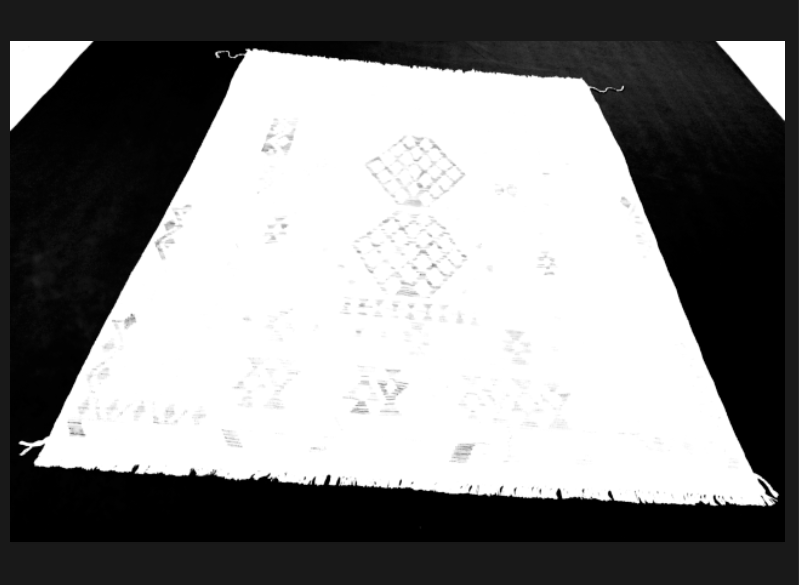
original picture:
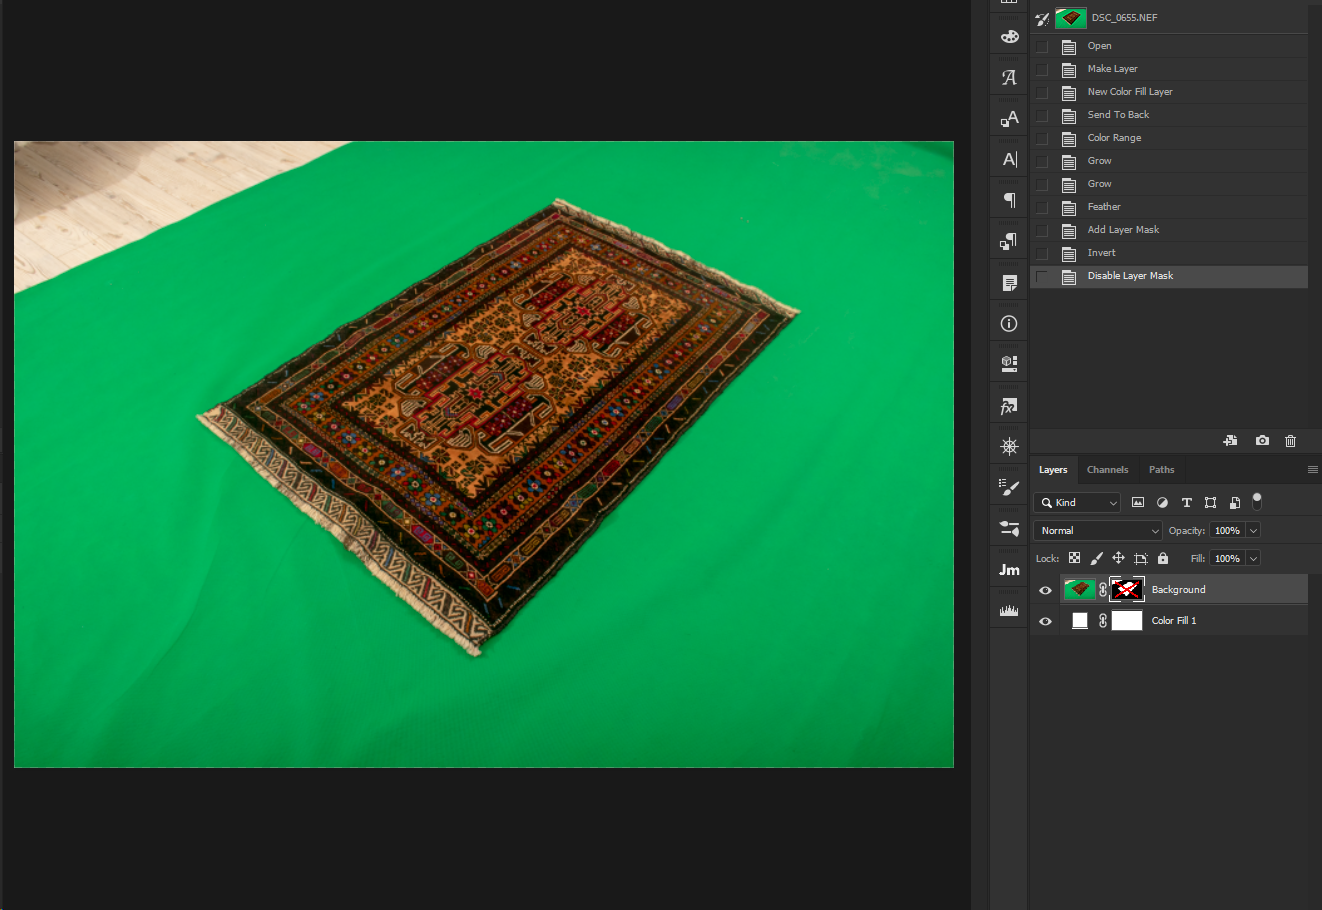
created a mask (isolated the background):
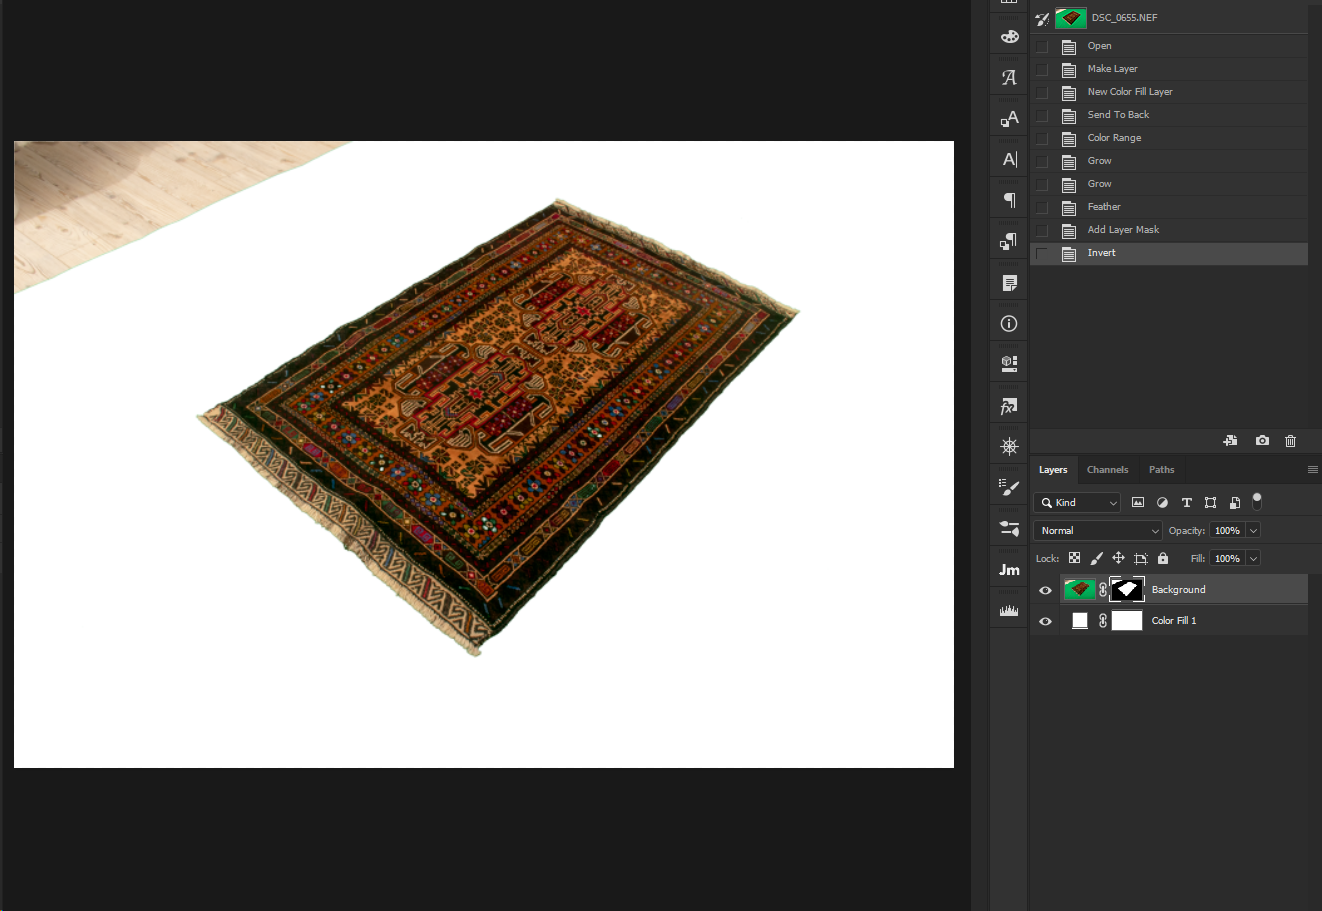
show the mask:
(as you see my object isn't entirely white)

I've scripted a MagicWand click on the middle of the canvas, because my subject is almost always in the middle.
so right now I'm here:
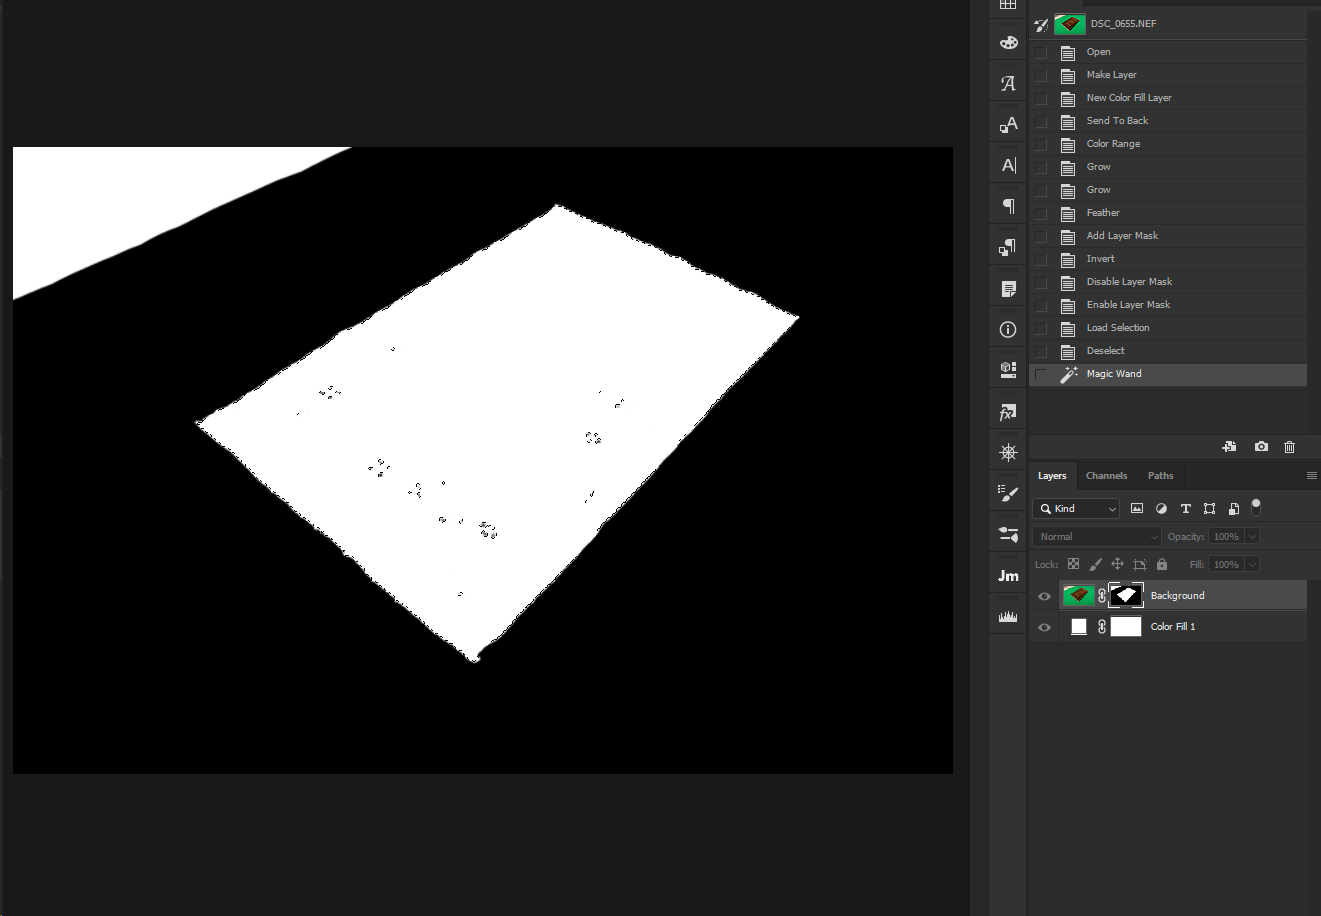
How do I make all the small selections inside it merge into one? (I thought of a script that finds all the subpaths inside a selection and then removes them)
Any help will be much appreciated 


 1 Correct answer
i found that you and r-bin already answered me for something else that does the same thing! (thank you again)
i'll share it for others to use as well
...select_max_selection();
function select_max_selection()
{
try {
// selection to workpath
var d = new ActionDescriptor();
var r = new ActionReference();
r.putClass(stringIDToTypeID("path"));
d.putReference(stringIDToTypeID("null"), r);
var r1 = new Ac
Explore related tutorials & articles
 25
Replies
25
25
Replies
25

Copy link to clipboard
Copied
Actually it's easy. Change your selection to pathItems, then make a loop over all subpaths, and store only the biggest one (or that with the most amount of anchors). Then from those points make a selection. That's all.
You can use also: EZ Green Screen - Photoshop Plugin Software
Copy link to clipboard
Copied
1. "Actually it's easy. Change your selection to pathItems, then make a loop over all subpaths, and store only the biggest one (or that with the most amount of anchors). Then from those points make a selection. That's all." - sounds great! I just need help to execute this. 
2. EZ Green Screen seems nice, but color range does good job for now before i pay the $200
Copy link to clipboard
Copied
i found that you and r-bin already answered me for something else that does the same thing! (thank you again)
i'll share it for others to use as well
select_max_selection();
function select_max_selection()
{
try {
// selection to workpath
var d = new ActionDescriptor();
var r = new ActionReference();
r.putClass(stringIDToTypeID("path"));
d.putReference(stringIDToTypeID("null"), r);
var r1 = new ActionReference();
r1.putProperty(stringIDToTypeID("selectionClass"), stringIDToTypeID("selection"));
d.putReference(stringIDToTypeID("from"), r1);
d.putUnitDouble(stringIDToTypeID("tolerance"), stringIDToTypeID("pixelsUnit"), 0.5);
executeAction(stringIDToTypeID("make"), d, DialogModes.NO);
// leave only one subpath with maximum points;
var d = new ActionDescriptor();
var r = new ActionReference();
r.putEnumerated(stringIDToTypeID("path"), charIDToTypeID("Ordn"), charIDToTypeID("Trgt") );
var pth = executeActionGet(r).getObjectValue(stringIDToTypeID("pathContents"));
var lst = pth.getList(stringIDToTypeID("pathComponents"));
var list = new ActionList();
var len = lst.count;
var max;
var max_obj;
for (var i = 0; i < len; i++)
{
var obj = lst.getObjectValue(i);
var count = obj.getList(stringIDToTypeID("subpathListKey")).getObjectValue(0).getList(stringIDToTypeID("points")).count;
if (!max || max < count)
{
max = count;
max_obj = obj;
}
}
max_obj.putEnumerated(stringIDToTypeID("shapeOperation"), stringIDToTypeID("shapeOperation"), stringIDToTypeID("add") );
list.putObject(stringIDToTypeID("pathComponent"), max_obj);
var r = new ActionReference();
r.putProperty( charIDToTypeID( "Path" ), charIDToTypeID( "WrPt" ) );
d.putReference( stringIDToTypeID( "null" ), r );
d.putList(charIDToTypeID("T "), list);
executeAction(charIDToTypeID("setd"), d, DialogModes.NO);
// workpath to selection
var d = new ActionDescriptor();
var r = new ActionReference();
r.putProperty(stringIDToTypeID("channel"), stringIDToTypeID("selection"));
d.putReference(stringIDToTypeID("null"), r);
var r1 = new ActionReference();
r1.putProperty(stringIDToTypeID("path"), stringIDToTypeID("workPath"));
d.putReference(stringIDToTypeID("to"), r1);
d.putBoolean(stringIDToTypeID("antiAlias"), true);
d.putUnitDouble(stringIDToTypeID("feather"), stringIDToTypeID("pixelsUnit"), 0);
executeAction(stringIDToTypeID("set"), d, DialogModes.NO);
// delete workpath
var doc = app.activeDocument;
for (var i = 0; i < doc.pathItems.length; i++)
{
if (doc.pathItems.kind == PathKind.WORKPATH)
{
doc.pathItems.remove();
break;
}
}
}
catch(e) { alert(e); }
}
Copy link to clipboard
Copied
I'm bringing up this 2 months old thread to ask something.
r-bin's script to select the biggest sub-path (maximum points) works great.
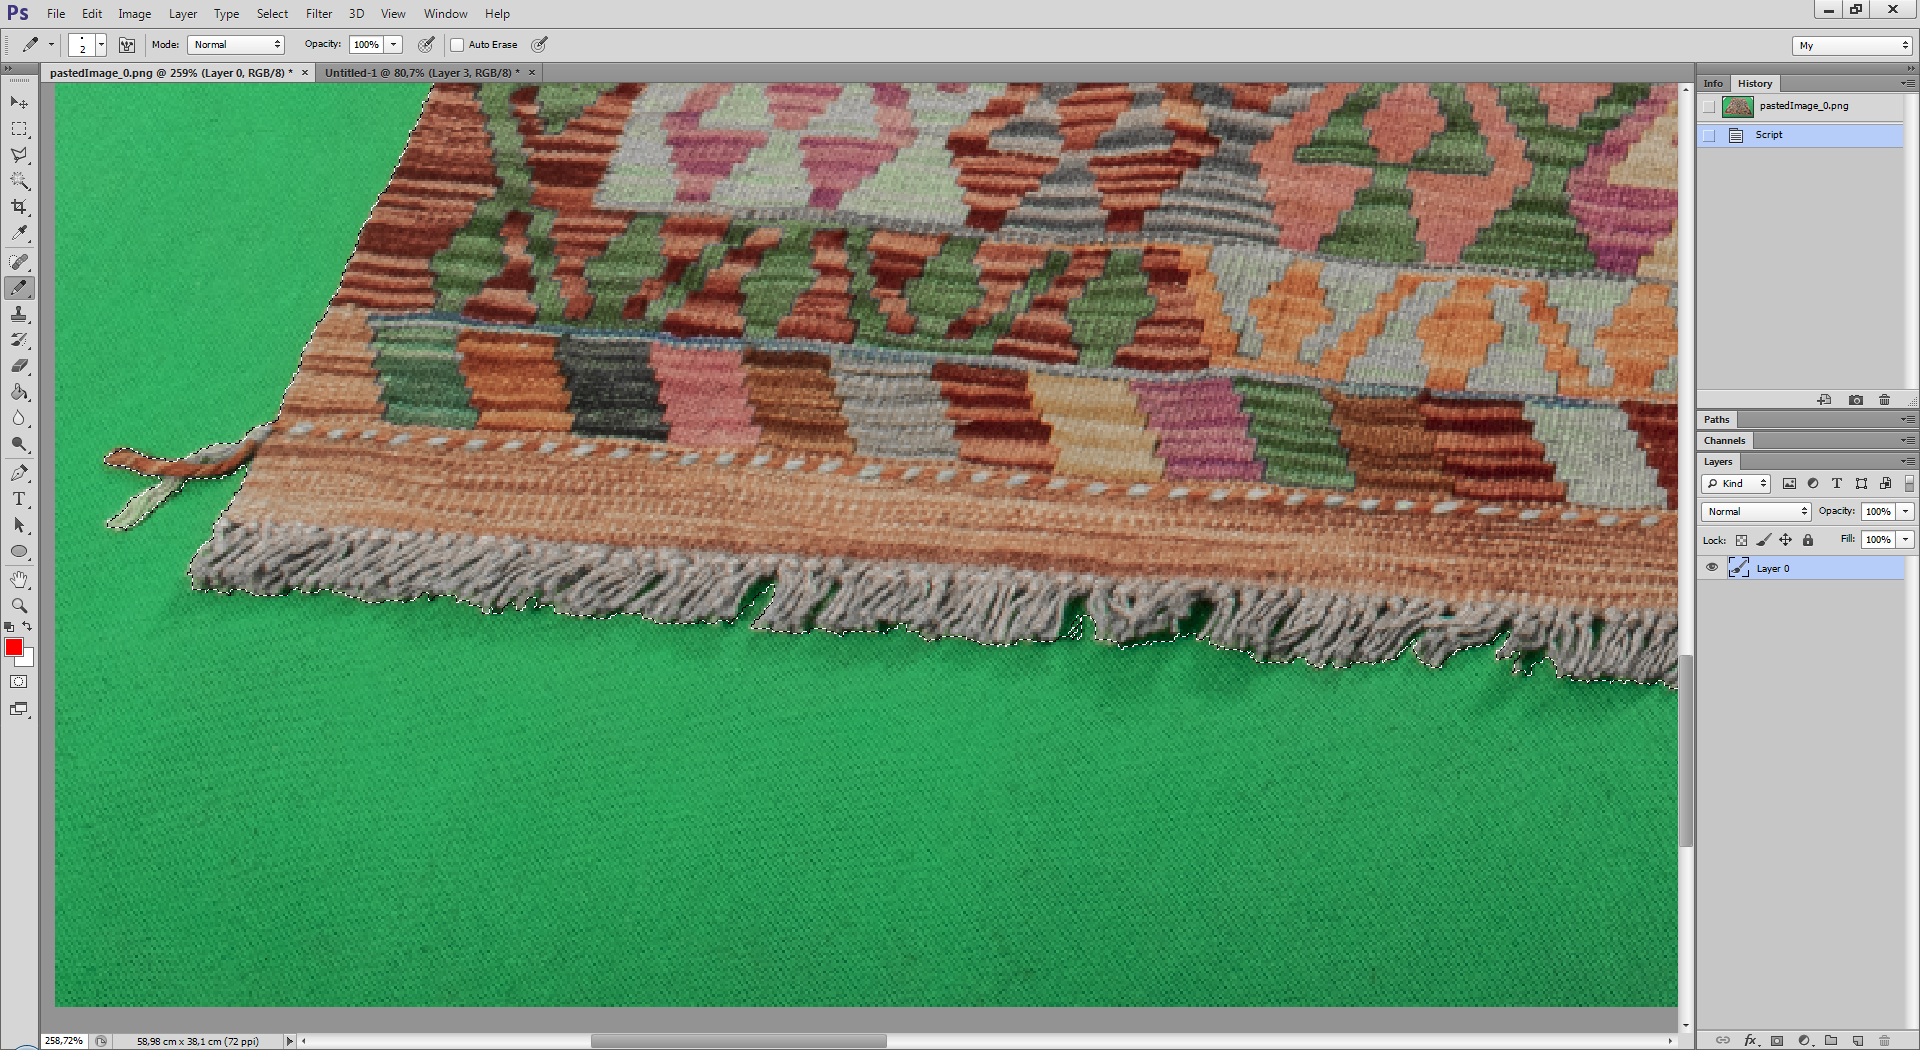
the end result is to cut green screen from rugs:
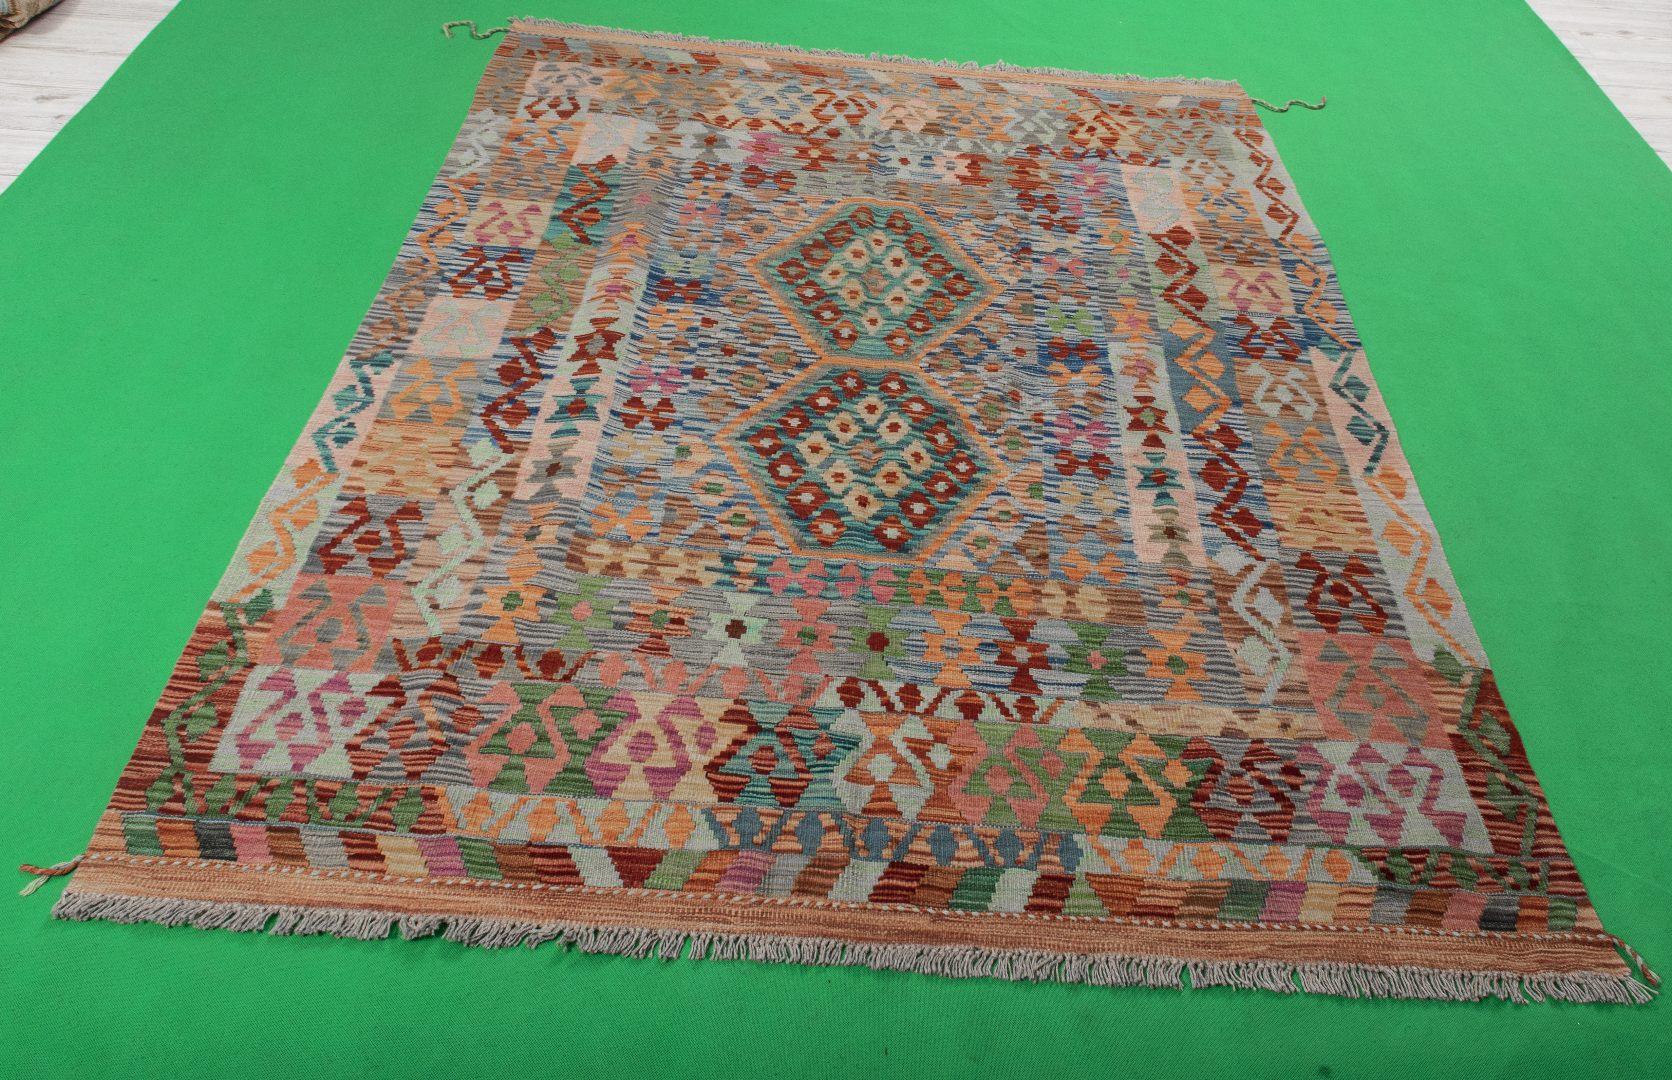
color range selection is:
and r-bin's script cleans all the unwanted smaller subpathes:
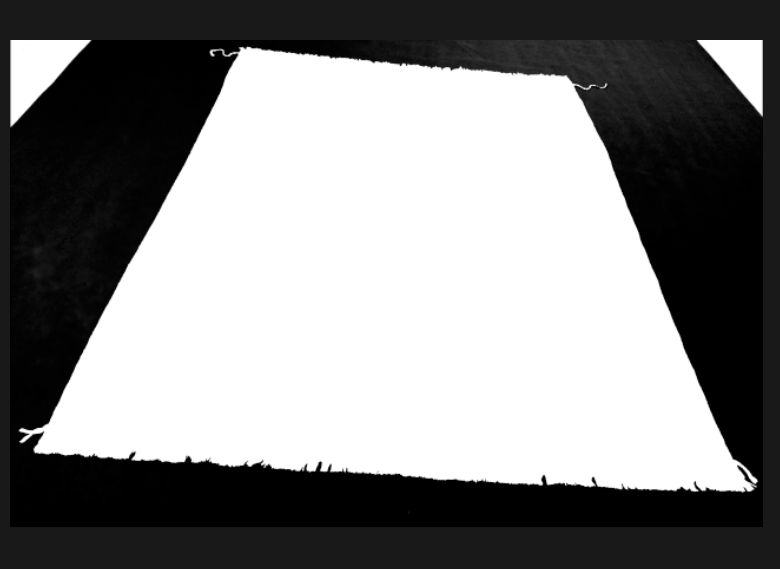
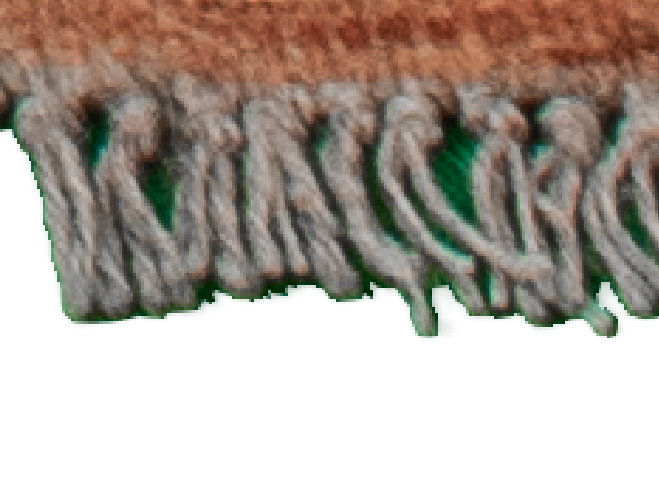
The problem is those small fringes in the edges suppose to have small subpathes:
with r-bin's script:
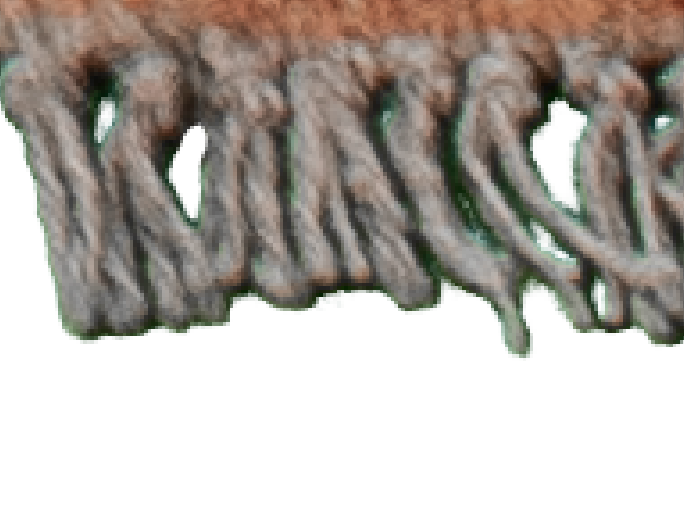
without:
I need r-bin's script to not apply on the fringes on the top and bottom edges. is that possible?

Copy link to clipboard
Copied
Save the original selection and intersect with what comes out from the path.
Copy link to clipboard
Copied
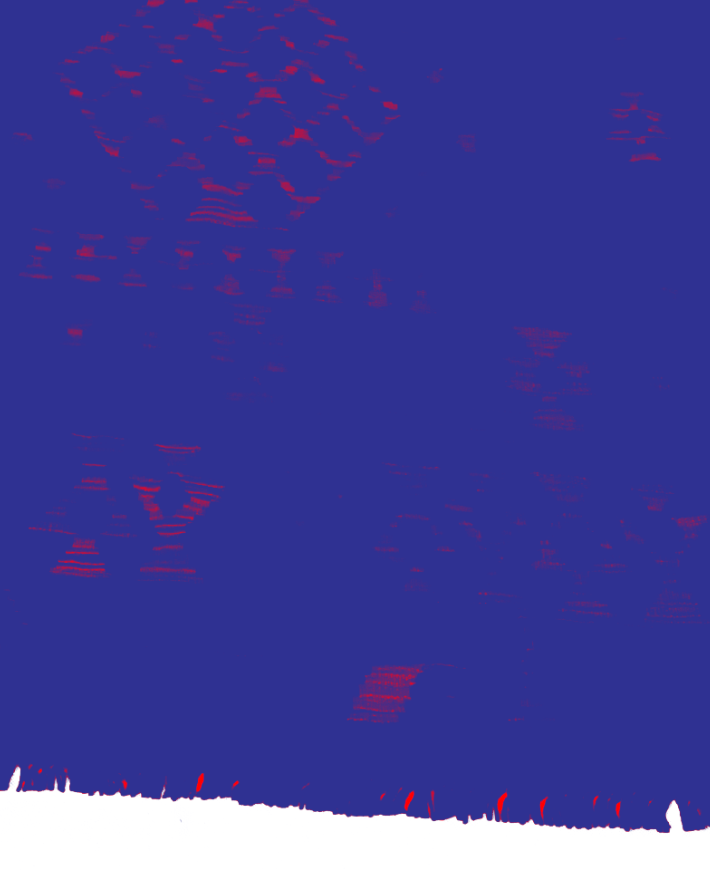
it wouldn't work:
BLUE = Color Range
RED = Color Range + Select Maximum Subpath
if i intersect it doesn't know which part i want to keep from the original selection, there must be some sort of layer bounds or near edges solution
Copy link to clipboard
Copied
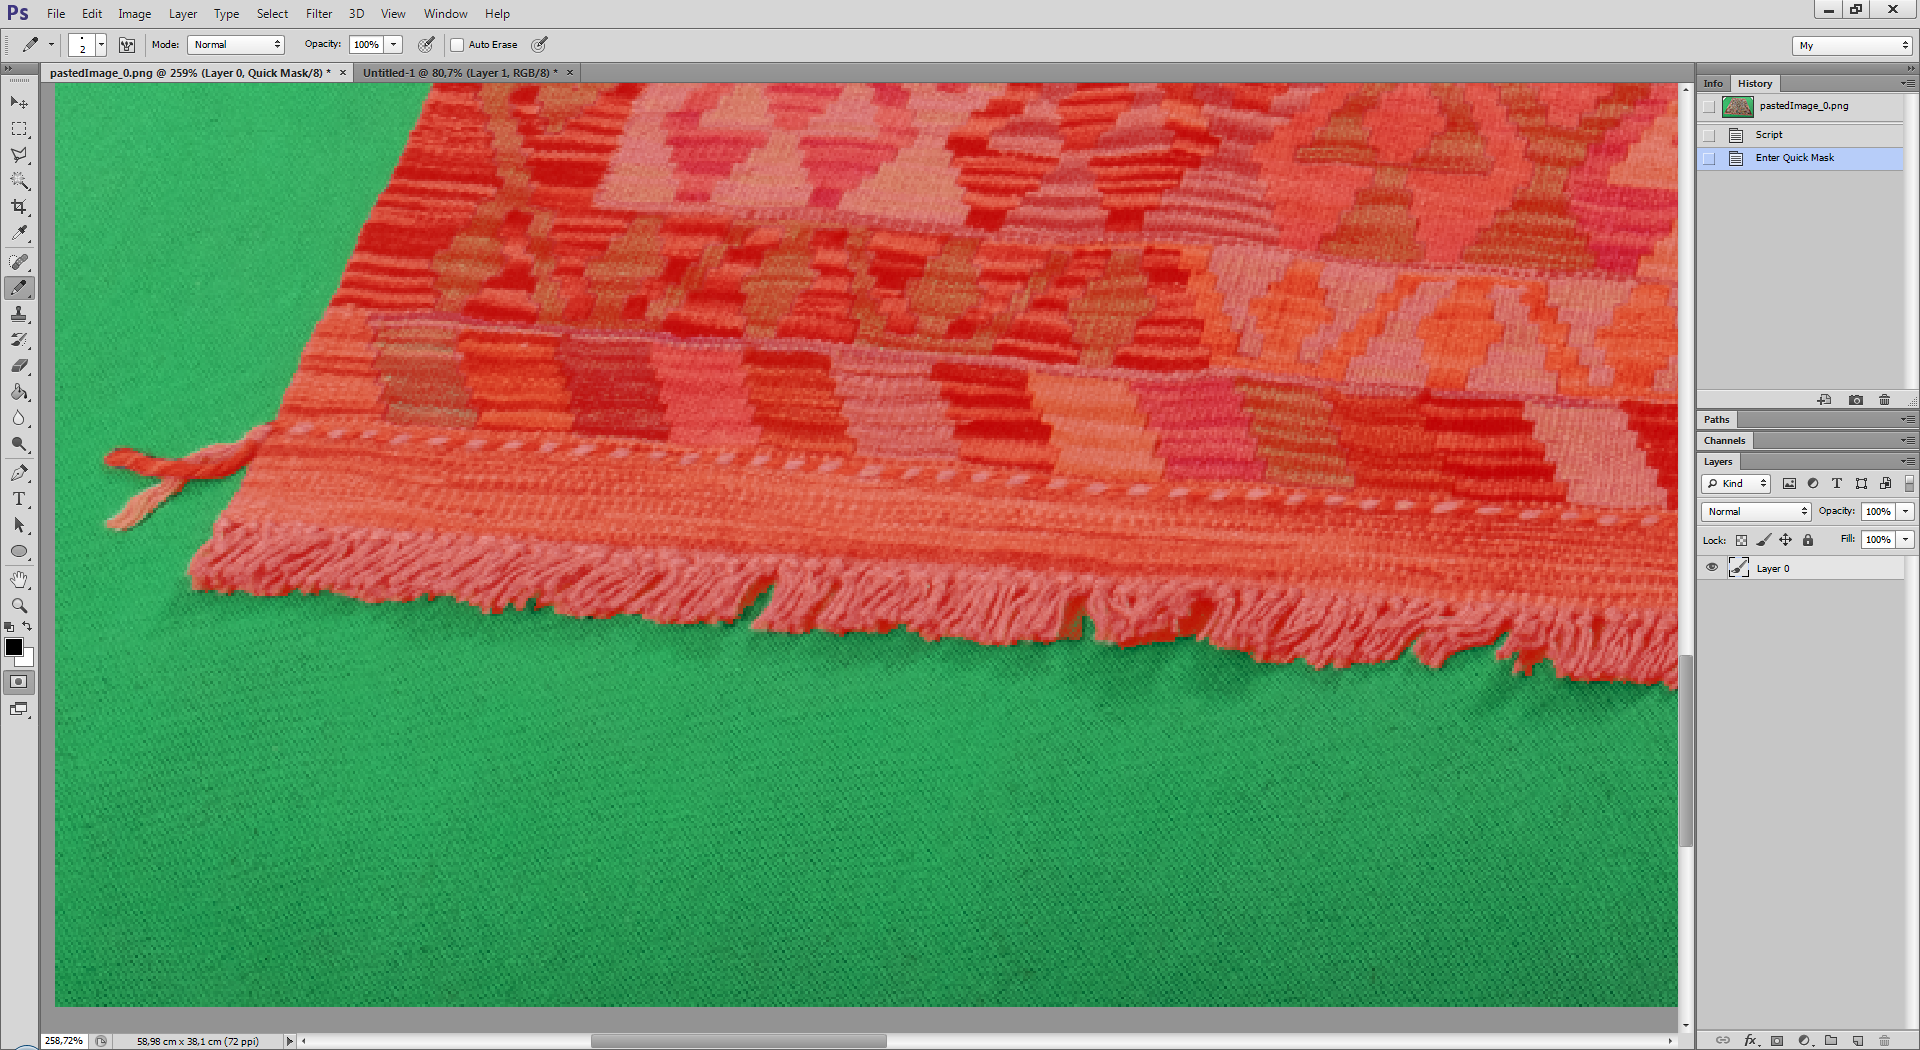
1. Make the maximum selection without holes.
2. Turn it into QuickMask.
3. Turn it back into a selection.
4. Use ColorRange to make holes.
5. Turn selection with holes into QuickMask.
6. Set this HistoryState as the source for HistoryBrush.
7. Select HistoryState with QuickMask without holes. (which was in point 2)
8. With hard HistoryBrush paint the necessary holes in QuickMask.
9. Turn QuickMask back into selection.
Copy link to clipboard
Copied
If I did it right, after point 3 (so when quick mask is active still), Color Range can't be done untill quick mask gets disabled.
Copy link to clipboard
Copied
In point 3 there is no QuicjMask but there is a selection.
Do everything carefully.
Copy link to clipboard
Copied
Yes, there's selection. I meant when doing selection in point 3 (after quick mask was done in point 2, so still active), when trying to do point 4, Color Range is grayed. The only option to enable that is to disable quick mask between point 3 and 4.
Copy link to clipboard
Copied
This is quick mask?
you described what need to be done very clearly but yet I didn't quite understand. (i think i missed something you meant regarding QuickMask, and also I have never used the HistoryBrush)
for example:
"2. Turn it into QuickMask.
3. Turn it back into a selection."
doesn't it return to the same situation as before?
You help a lot, but can i ask you please to describe it more? (pictures maybe)
Copy link to clipboard
Copied
It leaves quickmask around selection.
Copy link to clipboard
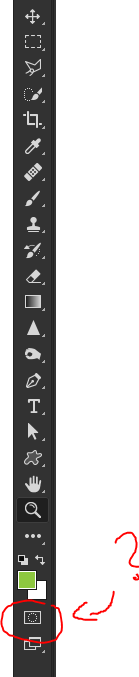
Copied
is it the tool i circled in the image above?
it does something if you enter QuickMask and then quit QuickMask without making any changes while you inside it?
Copy link to clipboard
Copied
You can choose it also from 'Select' menu, or else use Shift Q shortcut in default workspace.
Copy link to clipboard
Copied
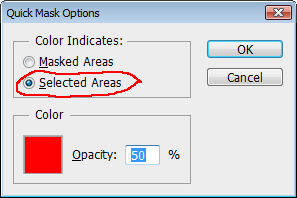
0. Double click Quick Mask icon on tool panel and set this
1, run script
2. Convert selection to quick mask. To get this, press "Q"
3. Convert quick mask to selection. To get this, press "Q"
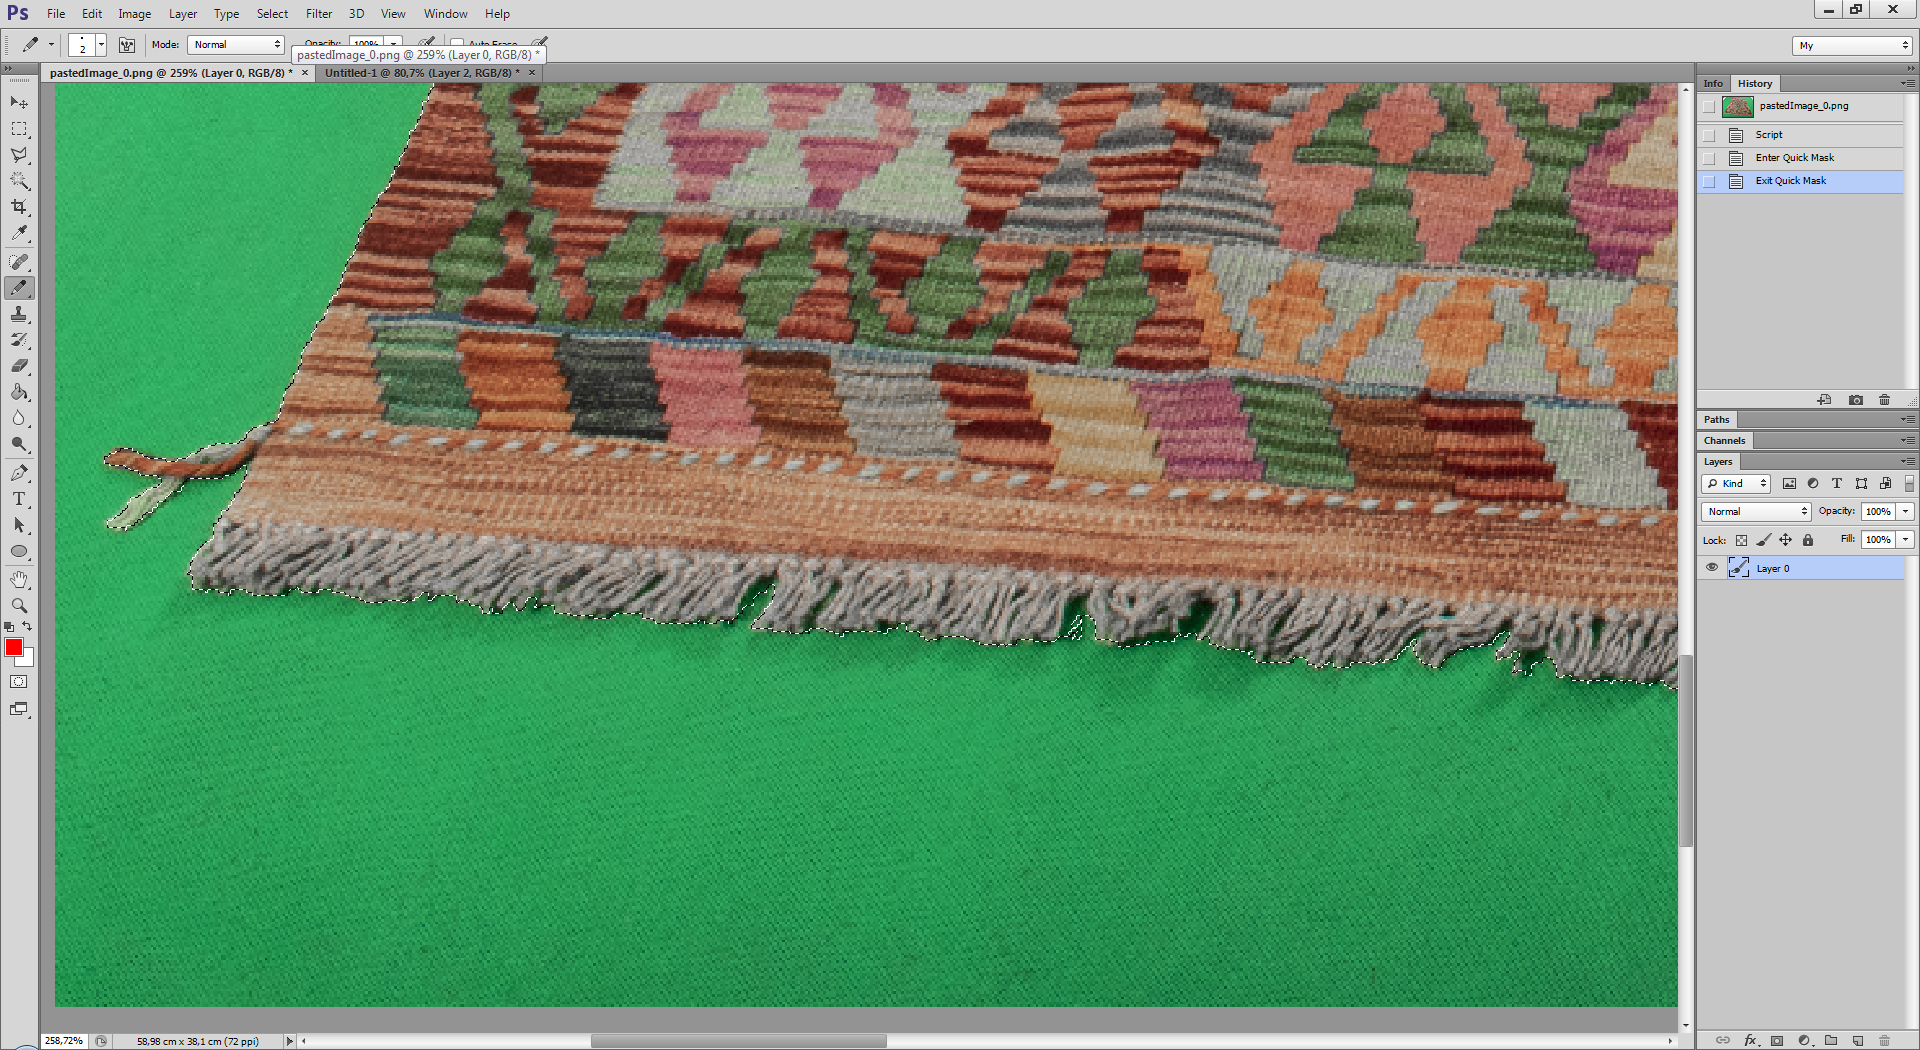
4.Use color Range
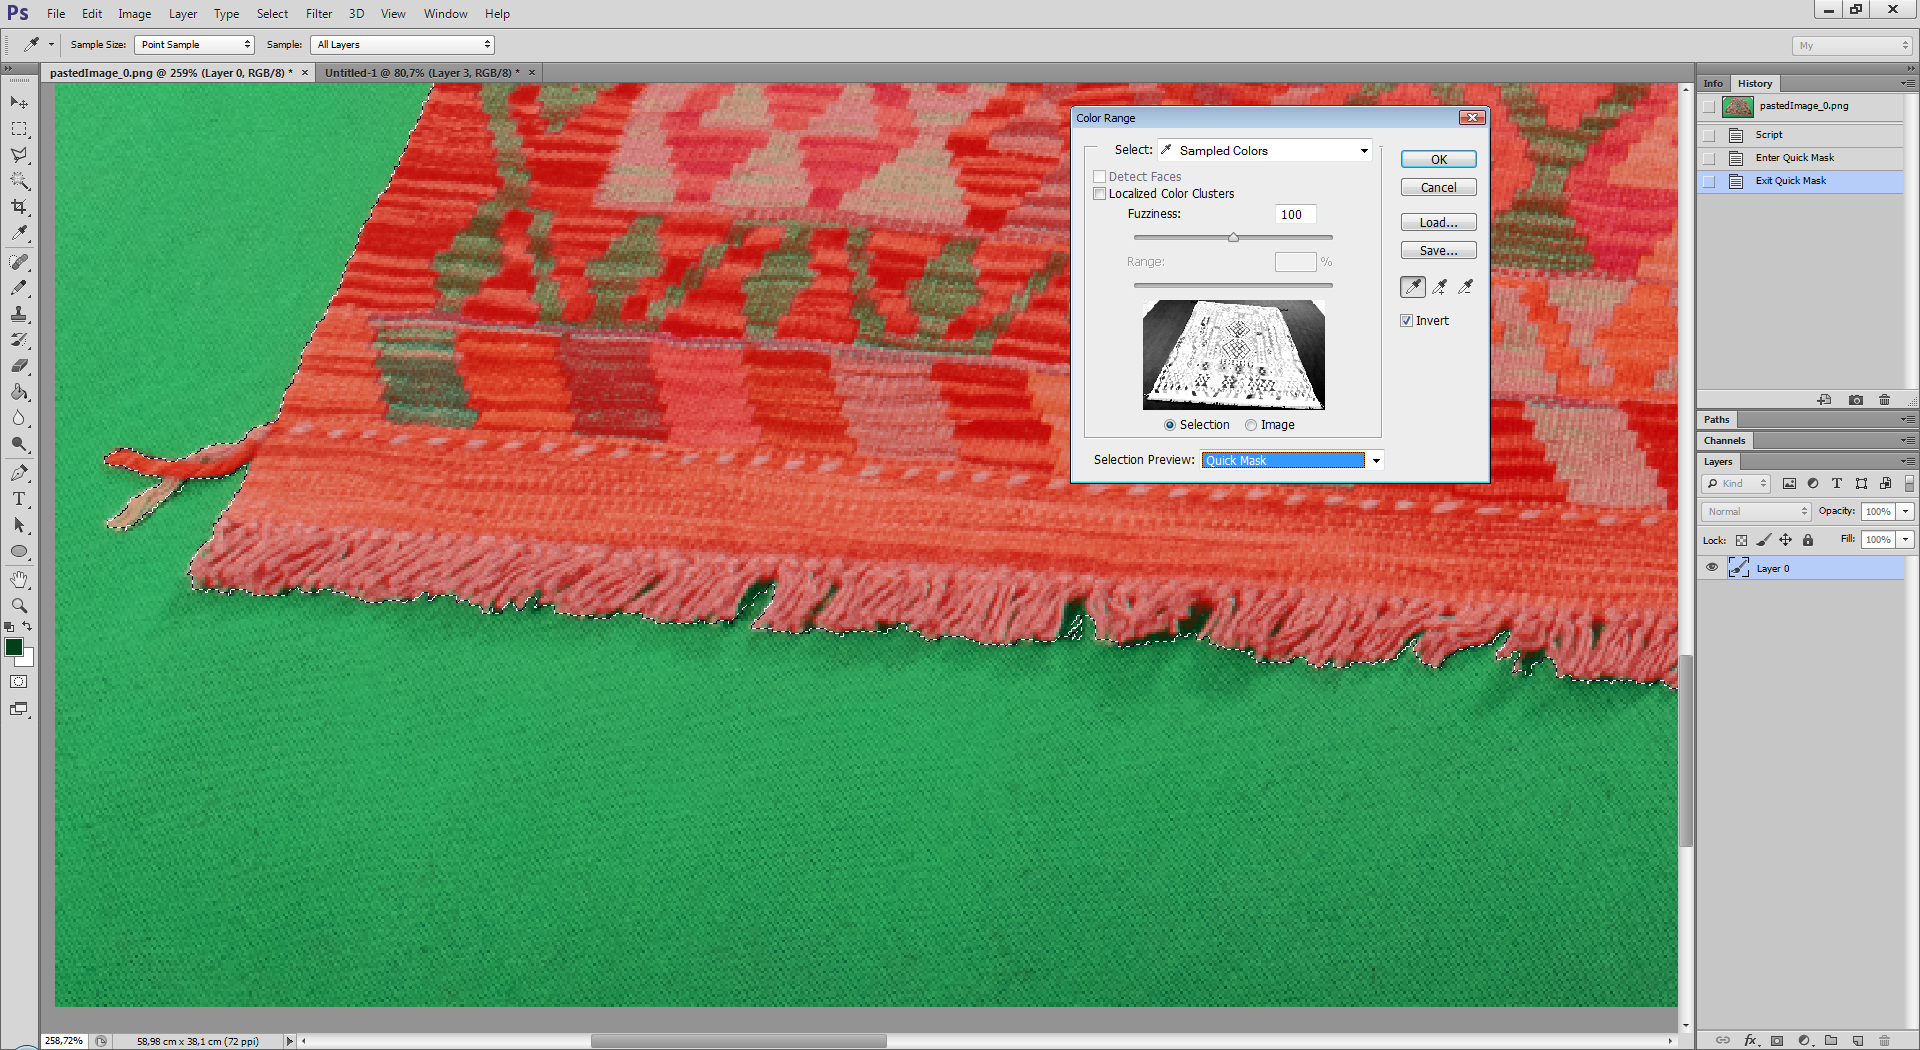
Result

5. Convert selection to quick mask. To get this, press "Q"

6 Goto History State

7. Use history brush and draw on edges.

8. Convert quick mask to selection. To get this, press "Q"

Copy link to clipboard
Copied
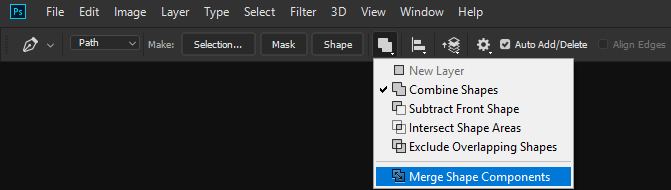
You can turn the selection into a path.
Change the mode of all subpaths to "Combine". And turn the path back into a selection.
Copy link to clipboard
Copied
Actually 'Merge Shape Components' instead of 'Combine Shapes', but that was what you meant 
Copy link to clipboard
Copied
No, I meant precisely "Combine" ("shapeOperation" -> "add")
Copy link to clipboard
Copied
It does not work for me if you do it manually from Photoshop. I had to select 'Pen Tool', then in Options bar choose 'Path operations', then click last, the bottom item (while 'Path' or 'Shape' is set in 'Pick tool mode'). Where is 'shapeOperation'?
Copy link to clipboard
Copied
What are you talking about? Can you show a screenshot?
"shapeOperation", "add" are stnigIDs for AM code. Similar to ShapeOperation.SHAPEADD for the DOM version.
Copy link to clipboard
Copied
I thought you are advicing how to do it manually by Photoshop, so then someone can record it to ScriptListener log.
This way if there are pathItems inside of other pathItem, all inner pathItems will be removed, so only one will remain.
Copy link to clipboard
Copied
I again did not understand what it was about.
"Merge Shape" does not work.
That's what I'm talking about.
var d = new ActionDescriptor();
var r = new ActionReference();
r.putEnumerated(stringIDToTypeID("path"), stringIDToTypeID("ordinal"), stringIDToTypeID("targetEnum"));
var pth = executeActionGet(r).getObjectValue(stringIDToTypeID("pathContents"));
var lst = pth.getList(stringIDToTypeID("pathComponents"));
var list = new ActionList();
var len = lst.count;
for (var i = 0; i < len; i++)
{
var obj = lst.getObjectValue(i);
obj.putEnumerated(stringIDToTypeID("shapeOperation"), stringIDToTypeID("shapeOperation"), stringIDToTypeID("add"));
list.putObject(stringIDToTypeID("null"), obj);
}
var r = new ActionReference();
r.putProperty(stringIDToTypeID("path"), stringIDToTypeID("workPath"));
d.putReference(stringIDToTypeID( "null" ), r);
d.putList(stringIDToTypeID("to"), list);
executeAction(stringIDToTypeID("set"), d, DialogModes.NO);
Copy link to clipboard
Copied
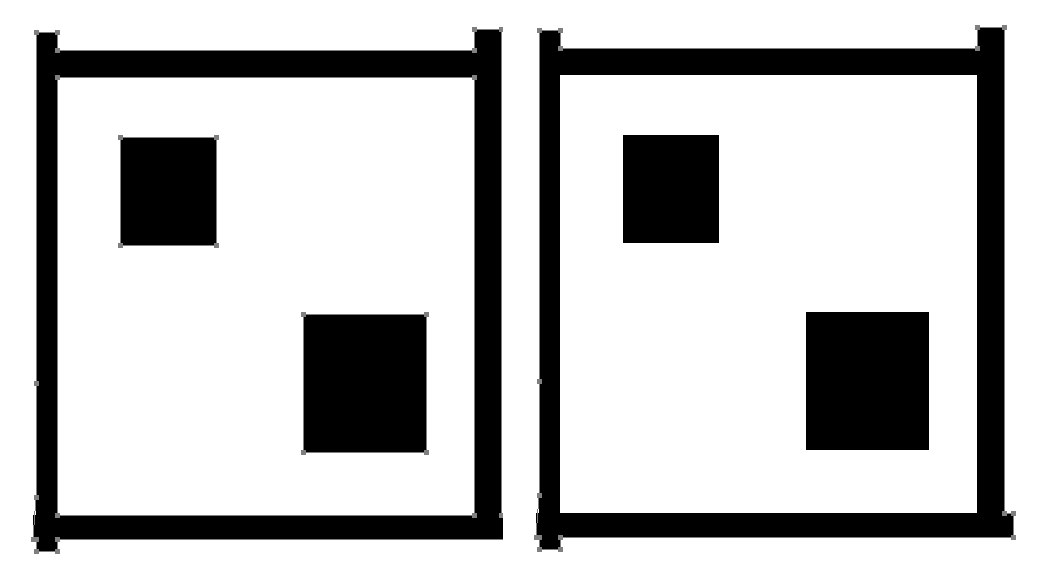
For me that I described works well. In first instance when 'Shape' is set in 'Pick tool mode', click 'Combine Shapes' in 'Path Operations', and then again in 'Path Operations' click 'Merge Shape Components'. Before & After result (look for grey dots):
Copy link to clipboard
Copied
Make a path from such a selection.
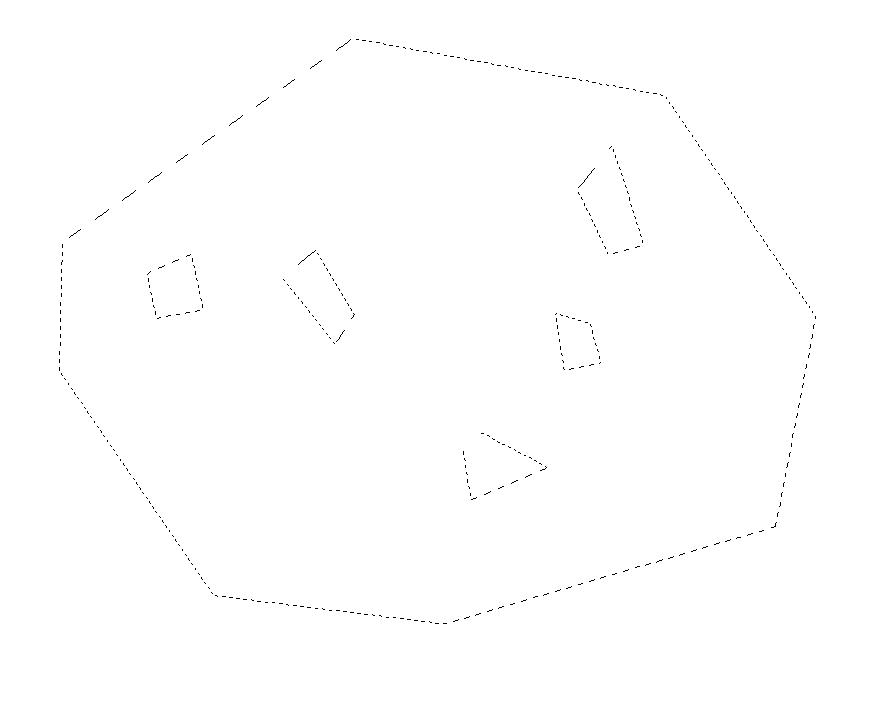
Do your manipulations.
Convert the path back to the selection.
Have the "holes" in your selection disappeared?
-
- 1
- 2

Find more inspiration, events, and resources on the new Adobe Community
Explore Now
 AdChoices