Exit
  • Global community
    • Language:
      • Deutsch
      • English
      • Español
      • Français
      • Português
  • 日本語コミュニティ
    Dedicated community for Japanese speakers
  • 한국 커뮤니티
    Dedicated community for Korean speakers
0

Removing canvas texture [2018]

Community Beginner ,
Mar 30, 2018 Mar 30, 2018

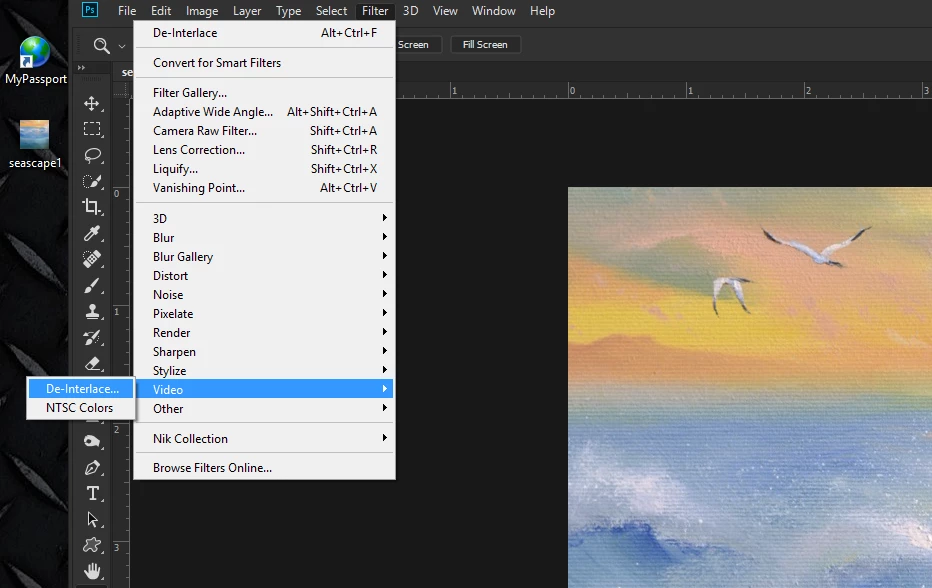
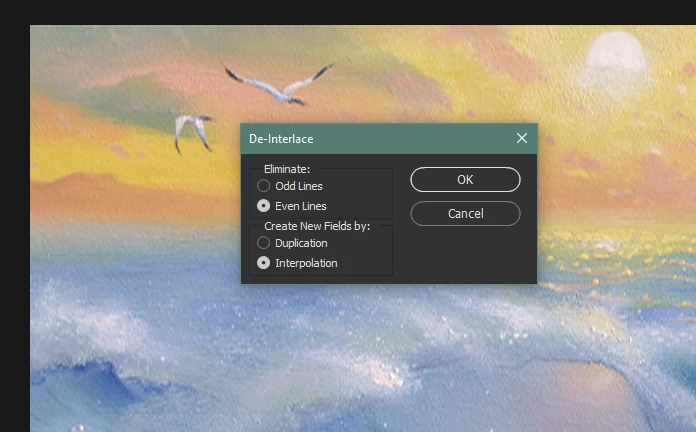
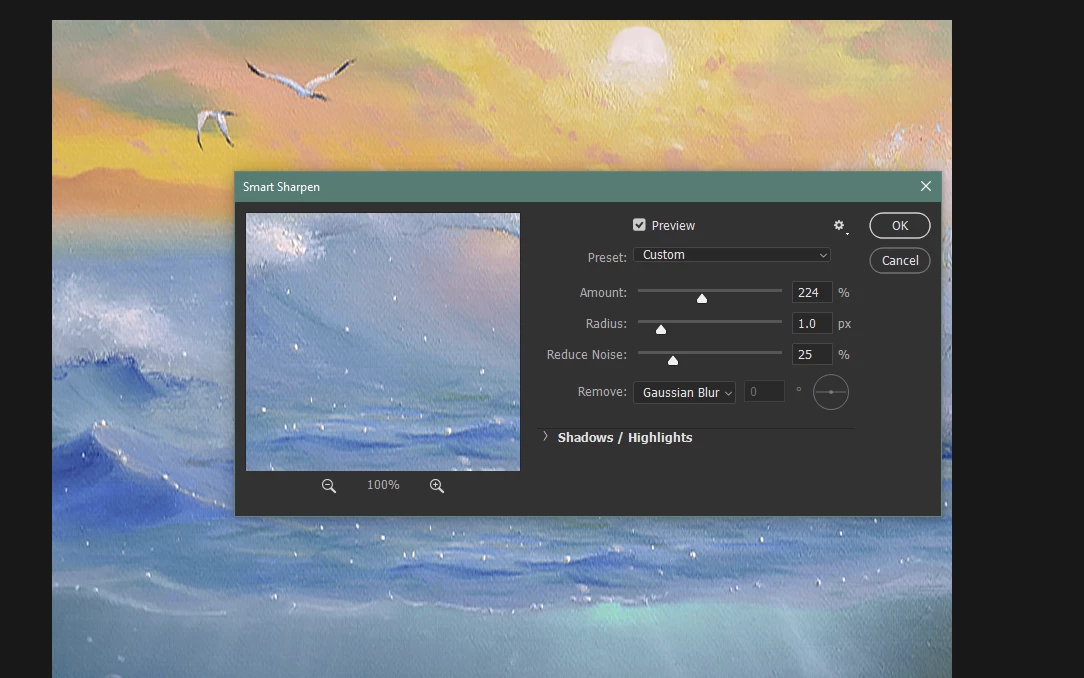
HI all. I really need some help with this. Im taking photos of some oil paintings with a camera, cropping in photoshop etc. the problem is the texture of the canvas is visible in the image and It looks not so good, on the other hand I want to save as much detail as possible. Can anyone tell me how to get rid of the canvas lines/texture? if its even possible.

Thank you very much


The image: (you can see the horisontal lines everywhere)

seascape1.jpg

TOPICS
macOS , Windows
21.0K
Translate
Report
Community guidelines
Be kind and respectful, give credit to the original source of content, and search for duplicates before posting. Learn more
community guidelines

correct answers 1 Correct answer

Guide , Mar 30, 2018 Mar 30, 2018

Files > Video > Deinterlace >odd lines interpolation  (repeat) even lines interpolation

Filter > Sharpen > Smart Sharpen > play with amount until it looks okay.

DE1.PNGD2.PNGD3.PNGsh1.PNGsh2.PNG

Translate
Adobe
Guide ,
Mar 30, 2018 Mar 30, 2018

I treated as if it was a video frame: deinterlaced it (Filters/video) and then smart sharpened.seascape1.jpg

Translate
Report
Community guidelines
Be kind and respectful, give credit to the original source of content, and search for duplicates before posting. Learn more
community guidelines
Community Beginner ,
Mar 30, 2018 Mar 30, 2018

This looks pretty good! thanks for your time. can you tell me the numbers? or atleast be more specific in what you did there?

Im a dumb person

Translate
Report
Community guidelines
Be kind and respectful, give credit to the original source of content, and search for duplicates before posting. Learn more
community guidelines
Guide ,
Mar 30, 2018 Mar 30, 2018

Files > Video > Deinterlace >odd lines interpolation  (repeat) even lines interpolation

Filter > Sharpen > Smart Sharpen > play with amount until it looks okay.

DE1.PNGD2.PNGD3.PNGsh1.PNGsh2.PNG

Translate
Report
Community guidelines
Be kind and respectful, give credit to the original source of content, and search for duplicates before posting. Learn more
community guidelines
Community Beginner ,
Mar 30, 2018 Mar 30, 2018

Thank you very much!

Translate
Report
Community guidelines
Be kind and respectful, give credit to the original source of content, and search for duplicates before posting. Learn more
community guidelines
Community Expert ,
Mar 30, 2018 Mar 30, 2018

Nice job.

I never really considered using the Filter > Video > Deinterlace to remove textures/patterns and or lines from photos/scans/non video files..

Definitely will being keeping this in mind for future use.

Translate
Report
Community guidelines
Be kind and respectful, give credit to the original source of content, and search for duplicates before posting. Learn more
community guidelines
Community Beginner ,
Apr 02, 2021 Apr 02, 2021

Jon (or anyone else that can help!), 

My wife has the same type of issue for her painting. She had her painting professionally scanned and unfortunately with the light glare, the texture of the canvas has very prominent more than any other scans she has gotten done. She followed the steps of what you shared but it hasn't made a difference. Not sure if she is doing it right.

Forest painting.pngexpand image


Translate
Report
Community guidelines
Be kind and respectful, give credit to the original source of content, and search for duplicates before posting. Learn more
community guidelines
New Here ,
Jun 21, 2024 Jun 21, 2024
LATEST

it also didnt help me using de interlace.. so i did my own. the thing that worked for me was using surface blur. then use smart sharpen . sharpen edges.  you need to learn to copy layers when you apply the separate filter per layer. then mask separete layers  brush over the parts on the mask you need to hide or boost.  play with their opacity and finally sharpen the overall image. it willl take some practice using the brush tool and mask. check youtube tutorials.

Translate
Report
Community guidelines
Be kind and respectful, give credit to the original source of content, and search for duplicates before posting. Learn more
community guidelines
Guest
Mar 30, 2018 Mar 30, 2018

i think this can be solved the filter gallery u can check there add filters and check from where is remove

Translate
Report
Community guidelines
Be kind and respectful, give credit to the original source of content, and search for duplicates before posting. Learn more
community guidelines
Guide ,
Mar 30, 2018 Mar 30, 2018

Really?

Translate
Report
Community guidelines
Be kind and respectful, give credit to the original source of content, and search for duplicates before posting. Learn more
community guidelines
Community Expert ,
Mar 30, 2018 Mar 30, 2018

The texture pattern does look eerily similar to Filter>Texturizer>Brick.

Translate
Report
Community guidelines
Be kind and respectful, give credit to the original source of content, and search for duplicates before posting. Learn more
community guidelines
Community Expert ,
Mar 30, 2018 Mar 30, 2018

Jeff I am sure I can remember you suggesting FFT for a similar issue.

Yep, here you go:

Are there any FFT (Fast Fourier Transform) plugins for Photoshop CC?

It's ages since I last used one, and I am even sure if there are any that work post CC 2014.2. 

Translate
Report
Community guidelines
Be kind and respectful, give credit to the original source of content, and search for duplicates before posting. Learn more
community guidelines