Copy link to clipboard
Copied
Hi,
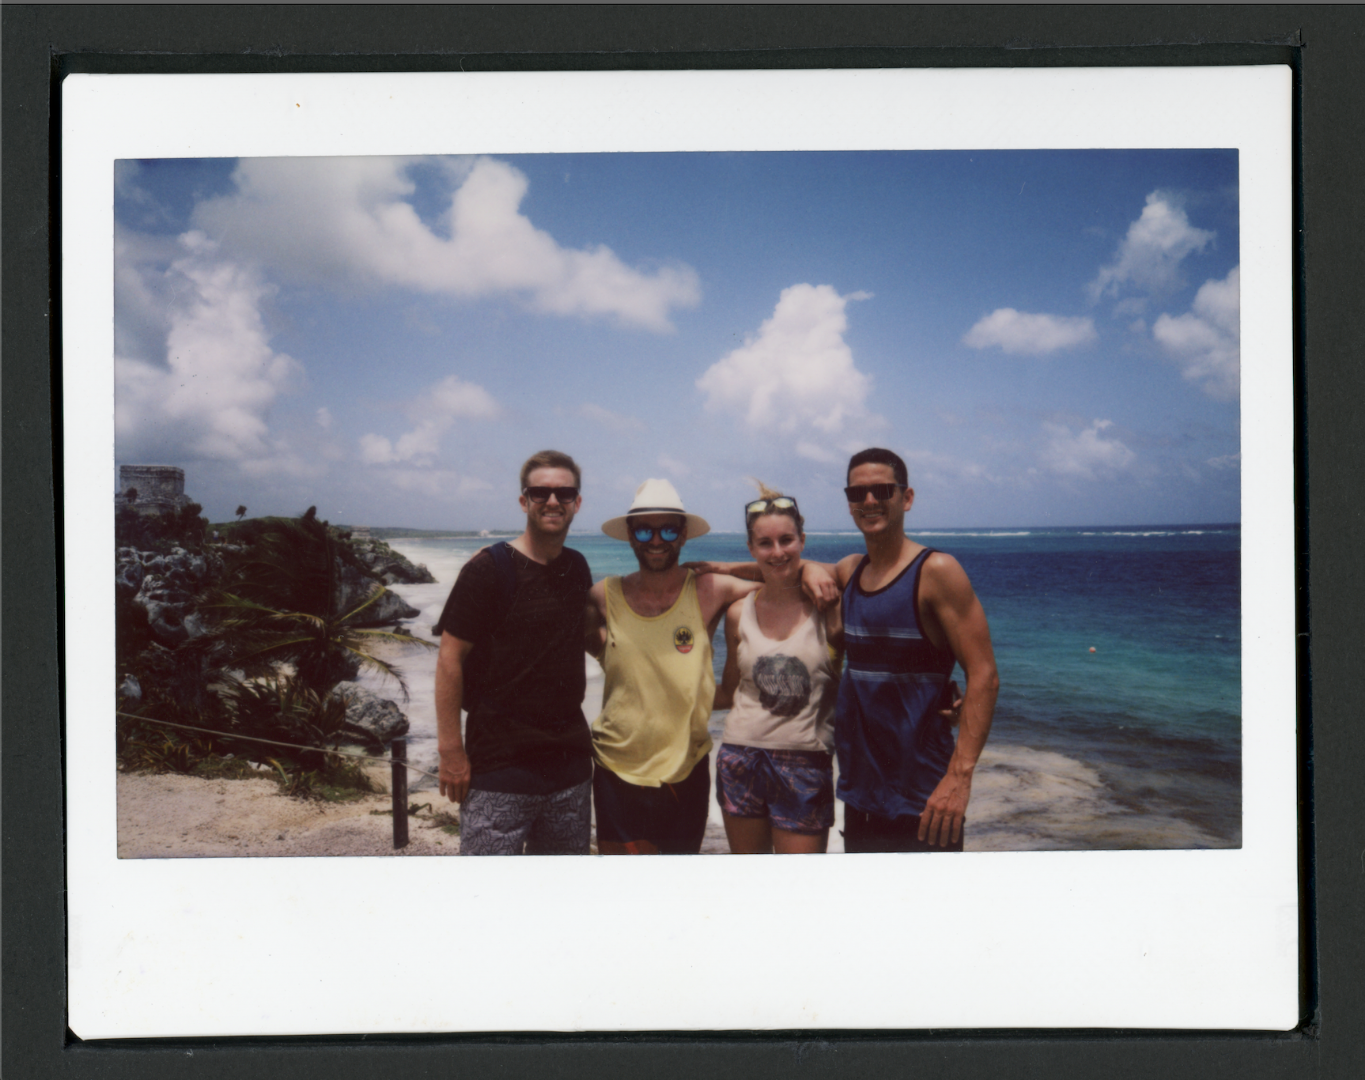
I scanned some polaroid and instax wide instant film from a friend's wedding. I intend to print a wedding book with the digitized instant film images. I used a homemade black scan adaptor to avoid newton rings (see below, image #1).
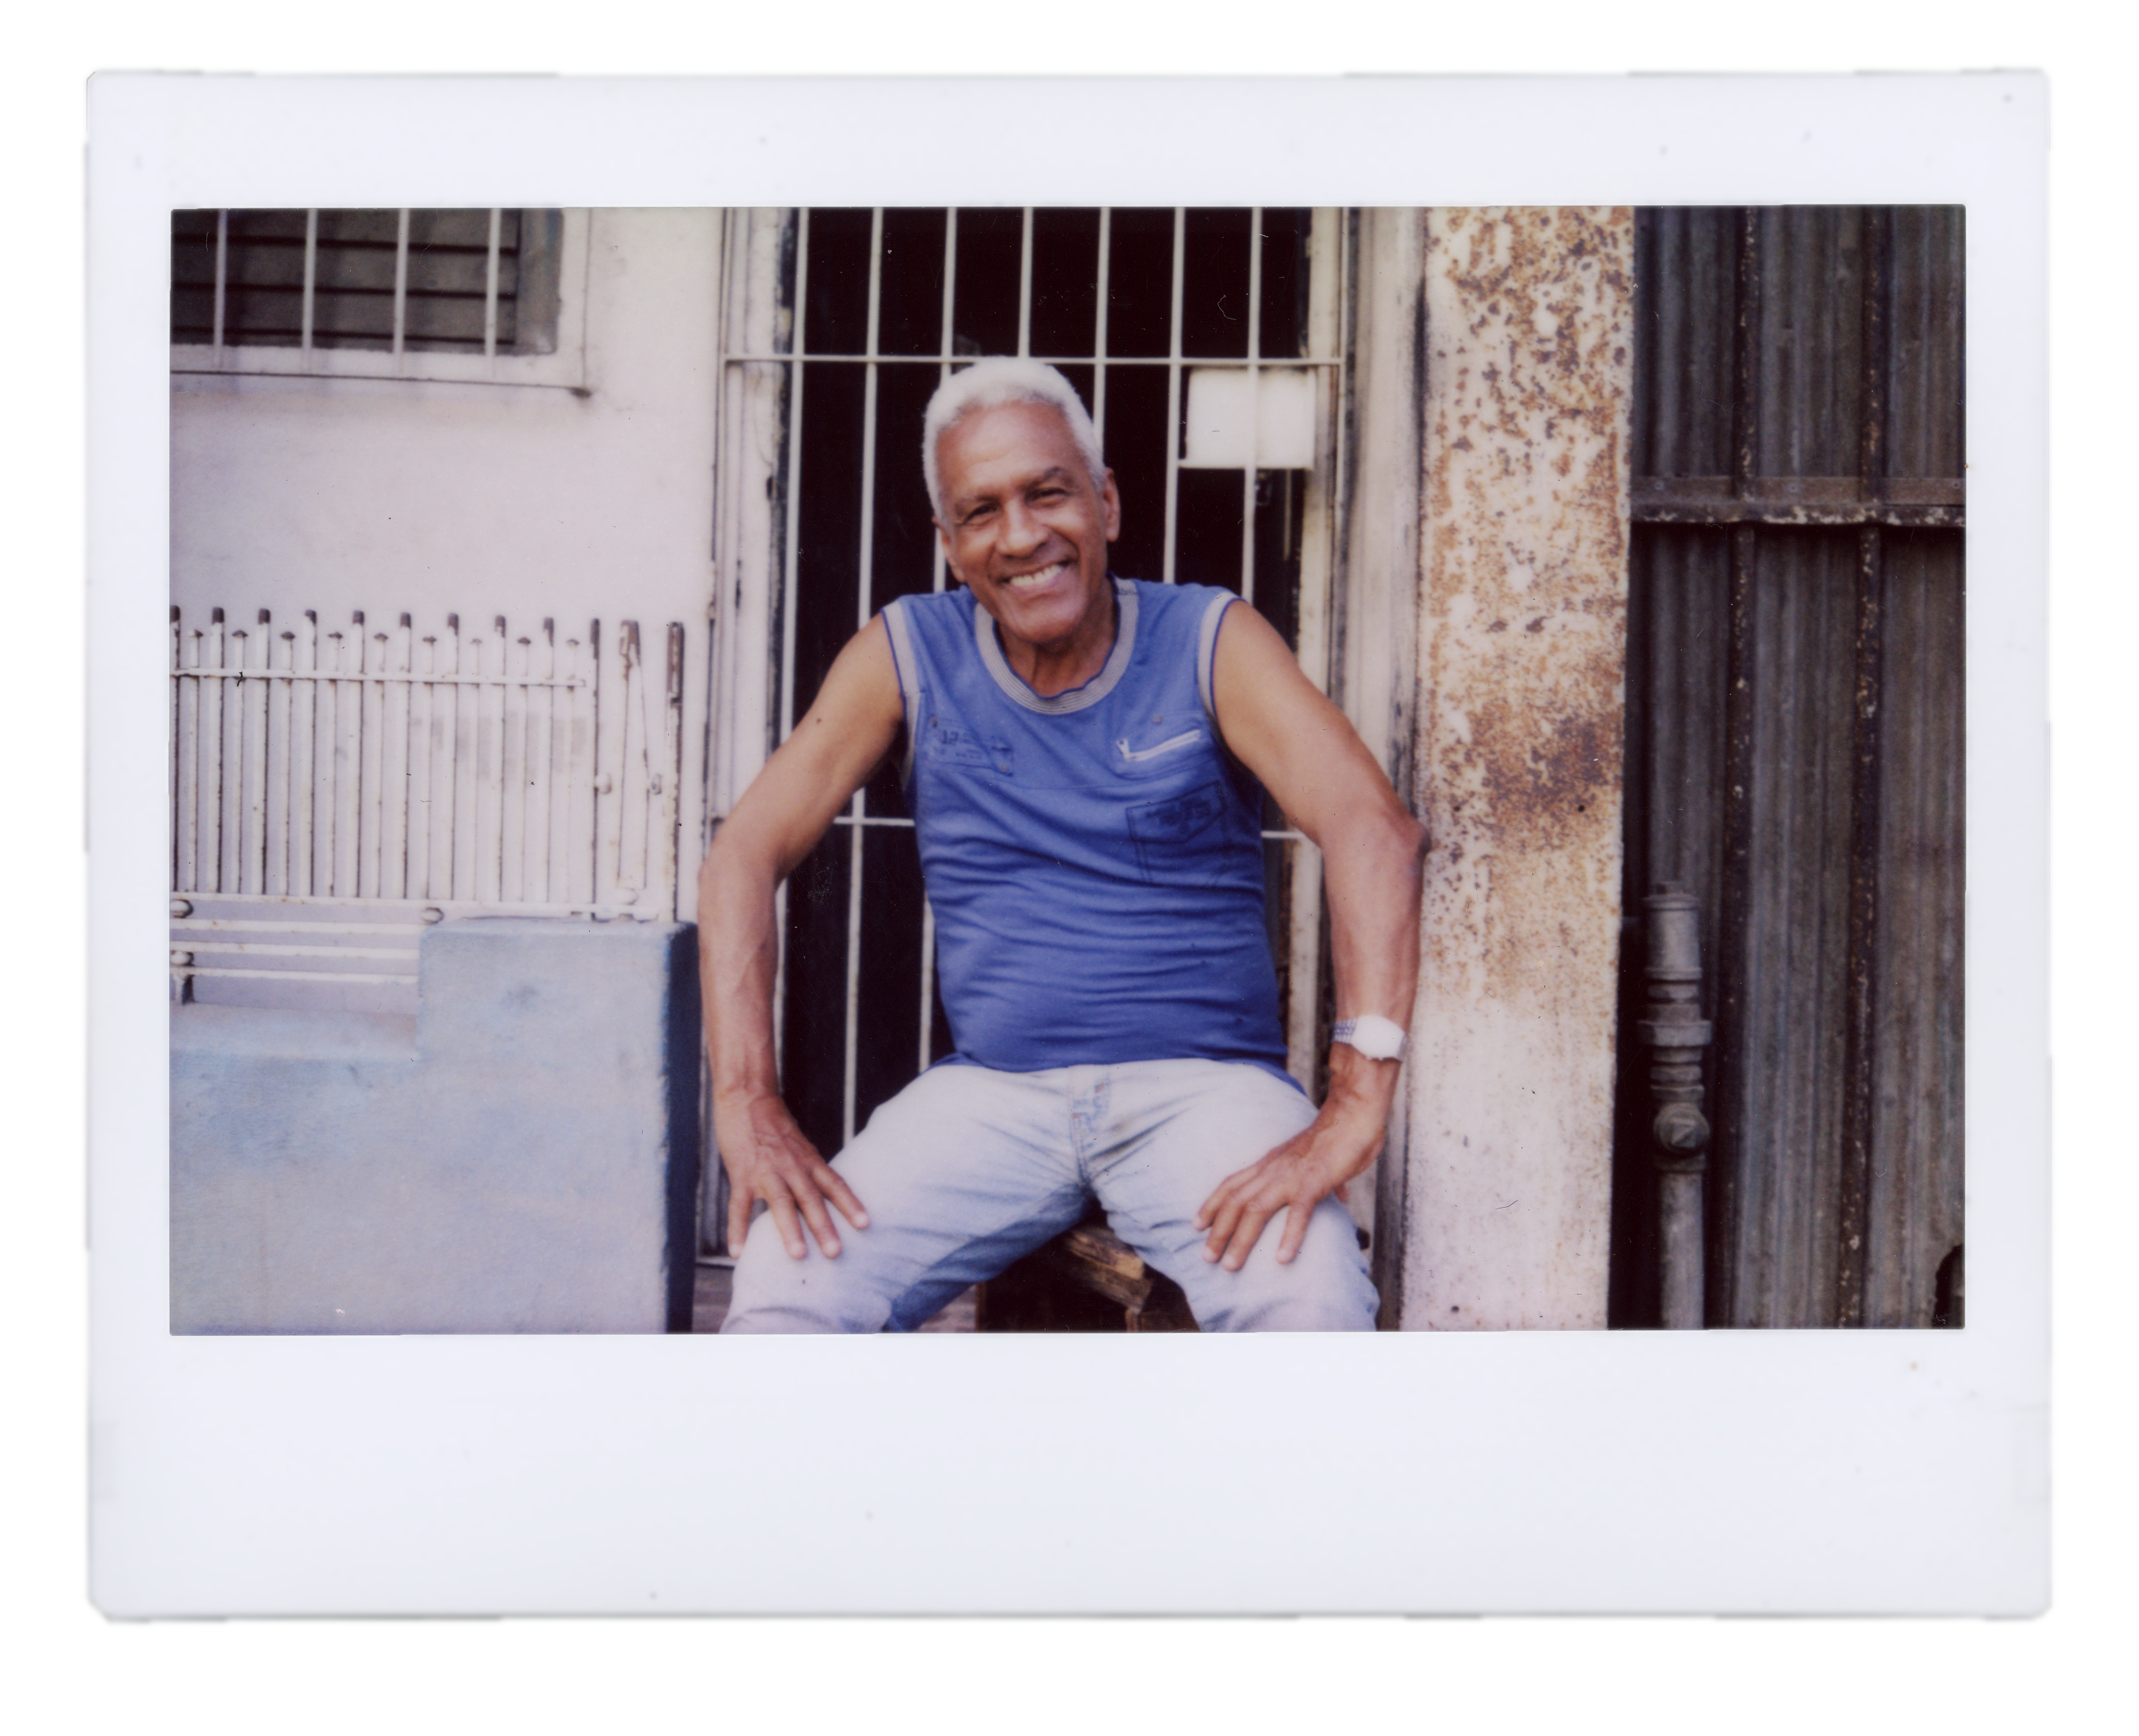
PROBLEM: When I select and remove the black background from the scan adaptor, the white border of the polaroid/instax is not super smooth...It looks jagged (see below, image #2).
NEED: I want to smooth out the outside of the white border so that the border line is relatively straight. At the same time I want the originality of each instant film image to remain...I want the border edges to be straight, but I want to maintain the image originality (see below, image #3).
I would appreciate any help on how I can better smooth the white border edge! Thank you.
Image #1: Scanned Image with adaptor border:

Jagged Edges Image:

DESIRED LOOK (obviously not Helmut Newton's image quality, but the border
)

Hi bgagliardi. I had the same idea as you regarding selecting the polaroid with the Quick Selection tool and then masking it.
After pressing the Select and Mask button I went to the Global Refinements section. The image below shows the quick settings that I was playing with and the resulting image.

If this is enough, good luck. I can further explain those settings if it helps.
Copy link to clipboard
Copied
So, forgive me for asking, but you removed the black by using color select? Since its a scanned image, it may not be entirely straightforward black and white and could cause some artifacts that appear as a jagged edge. Me, I would just use the crop tool to just inside the white. But that's just me
Copy link to clipboard
Copied
Dave,
I used quick select which did a pretty good job of selecting the white/black...As you mentioned though, there are some dark artifacts that make the outside white edge look jagged. I would crop, but I want to keep the actual shape of the polaroid...I think it makes it look authentic rather than some fake digital polaroid copy. As I will be printing these images, I think the jaggedness will make the images look amateur.
I was messing around with select/mask (refine edge) but I can't figure out how to accomplish what I am hoping for. Is there any simple way to select/remove/mask the dark artifacts so that the white border appears straight without drastically changing the border shape?
Copy link to clipboard
Copied
Hi bgagliardi. I had the same idea as you regarding selecting the polaroid with the Quick Selection tool and then masking it.
After pressing the Select and Mask button I went to the Global Refinements section. The image below shows the quick settings that I was playing with and the resulting image.

If this is enough, good luck. I can further explain those settings if it helps.
Copy link to clipboard
Copied
Those Global Refinements settings…
Smooth
This will take off the rough edges of the selection.
Feather
This will soften the edge of the selection. Your polaroid ultimately needs a hard edge but you need to first soften this edge before you can shrink the selection via the Shift Edge option.
Contrast
Having softened an edge with the Feather option, increase the Contrast to restore a strongly defined edge.
Shift Edge
Set a negative value to shrink your selection and remove any pixels from outside the polaroid. This effect is minimal unless some Feather is first applied.
Copy link to clipboard
Copied
Michael,
Thanks so much, I really appreciate it! I used your settings for another photo and it worked fairly well. What settings would you suggest changing for the top left jaggedness in the photo below?

Copy link to clipboard
Copied
Hey bgagliardi,
Great to hear this method is working for you.
I've looked at the recent image you posted. I'm reluctant to recommend specific numbers given that the image you posted has already been cut out.
Given that there is more jaggedness in this image you might want to get more aggressive with the four sliders. For example you might want to use a larger negative number for Shift Edge which would also require a larger amount of Feather. This in turn would require more Contrast to offset the now softer edge. It really is a bit of a game of adjusting one slider a little and then adjusting the others to suit.
Another tip would be not to go crazy with the Feather. Usually, but not always, only 2 or 3 pixels at the most is required.
If you aren't already you might want to play with the different View options at the top of the panel. When adjusting a selection I will regularly review different modes just to see if I'm making a good adjustment to my selection/mask.
Cheers
Find more inspiration, events, and resources on the new Adobe Community
Explore Now