

- Home
- Photoshop ecosystem
- Discussions
- Re: This shadow simply doesn't look authentic, how...
- Re: This shadow simply doesn't look authentic, how...

Copy link to clipboard
Copied
Hello to all of you,
I am having trouble making the shadow in this picture look authentic.
Can the thickness even be this much?
Am I blurring it too much?
Thank you in advance for the help!


 1 Correct answer

There really are an infinite ways to light this. A couple of quick renders in Blender:
First three are a simple point light positioned directly above, at varying sizes (or distances). The smaller a light source, the sharper the shadows will be.
The 4th one is equivalent to out Sun's size, overhead.
The ones after that I used an environment lighting (HDR) which simulates 'real' lighting conditions. The final one is a simple spot light, aimed from an forward angle.
Then there's the contrast as well to
...Explore related tutorials & articles
 19
Replies
19
19
Replies
19

Copy link to clipboard
Copied
What software are you using? Photoshop? Photoshop Elements? Illustrator? After Effects? Something else?
Copy link to clipboard
Copied
Hello,
Photoshop
[Here is the list of all Adobe forums... https://forums.adobe.com/welcome]
[Comments is to ask about the operation of the Forum, not a specific program]
[Moved from the Comments forum to the specific Program forum... Mod]
Copy link to clipboard
Copied
There are so many ways to accomplish a drop shadow.
Found this online tutorial which may help.
https://photoshopcafe.com/tutorials/cast_shadow/cast_shadow.htm

Copy link to clipboard
Copied
The shadow softens the further away the object is from the surface:


Copy link to clipboard
Copied
There is not enough information to say exactly how big and far away, and what direction the light source is coming from.
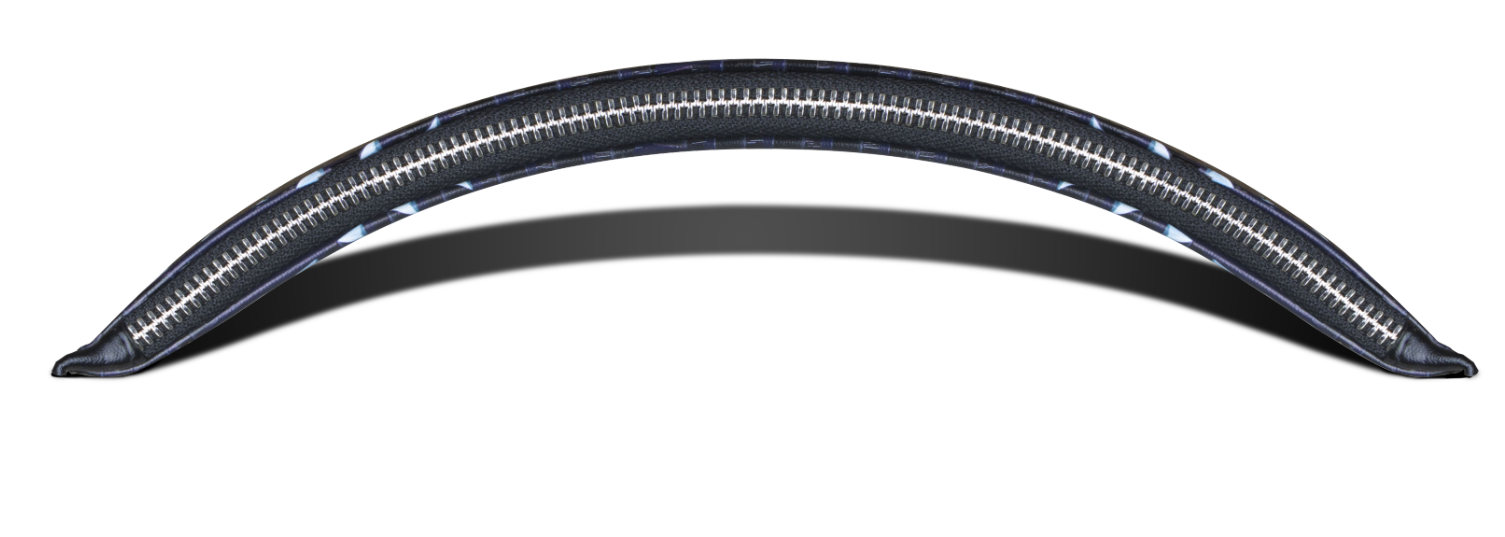
This example assumes centre and in front of the zip, and fairly small (tiny Shadow Edge Transfer).
The shadow will be harder and denser where it is closer to the zip, so darker towards the edges.
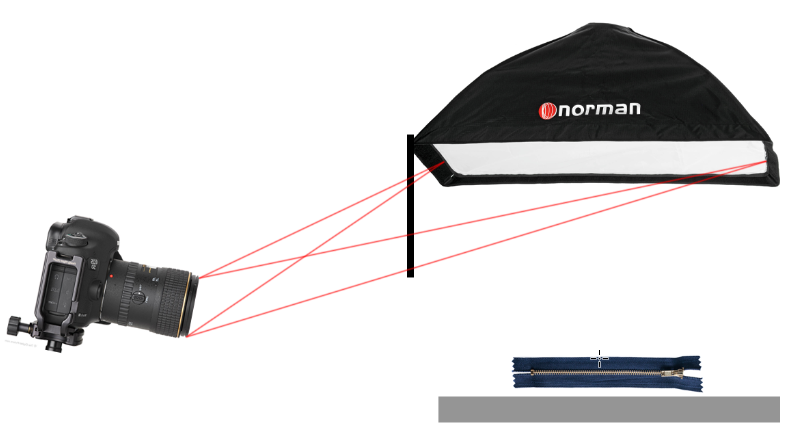
Dag's example in post #4 assumes a large light source directly above the zip, so a huge Shadow Edge Transfer. In practice we probably wouldn't light exactly light this, because the lens front element is likely to be hit with direct light causing flare. A lens hood and careful use of flags (black card) will prevent this, but it is easier to move the light towards the camera, and tilt it towards the target.
Doing this sort of thing with Photoshop is best done with multiple layers (at least two), because it makes it so much easier to achieve the different shadow properties. We can make use of Mask Properties.

I paint the close in hard shadow with the paint brush, which is tricky to get just right, but being on a separate layer I use the blur and smudge tools to soften and drag the shadow into best position.
I'd love for davescm to do this with 3D and render the shadows. 
Copy link to clipboard
Copied
I assume soft light, Trevor, the way you would do product photography. A large overhead softbox. Flare is not a problem in those circumstances.
A naked light bulb hung from the ceiling would produce those hard shadows. We don't want that, do we? 
Copy link to clipboard
Copied
https://forums.adobe.com/people/D+Fosse wrote
I assume soft light, Trevor, the way you would do product photography. A large overhead softbox. Flare is not a problem in those circumstances.
A naked light bulb hung from the ceiling would produce those hard shadows. We don't want that, do we?
It's irrelevant. If there is a direct path between any part of the light source, and any part of the front element, then we are looking at flare.

We can flag the light, and use a lens hood, but tilting the light away from the camera gives us less work to do.
In actual face, I am asked to provide pretty much all my commercial shots clipped with transparent backgrounds. I used a 1DsMK3 for eight years before realising there was never going to be a suitable 1D replacement, so I now use and love a 5DS which has a 50Mp sensor, which makes clipping paths so much easier.
Copy link to clipboard
Copied
Thank you,
Gave me a good input in how the shadows works.
Copy link to clipboard
Copied
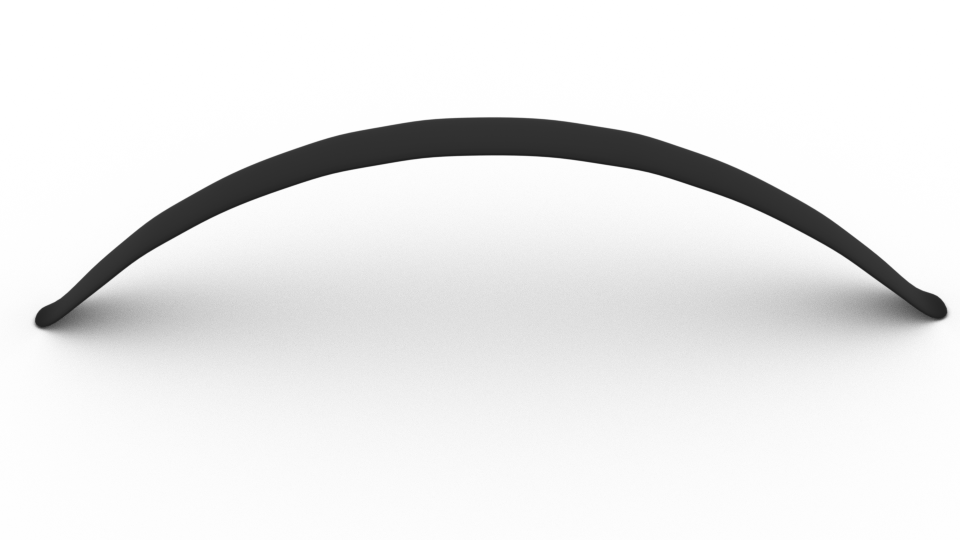
There really are an infinite ways to light this. A couple of quick renders in Blender:
First three are a simple point light positioned directly above, at varying sizes (or distances). The smaller a light source, the sharper the shadows will be.
The 4th one is equivalent to out Sun's size, overhead.
The ones after that I used an environment lighting (HDR) which simulates 'real' lighting conditions. The final one is a simple spot light, aimed from an forward angle.
Then there's the contrast as well to consider. It really depends on the lighting conditions you would want to emulate.


Copy link to clipboard
Copied
Thank you,
You have been so helpful, can't thank you enough.

Copy link to clipboard
Copied
Trevor.Dennis wrote
I'd love for davescm to do this with 3D and render the shadows.
Similar to Rayek's a large plane over the object, which acts just like a softbox, to cast a soft shadow,

However, normally with a 2D image like that I would paint in the shadows , which is quicker than modelling.
Dave
Copy link to clipboard
Copied
How did you paint it?
Copy link to clipboard
Copied
On the example I posted above, I modelled it in Blender as Trevor had asked the question about what it would look like using 3D. Like I said, I would not normally do that just for a shadow. I would use a soft brush and paint it in - as Dag showed earlier.
Dave
Copy link to clipboard
Copied
Veering off topic, which is so unusual here , I hate soft brushes. You can't see what you are doing. As far as I can remember, I always paint with a hard brush, and blur after. I like being able to select just that area I want to blur, and use the smudge tool to nudge things into place. Or, like I said back up the thread, use multiple layers for the one shadow.

Copy link to clipboard
Copied
For more complex shapes and forms I always create a simplified model in Blender and use it later as a reference and/or for overpainting. Or look at reality, but a 3d app is so accommodating 🙂
I pretty much work like this guy:
In particular now with the new Eevee realtime render engine in the upcoming Blender 2.8 (which is already avaliable as a usable alpha): any change to lighting and shadows happens instantaneously. It's amazing.
Copy link to clipboard
Copied
Hello Rayek,
I have been trying and trying in blender, but I honestly don't understand blender..
How would I do it with this picture?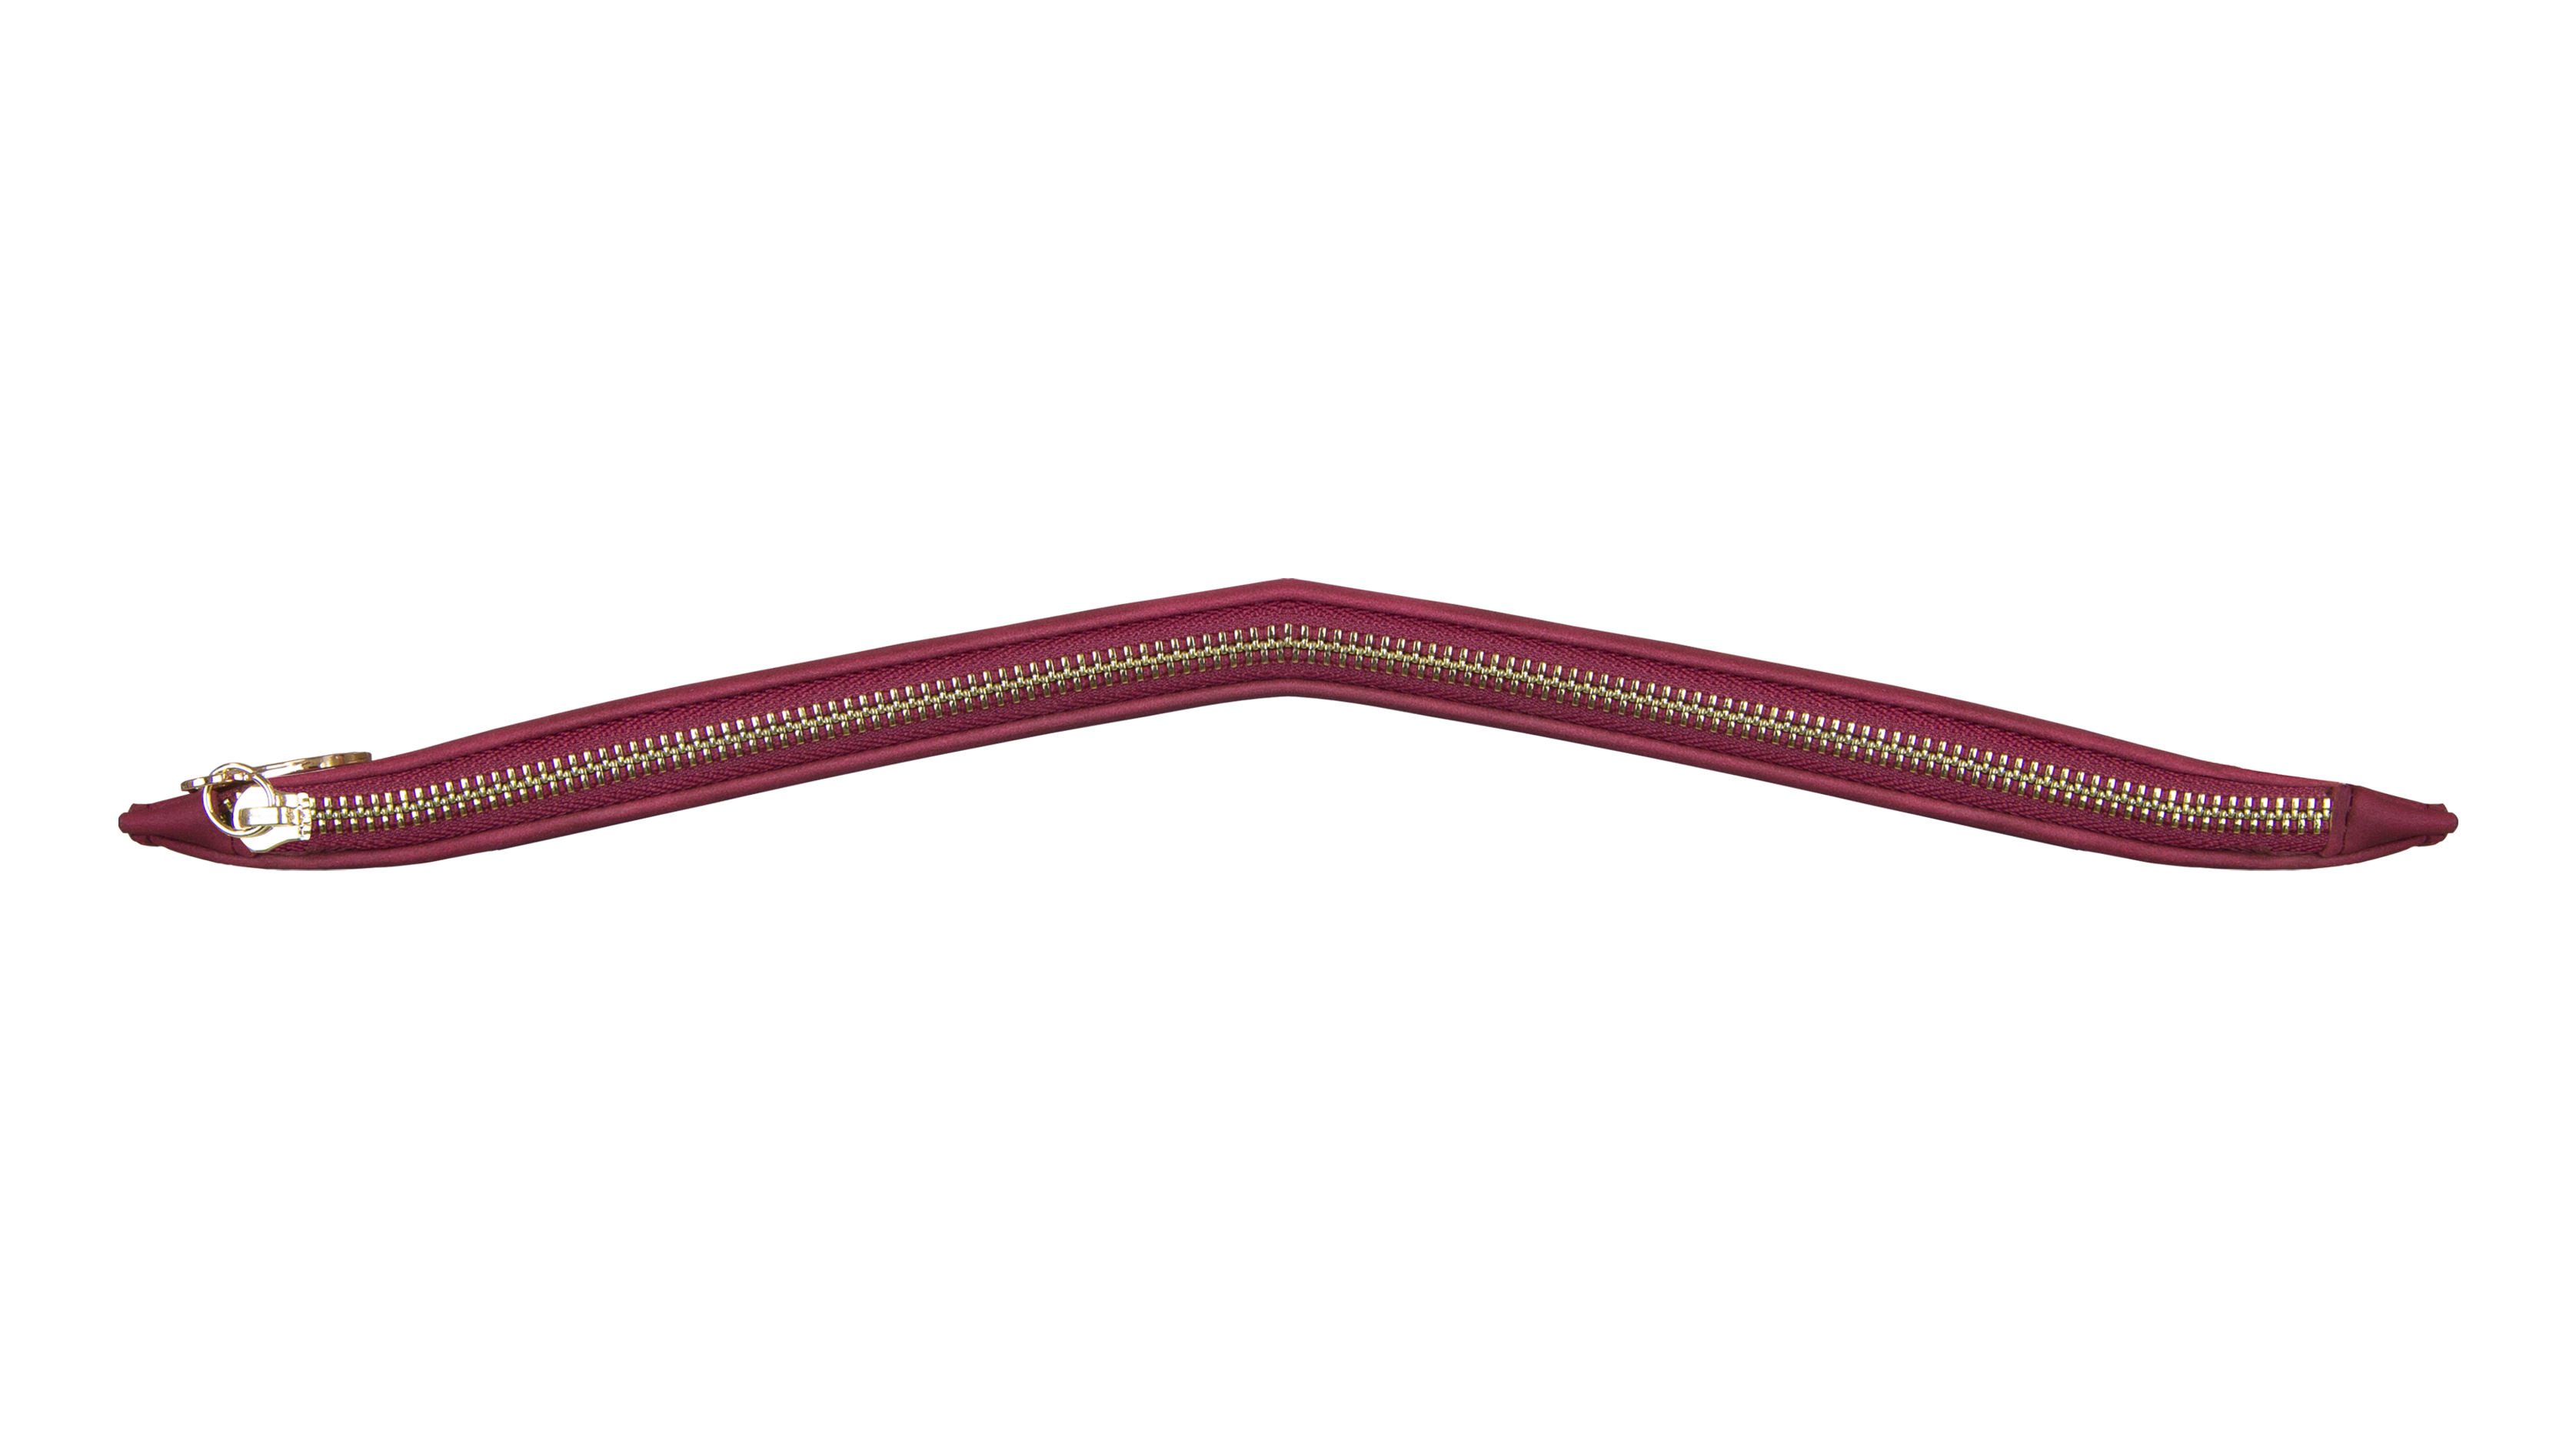
Copy link to clipboard
Copied
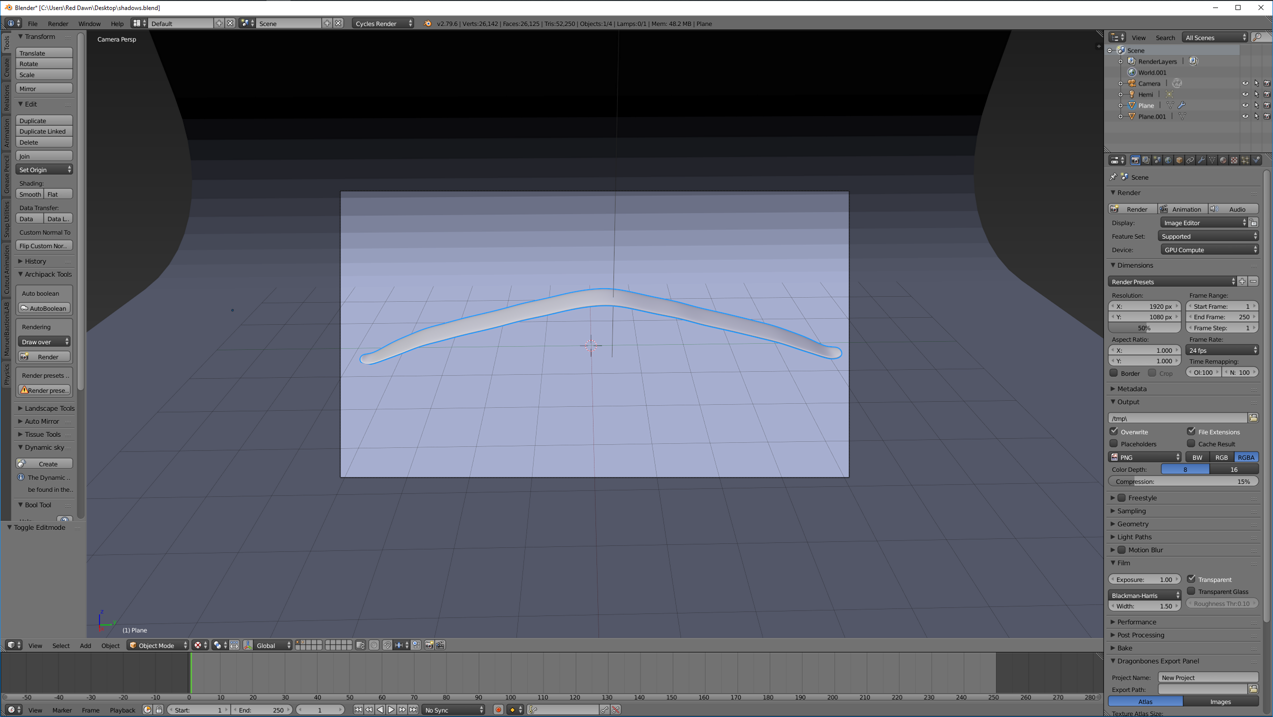
IF you'd do this with the help of Blender (or any other 3d app with a shadowcaster option), you would transform and edit the 3d object like this to more or less follow the new zipper's shape:
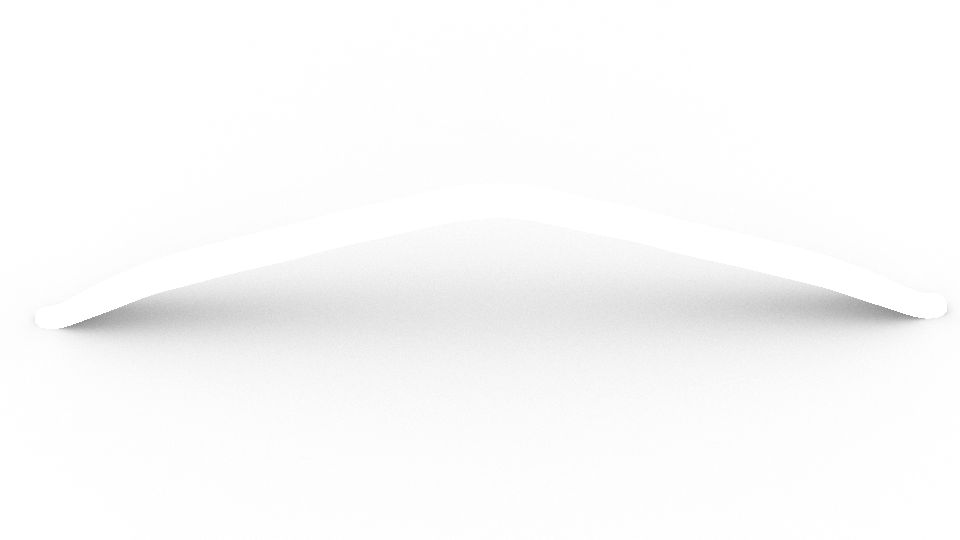
You would then render out the shadow pass separately from the object with the use of a shadow catcher object, as well as the mask for the 3d object to simplify compositing later in your image editor. I rendered a multi-layered EXR file, and imported that. The shadow masked looks like this (I had to use the minimize filter to choke the mask a bit):
Finally, by transforming this shadow you'd blend it with your original zipper file, and make some adjustments to the contact shadows, etc. (in this simple example I did not bother with the flattened ends, and decided to do that in post):

If you look carefully, you will spot some issues with the shadow cutting off at the edges - I should have rendered a larger white area or use an elliptical layer mask to hide it, but since it only serves as a simple example, I left it in. It still looks reasonably convincing. Contact shadows must be darkened more, btw.
Thing is, I can't really teach you how to use Blender, or how to deal with render passes, or how to use Photoshop's tools for compositing in just a few mere steps and paragraphs. If you want to learn more about Blender, I suggest viewing one of the many (free) basic Blender tutorials online. Also read up on render passes and compositing.
As a simple solution, you could just use one or two basic rendered shadows, and use Photoshop's transformation and masking tools to adjust them to your needs. I wouldn't want to use this method if hundreds of different zippers must be treated with an added shadow! 😉
Copy link to clipboard
Copied
...which illustrates my point perfectly
The OP doesn't need to simulate any particular conditions. He just needs something credible, so an abstract of Rayek's (all of them except 4 and 8). Or mine, which was entirely manual.
Copy link to clipboard
Copied
Here's the Blender file in case you'd like to test this for yourselves. It produces this version:
http://www.upl.co/uploads/shadows1542787142.zip


Find more inspiration, events, and resources on the new Adobe Community
Explore Now
 AdChoices