

- Home
- Photoshop ecosystem
- Discussions
- Re: Tips and tricks for selecting and masking in P...
- Re: Tips and tricks for selecting and masking in P...
Tips and tricks for selecting and masking in Photoshop?

Copy link to clipboard
Copied
Hey all, I have been using Photoshop for several months now and have of course come by masks. I mainly edit portraiture and fashion imagery.
I am very eager to quiz you all on anything I may need to add to my selecting and masking arsenal e.g. quicker work arounds or longer yet more in depth techniques.
Here is my routine for selecting and masking something:
1. I draw around or select the subject with whatever selecting tool I choose (normally pen tool).
2. I right-click and select "make selection". Then when the marching ants are visible I create a curves layer, which creates a layer mask.
3. Thirdly, I'll use the "select and mask" tool to develop my mask further, primarily for the hair, overall reaching more intricate parts of the image.
4. I will then (alt-click) go into my layer mask and clean up any imperfections e.g. clean up any unwanted black paint inside the white silhouette.
5. The next step would be to blur the mask and be rid of overly sharp edges.
6. Following that, I would click out of the layer mask and select the backslash key, to visualise my mask.
7. Able to visualise my mask I can now use the blend modes Multiply and Screen to help pinpoint parts of my mask, which don't completely fit the subject. Once I have pinpointed the faults I will either brush in the corrections or use the dodge and burn tools to push in or push out the mask.
This is my method. Feel free to critique it and comment sensibly below. I value all your comments so please do post. I would love to develop my select and masking skills further and your minds are full of ideas.
If in need of understanding or clarification on anything I've commented do not hesitate to ask!
Thanks!


Explore related tutorials & articles
 9
Replies
9
9
Replies
9

Copy link to clipboard
Copied
Call me old fashion. Even with all the new selection tools and refining tools in Photoshop, Select subject and quick selection etc. I still tend the get best extraction starting with a color channel copy as a starting point. It also best to Photograph your portraits with a neural background to make extraction easier.

Copy link to clipboard
Copied
Layer Masks are definately the way to go, especially with human subjects, I usually prefer to use the brush tool, as you can edit the size and softness on the fly as needed. The only thing I would add, is I will put a layer behind that is filled with an obnoxious color as a "worst case scenario" for compositing.
Copy link to clipboard
Copied
"The only thing I would add, is I will put a layer behind that is filled with an obnoxious color as a "worst case scenario" for compositing."
Could you possibly elaborate on this, it seems interesting.
Copy link to clipboard
Copied
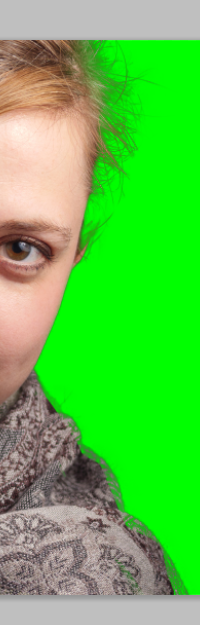
I just use a bright color like chroma key green or hot pink behind the layer that i am masking, It makes the edges of the subject more visible than over white or a grid. This is especially helpful with things like hair or fur... When finished, I just delete that layer.

Copy link to clipboard
Copied
Select Subject is working surprisingly well as an initial selection tool. I'm guessing it uses what Adobe is calling Sensei to work out the likely subject matter. Then use ever smaller brushes with the Quick Select tool to do some more, and maybe Quick Mask as a final step before Select & Mask, but you are probably going to need to use Quick Mask after Select & Mask, so might be better to wait.
Always set Select & Mask to output to a Layer Mask. I usually choose with new layer because I can't think why not. You can then use all the selection tools to fine tune the layer mask:
Using Shift with the brush tool to force perfectly straight edges in the layer mask
Using the Lasso tool with the Alt key to make quick selections on straight outer edges to clean the layer mask.
Using the pen tool to make curves which I Ctrl click in the Paths panel to make a selection.
The point is that once you have the layer mask, you can use the entire power of Photoshop to fine tune it.
BTW I wonder if some people don't realise that most of what you can do to a pixel layer, you can do a layer mask. Nudge it, blur it, run gradients, Free Transform it (you have to unlink the mask for this to work).
Dave Cross told us a story at MAX in 2016 about the other Kelby TV people being amazed at how well he'd masked some flyaway hair. He fessed up that he actually painted the fine strands back in after making the selection. I have been doing this for as long as I remember. Use fully hard brushes up to 3 pixels, with size jitter set to Fade. Use a new layer of course, and finally reduce layer opacity to get a good match.
Side Bar — Fade is related to Brush Spacing. I've set the Fade to 20 in the example below, and increased spacing so we can see the individual touch downs. Brush size was 10 pixels, and if you count, you'll find that there are 20 dots, each diminishing by 2 pixels. Knowing this will help you set a sensible value for Fade, but if you have a very low spacing, it gets tricky again.

Hair inside the cyan highlight is painted in with a 2 pixel brush with spacing set to 8% and Fade set to 500. Layer opacity is 100%
The red highlight what Select & Mask output.

Layer opacity reduced to 40%

Or if you want it stronger, copy the layer. Set it to Screen if you want to go crazy. 

If you really want to do hair, get the Skin and Hair Texture brushes by Castrochew. They are all I use with the addition of some fade brushes
Skin and Hair Texture Brushes by castrochew on DeviantArt
Start with darker tones to do the background, and build up with ever lighter tones.
Scooter mentioned using a contrasting colour behind the layer you are making the selection on. This is another useful trick. Just choose a bright colour that does not appear in the image. It becomes very clear where the green is bleeding through what should be sold clothing.
Copy the layer and adjust the contrast to reveal difficult areas. Make the selection using the adjusted version, but apply the same selection to the original. You don't have to do this in one go btw. Make different edits to different areas to best aid the selection. Remember, contrast is good.

That's a few off the top of my head, and some of the other lads will no doubt add their two cents worth.
Copy link to clipboard
Copied
But surely instead of making a chroma green layer behind my layer mask layer, I could just hit the backslash key to visualise my mask instead (making sure the colour of my visual mask is set to a contrasting colour to).
Or am I missing the point here?
Copy link to clipboard
Copied
ChadPT18 wrote
But surely instead of making a chroma green layer behind my layer mask layer, I could just hit the backslash key to visualise my mask instead (making sure the colour of my visual mask is set to a contrasting colour to).
Or am I missing the point here?
I wonder if you are confusing things by using terms like Chroma key? The only reason you use a bright contrasting colour, is to highlight translucency where it should be solid. It also highlights you've missed or left partially masked.

Another good tool is to Alt (Opt) click the layer mask which reveals it as grey tone in the document window. The point is that you can very quickly switch between these views and build up a good selection.

I think the OP mentioned making a loose selection with the lasso tool. I wouldn't do that myself at the early stage, but I do this a lot when touching up the layer mask and I have some semi transparent tones I want to remove. Sort out the edges, and then make a rough selection so I can Alt backspace to fill with black and remove them.

Copy link to clipboard
Copied
Hey Trevor,
Thanks for your quick informative replies. Sometimes I overthink what has been explained to me then later realise it was simpler then I thought.
Your posts have been fantastic, especially where you mentioned how Dave cross had wondrously masked some fly away hair.
Thanks!
Copy link to clipboard
Copied
ScooterD76 wrote
usually prefer to use the brush tool, as you can edit the size and softness on the fly as needed.
When painting on a layer mask I find painting with a soft low opacity tip with blend mode overlay protect the Black and white areas of your mask only the gray areas can be painted. Once an area turns white or black it can no longer be changed with the brush tool. Use many strokes watch the effect each stroke has on the composite image. Go slow and easy.

Find more inspiration, events, and resources on the new Adobe Community
Explore Now
 AdChoices