- Home
- Photoshop ecosystem
- Discussions
- Re: Trying to distort a cubemap to look like a sph...
- Re: Trying to distort a cubemap to look like a sph...
Trying to distort a cubemap to look like a sphere but having no idea how.
Copy link to clipboard
Copied
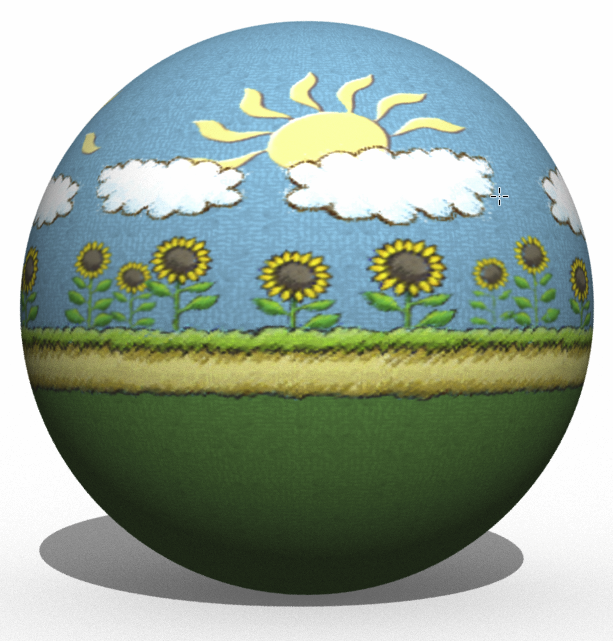
Basicly im trying to distort this image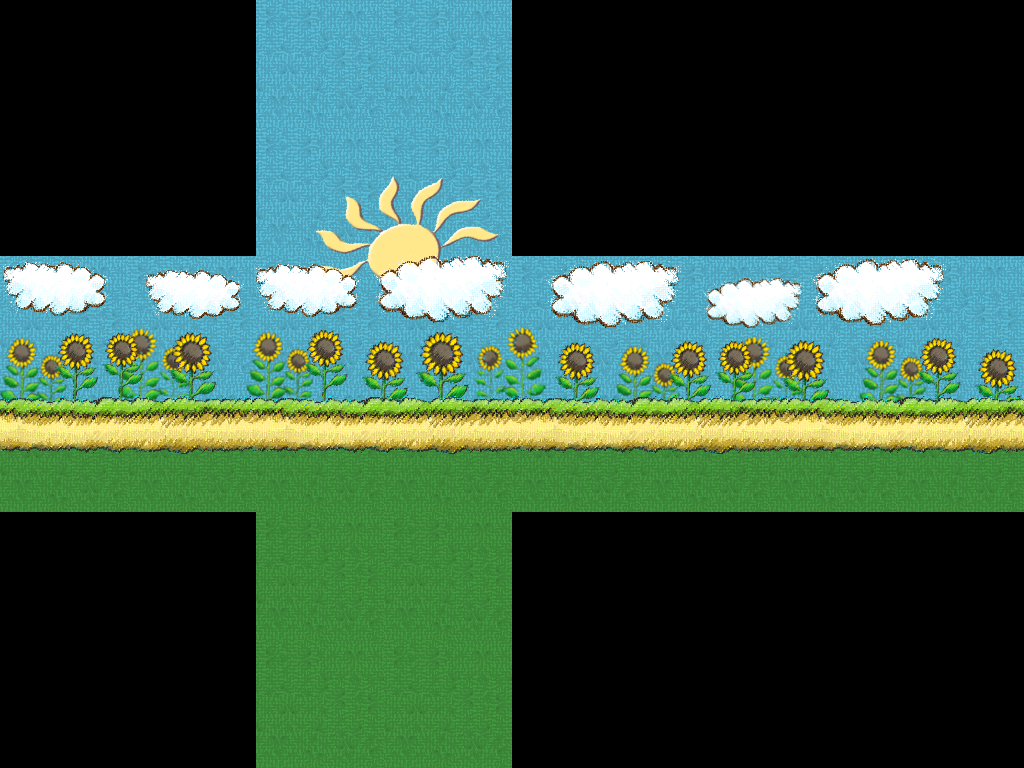
To look more like this image 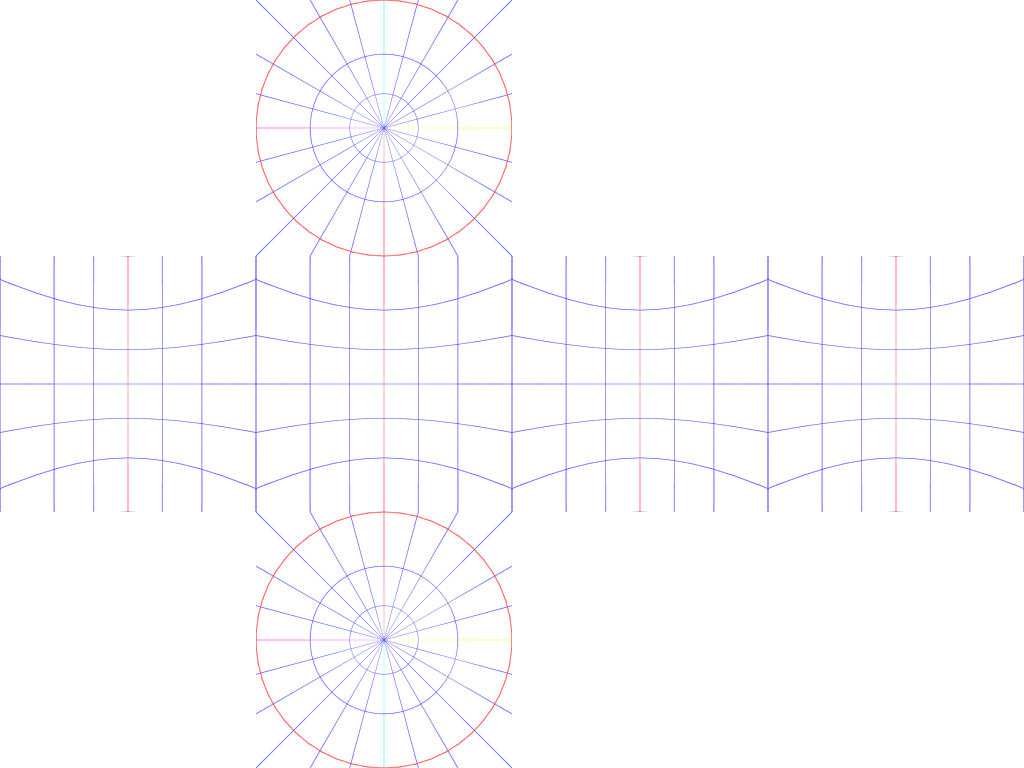
This is how the source engine handles skyboxes and there is no other way i would be able to do it
Explore related tutorials & articles
Copy link to clipboard
Copied
Open the 3D workspace
Make a new document with square sides. Say 1000 x 1000 pixels
From the 3D menu chose Mesh from Preset, and chose Sphere from the drop down.
Now you need to make your box texture the same size. (1000 pixels square) and fill in the corners with Content Aware Fill.
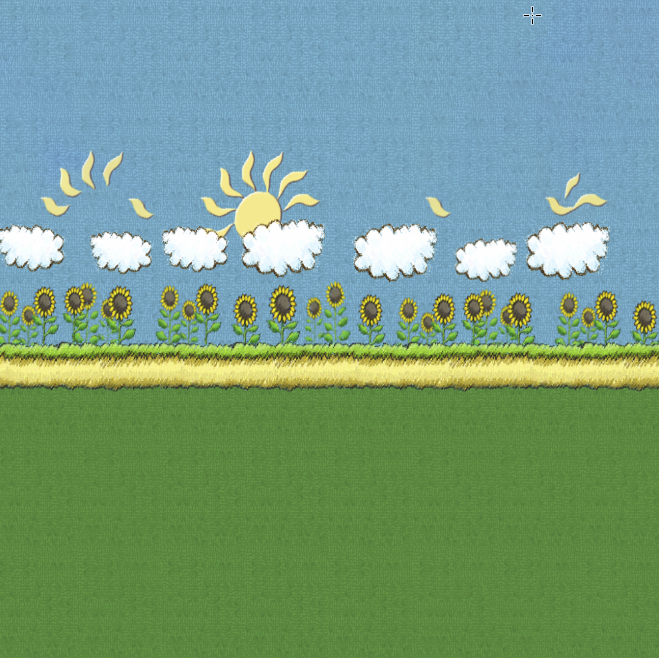
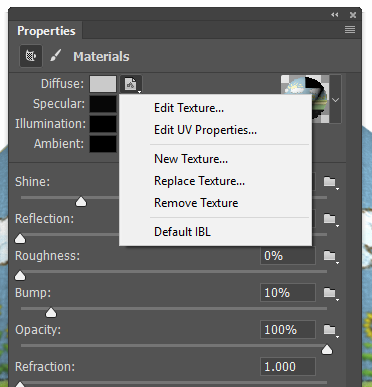
In the 3D panel click on Sphere material, and in the Properties panel click on the drop down next to Diffuse, and chose Replace Texture. Replace it with you now square texture. Job done.
Copy link to clipboard
Copied
Not in any way what i asked for but thanks anyways
Copy link to clipboard
Copied
You might be able to do this with Faling Pear's Flexify plugin - Flexify 2 Photoshop plug-in for panoramas, polyhedra, and maps - Flaming Pear Software
Copy link to clipboard
Copied
Semaphoric wrote:
You might be able to do this with Faling Pear's Flexify plugin
That made me smile. I have a few FP plugins, and while they are still useful, their UIs are decidedly dated.
Copy link to clipboard
Copied
Twashman ,
I think Trevor's method is the nearest you will get in Photoshop without additional plug ins - although the warping needs to leave the edges of each square in place for a skybox so that the cube-map joins up.
It is a pity that pinch filter cannot be made to work only in one dimension (it always pinches in two).
The plug in suggested by Semaphoric looks the best bet.
Trevor.Dennis - good to see the 3D work progressing ! My "Christmas card" on the Happy Christmas thread is a 3D render - just for a bit of practice ![]()
Dave
Copy link to clipboard
Copied
davescm wrote:
Trevor.Dennis - good to see the 3D work progressing ! My "Christmas card" on the Happy Christmas thread is a 3D render - just for a bit of practice
Dave
One of the great things about this forum is that gives you a reason to practice things that might not otherwise come into your day to day use of Photoshop. Even if those things happen to be questionable memes and cartoons that get you into trouble ![]() . With 3D I'm of an age where it use it or lose it, and if I don't keep practicing, I'll be back to square one. But being serious, thanks for kicking me into making a start with 3D. There is never enough time though. I was actually really pleased not to be in the top posters list this time round, because it means I am spending more time creating artwork, and less time on this forum. Unfortunately, following this forum is almost as addictive as using Photoshop. Luckily there is a great deal of overlap.
. With 3D I'm of an age where it use it or lose it, and if I don't keep practicing, I'll be back to square one. But being serious, thanks for kicking me into making a start with 3D. There is never enough time though. I was actually really pleased not to be in the top posters list this time round, because it means I am spending more time creating artwork, and less time on this forum. Unfortunately, following this forum is almost as addictive as using Photoshop. Luckily there is a great deal of overlap.
Copy link to clipboard
Copied
LOL, and I was pleased with my answer, because I haven't been using Photoshop 3D long. In fact I meant to dedicate my answer to davescm who talked me into making the effort.
OK, so to answer your question more directly, you need to remove the black corner cutouts, which I am guessing were only there for the sake of your screen shot.
Overlay your guide, and set it to Multiply and can use it when you Transform the texture.
Select just one of the sides, and Free Transform > right click and choose Warp.
Move the handles using your overlay as a guide.
Repeat for the other two square sides.
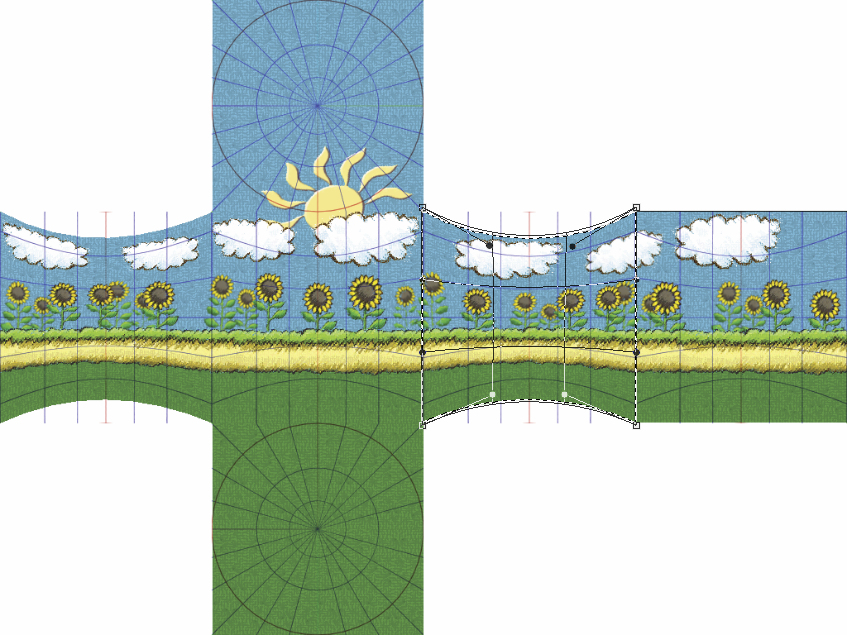
Now I am rethinking this. You need to move the top and bottom sides with the circular overlay, each to a new layer, and repeat the Transform > Warp on square side left behind.
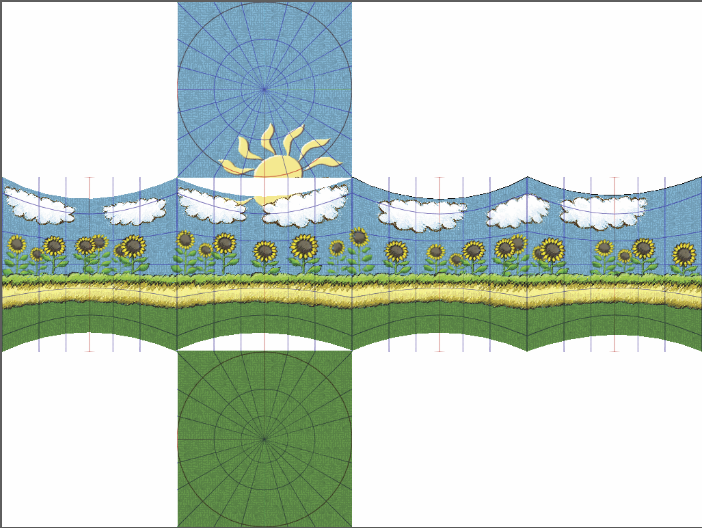
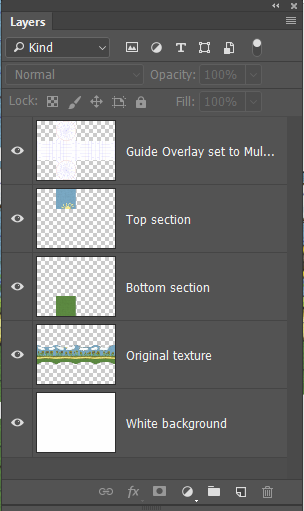
Select the round central area, invert the selection and delete it leaving the circles.
I have a feeling there are alternate workflows here, but what I did is make the top and bottom sections into Smart Objects. That lets us double click to open in a new window, the centre of which will be the centre of the layer, and not offset as it would be in the master document. This so that Spherize works properly.
You'll need to add some Canvas size to give the objects room to expand into. I used 50 pixels, but this value is critical as it will affect how Spherize works. With the canvas expanded, go Filter > Distort > Spherize. If the value you use is not right, the SO will let you repeat without quality loss. I don't know what your final result needs to be.
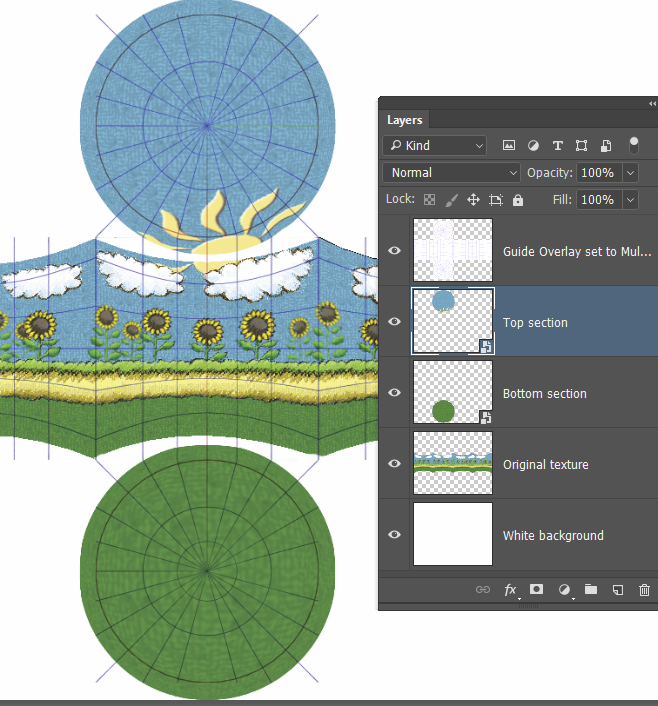
I hope this is more what you wanted. I can see that if this to be cut out and pasted to a ball, you'd need to do something like this, but there is an obvious issue — unless you have stretchy paper.

