I suppose there are alternatives, but they all come down to the same thing as the Blend-if method c.p. showed you, so I guess it would come down to which one fitted your workflow best.
To create a clipping mask you basically need a selection. With that you can add a layer mask as probably the most obvious way forward.
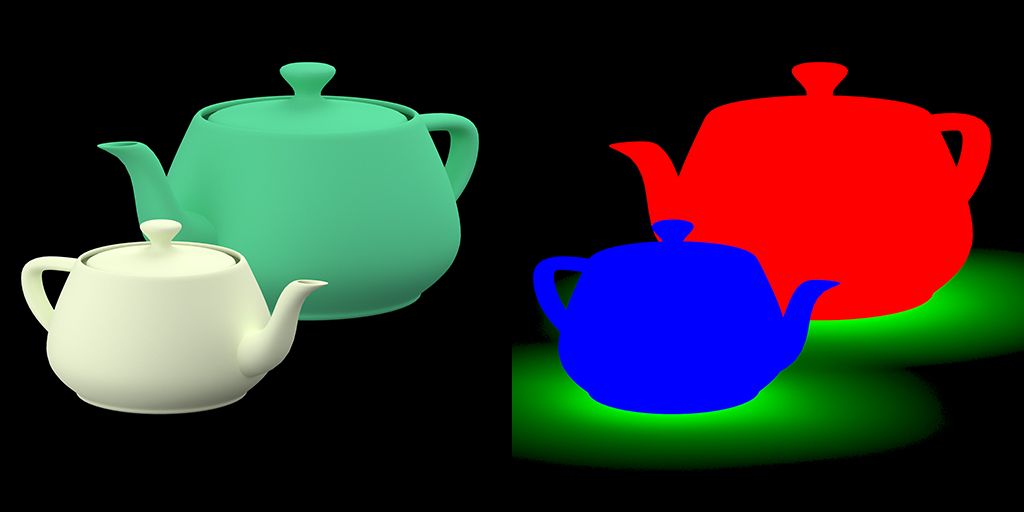
So to clip to red, Ctrl (Cmd) click the red channel. There is some red content in both the left hand teapots, so you have to Alt (Opt) drag a marquee across to unselect that area.
Ctrl clicking the Blue channel will work for the blue teapot.

Note that I have the large thumbnail selected in the Panel Options. This makes most sense when using multiple screens.
Dragging a channel to the New Channel icon gives you a full screen version, and effectively saves the selection (you can Ctrl click the new channel any time to load it as a selection).

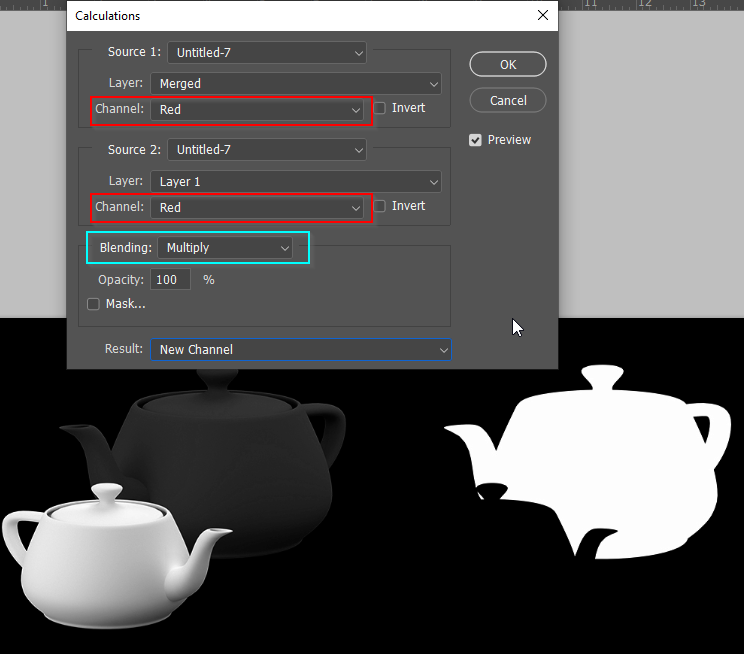
I hesitate to show you Calculations as it is the same process from a different direction, but there are times when it would beneficial.
You have clear and obvious colours in your example image, but that is not always going to be the case. Calculations (you'll find it under the Image menu) allows you to use different blend modes to calculate channels against each other. In this instance both are set to the same channel (red) and the default blend mode which is Multiply.
But it really does all come down to the same thing that c.p. showed you.
[EDIT] I should really say how I would personally approach it. That would be to Ctrl click the appropriate channel and add a layer mask. Then use whatever tools I needed to fine tune the layer mask. I like to work this way as once you have the layer mask in place, you can use _any_ of Photoshop's tools to fine tune the mask.


 5
Replies
5
Replies


 Anyways, I will use that method for now.

 AdChoices