• Global community
    • Language:
      • Deutsch
      • English
      • Español
      • Français
      • Português
  • 日本語コミュニティ
    Dedicated community for Japanese speakers
  • 한국 커뮤니티
    Dedicated community for Korean speakers
Exit
0

What filter/action is this...Help!

Guest
Jul 19, 2018 Jul 19, 2018

Copy link to clipboard

Copied

I am trying to figure out what filter is used in these images.  I use low poly abstract action on stuff I do but I have not seen this one before.

The low poly abstract is col, but blends the colors where this one seems to outline them which I love.

Thanks in advance!

Picture1.png

Views

361

Translate

Translate

Report

Report
Community guidelines
Be kind and respectful, give credit to the original source of content, and search for duplicates before posting. Learn more
community guidelines
Adobe
Community Expert ,
Jul 19, 2018 Jul 19, 2018

Copy link to clipboard

Copied

These don't look like they were made with a filter -- the variation in the line work and the color choices make it look like illustration.

It might have been done in photoshop, but I'd be surprised if there was a filter that could create work like this. I'd guess a lot of time, talent and effort was involved in creating these.

Votes

Translate

Translate

Report

Report
Community guidelines
Be kind and respectful, give credit to the original source of content, and search for duplicates before posting. Learn more
community guidelines
Community Expert ,
Jul 19, 2018 Jul 19, 2018

Copy link to clipboard

Copied

You could create this by making and duplicating a smart object, then just swap out the graphic on one layer to make the new image.

Screen Shot 2018-07-19 at 2.18.05 PM.png

Then select the 5 layers and transform.

Screen Shot 2018-07-19 at 2.18.33 PM.png

Double click to edit the hidden untransformed smart object  I Called MASTER, then save the .psb and Viola!

Screen Shot 2018-07-19 at 2.22.29 PM.png

Votes

Translate

Translate

Report

Report
Community guidelines
Be kind and respectful, give credit to the original source of content, and search for duplicates before posting. Learn more
community guidelines
Enthusiast ,
Jul 19, 2018 Jul 19, 2018

Copy link to clipboard

Copied

Agree with SJReigal "allot of time and talent went into this effect".

Possible option:

1. Apply "Image Trace" feature in Illustrator that sharp effect

2. Place or Embed Vector Art into Photoshop

3. Duplicate Layer in Photoshop

4. Apply Filter>Filter Gallery>Under Sketch Category> Stamp or Photocopy

5. In Layers Panel Use: Linear Burn Mode

*notice my lizard image not as defined as your example

specialEffect.jpg

Votes

Translate

Translate

Report

Report
Community guidelines
Be kind and respectful, give credit to the original source of content, and search for duplicates before posting. Learn more
community guidelines
Guest
Jul 19, 2018 Jul 19, 2018

Copy link to clipboard

Copied

That is a damn cool effect, but I was actually referring to the artwork like that of the lion that your example had.  How did you do that!  That's amazing!

Votes

Translate

Translate

Report

Report
Community guidelines
Be kind and respectful, give credit to the original source of content, and search for duplicates before posting. Learn more
community guidelines
Community Expert ,
Jul 19, 2018 Jul 19, 2018

Copy link to clipboard

Copied

LATEST

This art isn't the result of any filter. It has been hand painted, possibly by tracing over a photo to start. I've done a series of similar drawings using the mobile app Adobe Illustrator Draw on my iPad. You could do the something similar in Photoshop by taking your time, and thinking creatively as you draw and paint the subject.

Votes

Translate

Translate

Report

Report
Community guidelines
Be kind and respectful, give credit to the original source of content, and search for duplicates before posting. Learn more
community guidelines
Community Expert ,
Jul 19, 2018 Jul 19, 2018

Copy link to clipboard

Copied

dots.png

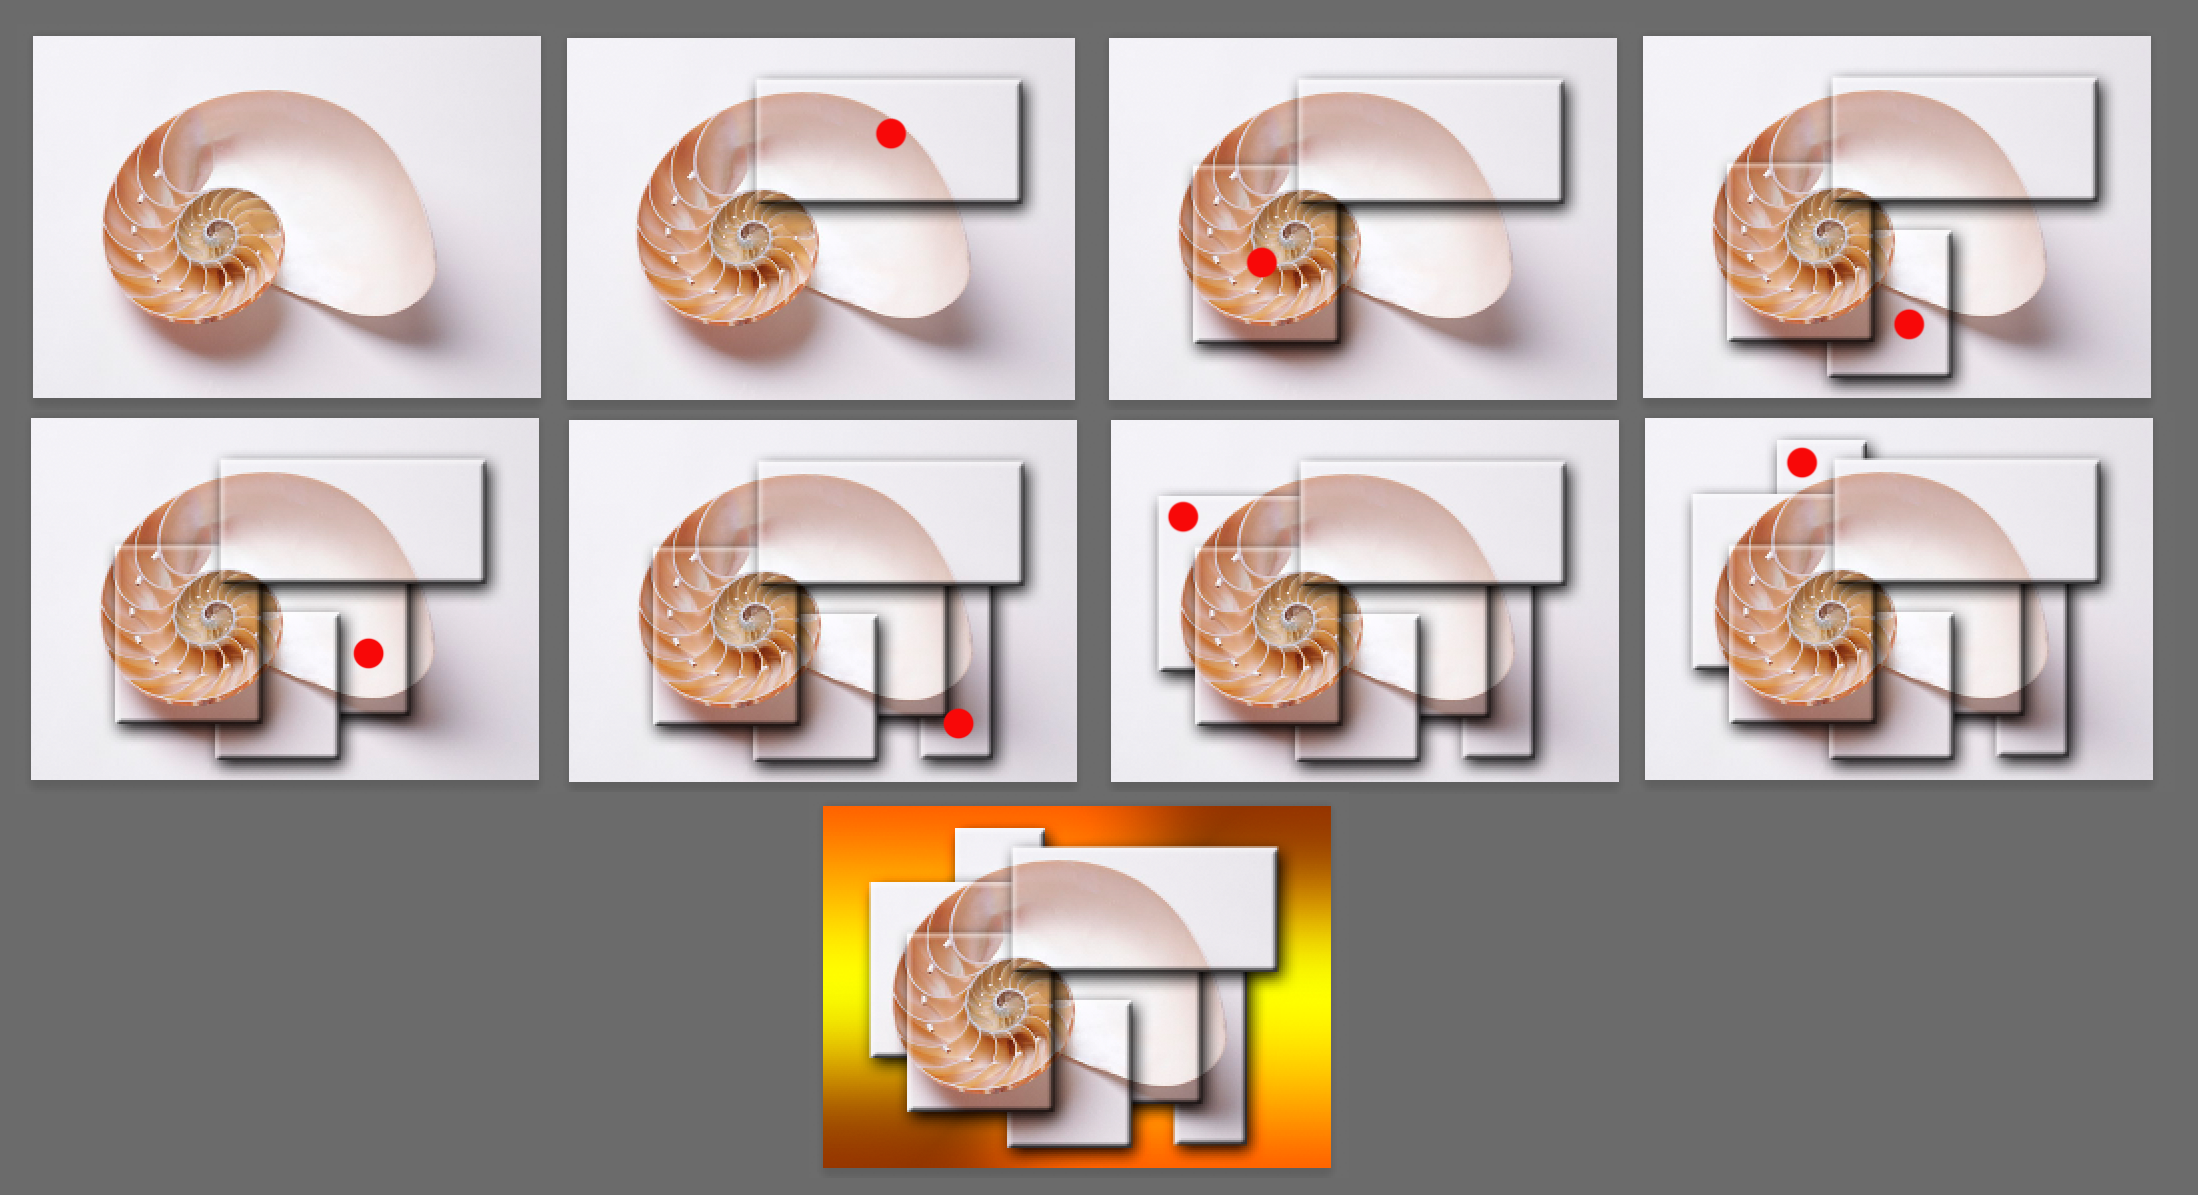
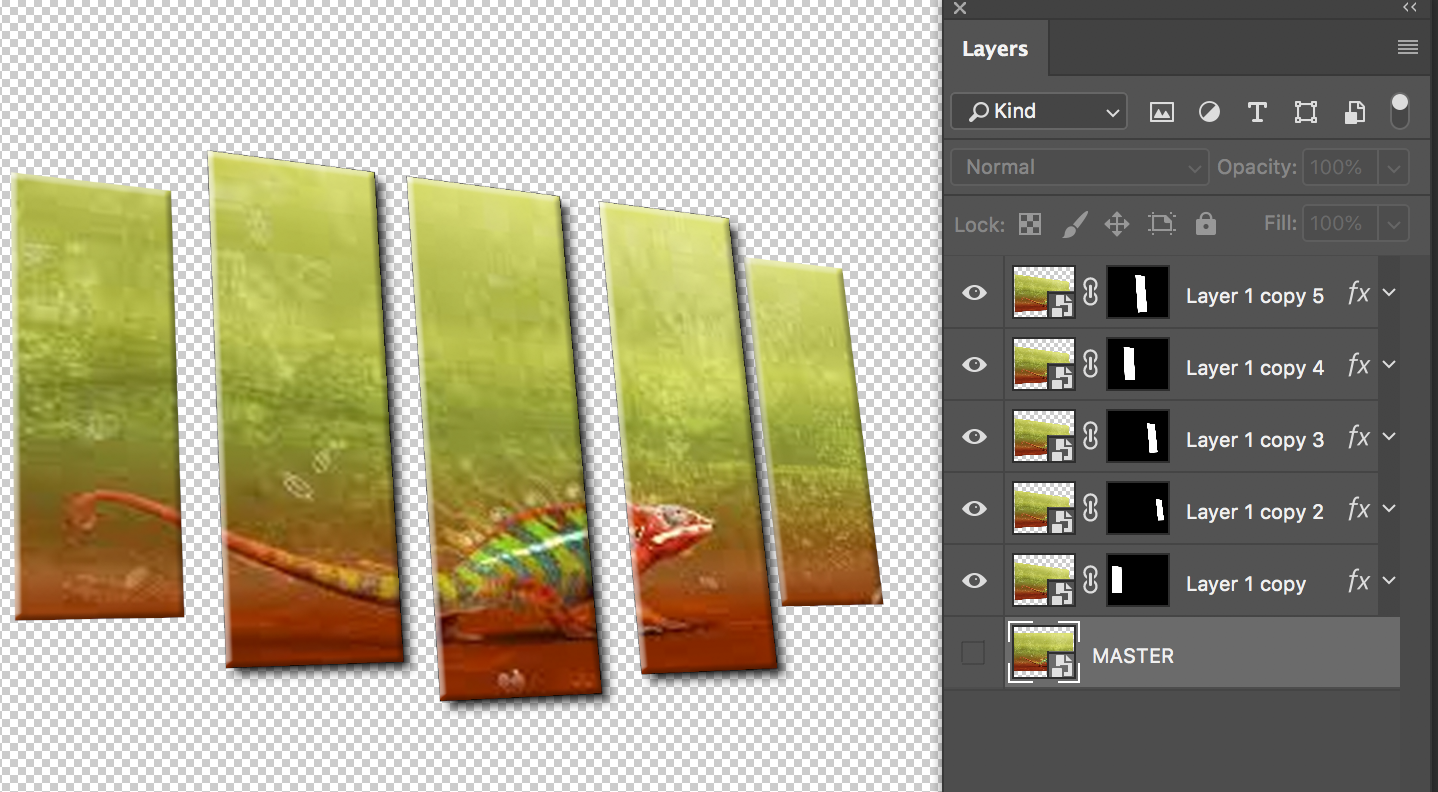
1. Starting with the original image, make a rectangular selection and cmd+J to place it on its own layer.

2. Add a Bevel & Emboss Layer Style.

3 Return to the original image and make another rectangular selection, either butting the first one, or overlapping it, as shown here.

4. Repeat the procedure until several selections have been added.

5. If desired, place a layer style directly above the original image layer.

You may also add a Type layer to the top if the stack.

(Dots provided to show sequence of added layers)

Votes

Translate

Translate

Report

Report
Community guidelines
Be kind and respectful, give credit to the original source of content, and search for duplicates before posting. Learn more
community guidelines
Guest
Jul 19, 2018 Jul 19, 2018

Copy link to clipboard

Copied

Sorry I was referring to the actual art that was on the canvas.  That's awesome thought thanks for the tip!

Votes

Translate

Translate

Report

Report
Community guidelines
Be kind and respectful, give credit to the original source of content, and search for duplicates before posting. Learn more
community guidelines