• Global community
    • Language:
      • Deutsch
      • English
      • Español
      • Français
      • Português
  • 日本語コミュニティ
    Dedicated community for Japanese speakers
  • 한국 커뮤니티
    Dedicated community for Korean speakers
Exit
0

How to transfer an image from one picture to an other

New Here ,
Jan 02, 2020 Jan 02, 2020

Copy link to clipboard

Copied

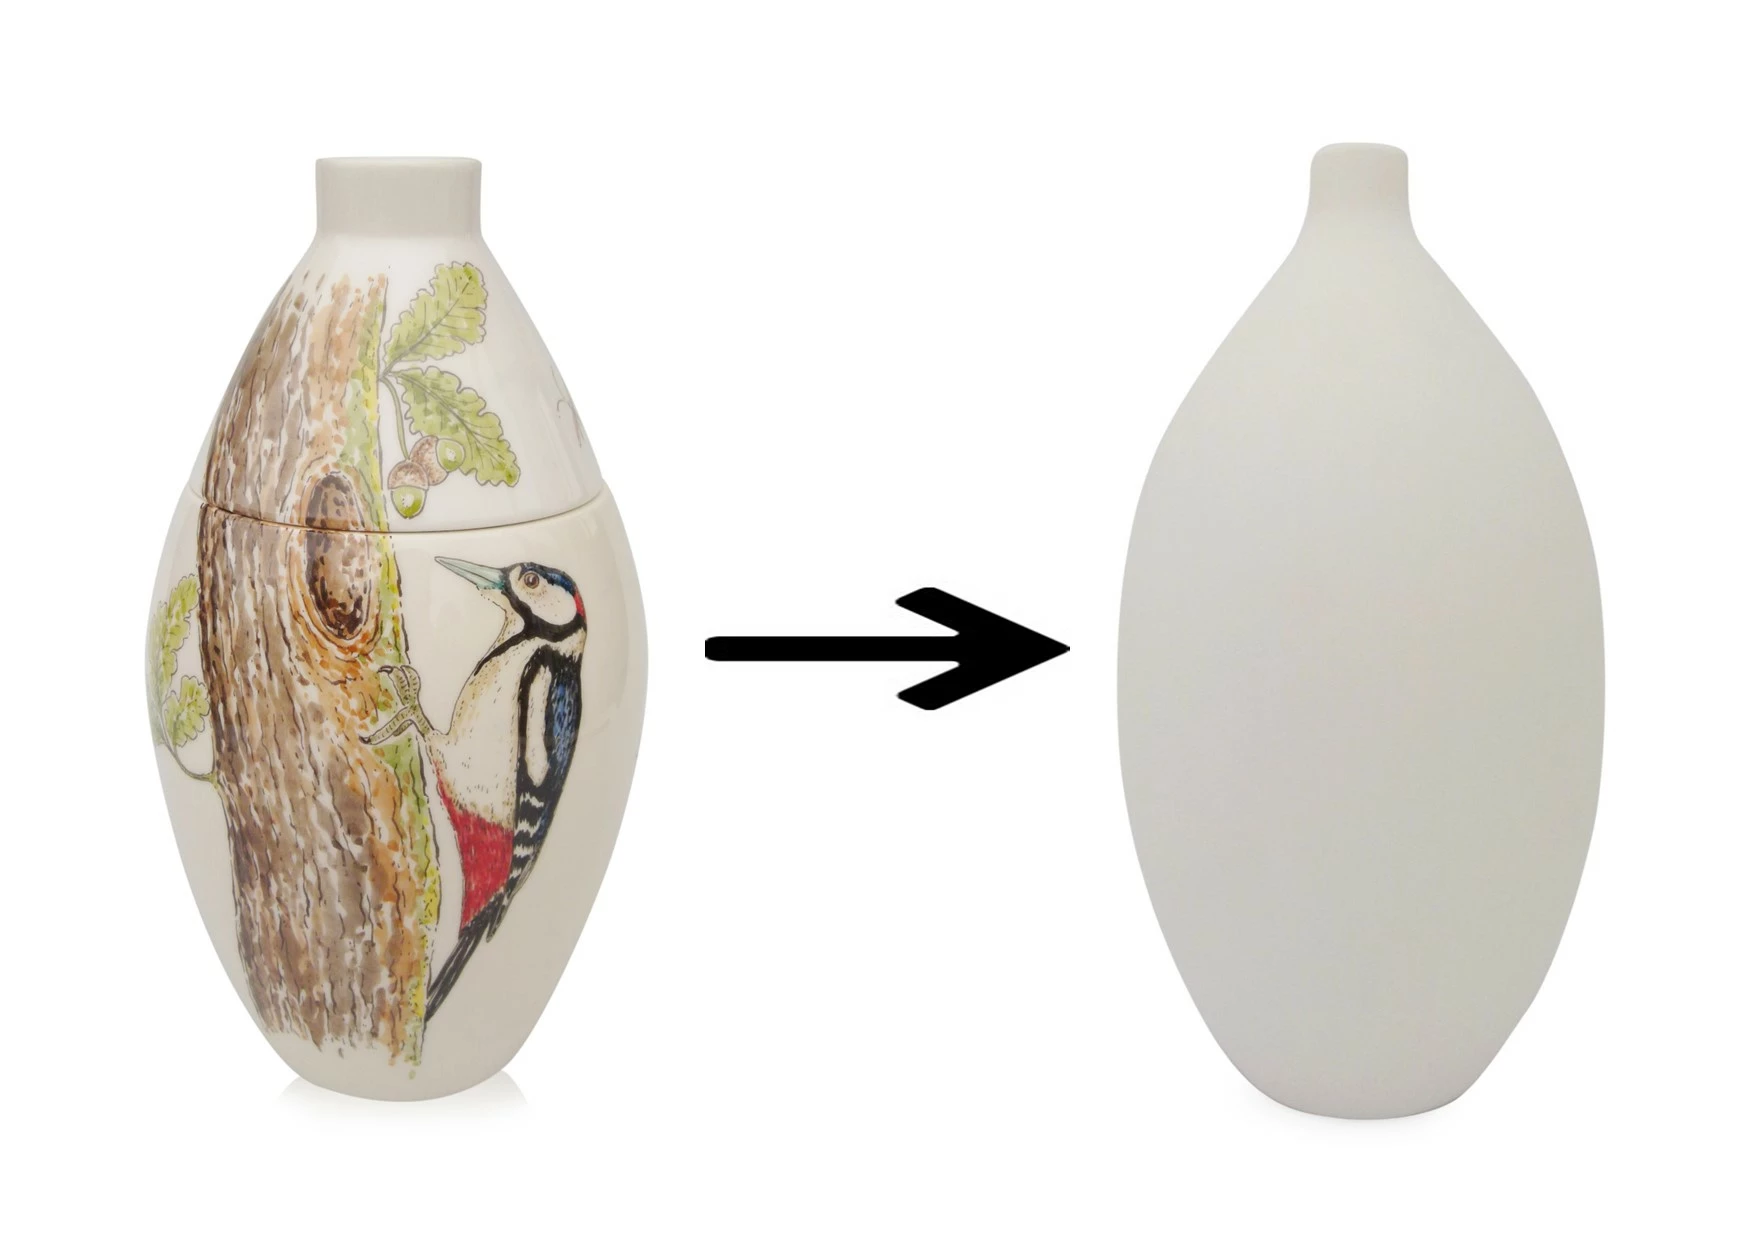
I am completely new to Adobe Photoshop elements, so for me it's quite difficult to find out how things work. I only need a few possibilities, which I will be using. I want to transfer parts of an image (on a vase) to a new image of a vase. Can anyone explain to me how to do this step by step? How to transfer an image from one picture to an other. I would also like to know how I can remove parts of an image and make it white, like the background (the colour of the vase itself). See the picture that I attached.ADOBE photoshop elements (how to transfer parts of a picture).jpg

TOPICS
How to , Problem or error

Views

516

Translate

Translate

Report

Report
Community guidelines
Be kind and respectful, give credit to the original source of content, and search for duplicates before posting. Learn more
community guidelines
Community Expert ,
Jan 02, 2020 Jan 02, 2020

Copy link to clipboard

Copied

To transfer parts of an image:

  1. Use one of the selection tools, e.g. selection brush or lasso tool,  to select the image
  2. Go to Edit>copy to place it on the clipboard
  3. Open the destination image
  4. Go to Edit>paste. The imge will come in on a separate layer.
  5. Activate the move tool to position the image.


To remove parts of an image:


  1. Open the image
  2. Sample the background color with the eye-dropper tool. This will show up as the foreground color on the color chip
  3. Duplicate the Background layer and shut off the visibility of the background layer by clicking on the eye icon in the layers palette. Work on the background copy layer
  4. Use the eraser tool to erase the parts of the image that you wish to remove
  5. Open a blank layer between the Background and Background copy layers
  6. Activate the Paintbucket tool and left click on the blank layer
  7. Tidy up with the eraser tool.


Another way:


  1. Activate the Magnetic lasso tool and make a selection of the entire vase. You should see "marching ants" once the selection is complete
  2. Open a blank layer at the top (Layer 1)
  3. Go to Edit>Stroke(outline0 selection Enter a 3 or so pixel width for the stroke
  4. Go to Edit>Fill selection
  5. Delete the background layer
  6. Note: the checker board pattern denotes transparency. You can fill it with anything to suit.

Votes

Translate

Translate

Report

Report
Community guidelines
Be kind and respectful, give credit to the original source of content, and search for duplicates before posting. Learn more
community guidelines
New Here ,
Jan 02, 2020 Jan 02, 2020

Copy link to clipboard

Copied

Thank you very much for your reply Hatstead  🙂

I will give it a try


Votes

Translate

Translate

Report

Report
Community guidelines
Be kind and respectful, give credit to the original source of content, and search for duplicates before posting. Learn more
community guidelines
Community Expert ,
Jan 02, 2020 Jan 02, 2020

Copy link to clipboard

Copied

Let us know if you should encounter a problem.

Votes

Translate

Translate

Report

Report
Community guidelines
Be kind and respectful, give credit to the original source of content, and search for duplicates before posting. Learn more
community guidelines
Community Expert ,
Jan 02, 2020 Jan 02, 2020

Copy link to clipboard

Copied

LATEST

Since you want to place an image on a curved object, you may want to try using a displacement map to give a more realistic result.  Take a look here.

Votes

Translate

Translate

Report

Report
Community guidelines
Be kind and respectful, give credit to the original source of content, and search for duplicates before posting. Learn more
community guidelines