Photoshop on the iPad: Curves adjustment layers
Using Curves adjustment layers to adjust an image
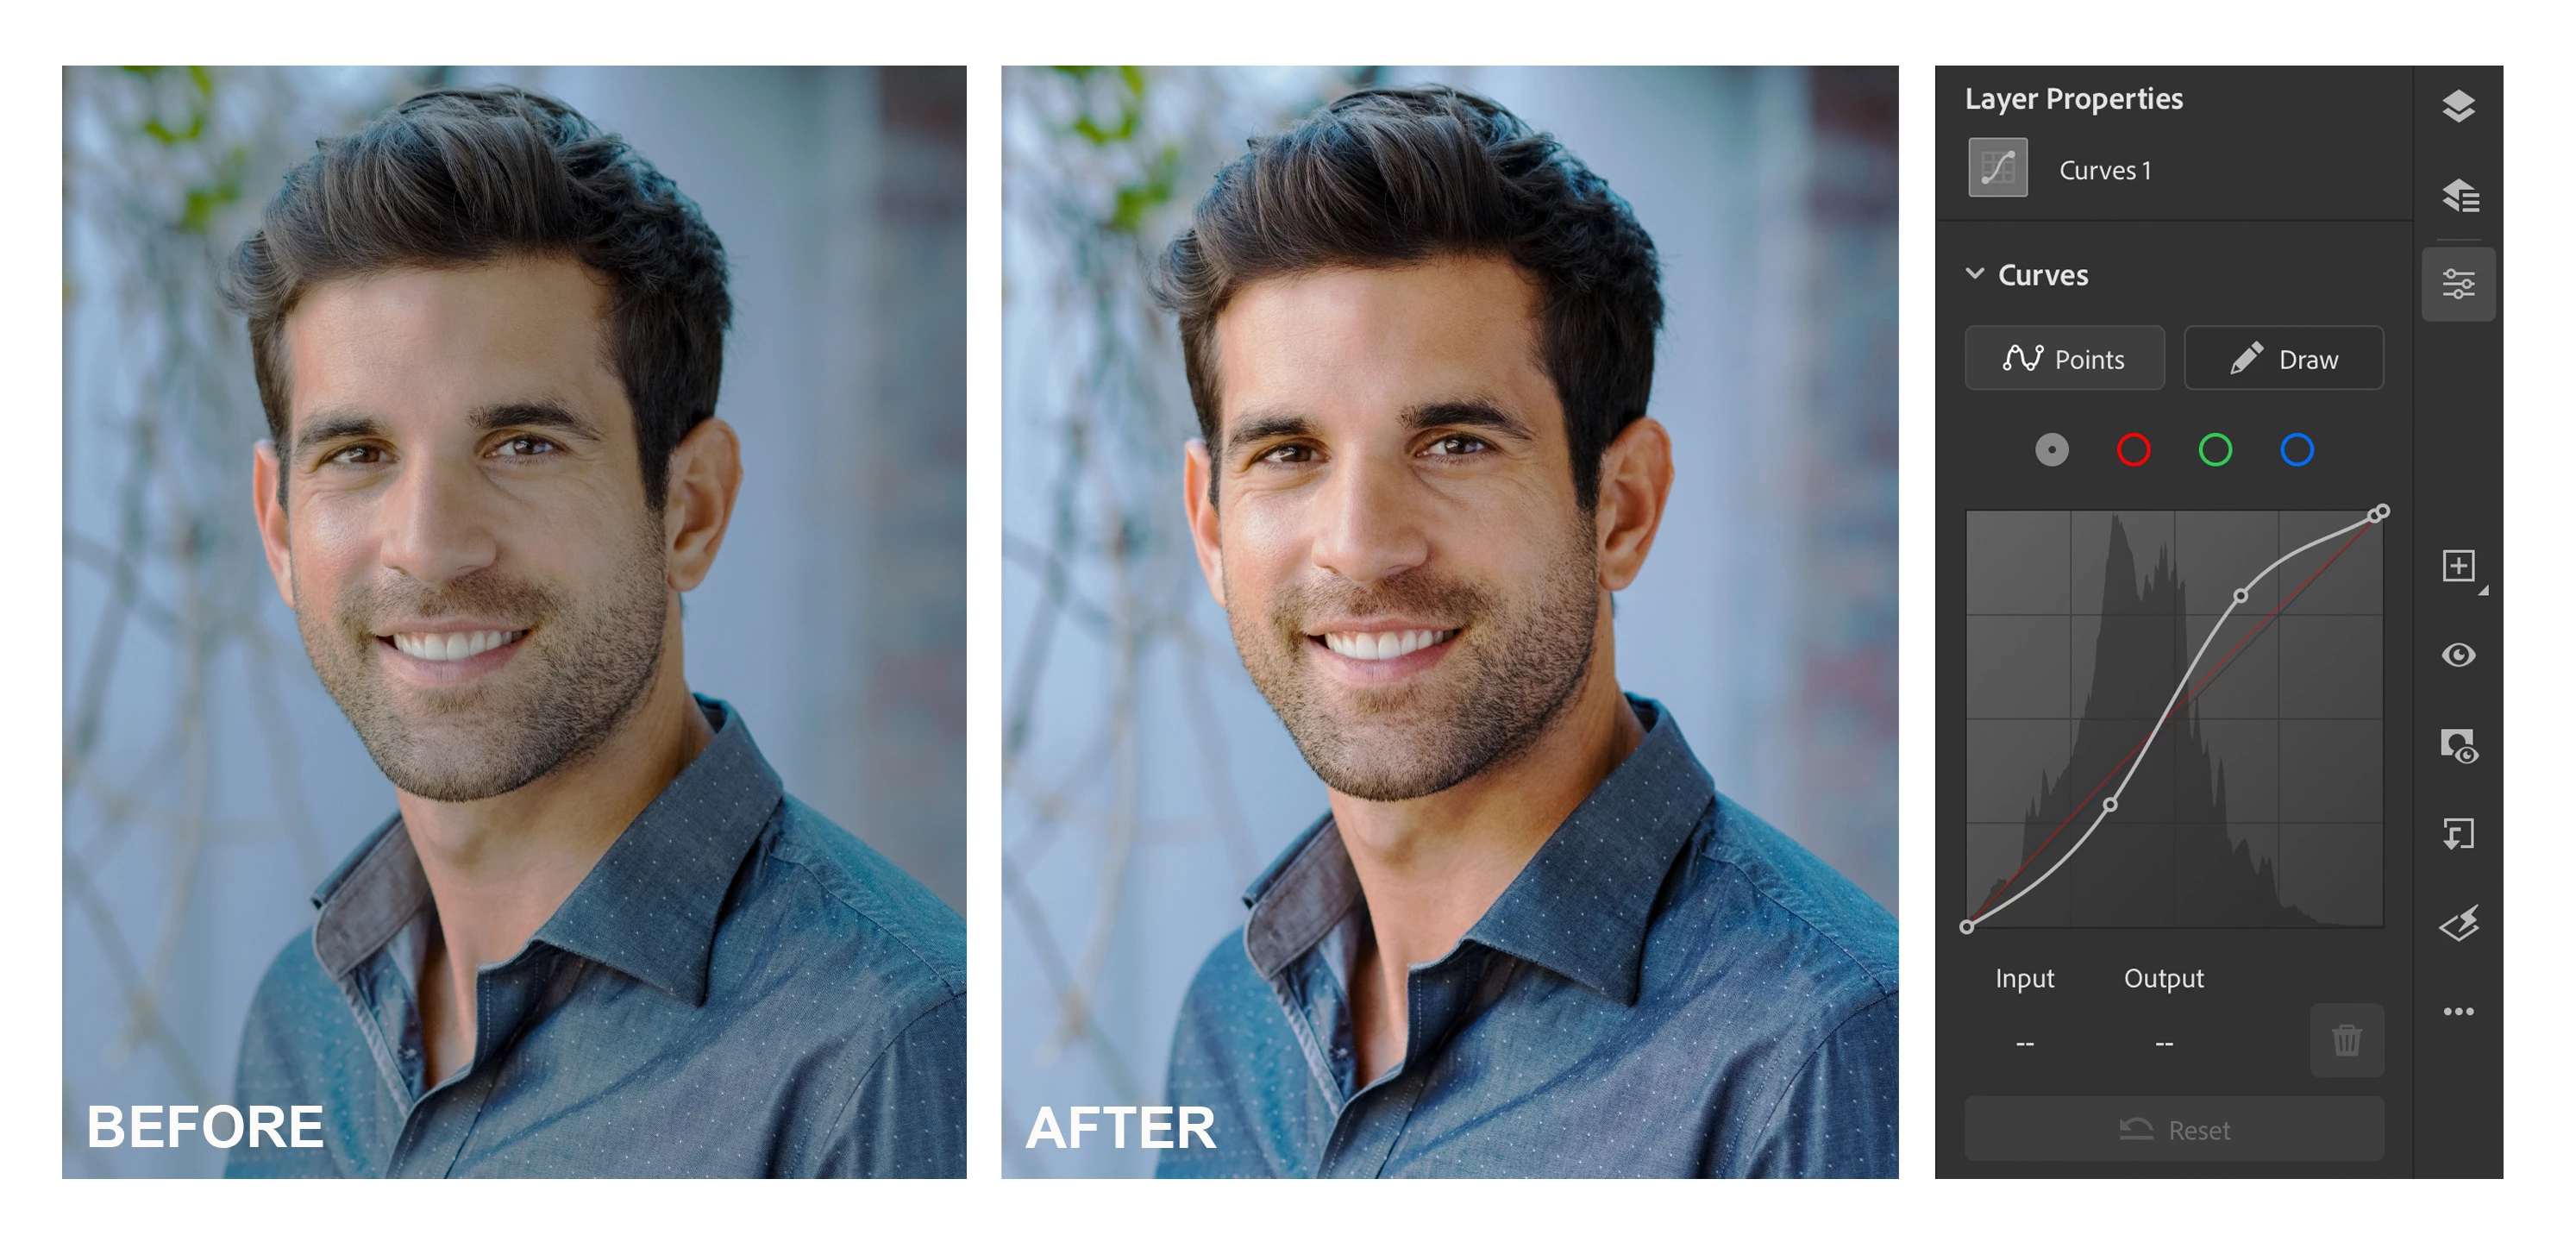
If you use the desktop version of Photoshop, you may already be familiar with curves adjustments. As of May 2020, Photoshop on the iPad offers curves adjustment layers. The curves adjustment layer offers a versatile non-destructive method for improving the brightness, contrast, and color of an image by adjusting the tonal range and color balance. Adjusting Red, Green, and Blue channels independently allow you to create some cool artistic effects.
Follow these steps to open an image and edit using curves adjustment layers.
❶ Open an image
- Open Photoshop on your iPad
- Choose Import and open in the bottom left corner

- Navigate to the image you want to edit

- Select the image

❷ Select the Curves adjustment layer type
- Long press the + icon from the taskbar on the right side and Select Adjustment layer
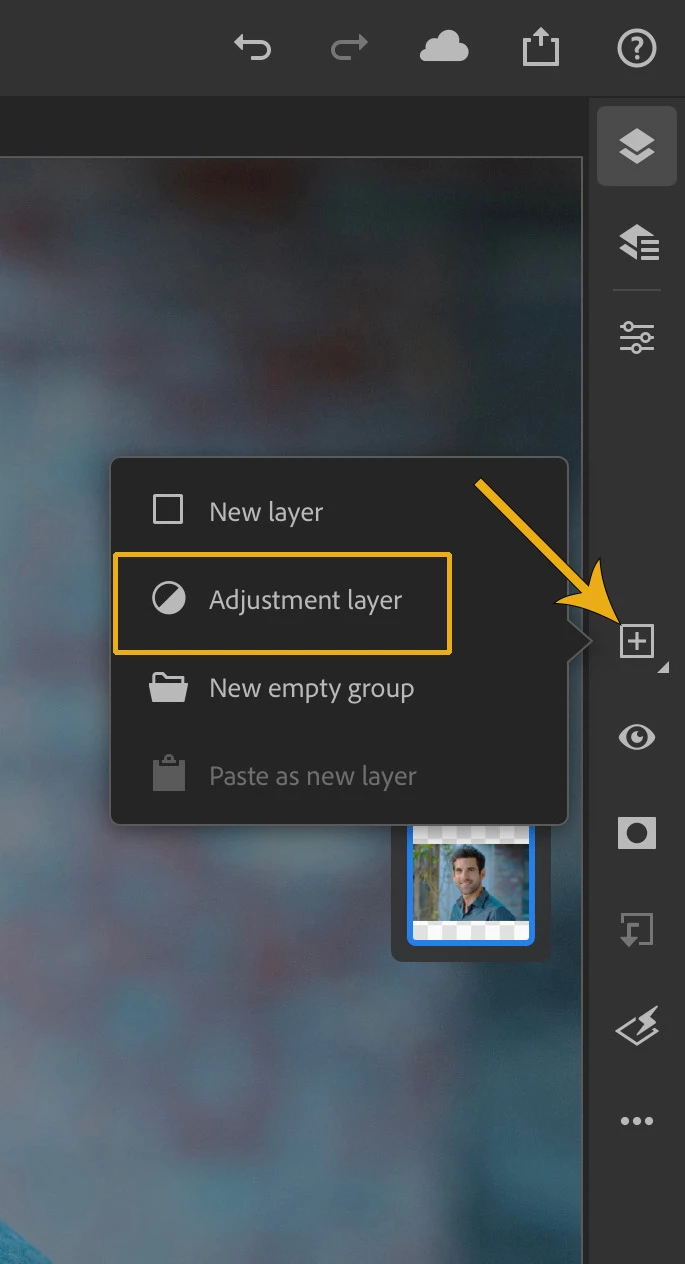
-
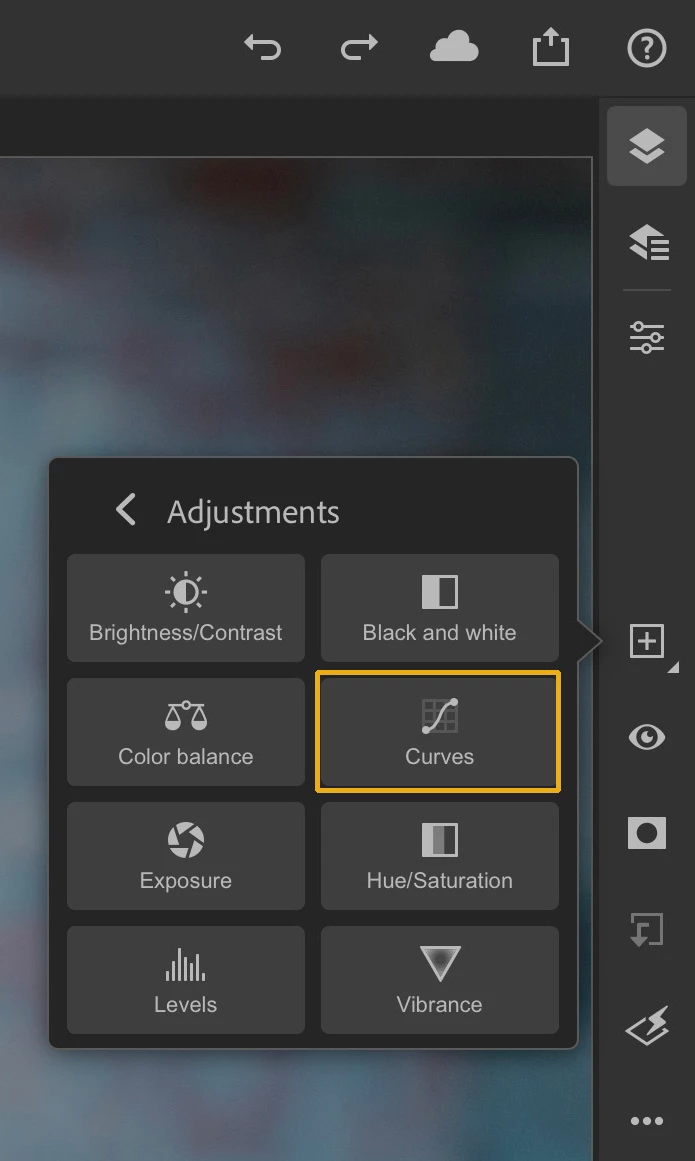
Choose Curves
- Your screen will look something like this
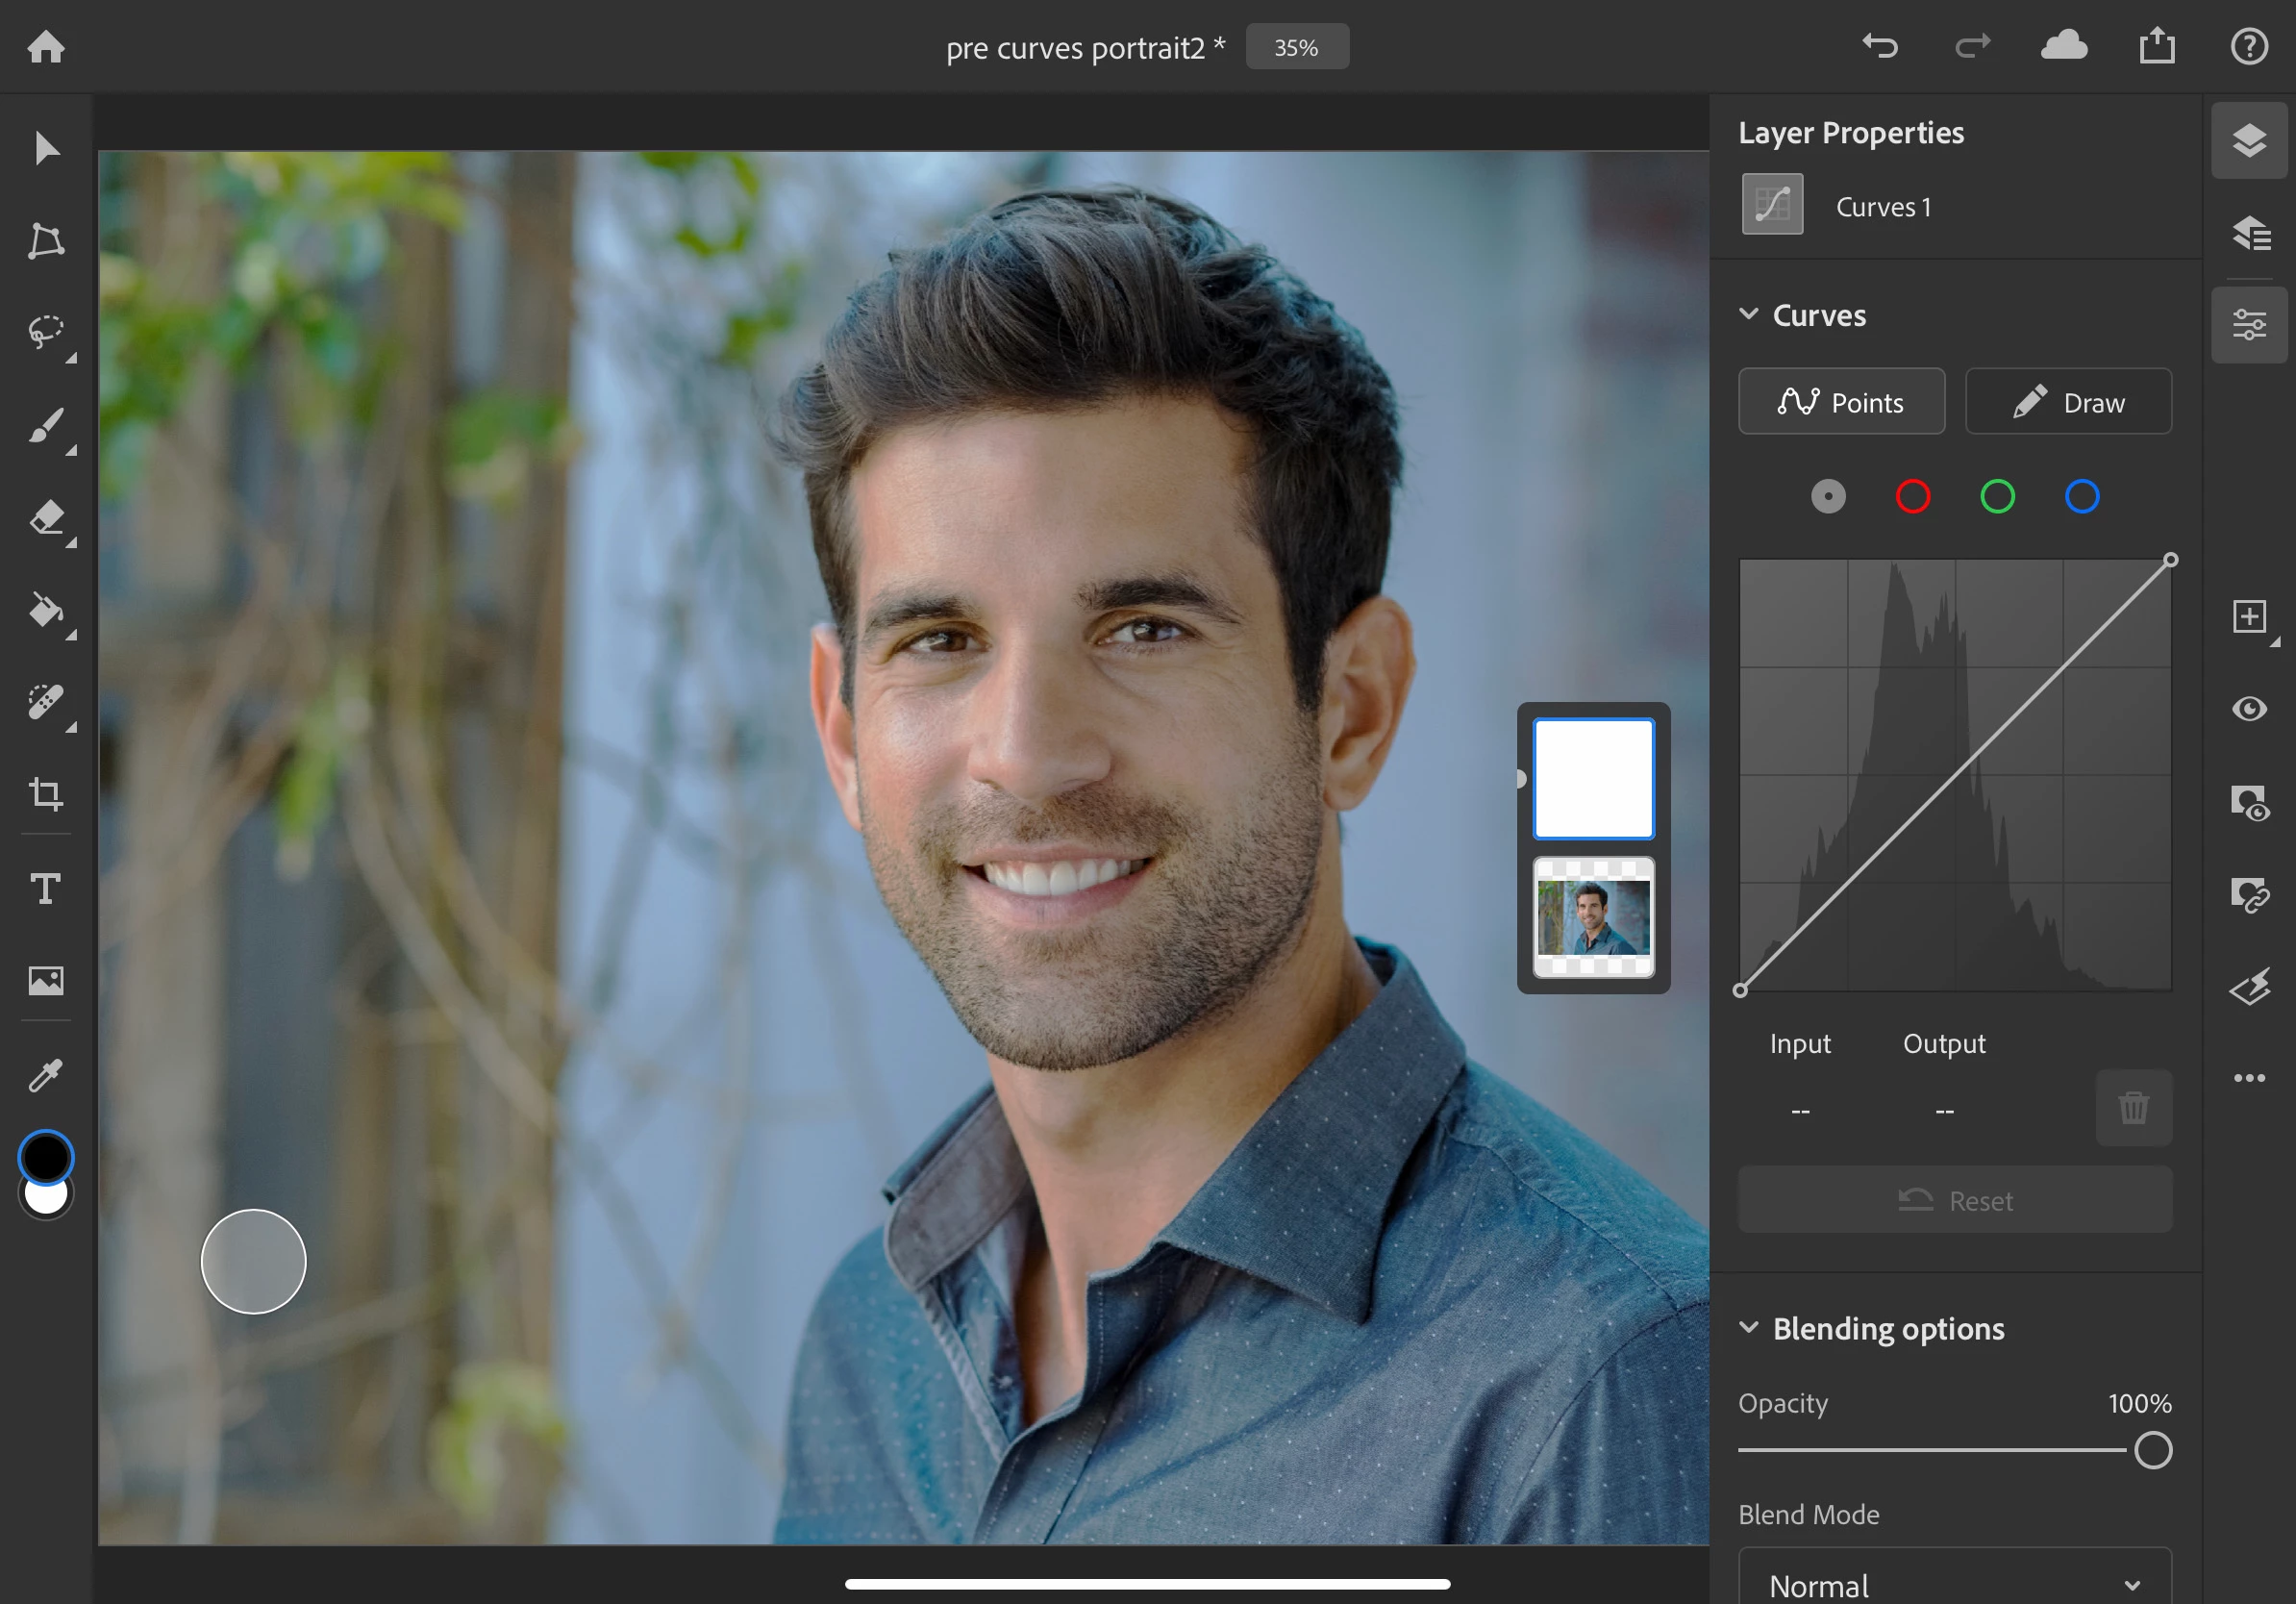
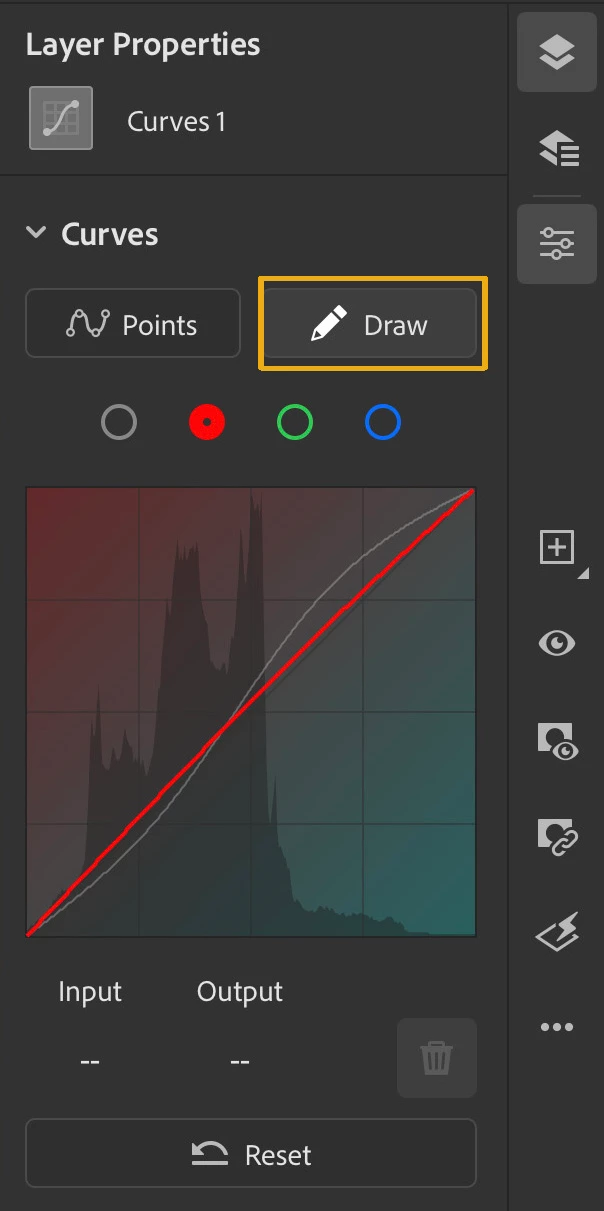
Initially, you will see a straight diagonal line in the histogram. The left side of the curve represents the shadows, the center represents the mid-tones, and the right side represents the highlights. The histogram illustrates the number of pixels at each color intensity level in your image. The horizontal axis of the graph represents the input levels (original values) and the vertical axis represents the output levels (adjusted values).
One of the common simple curves adjustments for creating contrast is the s-curve, which you can make by dragging one point in the highlights upward and one point in the shadows downward. If you are new at this, start by selecting highlight and shadow points about 1/3 of the way in from the left and right sides. If your mid-tones still need adjusting, you can set one point in the middle to keep the mid-tones from changing. The steeper the angles of the curve are, the more change you will notice. This is not the only curve shape you will want to use for editing, but it is a starting point if you want to add contrast to your photo. In other cases, your highlights may need darkening and your shadows lightening, or your mid-tones may need darkening. You can adjust the curve based on the changes needed for your particular image, and the effect you desire to achieve.
❸ Adjust your image
- Tap on the diagonal line in the histogram about one-third of the way down from the top right corner to add a point (node). Drag the point upward somewhat and you will see the light areas get lighter.
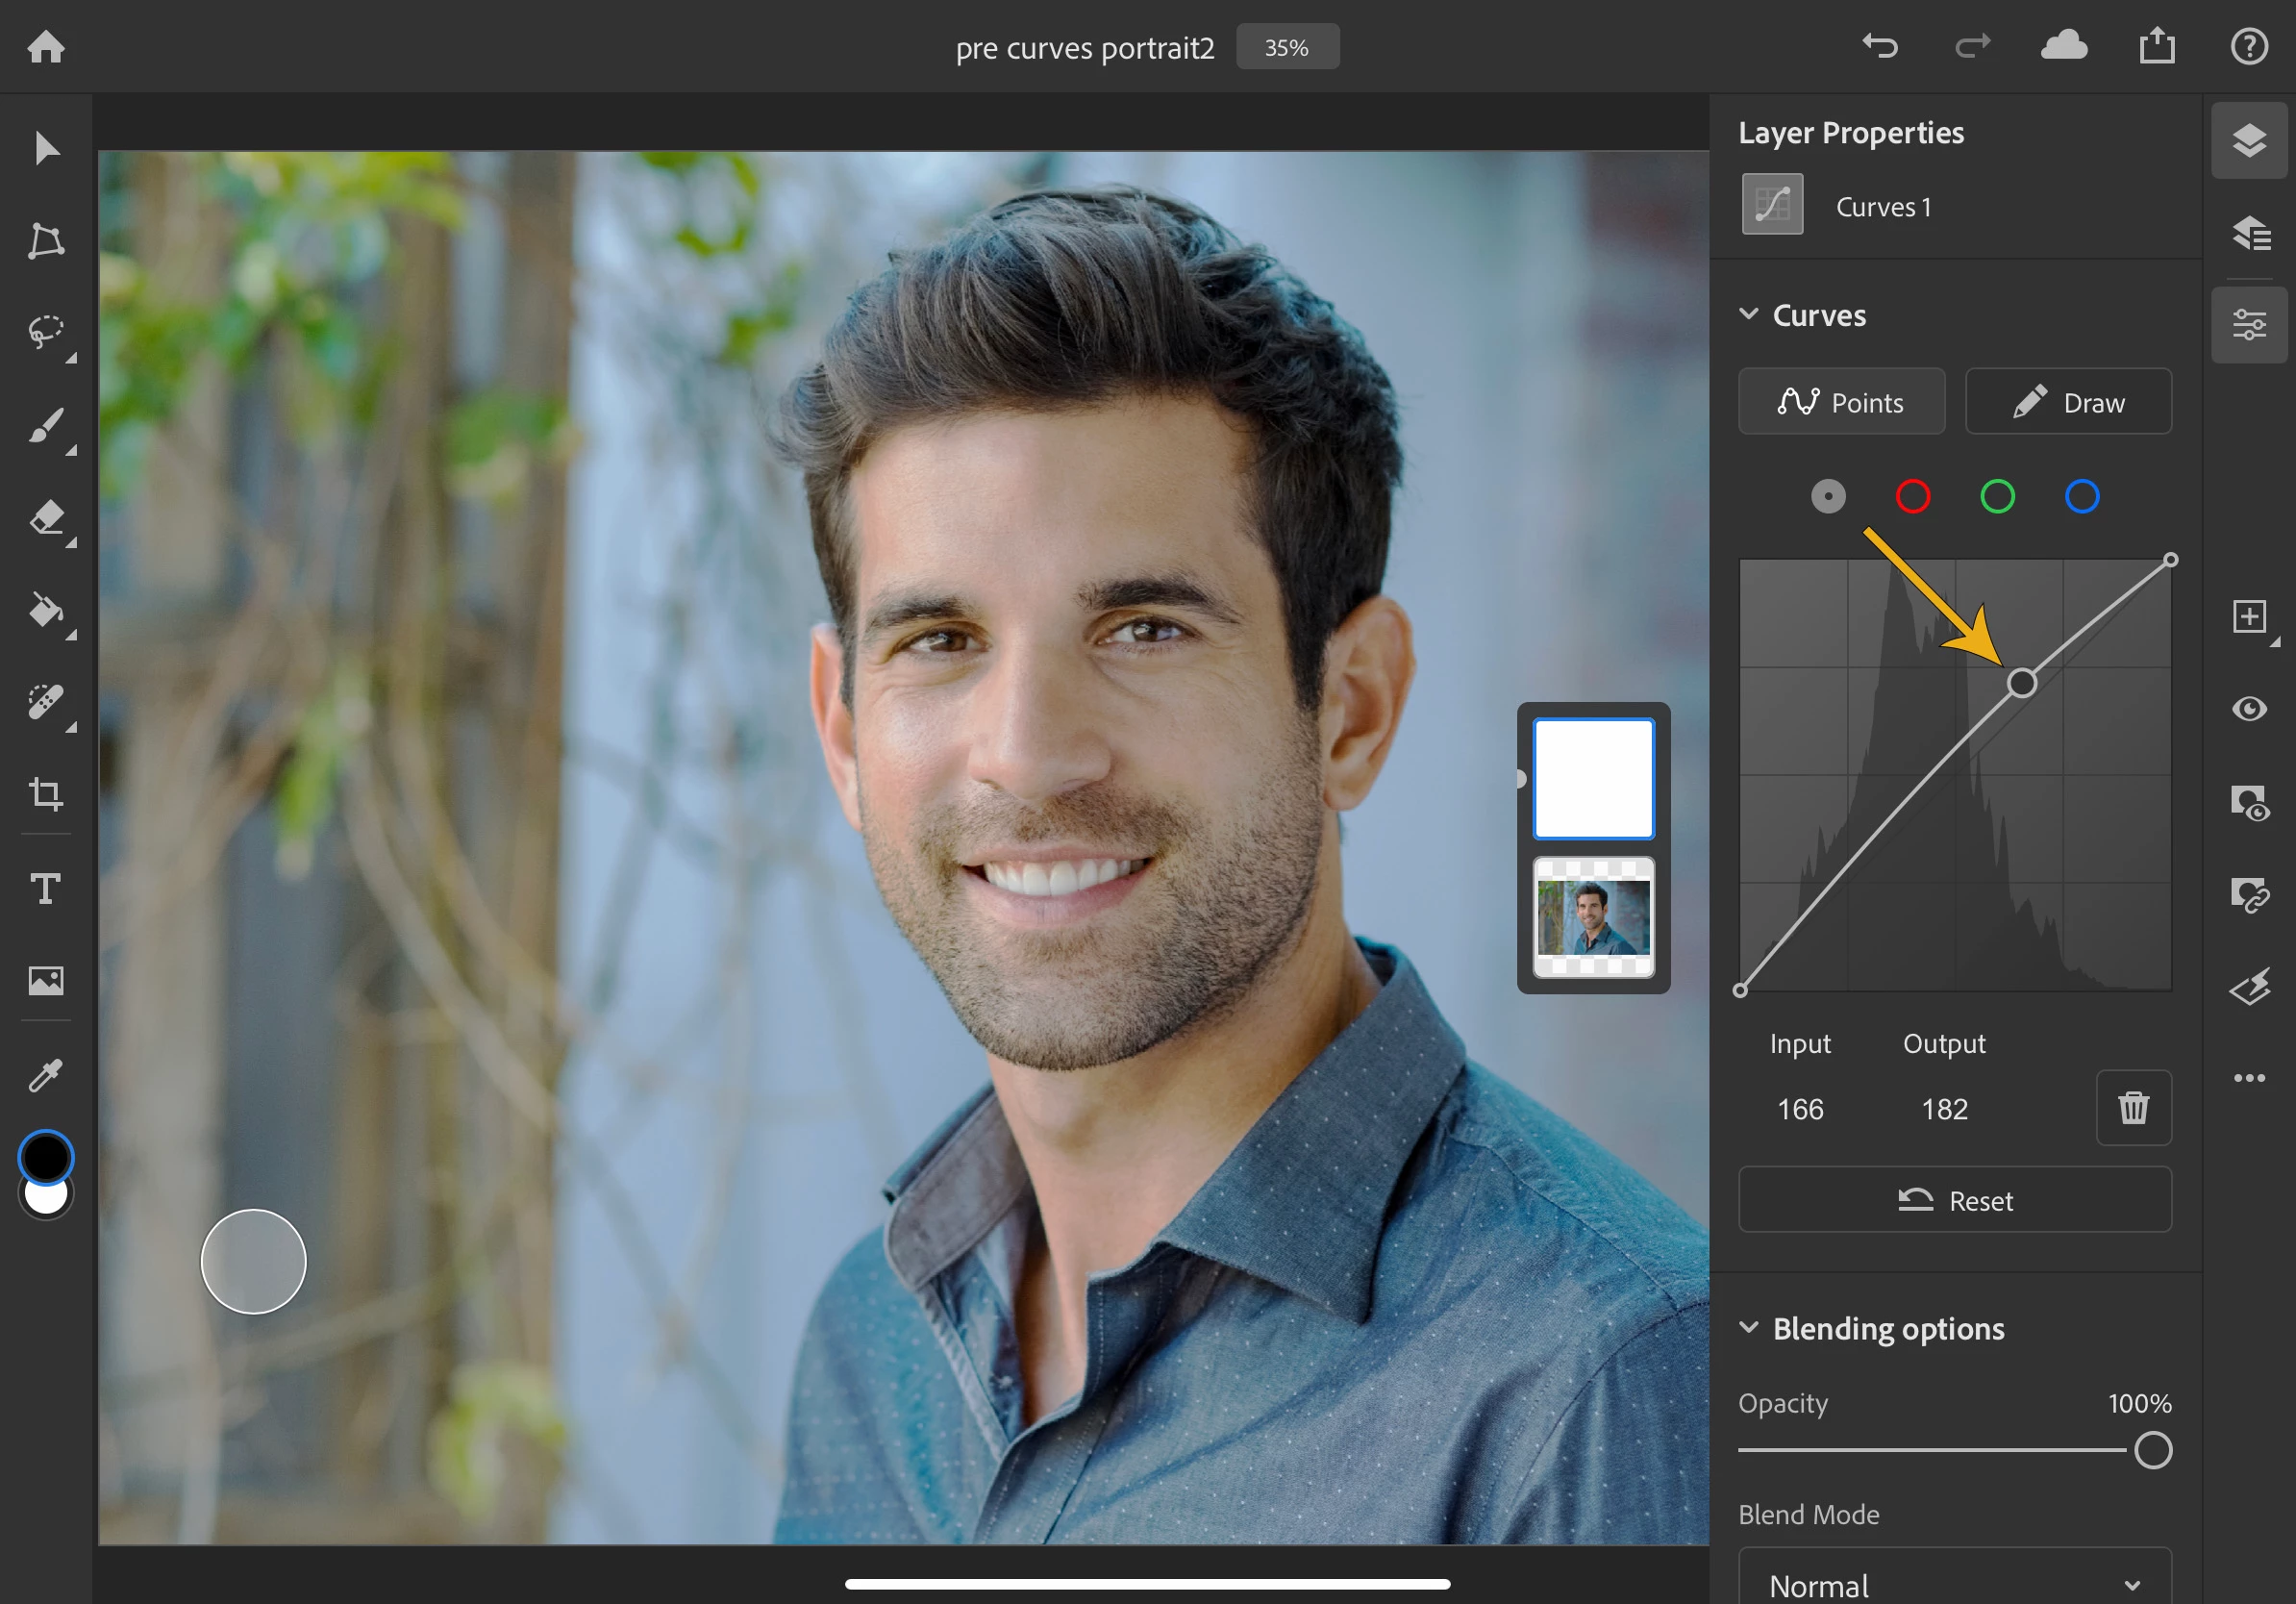
- Now tap on the diagonal line in the histogram about one-third of the way from the bottom left corner to add another point. Drag the point downwards somewhat and you will see the dark areas get darker.
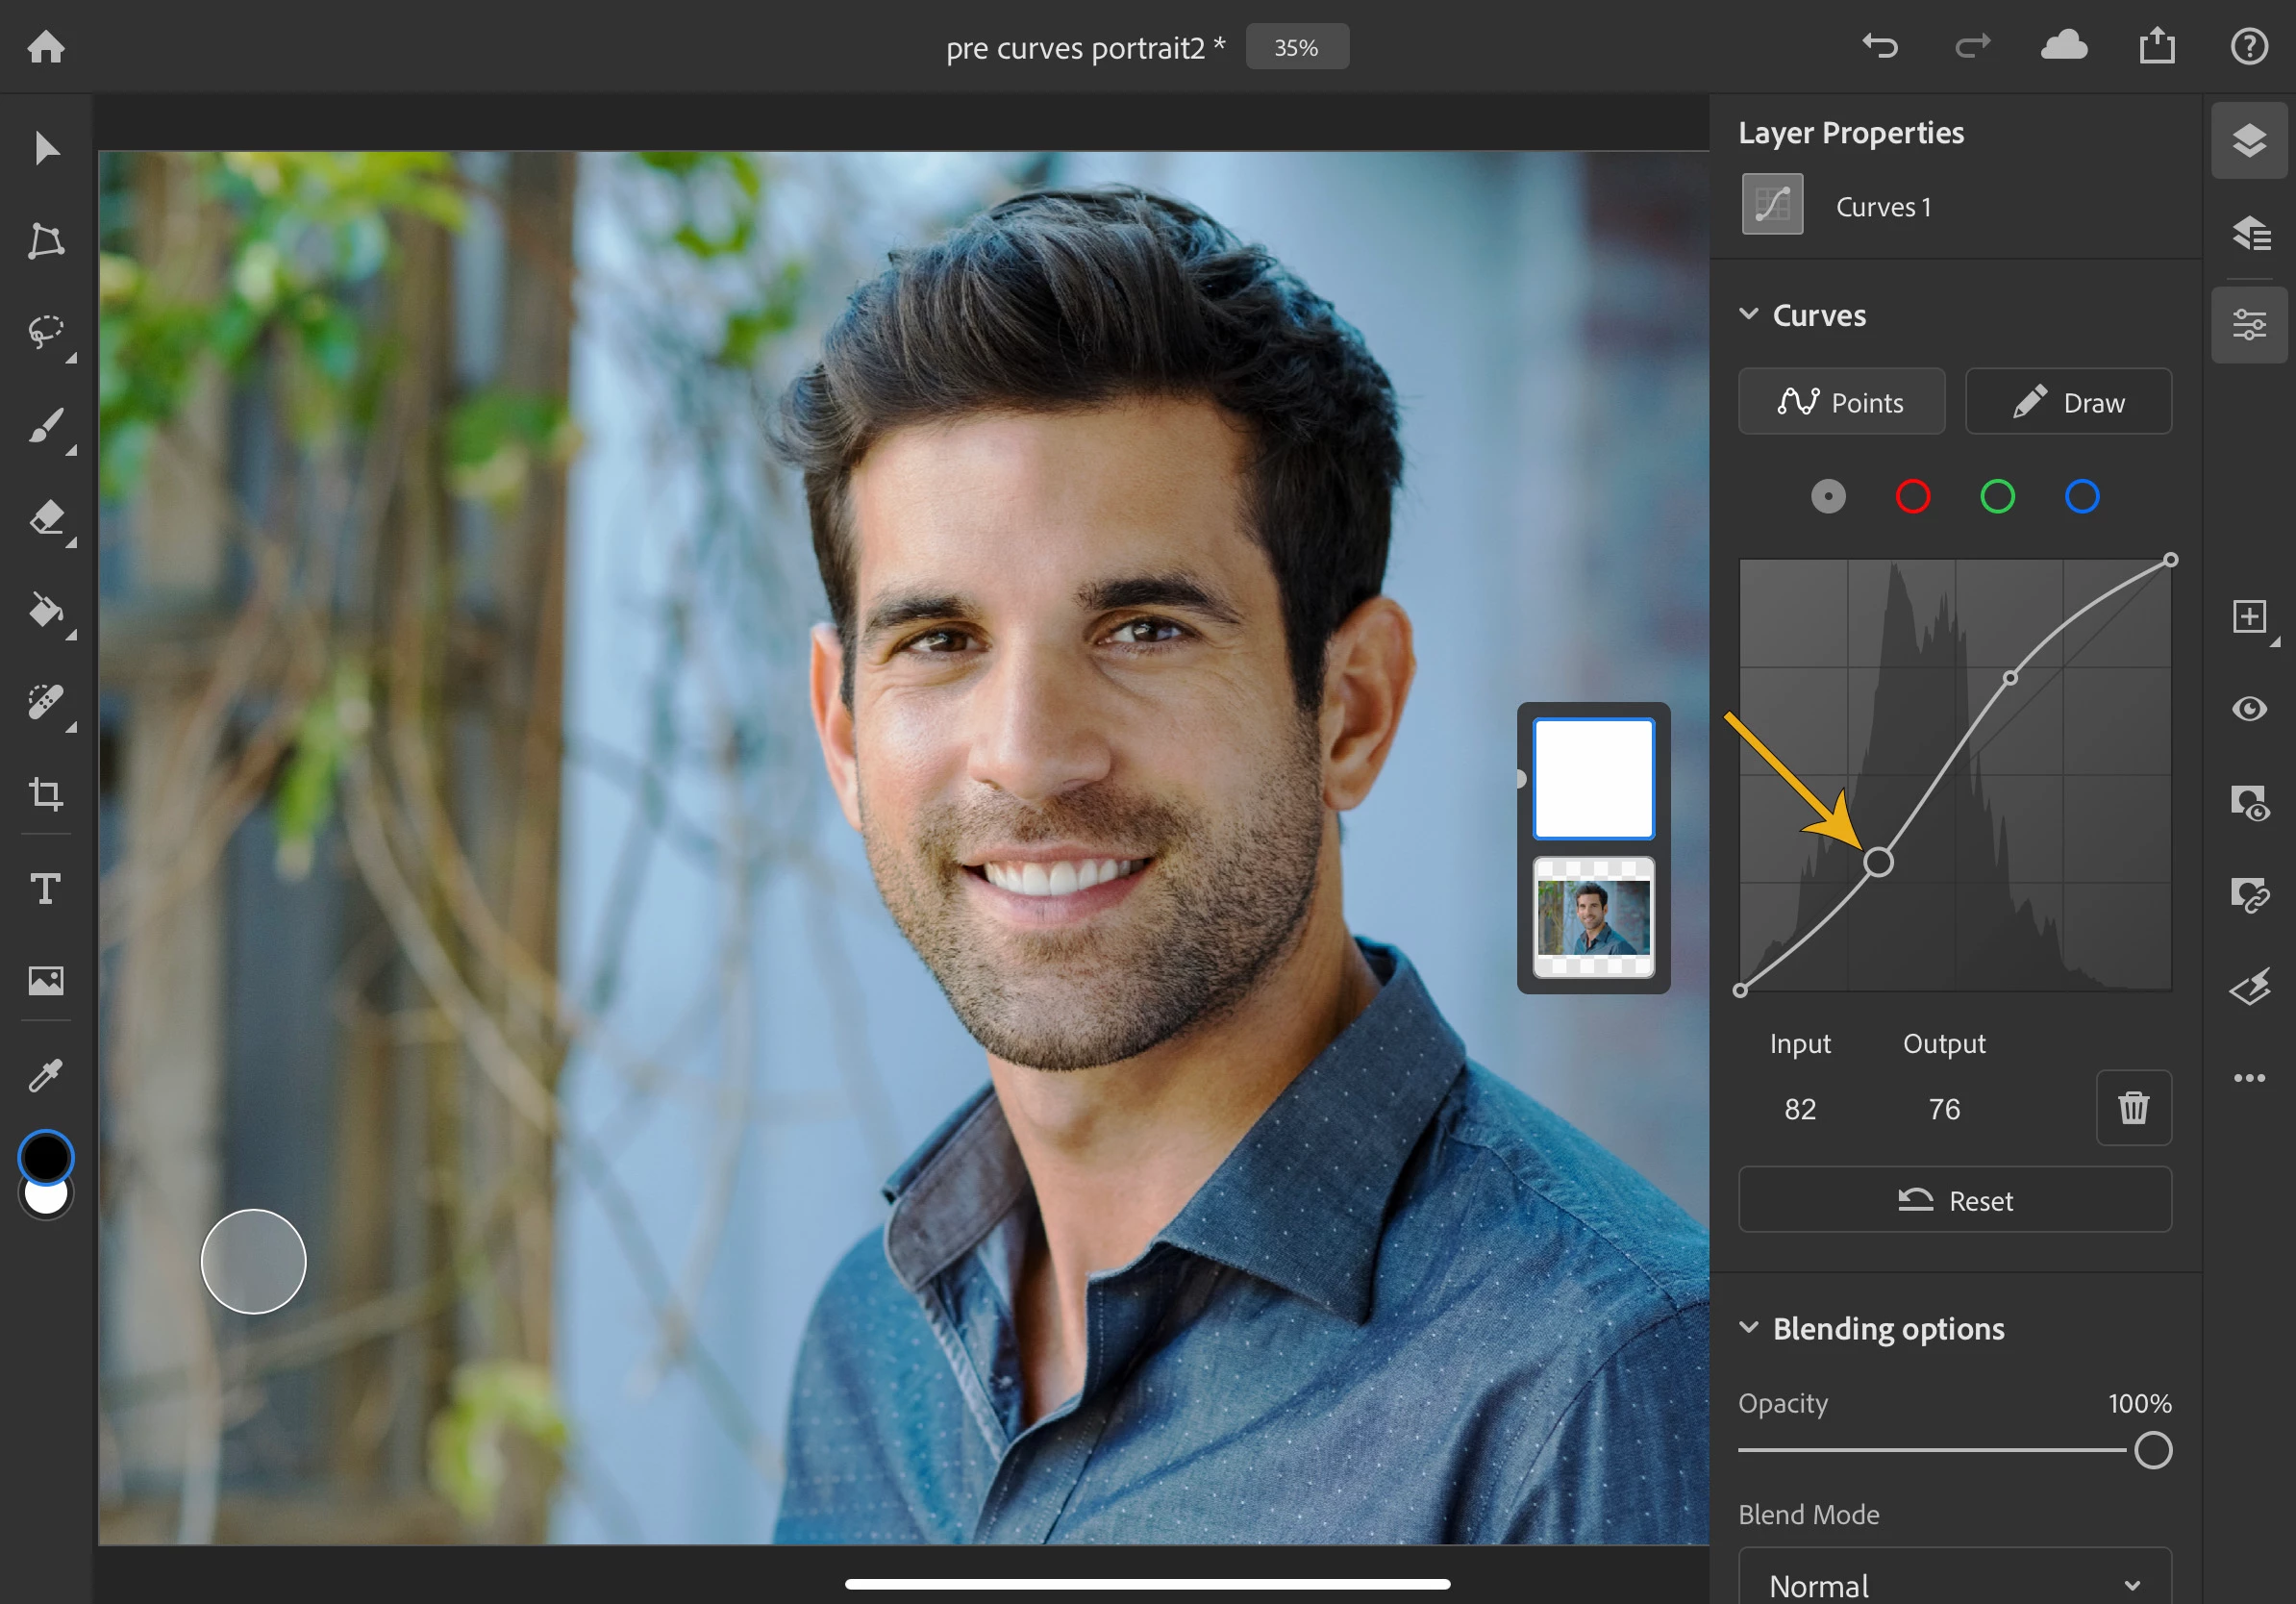
As you add nodes to the diagonal line and move them, the shape of the curve changes, reflecting your adjustments. The steeper sections of the curve represent areas of higher contrast while flatter sections represent areas of lower contrast. You can continue to move the points around until you are satisfied with the look.
- You can also use curves to adjust the color balance - select and adjust the Red, Green, or Blue channel to make an adjustment
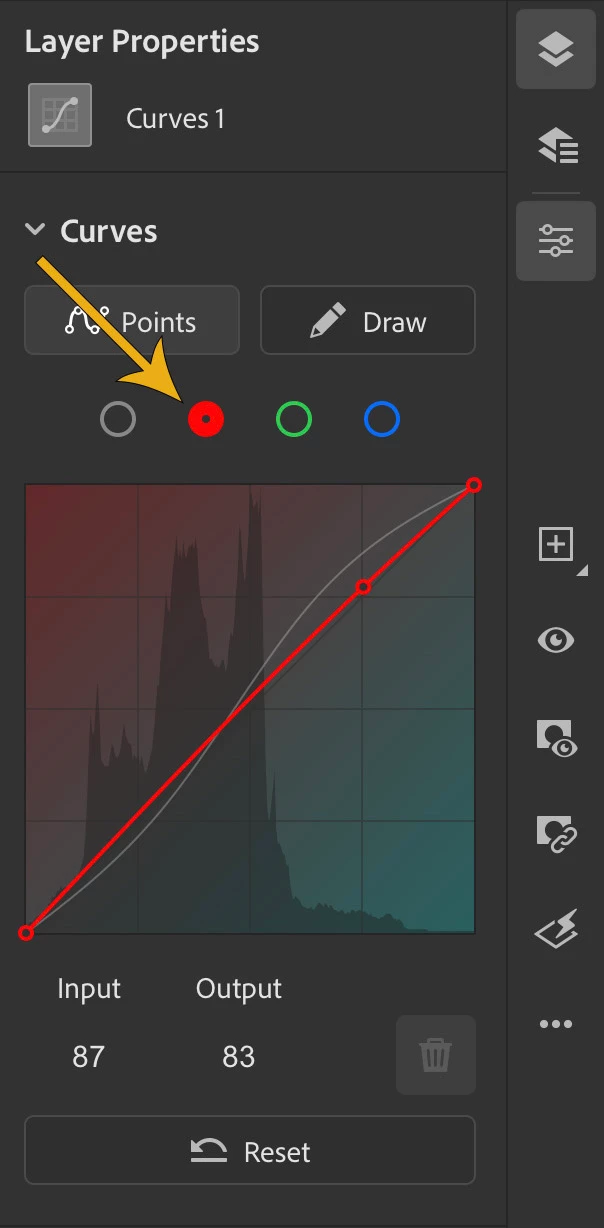
- Add a point as before and adjust
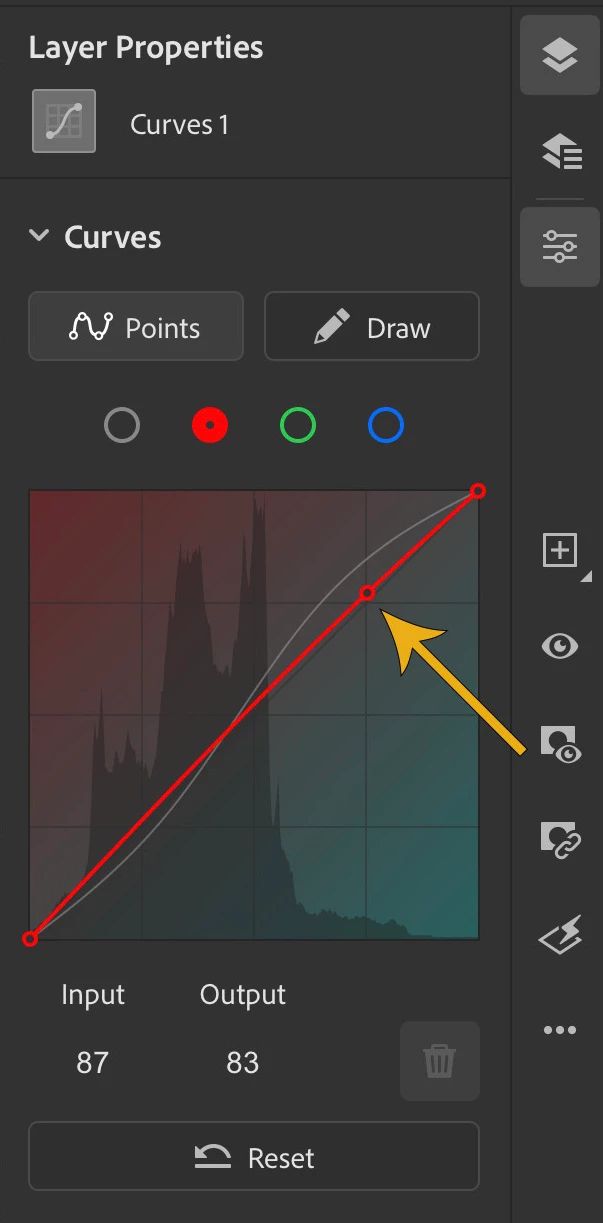
- If you prefer to draw the curve instead of adding and moving points, you can select the draw option and draw a curve
❹ Clip the adjustment (Optional)
An adjustment layer affects all layers positioned beneath it in the Layers panel. If you only want the adjustment applied to a single layer, ensure the adjustment layer is the layer just above the layer you want to modify, and then clip the Curves adjustment layer to the layer below it. To learn more about clipped adjustments, refer to these articles:
Learn the difference between a global adjustment layer and a clipped adjustment layer
Enhance your photos quickly using adjustment layers
Related Links

