Copy link to clipboard
Copied
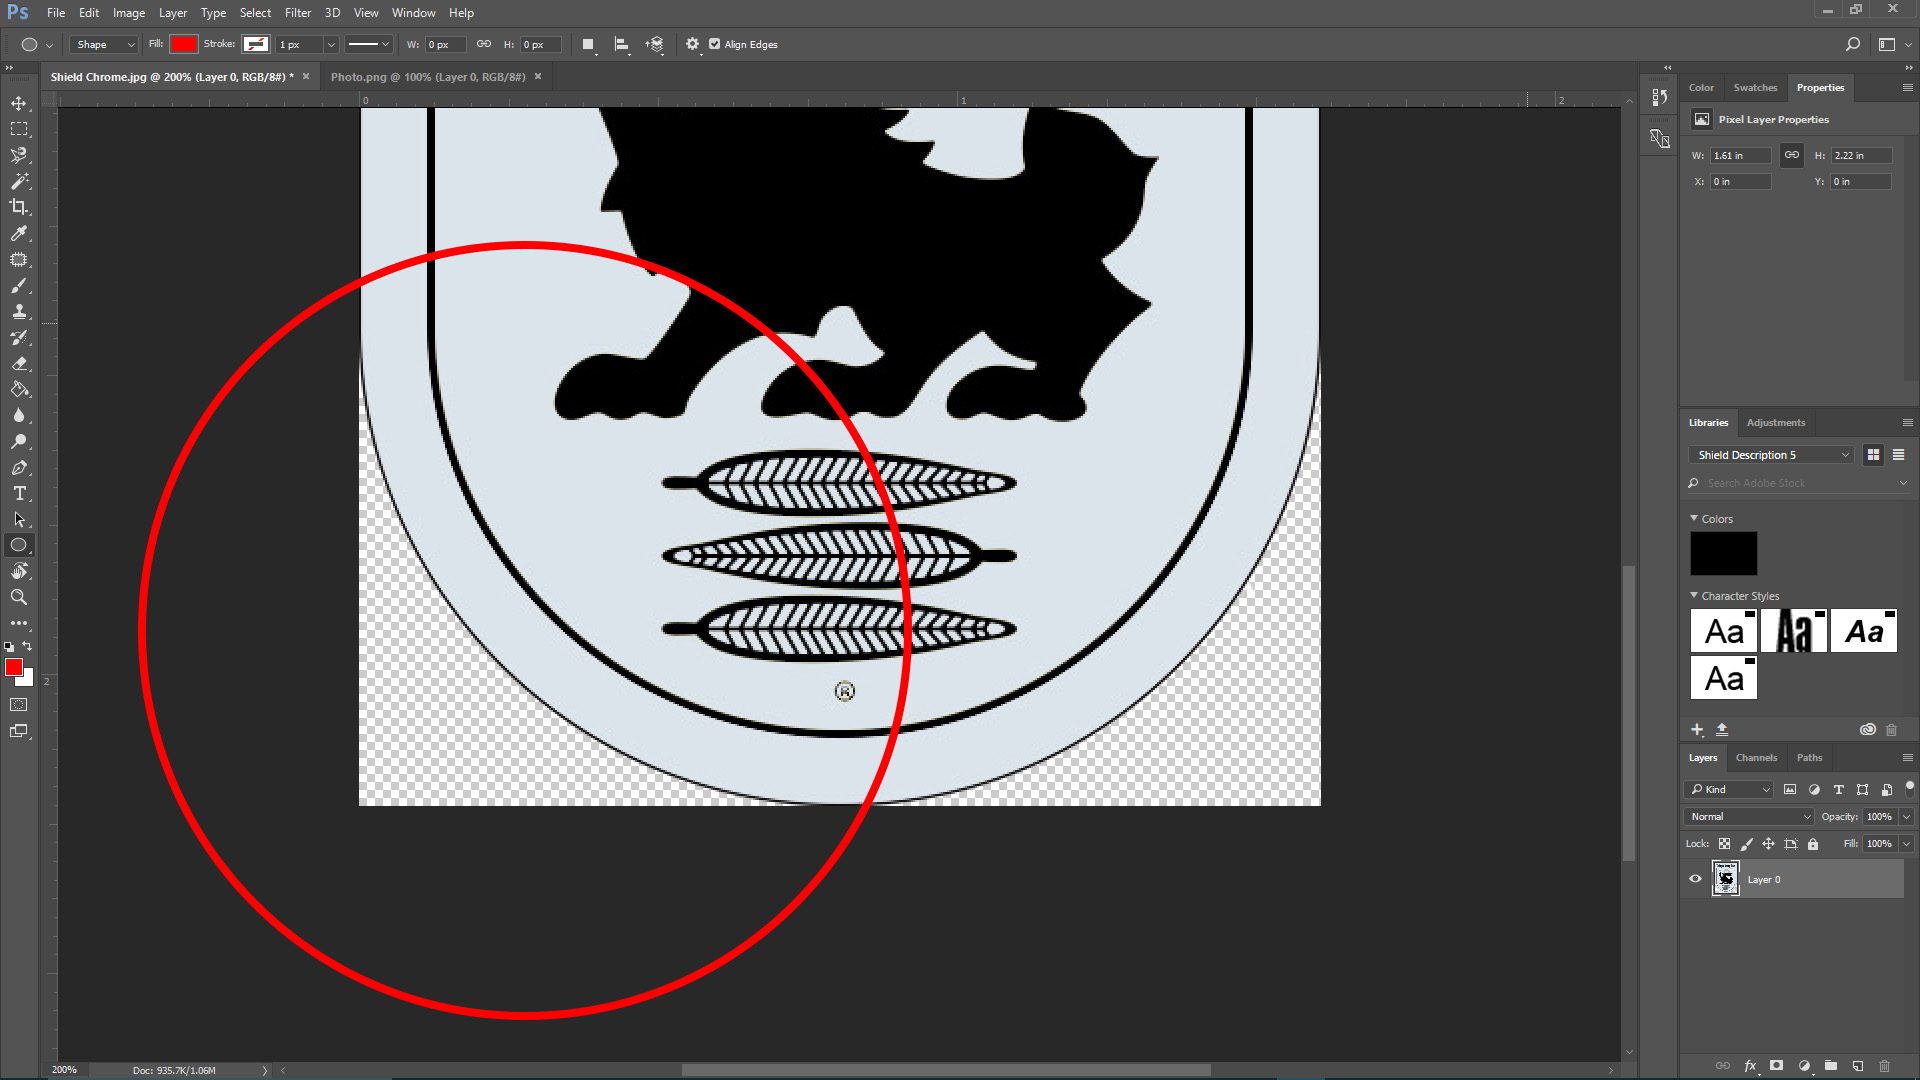
Hi everyone, I am a self-taught Adobe person and I can't seem to figure out how to crop the curved edges from this image attached. I've used the lasso tool and all that other stuff but it doesn't give me a clean cut or the exact shape of the curve. I just want to crop the image and have on background whatsoever. HELP! Thanks

 1 Correct answer
The Pen tool is just another way to draw a selection edge. It will help you draw the curve perfectly, but by itself the Pen tool isn't going to crop anything.
It sounds like what you expect is a curved crop. Unfortunately that is not going to happen. You can only have a rectangular crop. What you are really after is having transparency outside the curve so that it doesn't block what's behind it.
When you're looking at the image in Photoshop, as long as you can see the checkerboard pattern behind t
...Explore related tutorials & articles
Copy link to clipboard
Copied
Try the Pen tool. Should be just what you need.
Here's a tutorial on YouTube: How to Use the Pen Tool in Photoshop - YouTube
Copy link to clipboard
Copied
Benjamin,
Thank you, I will attempt the Pen tool right now and come back with an update of how I did! Thank you so very much for answering and helping me out.
Copy link to clipboard
Copied
Okay, don't be frustrated with the NewB here, I watched the video, followed the exact instructions 5 times. It looks correct and looks like everything the guy is doing on the video.
So when I save the image and use it to place into Adobe Indesign, this happens as shown on the image. Can someone explain this to me? Does something not compute from Ps to Id in the process?
.jpg)
Copy link to clipboard
Copied
The Pen tool is just another way to draw a selection edge. It will help you draw the curve perfectly, but by itself the Pen tool isn't going to crop anything.
It sounds like what you expect is a curved crop. Unfortunately that is not going to happen. You can only have a rectangular crop. What you are really after is having transparency outside the curve so that it doesn't block what's behind it.
When you're looking at the image in Photoshop, as long as you can see the checkerboard pattern behind the image you have transparency anywhere the checkerboard is visible. If you can see that in Photoshop, good. The next requirement is to save it in a format that preserves transparency, which InDesign will respect. Typically, especially with layered files, you want to save it in Photoshop or TIFF format with the Layers option enabled, because that preserves transparency when you place the image in InDesign.
Some other formats such as JPEG do not support transparency.
Copy link to clipboard
Copied
Thank you everyone! I saved the file as a PNG and that did the trick! Not only did I learn one thing but I learned how to used the Pen Tool as well which is super useful!
This is a great forum, thanks again guys!
Copy link to clipboard
Copied
Another approach (there is _always_ another approach with Photoshop).
Drag some guides to the outline of the design. The should snap into place, but zoom in and place carefully if not.
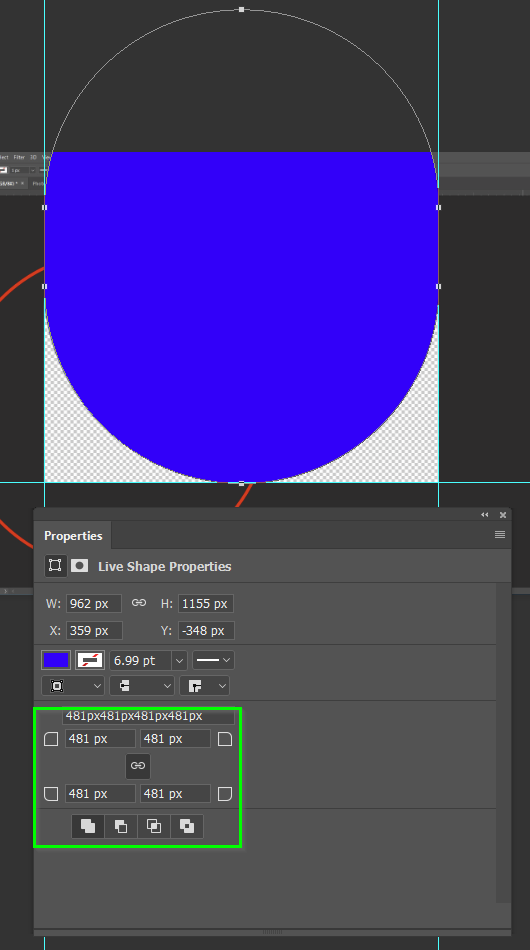
Now drag a rounded rectangle shape layer letting it snap to the guides, and scrub one of the radius controls as far as it will go.
This will give you a perfect semicircle you can use in multiple ways.

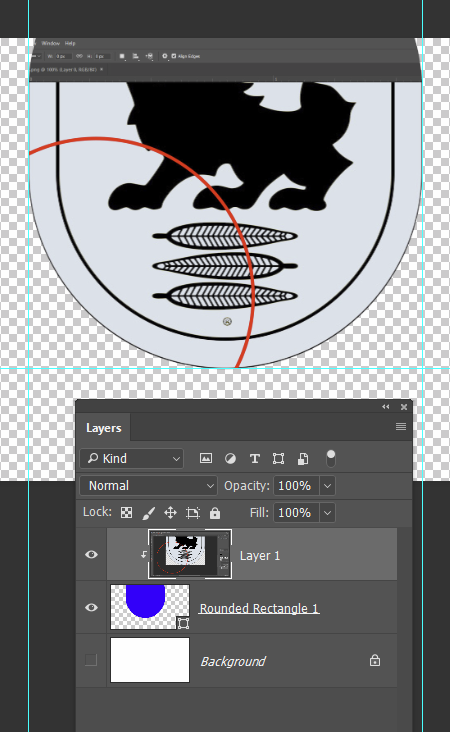
For instance you can place the new shape layer blow the design layer and clip together. I don't know what is out of shot, but you might be able to encompass that with another shape layer or with the Pen tool, and merge with the rounded rectangle shape. I'm thinking this is such a clean and accurate way to do this, that I'd go this way rather than use the pen tool for all of it.

Copy link to clipboard
Copied
Sorry, we can't edit posts because the forum is broken (again)
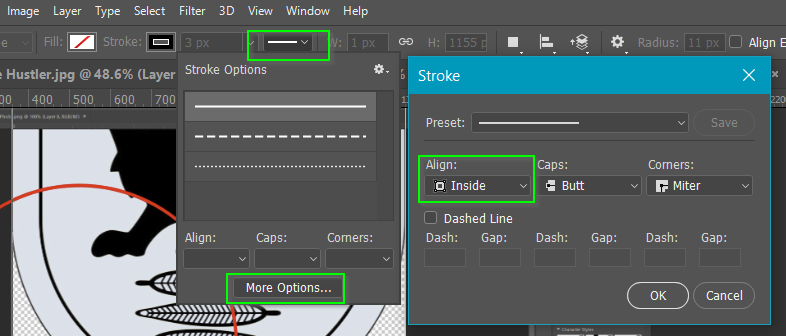
I would also copy the rounded rectangle layer and move above the design layer, and set fill to off, and give it a thin black stroke. This would tidy up the outline.

Note, you might need to open Stroke options and set to Inside.


