• Global community
    • Language:
      • Deutsch
      • English
      • Español
      • Français
      • Português
  • 日本語コミュニティ
    Dedicated community for Japanese speakers
  • 한국 커뮤니티
    Dedicated community for Korean speakers
Exit
0

Photoshop Model texture problem?

Community Beginner ,
Jun 30, 2018 Jun 30, 2018

Copy link to clipboard

Copied

Hi I've placed my texture onto my model in Photoshop and it is perfect besides the head, the texture is perfectly laid out and everything. What do I do now?Screen Shot 2018-06-30 at 10.22.09 PM.png

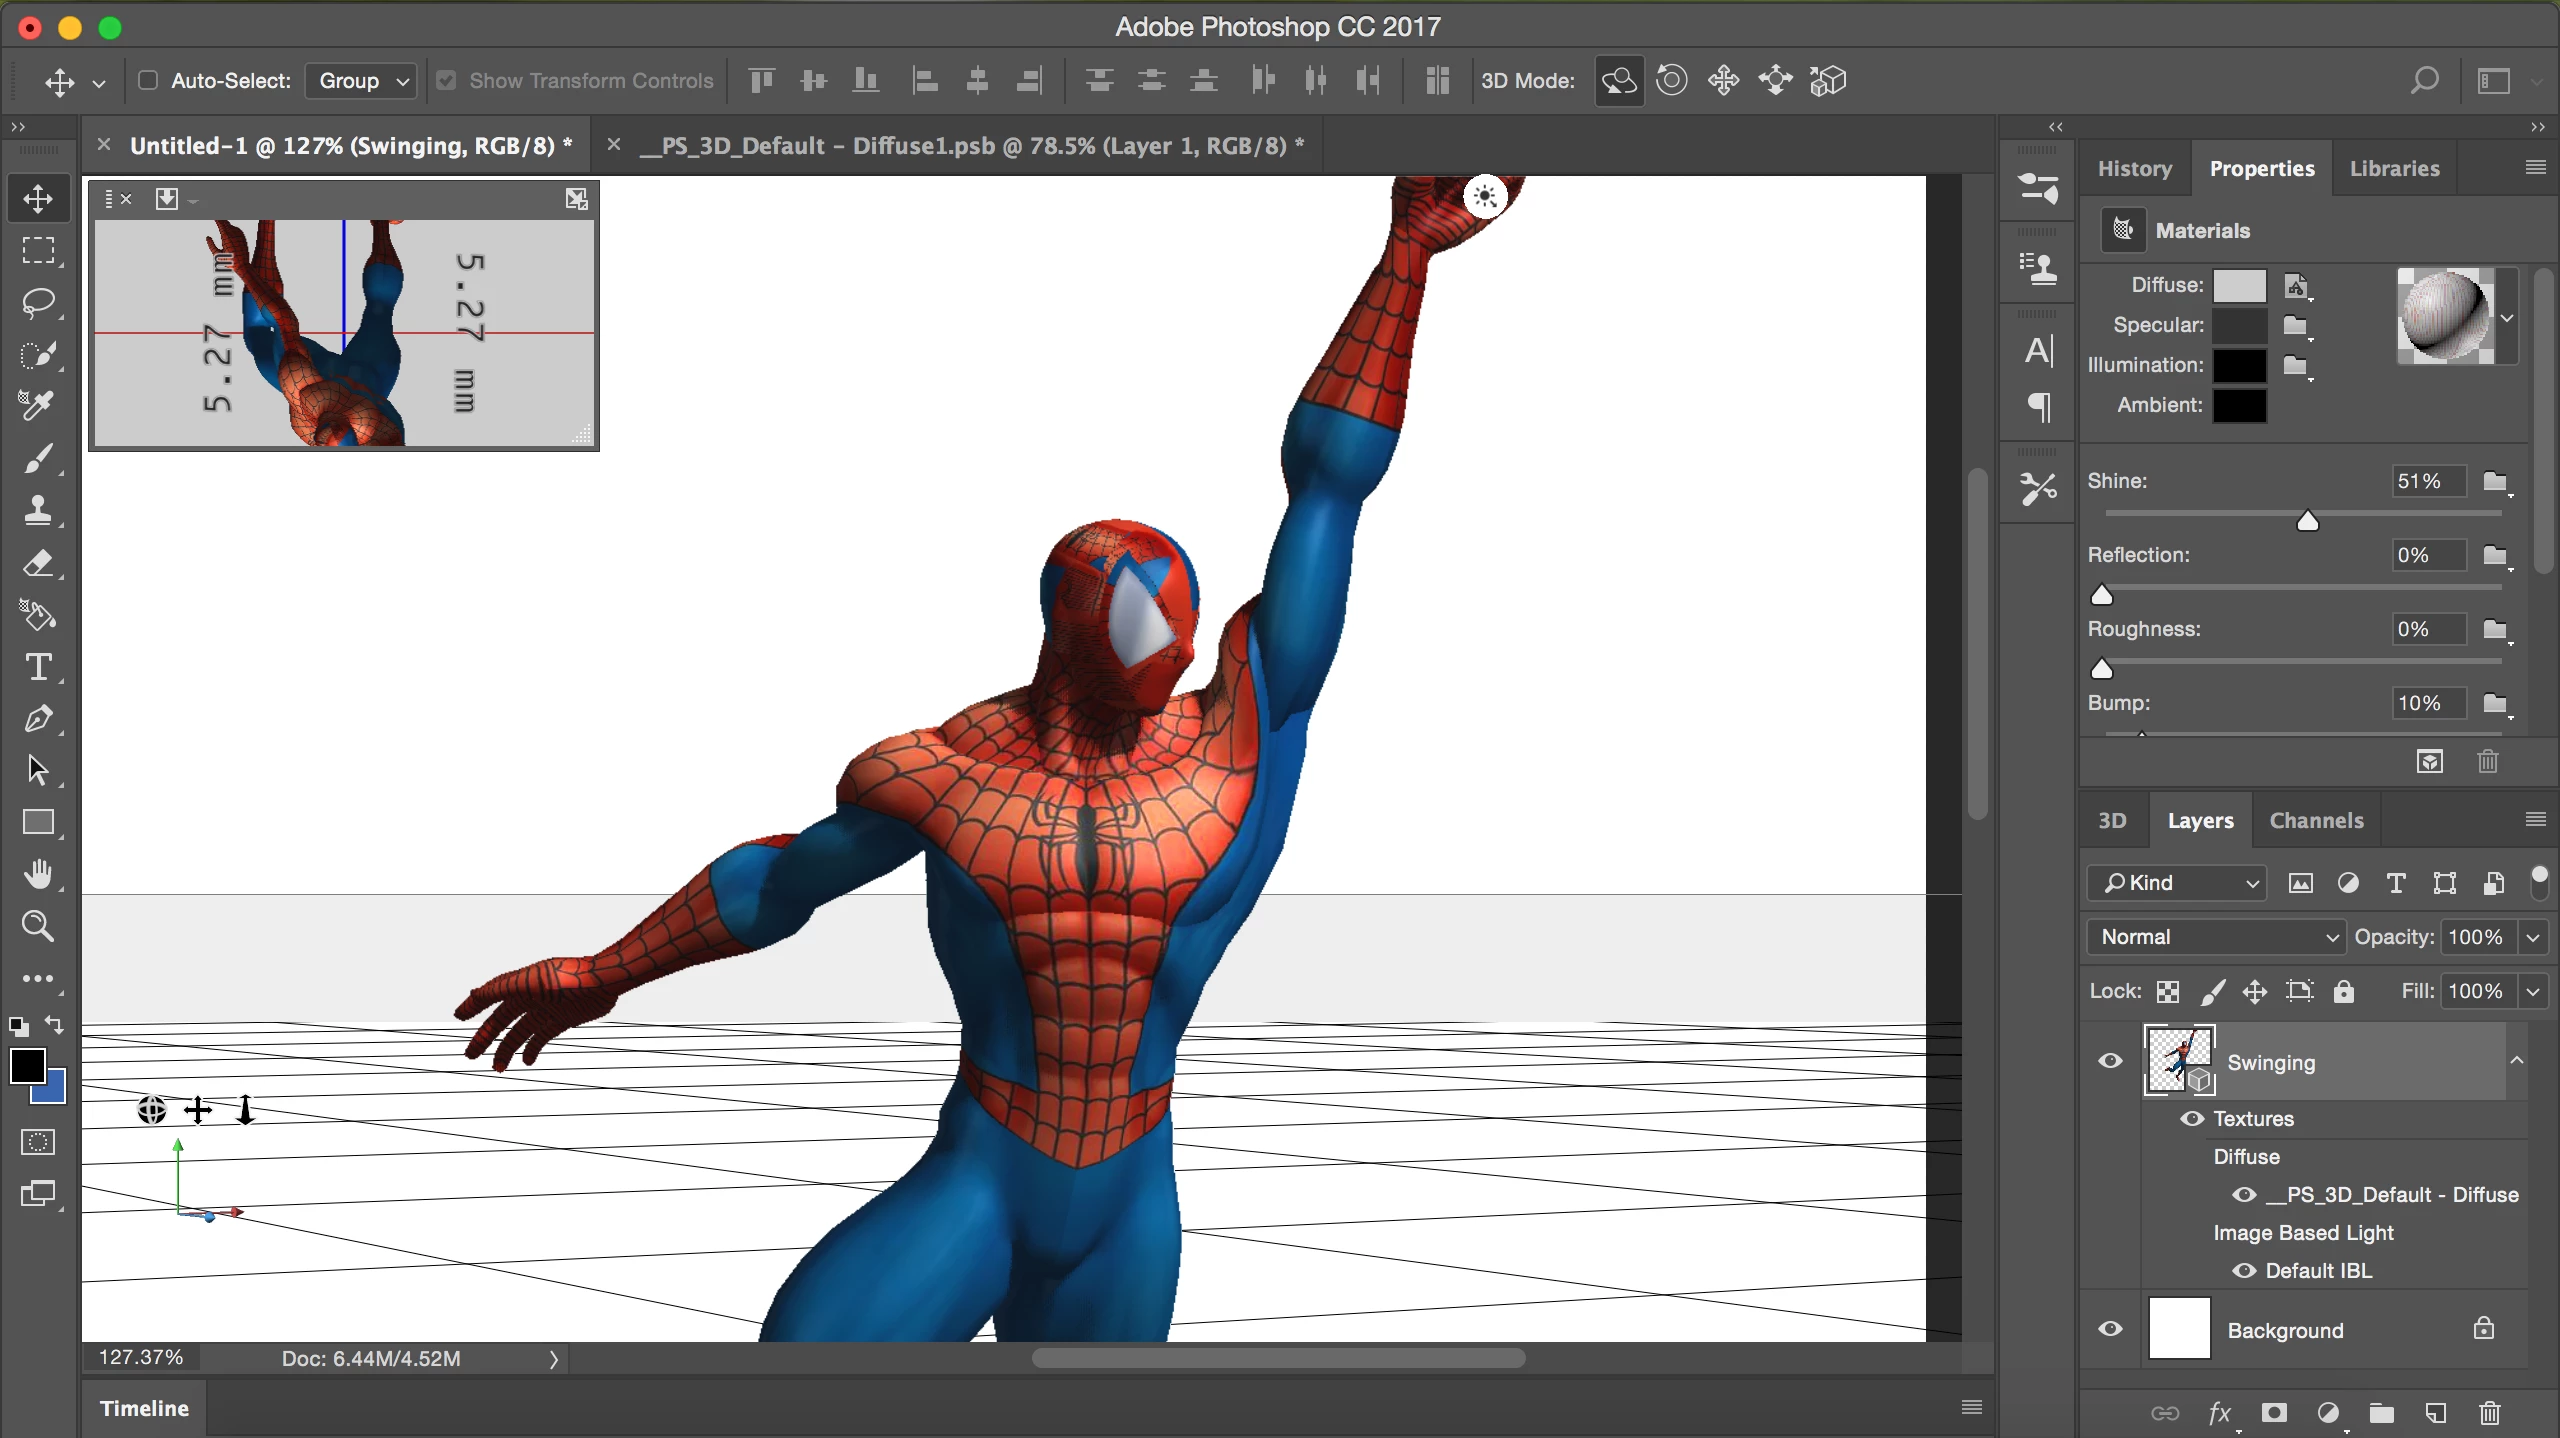
I'm very new to 3D models in Photoshop, I've clicked all around and when trying to use the Specular option or Illumination with the same texture it will just make the model brighter in color.

Screen Shot 2018-06-30 at 10.22.23 PM.png

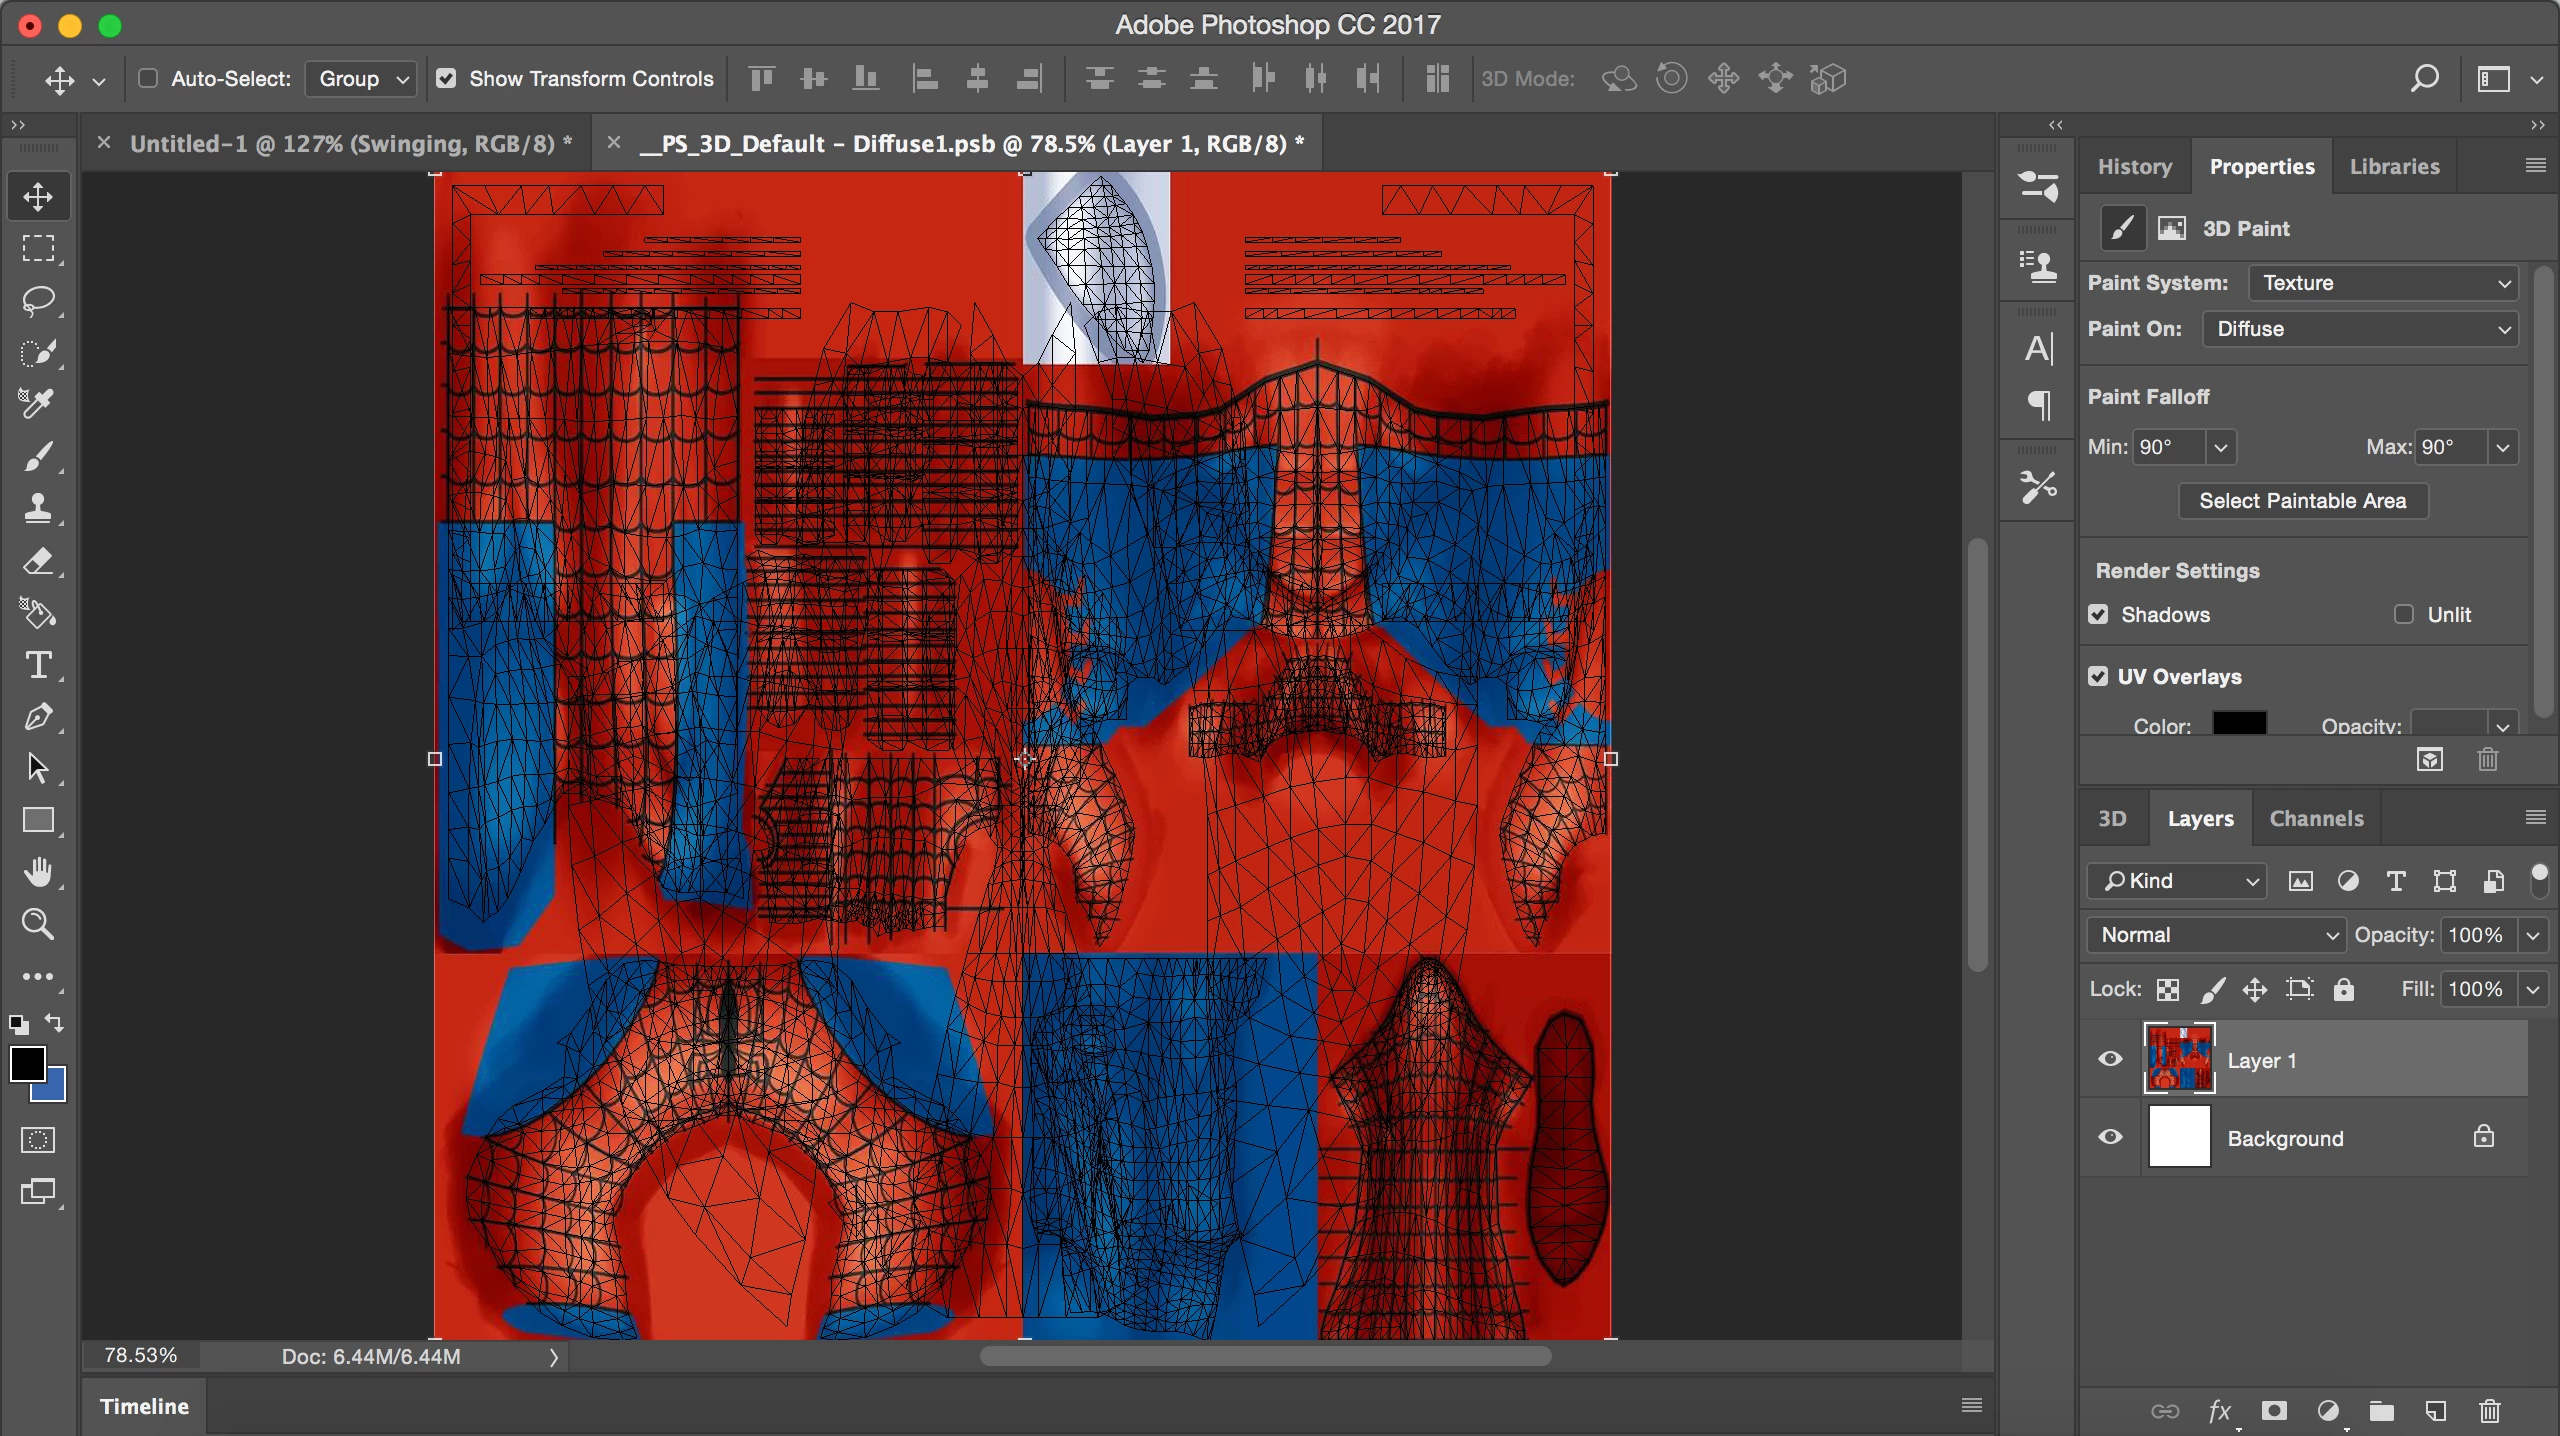
This is the texture.

Any help would be great!

Views

4.4K

Translate

Translate

Report

Report
Community guidelines
Be kind and respectful, give credit to the original source of content, and search for duplicates before posting. Learn more
community guidelines
Adobe
LEGEND ,
Jun 30, 2018 Jun 30, 2018

Copy link to clipboard

Copied

first step is to upgrade Photoshop to the current 19 build instead ... that should be a no brainer for someone doing 3d work unless your system | school can't handle modern software for some reason.

now what to do next is up to you but what is it you want the model to look like?

i.e does this Spiderman have a face and skin under that mask and you want to show it... in which case you edit the opacity map

Screenshot (1056).png

add a new layer so you don't bugger up the current map then just paint in the parts black that you want to disappear

white = show detail

black = hide detail

I like to split my work space into two side by side layouts for 3d edits because Photoshop will then show you where that adjustment is in real time as you work and 3d textures can be tricky without a guide

Screenshot (1046).png

if you don't have any other textures i.e, nothing under the mask then you have to use the defuse map... for a new learner this is hard and I would go back to whom ever you got this model from and ask for correct textures or look for extra detail maps

Votes

Translate

Translate

Report

Report
Community guidelines
Be kind and respectful, give credit to the original source of content, and search for duplicates before posting. Learn more
community guidelines
LEGEND ,
Jul 01, 2018 Jul 01, 2018

Copy link to clipboard

Copied

the texture is perfectly laid out and everything.

I don't think so. Your second screenshot clearly shows overlapping UV islands, which is a big no-no for all texture work. You need to fix the UV coordinates to create a contiguous mesh or at least not have overlaps. Since PS is a dumb nut in this department, you have to use a "real" 3D program.

Mylenium

Votes

Translate

Translate

Report

Report
Community guidelines
Be kind and respectful, give credit to the original source of content, and search for duplicates before posting. Learn more
community guidelines
LEGEND ,
Jul 01, 2018 Jul 01, 2018

Copy link to clipboard

Copied

good point, some 3rd party convert software could be behind the error as very few Adobe softwares will even open FBX

Votes

Translate

Translate

Report

Report
Community guidelines
Be kind and respectful, give credit to the original source of content, and search for duplicates before posting. Learn more
community guidelines
Community Beginner ,
Jul 01, 2018 Jul 01, 2018

Copy link to clipboard

Copied

That was when I clicked edit texture, the actual texture applied is the .jpg file

Votes

Translate

Translate

Report

Report
Community guidelines
Be kind and respectful, give credit to the original source of content, and search for duplicates before posting. Learn more
community guidelines
Community Beginner ,
Jul 01, 2018 Jul 01, 2018

Copy link to clipboard

Copied

Alright so under the diffuse I put the body texture and this was the resultScreen Shot 2018-07-01 at 3.38.37 PM.pngSpiderMan_Tex01_BM.360.jpeg

This is the body texture

And when I put the face texture on the diffuse tab this happenedScreen Shot 2018-07-01 at 3.39.39 PM.pngSpiderMan_Tex02_BM.jpeg

I tried using one under diffuse, one under specular or illumination and all the results are the same

Body texture - Diffuse and Head texture - SpecularScreen Shot 2018-07-01 at 3.44.05 PM.png

and Head texture - diffuse and body texture - specularScreen Shot 2018-07-01 at 3.43.39 PM.png

Like I found out that I just needed to mix both textures but how!? Thank you guys btw UssNorway​, Mylenium​

Votes

Translate

Translate

Report

Report
Community guidelines
Be kind and respectful, give credit to the original source of content, and search for duplicates before posting. Learn more
community guidelines
Community Expert ,
Jul 01, 2018 Jul 01, 2018

Copy link to clipboard

Copied

Hi

Mylenium has given you the right pointer - in that the UV mapping needs sorting and Photoshop is not the application in which to sort it. Try Blender or similar.

In the meantime. you appear to be randomly applying texture maps into various locations (you mentioned diffuse, specular, illumination). It may help if you understand what those locations do in Photoshop (despite similar names not all are the same as other common texture map sets for example PBR texture maps).

A texture map needs to be applied in the right place to work correctly. Your first screenshot suggests you only have one texture map - the diffuse texture - in which case it should be placed in Diffuse - nowhere else.

Diffuse - this is where the basic colour map for the texture goes.

Illumination - This is used when you want the surface to emit light. You may see this in a texture as an emission map.

Specular - This needs a coloured map. It is the colour that will be used to tint the diffuse colour in the Shine and Roughness map settings. If it is left at all black then shine does nothing. In your first screenshot there is no map here but instead the specular tint has been set at grey so the shine setting will have an impact and the impact will be the same everywhere on the surface.

Shine - this affects how the light is dispersed on the surface. It needs a black and white map - black being 0% and white being 100% It works in conjunction with the Roughness map below. 100% gives sharper specular highlights where as 0% gives very diffuse highlights.

With no map then the slider setting is used.

Roughness - this uses a black and white map - Black being 0% and white being 100% and sets the glossiness of the surface. If you are given a glossy map then you can invert it and use it here.

Opacity - sets the transparency of the texture. It needs a black and white map with black being transparent and white opaque. As with the other maps with an associated slider, the value on the slider is multiplied by the value from the map.

Refraction - this sets how light is refracted (bent) at the surface of a transparent material. Use 1.0 for air for other materials you can look up the refractive index on Wikipedia. It needs a black and white map

Bump - This is used to simulate variations in height on the surface without altering the actual model. It allows a level of detail to be simulated that would otherwise need a huge number of polygons.

Normal - This used a 3 channel map to simulate variations in a surface in the x, y and z directions. You can generate a normal map in Filter>3D>Normal map

Ambient : This is not the same as the ambient occlusion map in some 3D textures so don't drop an AO map here. Instead it sets a colour which interacts with the global ambient light settings to tint the surface based on the ambient light

I hope that helps you

Dave

Votes

Translate

Translate

Report

Report
Community guidelines
Be kind and respectful, give credit to the original source of content, and search for duplicates before posting. Learn more
community guidelines
LEGEND ,
Jul 01, 2018 Jul 01, 2018

Copy link to clipboard

Copied

LATEST

we all agree the model | textures are busted even if we would use different software to fix it so moving forward we need to know;

1st, have you still got the original (file - textures) you started with and before you edited them in any way? if so great as I'd put them in a dropbox and give us a look at them because its easyer to convert a correct texture than fix a busted one

2nd what are you trying to make? a still image is one set of needs... the defuse files can be stacked in Photoshop like a layercake

if you want to use this model in Unreal engine then we cann't add a lot of Shine, Specular or Refraction because their engine is for movment and too much detail layers will make the model stutter in game ideal

if you want Unity then the opposite is true and you have to spent a lot of time getting the fine details correct ... so my point is you have to know what you want to end up with

p.s, UV mapping is not a strong Photoshop area and if your original files need fixing then Blender or the auto mapper in Dimension are both possible options ime auto software gets it right about 40% of the time but a human eye is still king so for really busted maps that need to be made perfect I'd use Wrap 3.3

Votes

Translate

Translate

Report

Report
Community guidelines
Be kind and respectful, give credit to the original source of content, and search for duplicates before posting. Learn more
community guidelines