

- Home
- Premiere Elements
- Discussions
- Re: How Can I Properly Export to YouTube from Elem...
- Re: How Can I Properly Export to YouTube from Elem...

Copy link to clipboard
Copied
Hello to whoever is reading this and/answering me,
I thank you for it!
As the title suggests, I'm inquiring on how I can export to YouTube (in absolute highest quality) the best way. If you go to the 'Export and Share' on Elements, you see 'Quick Export,' 'Devices,' 'Disc,' 'Online,' 'Audio' and finally but not least... 'Image.'
Now, why have I stated that above? Simply because I'm questioning the best one for the highest quality YouTube uploads. You see, if I go to 'Online' and upload directly from Elements to YouTube, I'm extremely limited to my abilities to maneuver what settings I'd like. In fact, there's no custom or advanced settings to choose from.
Now, lets say I assume exporting from 'Devices' suits best, as I can go to advanced settings and so on, does that I mean I have to go to 'Audio' and 'Image' to put in the settings best suited for YouTube as well before I export? And even if I do not, each of these have their own limitations, 'Audio' has a few more advanced settings then does in 'Devices,' and so on in the opposite manner. I really don't want to bring this up but...it's quite in-convenient how it's setup. That's my criticism to the (software) system.
To add on, I'm a little disappointed. Can I not change my bitrate of the video? The recommended or/for normal quality videos that are recorded in 1920 x 1080, the bitrate should be 10,000 kbps. I went to 'Device,' 'custom,' 'advanced settings,' and then 'video' category. I then went to bitrate settings and, to my surprise, no way of changing the bitrate. The only thing I saw was 'Target Bitrate' and 'Maximum Bitrate' with a scale to go up/down.
To recap, my questions are this.
1. Before Exporting and Sharing, to get the best results for YouTube, I must go to each individual "folder(s)" (Devices, Online, Image, etc.) to choose each best setting, for example, audio to video, or can I do this all in Devices? Basically, when exporting, I should check each "folder" for best results in all respected aspects such as devices, audio, and video. Or...what's the best way to export to YouTube? I hope someone who knows video can help me with this question.
2. Can I change the bitrate?
I hope really hope someone can help me. It's a little stressing to be honest with you. Okay, it's really stressing me out.
Thank you so much for your time,
Andrew


 1 Correct answer

Steve Grisetti wrote:b
..... I still think the OP is overthinking this. You can only squeeze so much juice out of a YouTube upload. ...
Agreed. My habit has been to make my output close to my source input then upload to YouTube or, more often, Vimeo. Both are very good at getting right on their end. The same output is also "right" for my TV.
 41
Replies
41
41
Replies
41
Copy link to clipboard
Copied
Steve Grisetti wrote:b
..... I still think the OP is overthinking this. You can only squeeze so much juice out of a YouTube upload. ...
Agreed. My habit has been to make my output close to my source input then upload to YouTube or, more often, Vimeo. Both are very good at getting right on their end. The same output is also "right" for my TV.
Copy link to clipboard
Copied
To everyone who replied above, thank you! But I think there is a misunderstanding.
I forgot to specify that I'm asking if I should shoot in Raw + Jpeg (CR2.) and if I should shoot in 16:9 for video, which all of you thought I was talking about photos, which is all my fault. If someone could answer this, I would be extremely appreciative.
Thank you so much to everyone who's been helping, it really means a lot!
Copy link to clipboard
Copied
I'm confused. RAW+JPEG is a photo file specification. 16:9 is an aspect ratio that matches TVs. Your video clips can be in that aspect ratio, with a variety of quality settings and a couple file formats. RAW photos will be full size and of their own aspect ration, depending on the camera. JPEGs can have the 16:9 aspect ration from the camera. All photos can be cropped to 16:9 both before and after they are in Premiere Elements.
What are you making for YouTube? Is it a video from video clips? Is it a slideshow from photo files? Is it a mixed media project with both?

Copy link to clipboard
Copied
Yes what are you shooting photo's or video?
I was under the impression they were photo's for a videoproject.
If you are shooting video you need to get out your manually and start reading and testing the camera before taking on a shoot.
Copy link to clipboard
Copied
This is for video, I want to upload videos to YouTube, obviously... I'll re-state my question once more: on my DSLR (Canon 70D), should my aspect ratio be 16:9? And my second question is this: for video, for YouTube, should I record in CR2 or Jpeg? That's all I'm asking.
I really hope someone can answer these two questions, as this would help me a lot.
Copy link to clipboard
Copied
If your shooting video then get out the manual and go to the section: shooting video or movie.
If you are shooting video its something like H.264 in a mp4 or mov container.
I dont know the camera but I would say 16;9 is your only option for video.
CR2 (which is RAW) and jpeg are photo formats.
To make things more complicated: you can use photo's to produce a movie such as timelaps. You take a photos at a certain interval.
Copy link to clipboard
Copied
I'll shoot in the aspect ratio 16:9, and on the format, I'll just simply shoot in Jpeg format, or whatever else I may come upon which suits video right. But 16:9 for sure.
Anyways, thank you to everyone for the help! Extremely appreciated!
Copy link to clipboard
Copied
With respect, you've not paid any attention. JPEG is a picture photo choice that has nothing to do with video.
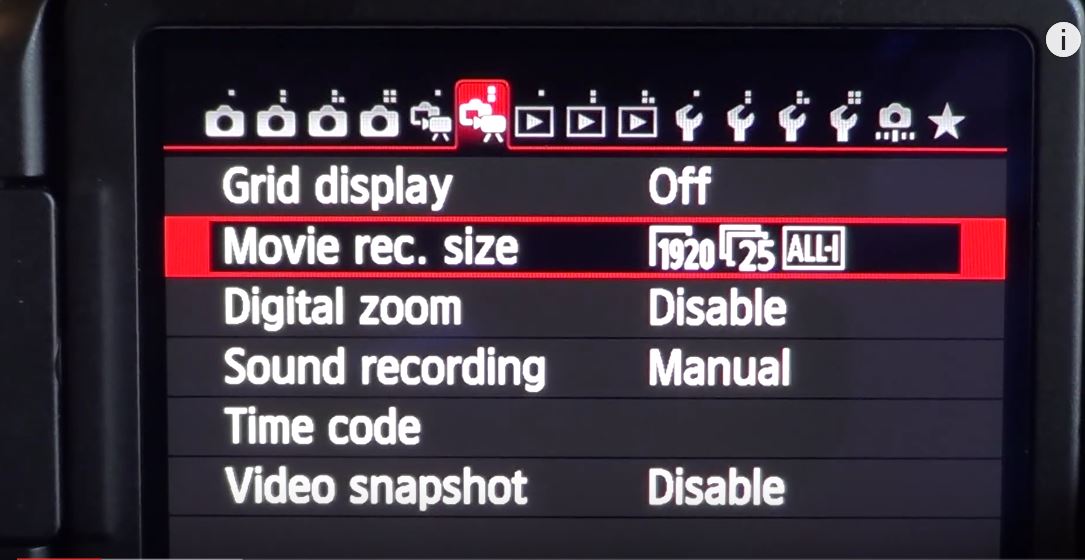
Find the menu that looks like this and pick the first and highest setting.

Copy link to clipboard
Copied
I have almost identical camera 80D.
I mix stills(HDR, animations, time-lapse etc) and video sequences, and for stills I use 16:9 cropping of the always 3:2 in camera.
I use Digital Photo Professional which comes with Canon cameras, and is excellent for all kinds for organizing and processing of stills even in batch.
If you did not use it - download from Canon site - really excellent for so many things, lens corrections, white balance changes and more - all available if shooting raw.
RAW CR2 in Canon is enough for stills, and opening photos in DPP will show a cropping rectangle for 16:9 if you want that for photos as well. I think it's cool with time-lapse, and do a freeze over to HDR images and such - and having the same aspect looks really good.
Export raw from DPP in 8-bit TIF for purpose of import stills, and they are cropped and much smaller than raw which is heavy to handle in the video editor.
I really recommend you use memory cards that are fast - rated 90 Mbps class 10 U3 V30 - that will secure that even using MOV container format with ALL-I type of format can write successfully. It will as well be good for shooting continuous stills write the buffer fast for next sequence. If shooting with exposure brackering(AEB) and maybe even combined with white balance variation - each shot can generate a dozen images on disc and a fast memory card is really worth it.
Copy link to clipboard
Copied
I figured the perfect export, how to export for great quality videos onto YouTube (by doing test recordings, etc.) and I recently just did a shoot that I now have to edit, but I noticed that, as Steve Grisetti warned, the "orange render line" above, it has appeared for me. And I have no clue why. I recorded 1920x1080, and everything should match, but since I got the render line, it suggests otherwise? Does anyone know why?
And thank you so much for the help on how to export, I've found that Export&Share/Devices/Computer or Export&Share/Devices/Custom work amazing, and I think I prefer custom as I see the slightest of slightest difference in quality. But extremely, extremely hard to tell.
Again, thank you, thank you, thank you. To everyone. I really appreciate it. Hope my question will be answered soon! 
Copy link to clipboard
Copied
In short, the orange line shows up when your project settings don't match your material or you've made creative edits including adjustments, effects, transitions, fades, etc.
Premier Elements uses a two render system. The first is for preview during editing. The second is for creating the final output.
The preview rendering is done in "real time" by making preview files that play to the specifications of your project settings. Normally the project settings are created automatically when you put your first clip on the timeline. If that first clip is not typical of the rest of your material, the orange line shows up to tell you that the preview files may need renewing to match whatever automatic project settings that were created. In other words, the orange line shows up when your source material does not match the project settings.
The orange line also shows up when you start making creative edits including adjustments, transitions, effects, etc.
Do you have to render every time the orange line shows up? No. It is only telling you that you might have to render to achieve smooth flowing previews. If you computer is strong enough, it may play smoothly without rendering.
The second rendering is done at output. All your project work is re-coded or rendered from scratch. That means that all of the source files are re-read according to the editing instructions you created during editing. The preview renders that may or may not have an orange line are ignored. That's why output files may play better than what you see during editing.
Copy link to clipboard
Copied
Okay, so if I'm not mistaken, the orange render line above appears because 1) it may not match with source or 2) I did a transition, etc.? And how do I render on Elements?
Copy link to clipboard
Copied
The type of rendering that makes the yellow line go away is initiated by pressing the Enter button on your keyboard. You can also press the "Render" icon with your mouse. 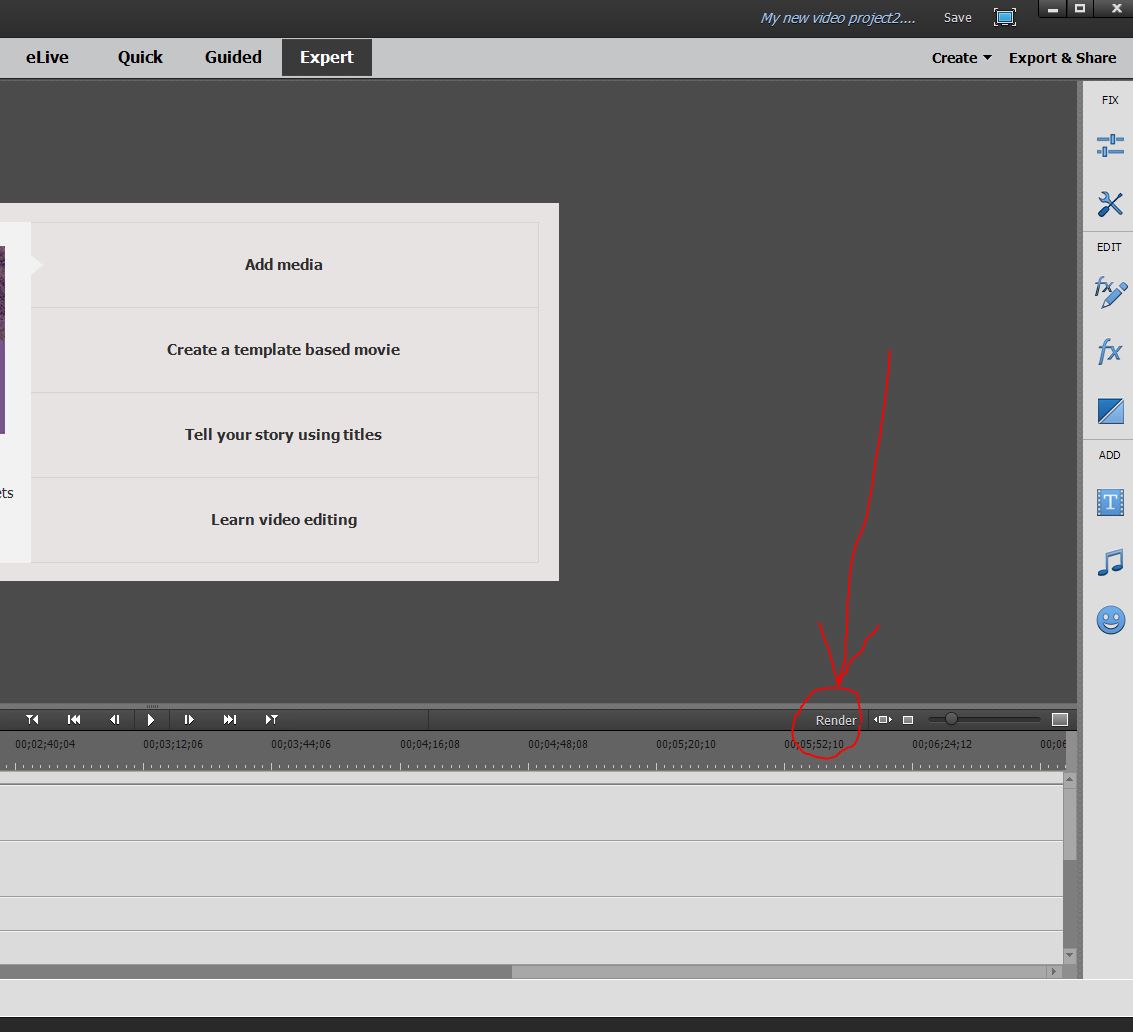
Copy link to clipboard
Copied
Okay, I rendered and the once "orange" render line above turned green, is this good? I'm assuming the orange render line appeared above that specific cut because I added an effect to it (which I did). That being said, this means all my footage matches the settings, and that green means it's all good. If this is not the case, could you explain why this happened? And how can I know if the footage doesn't match the settings?
Thank you so much!
Copy link to clipboard
Copied
Green is good! And, yes, it will normally change to orange when you add an effect.
Don't get too concerned. The orange line does not harm the video. It only means that the automatic previews generated in the background might not run as smoothly as they could while you are editing.
You are not editing the "real" original footage. You are editing preview copies, sometimes called proxies, of the originals. This is "non-destructive" and a good thing because your originals remain safe for any future projects or if something goes wrong with the one you are working on.
To see the project settings, on the Menu bar, use Edit > Project Settings > General. You'll see a screen that tells you what they are. Under normal conditions, the numbers on that screen will match the first clip you put on the timeline. If all the media on the timeline after the first clip come from the same camera with the same settings you should never see an orange render line.
If you do see an orange render line, it is because you've added media that does not match. Then you do the "render" thing and the preview "proxy" files are fixed. I think the official word is "conformed" to match the project.
At final output you can have orange bars all over the place. If you are happy with the editing process and the previews are playing smoothly, all is well. When you execute the final output process all the original files are re-read and "rendered" to the specification of the final output. Within the project file you've created is a road map of what, where and how to read the original files to make an entirely new file that should look at least as good, but probably better than what you see when editing with the previews.
Good luck with your learning curve! Video editing is a lot of fun even though the inner workings are complex.
Bill
Copy link to clipboard
Copied
Thank you so very much! You helped me a lot!

Copy link to clipboard
Copied
Please mark Bill's response as correct so he can get credit. Thanks, and glad you're up and running!
-
- 1
- 2

Find more inspiration, events, and resources on the new Adobe Community
Explore Now
 AdChoices