- Home
- Premiere Elements
- Discussions
- Re: Printing DVD case cover problem
- Re: Printing DVD case cover problem
Printing DVD case cover problem
Copy link to clipboard
Copied
Hello
I recently downloaded a DVD case cover template with the following dimensions: Document size: 10.75 inches wide by 7.2 inches high (resolution 300 px/inches).
I have followed these dimensions in Photoshop which shows my image as: 10.8 inches wide by 7.25 inches high which is fine.
The size of the actual DVD case, using a tape measure, is 11 inches wide x 7.5 inches high, so you would think that my image, when printed out, would fit neatly inside the DVD case cover, but it doesn't.
My printout is considerably bigger at 11.5 inches wide x 8.5 inches high. What have I done wrong? On the printer software (not Photoshop), I think I checked 'fit (image) to page'. Could that be the reason for the size differences? (I can only access the printer in a couple of days so I can't check the size differences now), but I would be grateful for any 'pointers'.
I don't need to resize my case cover image, do I?
Thank you.
Steve
Copy link to clipboard
Copied
Steve
This is all in the printer settings in inches and the size of the document in inches.
I think it best to return to your thread when you have the printer in front of you.
The key setting should be "Print Size". Typically there is a list including a choice for Custom. Set the Custom for your 10.75 width and 7.2 height.
The other consideration is Paper Size. If you have 10.75 width and 7.2 height paper for printing, then Custom set for that.
You could print to Letter size 11.0 width x 8.5 height and then trim the print to your 10.75 width and 7.2 height.
It is essentially a perfect fit. I would not bother with other options such as Crop. When you selected fit image to page, what was the page size?
The above was based on printing your 10.75 x 7.2 image in Photoshop Elements 10 Editor File Menu/Print and a HP printer that I have.
Please review your printer and the printer software that you are using.
We will be watching for your progress and, if necessary, working step by step with you when you have the printer ready to work.
Best wishes
ATR
Copy link to clipboard
Copied
Hello ATR
Thanks for your reply.
When you say Page Size, do you paper size?
It should be the standard A4 8 x 10 (it was printed in a public library and they only have an A4 printer) but, measuring it now, the paper is 11 and three-quarters of an inch wide and 8 and a quarter high.
I can either print it directly from Photoshop or use HP software to print it to a HP printer (but that's what I did today). I suppose I will have to do a couple of test runs.
I will have another go over the weekend and refer to your post when I am sitting next to the printer.
In the meantime, thanks again.
Steve
Copy link to clipboard
Copied
Steve
Thanks for the reply.
I think that I mentioned Paper Size and you mentioned Page Size.
Paper size should be equivalent to Page Size in this instance.
The other is as written Print Size.
What version of Photoshop Elements are you now using? Or are you using some version of Photoshop instead? If you want, I will post screenshots of the print of your 10.75 x 7.2 which was imported into Photoshop Elements Editor, and File Menu/Print used in conjunction with my HP printer. If you have Photoshop, I think I can get use of Photoshop CS5.1 for the screenshots and demo from there.
ATR
Copy link to clipboard
Copied
I have Premier Elements 11 but that software in unrelated to the DVD cover which I have created in Photoshop.
Did you print (or do you print) directly from your Photoshop Elements | File | Print, or do you import your photos/images into the HP software that, I imagine, came with your HP printer, and print from that?
Yes, I would be grateful if you could do that.
Thank you!
Copy link to clipboard
Copied
Steve
Good morning.
In my example, I created the file in Photoshop Elements and used Photoshop Elements' File Menu/Print for the printing in conjunction with the HP Printer.
I will try to look at it both ways and post details for both. If you used Photoshop instead of Photoshop Elements, I will use Photoshop CS5.1 for one part of the details.
To be continued....
ATR
Copy link to clipboard
Copied
Thanks.
I look forward to it.
Steve
Copy link to clipboard
Copied
Steve
I downloaded what was named DVD Cover Template from an online source. It was free. It came as a Photoshop .psd file zipped.
I unzipped it, and imported it into Photoshop CS51. Image Menu/Image Side readings that appeared included
Document Size 11.00 inches high and 7.5 inches wide. Resolution = 300 pixels per inch. For the readout, I had set the units = inches for convenience in the comparisons.
Photoshop CS5 Editor workspace....
Then on to Photoshop CS5.1 Editor File Menu/Print and what that immediately looked like...
To the right of the words "Print Settings", click on the Portrait icon.
At the bottom of the Print dialog, have a check mark next to Bounding Box and set units = inches.
In the Scaled Print Size section set for
No check mark next to Scale to Fit Media
Scale 100%
Height = 7.5
Width = 11.00
Print Resolution stayed at 300 pixels per inch
In the Print Settings, set a Custom Paper Option Width = 7.5 and Length (as it was called there) = 11.0. Units were in inches.
I had cut my printing paper to 11 inches width and 7.5 inches height.
Just before I hit the Print button, Photoshop CS5.1 Print dialog looked like (do not forget to have the Portrait icon enabled to see this view when the Printer settings are as I described above.
The printout was a perfect fit for the DVD Cover on the 7.5 x 11 inch paper.
But, here are the considerations -
1. 11 x 7.5 inches to me represents the sizing for bleed time consideration for a Final Trim Size = 10.75 x 7.2
What is Bleed and What Does it Mean for My Design?
If you do not want to trim the finished 11 x 7.5 to 10.75 x 7.1, then just do the above for custom 10.75 x 7.2 instead of 11 x 7.5.
2. Are you sure you want this particular DVD Cover product instead of what would be appropriate for a DVD-VIDEO on DVD in a jewel case?
Please consider and double check my steps. That Print Settings dialog is not a misprint. Any questions, please do not hesitate to ask.
Thank you for exploring the above.
ATR
Copy link to clipboard
Copied
That's great.
Thanks for all your detailed help - I will definitely need to refer to it come Saturday.
No, it's not a jewel case, it's a normal DVD size like this:
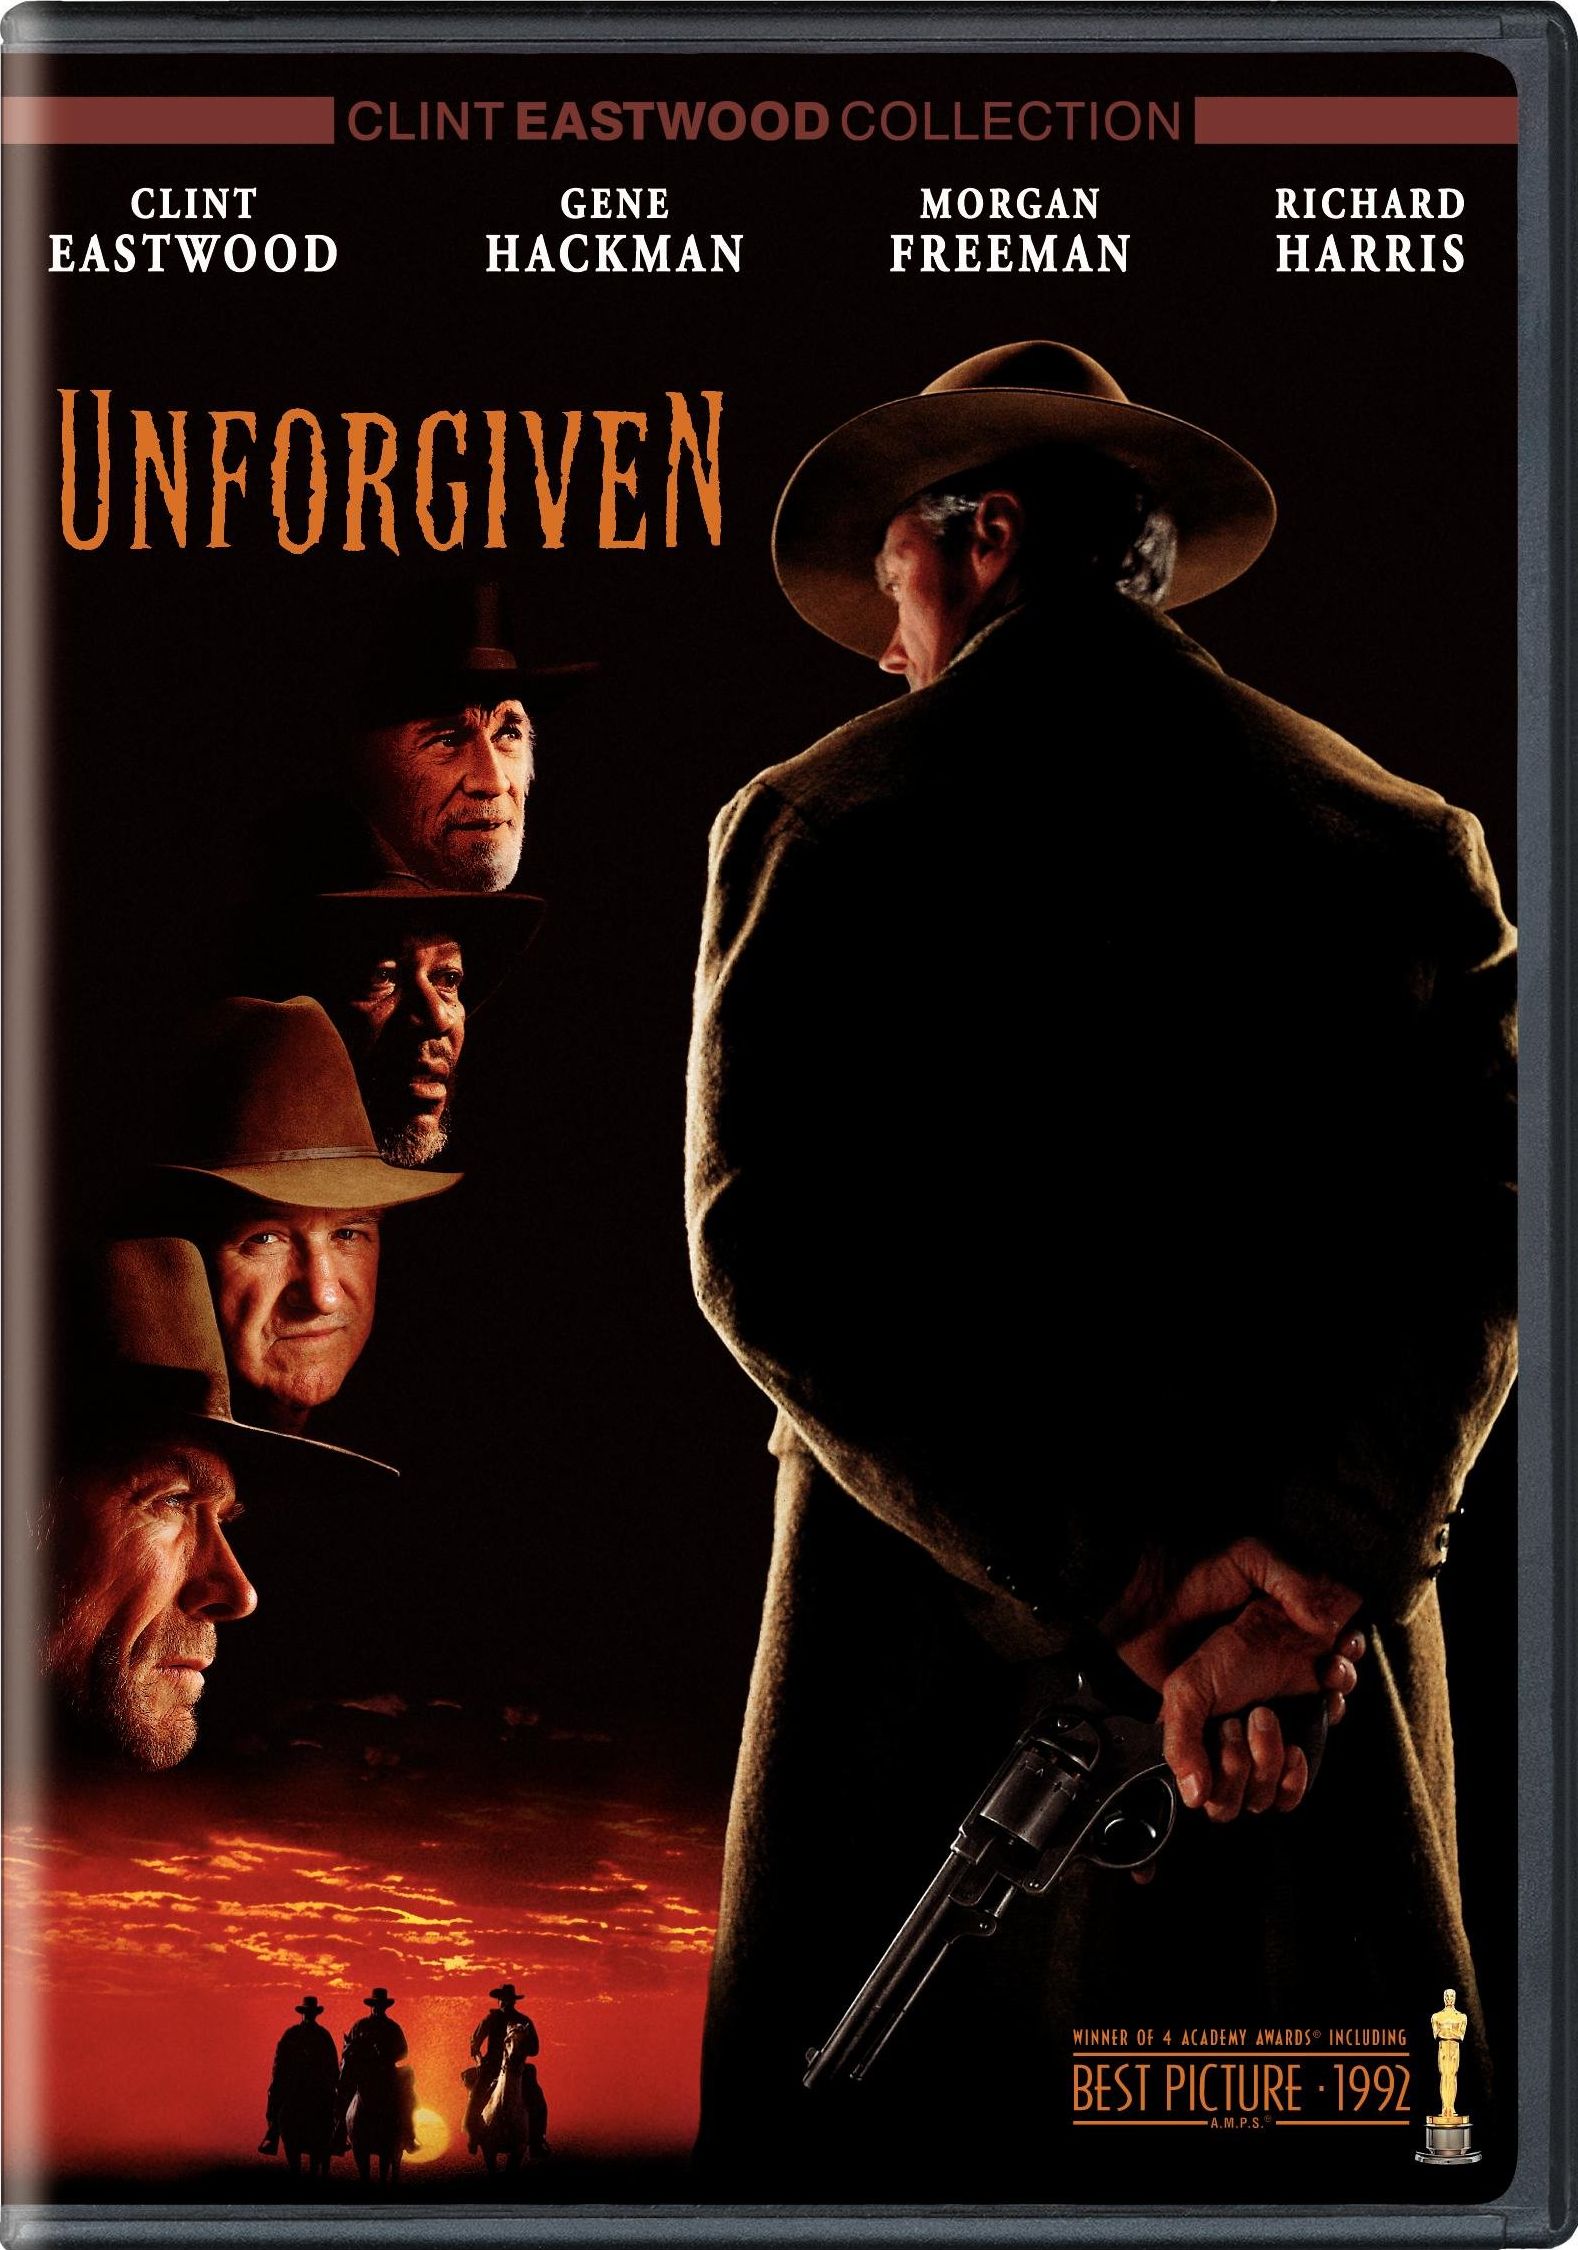
I checked that the Scaled Print Size settings you have in HP (you have them in cm) are an exact match for the inches in Photoshop and, yes, they are.
Also, when I printed my test run off, where you have 'No check mark next to Scale to Fit Media', I think I had that checked which was a mistake.
So in your Photoshop Print Settings, you select the Portrait icon, but in your final screenshot you have the landscape icon selected?
I will re-read your posts again tomorrow and have them available when I am in front of a printer!
Very many thanks again - grateful for your help.
Steve
Copy link to clipboard
Copied
Steve
Best wishes when you give this a run through.
It gets dizzy landscape and portrait when I get into my Printer dialog, but if followed to the word, it works.
The final printout shows the DVD Cover landscape with 11 inches width and 7.5 inches height
The last (4th) screenshot in post 7 show what you should be seeing just before you hit the Print button. Let that be your guideline. If you do not see that, do not hit Print, and post for comments to compare Photoshop and Printer settings.
ATR
Add On...My objective with your project was getting your 11 x 7.5 inches DVD Cover on 11 x 7.5 paper (exact fit as possible). I did not get into the settings on the right of the Photoshop CS5.1 Print dialog.
Copy link to clipboard
Copied
Thanks again.
I had trouble clicking on the link to get here earlier which is why I have delayed getting back to you. It was an Adobe problem.
Yes, I will follow your posts to the word.
I will post back with the results and thanks again for your time.
Steve
Copy link to clipboard
Copied
Hello ATR
This was about as far as I got over the weekend with my print project. I made the following notes beforehand:
1) Print to size 11" x 7.5" or 10.75" x 7.2". Either way, the current dimensions of the image, which are 10.8" x 7.25" (300dpi) means that the Photoshop side of things is fine and I no longer need to return to it (which is just as well because the library, where I will have to go to tomorrow, does not have Photoshop installed).
2) In Page Setup, set the format as Portrait and the paper size as 'User Defined Size'. If 'User Defined Size' or 'Custom Size' is not available, choose Letter size 11" x 8.5" and trim final result to my 10.8" x 7.25" image dimensions.
2) The main job concerns the Printer Settings. Aim for the final landscape image to print at 11" x 7.5" (a slight increase on my current image dimensions) on 11" x 7.5" paper, so that it fits exactly.
3) The printer settings (Scaled Print Size section) should be: Portrait. Do NOT check 'Scale to Fit Media'. Scale 100%. Do not check 'Show Bounding Box' (my preference). (When I got to this stage, the Portrait image height had been cut considerably (screenshot)):
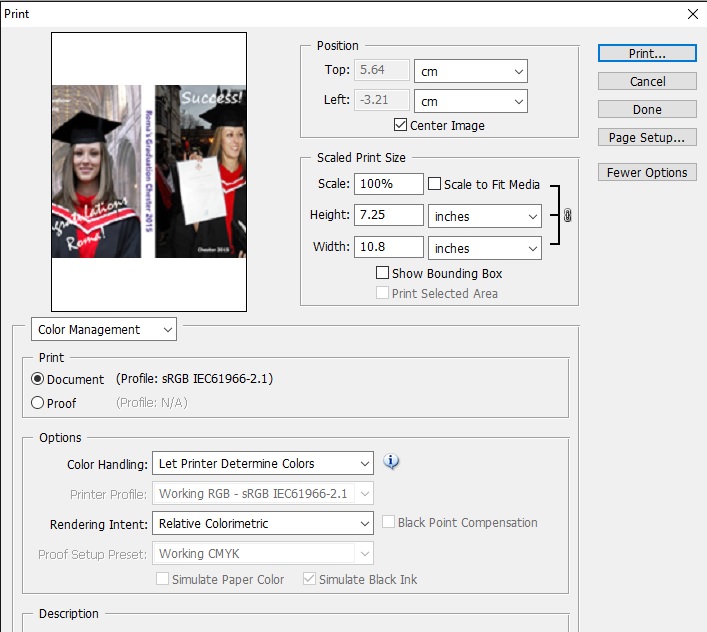
I then clicked on the Print button shown in the above screenshot but got an onscreen pop-up that told me the 'Image is larger than the paper's printable area; some clipping will occur'.
wasn't sure about that pop-up message, so I just clicked 'Proceed' and the result is this:
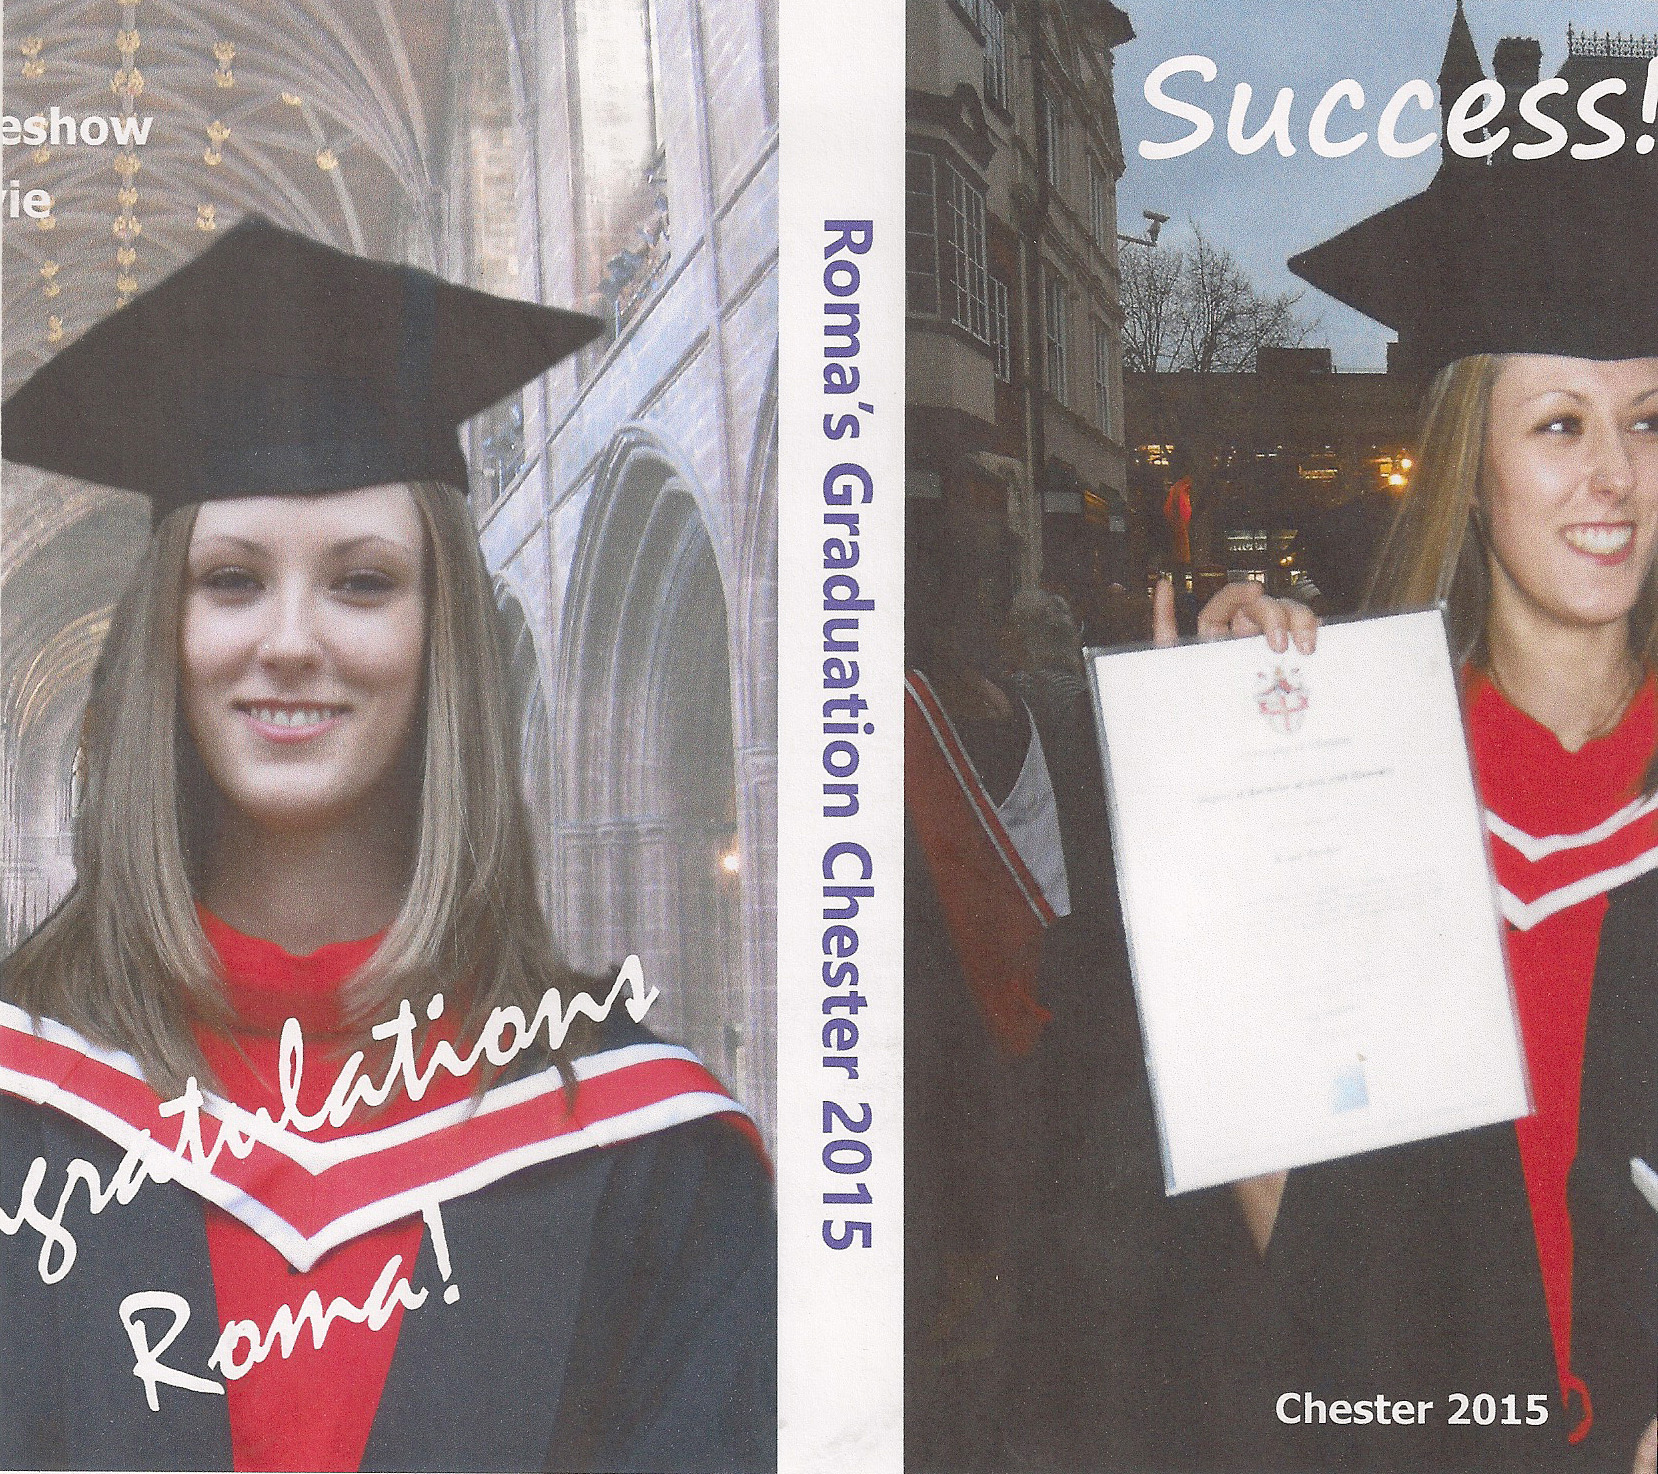
Is that how it is supposed to look in Portrait?
The final image on the DVD cover should look like this:
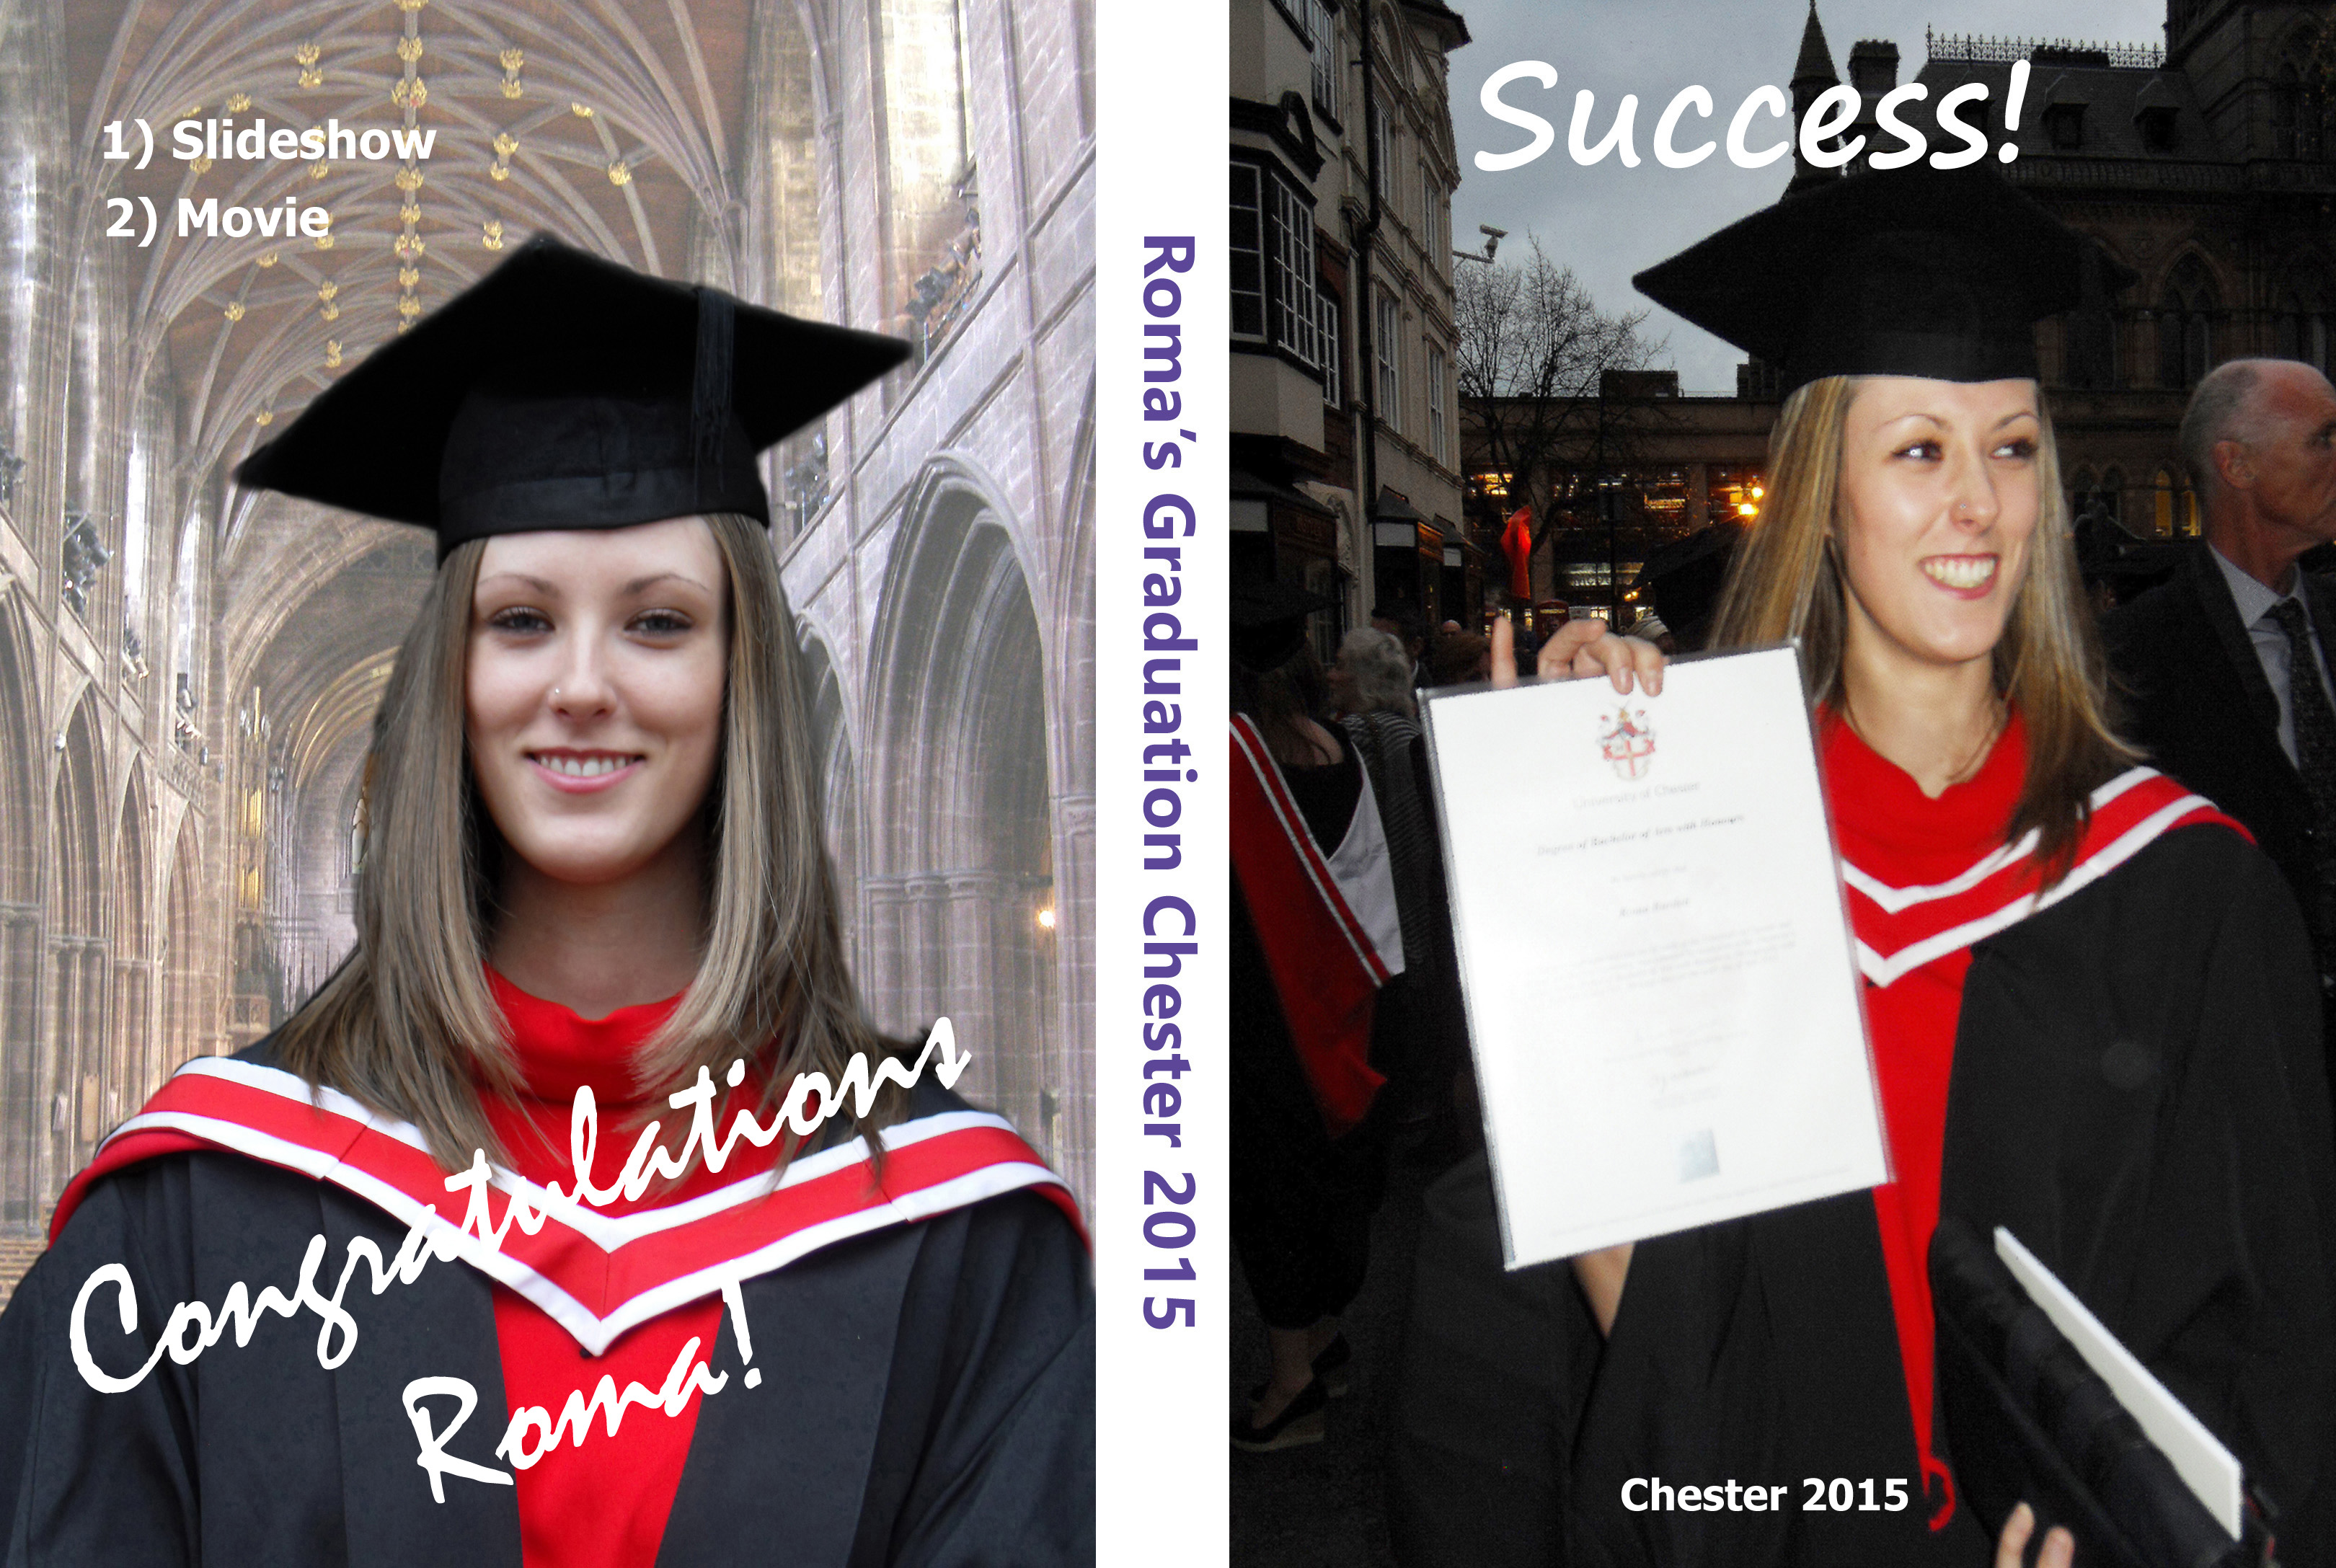
am not sure at what stage you changed the image to Landscape, so at that point I left it. I am no longer next to the printer (and it's almost midnight), but tomorrow morning I will visit the library again and try to print there.
Thanks again.
Steve
Copy link to clipboard
Copied
Steve
DVD Cover Template.
In Photoshop, what is width and height in each 11.00 wide, 7.5 high? Did your template come with a choice of widescreen or portrait insert spaces for the template spaces?
Did you fit (scale) each (front and back) image into its space in the template for a fit. When you were finished creating the DVD Cover, did it look exactly as shown in your last screenshot and, according to Image Menu/Image Size, was it 11.00 inches width and 7.5 inches height? Leave it that way for now.
File Menu/Print...
We are agree on
In the Scaled Print Size section set for
No check mark next to Scale to Fit Media
Scale 100%
Height = 7.5
Width = 11.00
Print Resolution stayed at 300 pixels per inch
in my first screenshot in post 7.
Where do you do your printer settings including selecting the printer? I do not see anything for that in your screenshots. Under printer settings, look for tabs named Paper Quality and Finishing. For now, we want Paper Size Height = 7.5 and 11.00 Width, and the same for Print Size. Letter size if other not possible.What is under the Page Set Up Tab?
What program are you printing from? Give another look for an option for landscape versus portrait orientation in the Printer dialog where you will hit the Print button.
We will be watching for your results.
Thanks.
ATR
Copy link to clipboard
Copied
It is 10.8 inches wide and 7.25 inches high.
No, the template was a simple 3240 x 2175px one (no widescreen dimensions) that shows only the division for the spine (nothing around any edges).
I sized both images to fit into their respective spaces (front and back) in the template. I had to diagonally drag both images a little to get a proper fit while holding down the Shift key (proportion).
Yes, it is exactly like that. This is the file info:
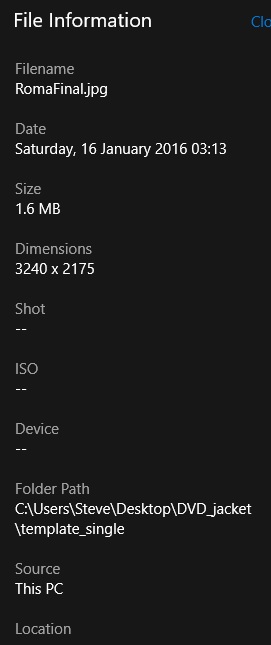
Re your post 7. In that case, I would need to increase my image width from 10.8 inches to 11 inches and the height from 7.25 inches to 7.5 inches, wouldn't I, but I have left it for the time being.
This is a screenshot I did yesterday and when I replicate those steps now on my own PC I see exactly the same thing: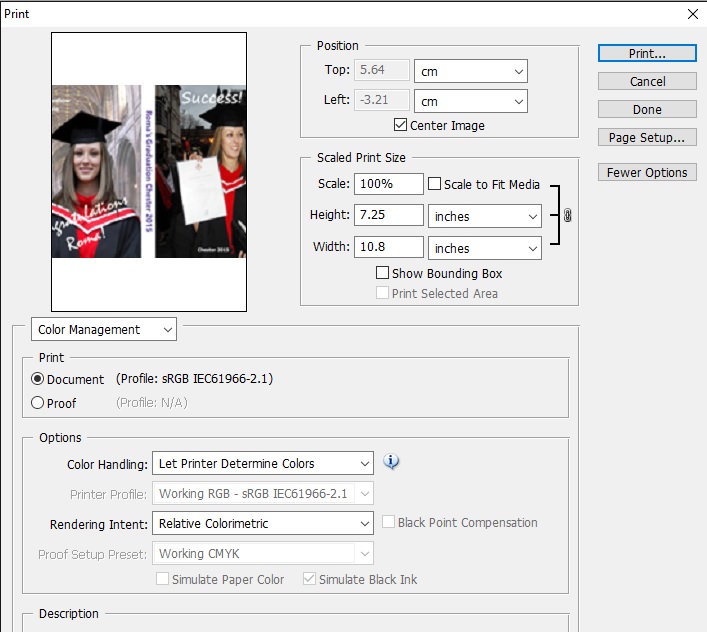
In the Page Setup tab, the default is A4 and that is what it is at this moment, but it is possible to select 'User Defined Size' so, all things being equal, I should be able to select a paper size of 11 x 7,5 inches in Printer Settings in the library tomorrow.
Yesterday, I was printing via Photoshop (I disregarded the HP software). Tomorrow, I am not sure until I get there. I imagine that most image editing software will share the fundamentals, at least.
OK, so just before I am ready to print, I should change the page orientation to Landscape.
Thanks again.
Steve
Copy link to clipboard
Copied
Steve
As for landscape or portrait orientation in the Printer screen just before you hit Print button, go with whichever one gives you the whole picture on screen. It has got to look right in the Printer screen before going to Print button.
See top of Print dialog - why do you have the units for Position/ Top and Left as cm instead of inches?
ATR
Copy link to clipboard
Copied
Yes I will look out for that - I must be able to see the whole image in Preview.
I didn't see the cm there - I don't have inches as default. Photoshop preferences must be set to cm as default - usually I would prefer pixels. It shouldn't make any difference, though, should it?
I will have another go tomorrow and let you know how I get on!
Thanks for your help.
Steve
Copy link to clipboard
Copied
Steve
Until you are confident of your setup, I suggest that you keep the units in inches.
That is a very beautiful DVD Cover design and a great complement for an even greater video inside the case.
ATR
Copy link to clipboard
Copied
Aww thank you!
Copy link to clipboard
Copied
Hello ATR
Everything turned out fine.
Library was limited - they only had Windows Paint installed set at a print default of 600 dpi which I couldn't change.
I managed somehow to print it on their colour laser printer.
I hope the young university will like it.
Many thanks again for your help and great effort.
Steve
Copy link to clipboard
Copied
Steve
I am so pleased about "Everything turned out fine." You did great.
As I said already that is one great DVD cover layout that needed to be created.
Best wishes
ATR
Copy link to clipboard
Copied
Many thanks.
You take care.
Steve
Find more inspiration, events, and resources on the new Adobe Community
Explore Now