samamara
Known Participant
June 13, 2023
Answered

Changing Colour of Weird Artefact

  • June 13, 2023
  • 2 replies
  • 1892 views

Good evening, all; 


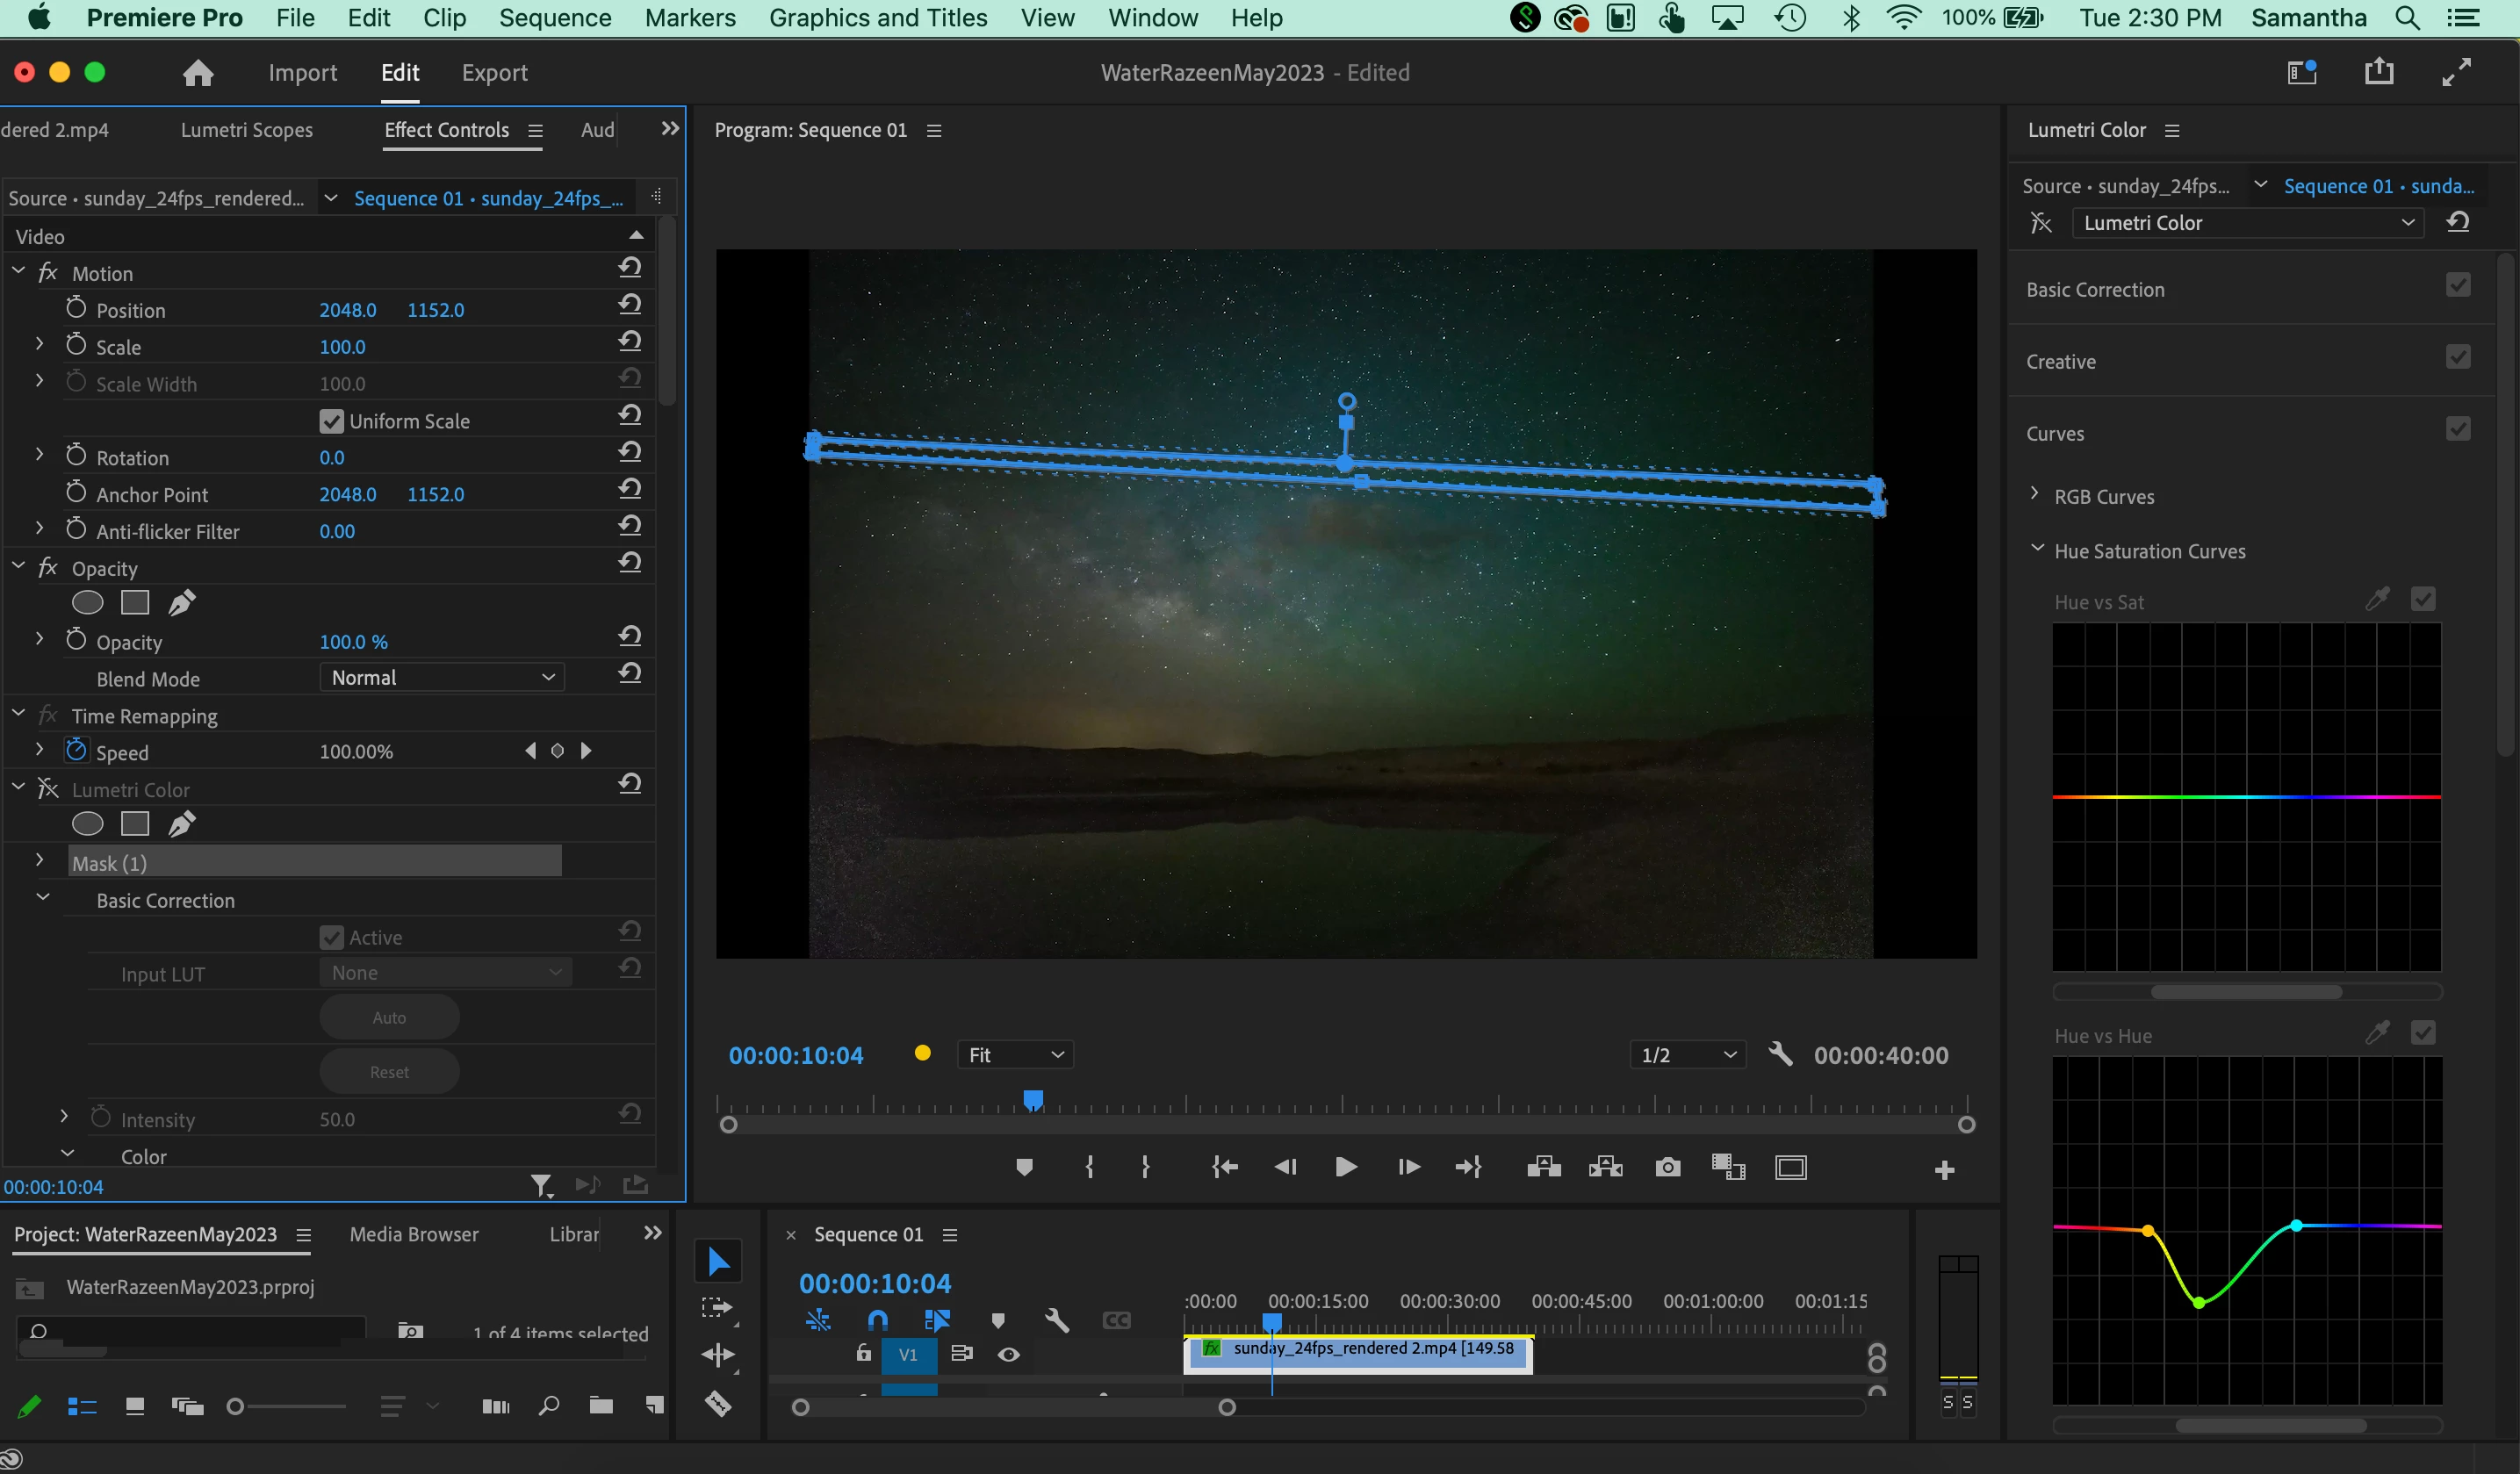
I created a time lapse video of the Milky Way rising and due to a known sensor issue for my camera, there is a yellow band across the clip. Normally, this is not so visible as to be disturbing, but due to the lighting of this particular clip, it's more prominent than I can live with, lol. In future, I may try to find a way to deal with this in Camera Raw unless it becomes easier to deal with in the final .mp4 as it's much less visible in a still image than in the shifting light and wispy clouds of the time lapse. 


Can anyone suggest for me a way I can try to remove this, or at least tone it down, in Premiere Pro? Initially I was thinking adjustment layer, isolating the band (very straight, horizontal), dropping the yellow colours but that's because that's what I would try in Photoshop, where I have more experience than in Premiere Pro. 


I am happy to try anything so if you have any ideas and a little guidance, I'd appreciate it! TIA!


samamara

This topic has been closed for replies.
Correct answer Sami Succar

Thanks a lot @Sami Succar - I appreciate that! Actually, I have already passed the PP exam, lol, but that is for very basic things and doesn't cover a lot about masks (and I'm pretty sure the scopes looked different when I saw them last 🤔 🤔). The keyframing I can handle. But the masking and getting rid this yellow/green line is a real challenge. Here are the screenshots you're asking for, though honestly they don't really show anything much. I've got the clip and the mask. I haven't tried anything further (I returned things back after I tried splitting the clip as I mentioned above). Any help or guidance you can offer would be appreciated! Thanks!


2 replies

R Neil Haugen
Legend
June 14, 2023

I would put a mask around one of those areas so you get a better indication of the specific hue involved. Which is around as much green as yellow, I think.


Then use the Lumetri Curves tab Hue v Hue, and see if you can select an area and adjust the hue to reduce the visibility of the issue.


Might be able to use the eyedropper, but may need to make a manual selection. Click on the line either side of the expected color, drag the center of the selection up or down and watch your Vectorscope as much or more as the image.


Change the area selected and try again.


Neil

Everyone's mileage always varies ...
samamara
samamaraAuthor
Known Participant
June 20, 2023

Sorry @R Neil Haugen - if I could just press you a little further please: I understand that I can add more than one mask (say if the left half of the photo shows the strip as a darker yellow/green due to the background and the right half shows it lighter), but how can I adjust it as the time in the clip moves on? Let's say it appears more saturated at 00:00:25:00 to 00:00:31:00 then it does on either side of those time stamps...how could I just affect that part of the clip? My limited knowledge of Premiere Pro makes me think I need to split the clip, but when I tried that it seemed that the mask I made just goes across both. Would adjustment layers over split clips help, or...? Again, any suggestions you ahve would be appreciated...thanks!

samamara
samamaraAuthor
Known Participant
June 21, 2023

Expand the Effects Control Panel window width by clicking on the little twirl-down arrown to the upper right of that panel. Just to the right of the clip name. That will open the keyframe part of the panel.


See the mask icons just below the Lumetri Effect name in the ECP? Use those to make your mask, and they will only affect that instance of the Lumetri effect.


Now twirl down the Lumetri effect tabs, and most of the controls have a stopwatch icon. Click that icon so it's blue, then it will adapt as you move through time.


So start by setting the controls to the first thing you want, then click the stopwatch to set keyfames 'on' for each control you'll change over time.


Move forward, when you need a change, stop ... make the change, it will add keyframes. Move on ... rinse & repeat.


Neil


Thanks @R Neil Haugen - I will work on that today and let you know how it goes. Fingers crossed!

Ann Bens
Community Expert
Community Expert
June 13, 2023

Screenshot would help!

samamara
samamaraAuthor
Known Participant
June 14, 2023

Yes...sorry @Ann Bens - I forgot to add! Here's a shot and a small clip from the video. I'm hoping that there is some way to fix this or even, as I said, tone it down a bit. I think I could do it with time and patience in Photoshop but I'd rather do it at the end in Premiere Pro if possible.  Because it's an issue with the sensor (known and practically unsolvable without replacing the sensor and even then there are no guarantees), its location is contstant and linear. I hope I'm not asking for a miracle here. Any ideas?