oliver0541
Inspiring
April 21, 2024
Answered

CS5: Wie erstelle ich ein Premiere Projekt mit 3680 x 2760 Pixeln?

  • April 21, 2024
  • 3 replies
  • 11787 views

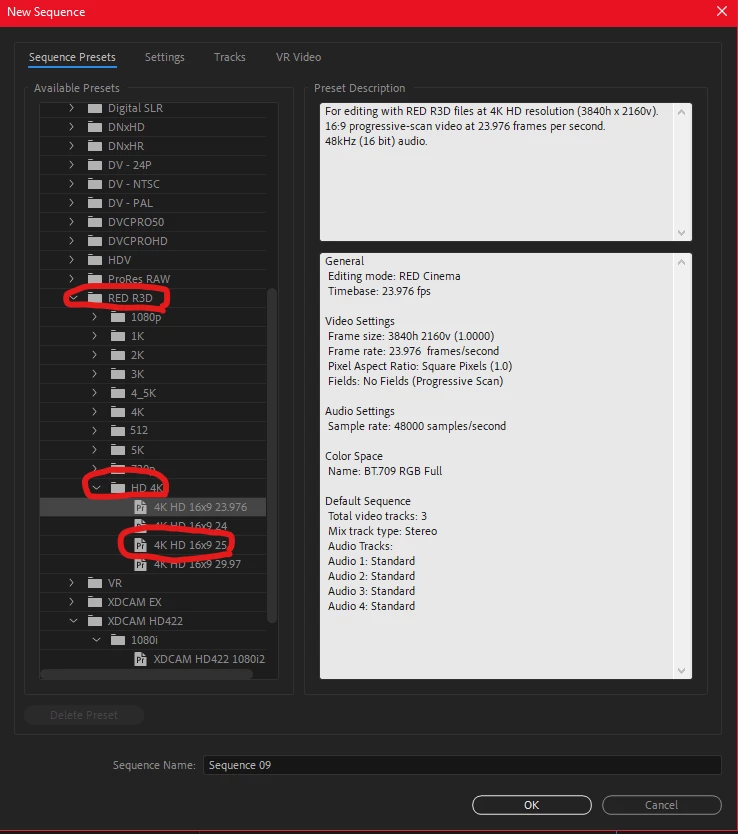
Ich habe Filmmaterial von meiner GoPro im Format 3680 x 2760 Pixeln. Wenn ich ein neues Projekt in Adobe Premiere Pro anlegen möchte, werden mir nur Auflösungen bis 1920 x 1080 Pixel angeboten. Was muss ich tun?

Correct answer T - Sal

And you are right: "Allgemein/Desktop" lets me create a sequence of size 1920 x 1440. But if I drop my still images there and resize to fit the sequence, it let me only export to 1920x1080


If that approach doesn't work, try opening a 4K sequence as shown in the following picture.


Please watch this link 

3 replies

Ann Bens
Community Expert
Community Expert
April 21, 2024

This is what it looks like in your version. Guessing you are using CS6.

You need to turn off Default scale to Framesize in the Preferences as you clips wont fit.

You will need to scale manually. You can copy motion from one and paste on the rest of the clips.

As for export settings: you need to set these manually by raising level and profile.

You cannot set it to 50 or 60 fps needs to be 25 or 30 (or 29,97)


oliver0541
Inspiring
April 21, 2024

It looks like, I have an older version of Premiere (its Premiere Pro CS5 version 5.03). I managed to create a sequence of size 3680 x 2760 matching my video material (actually, it is a bunch of still frames from my GoPro of size 3680 x 2760). However, when I put these frames on the sequence, they can not be rendered in 3680 x 2760, but only in 1920 x 1080.

oliver0541
Inspiring
April 21, 2024

Could you please share your export settings page?


export.jpg
Inspiring
April 21, 2024

In Premiere ist nicht das Projekt festgelegt, sondern nur die Sequenz. Du kannst viele verschieden Sequenzren mit beliebigen Auflösungen in einem Projekt haben, egal, wie es angelegt ist. Entsprechend sehe ich beim Anlegen eines neuen Projekts auch keine Option, die Auflösung festzulegen, sondern beim Anlegen einer Sequenz.

Wenn du eine Sequenz mit den Eigenschaften deines Materials anlegen willst, kannst du bequem einen der Clips nehmen, Rechtsklick, 'New Sequence from Clip', oder du ziehst den Clip auf das Symbol  'New Item' unten rechts am Bin-Fenster.

Vorteile hat es ggf, die Sequenz manuell anzulegen, wenn du weißt, was du tust und willst, zB einen anderen Ausgang als eine Stereosumme, der sich schlecht hinterher noch umstellen lässt.


oliver0541
Inspiring
April 21, 2024

Kann es sein, dass mein Adobe Premiere Pro CS5 Version 5.0.3 dieses Feature nicht hat? Ich sehe nur wahlweise die folgenden Fenster, wenn ich eine neue Sequenz anlegen will.

Community Expert
April 21, 2024

Hello,

Step 1: Setting Up the Project

Launch Adobe Premiere Pro: Open Adobe Premiere Pro on your computer.

Create a New Project: Go to File > New > Project. Name your project and choose a location to save it.

Set Project Settings

  • Choose a scratch disk location for your project files.
  • Set the desired project settings (like scratch disk location, capture format, etc.).

Step 2: Importing 4K Footage

Import Media: Go to File > Import and navigate to the location of your 4K footage. Select the clips you want to import.

Step 3: Creating a Sequence

Create New Sequence

  • Right-click in the Project panel.
  • Choose New Item > Sequence.
  • Select a preset or choose Settings to customize your sequence.

Choose Sequence Settings

  • Under Editing Mode, select Custom.
  • Set the frame size to 3840x2160 pixels (for 4K resolution).
  • Set the frame rate and other settings based on your footage specifications.
  • Click OK to create the sequence.

Step 4: Editing 4K Footage

Drag Clips to Timeline, Drag the 4K clips from the Project panel to the Timeline panel to start editing.

Step 5: Playback Optimization (if needed)

Set Playback Resolution:

  • Click on the Program Monitor panel.
  • Adjust playback resolution to 1/2, 1/4, or 1/8 to improve playback performance.

Use Proxy Workflow (Optional)

  • Create proxies for your 4K footage to edit more smoothly.
  • Right-click on your footage in the Project panel.
  • Choose Proxy > Create Proxies.
  • Select a suitable preset and location for proxy files.

Step 6: Exporting

Export Your Project

  • Go to File > Export > Media.
  • Set export settings (format, codec, resolution, etc.).
  • Click Export to render and save your project.
T-Sal
Community Expert
April 21, 2024

In the project panel, right click on one of your videos and select 'new sequence from clip'.

oliver0541
Inspiring
April 21, 2024

There is no such optionn. Could you attach a screenshot from the situation?

Community Expert
April 21, 2024