Participant
June 29, 2024
Answered

Free media disk space not reflecting available disk space in storage

  • June 29, 2024
  • 2 replies
  • 2069 views

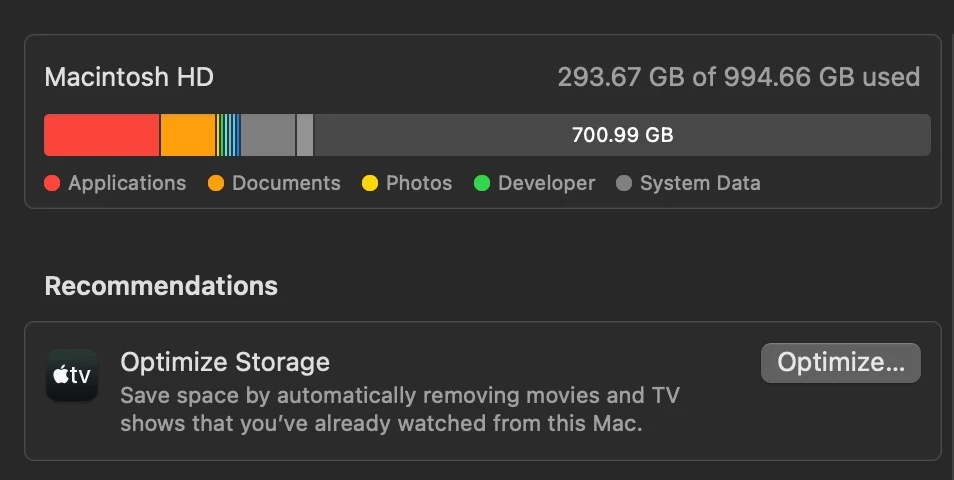
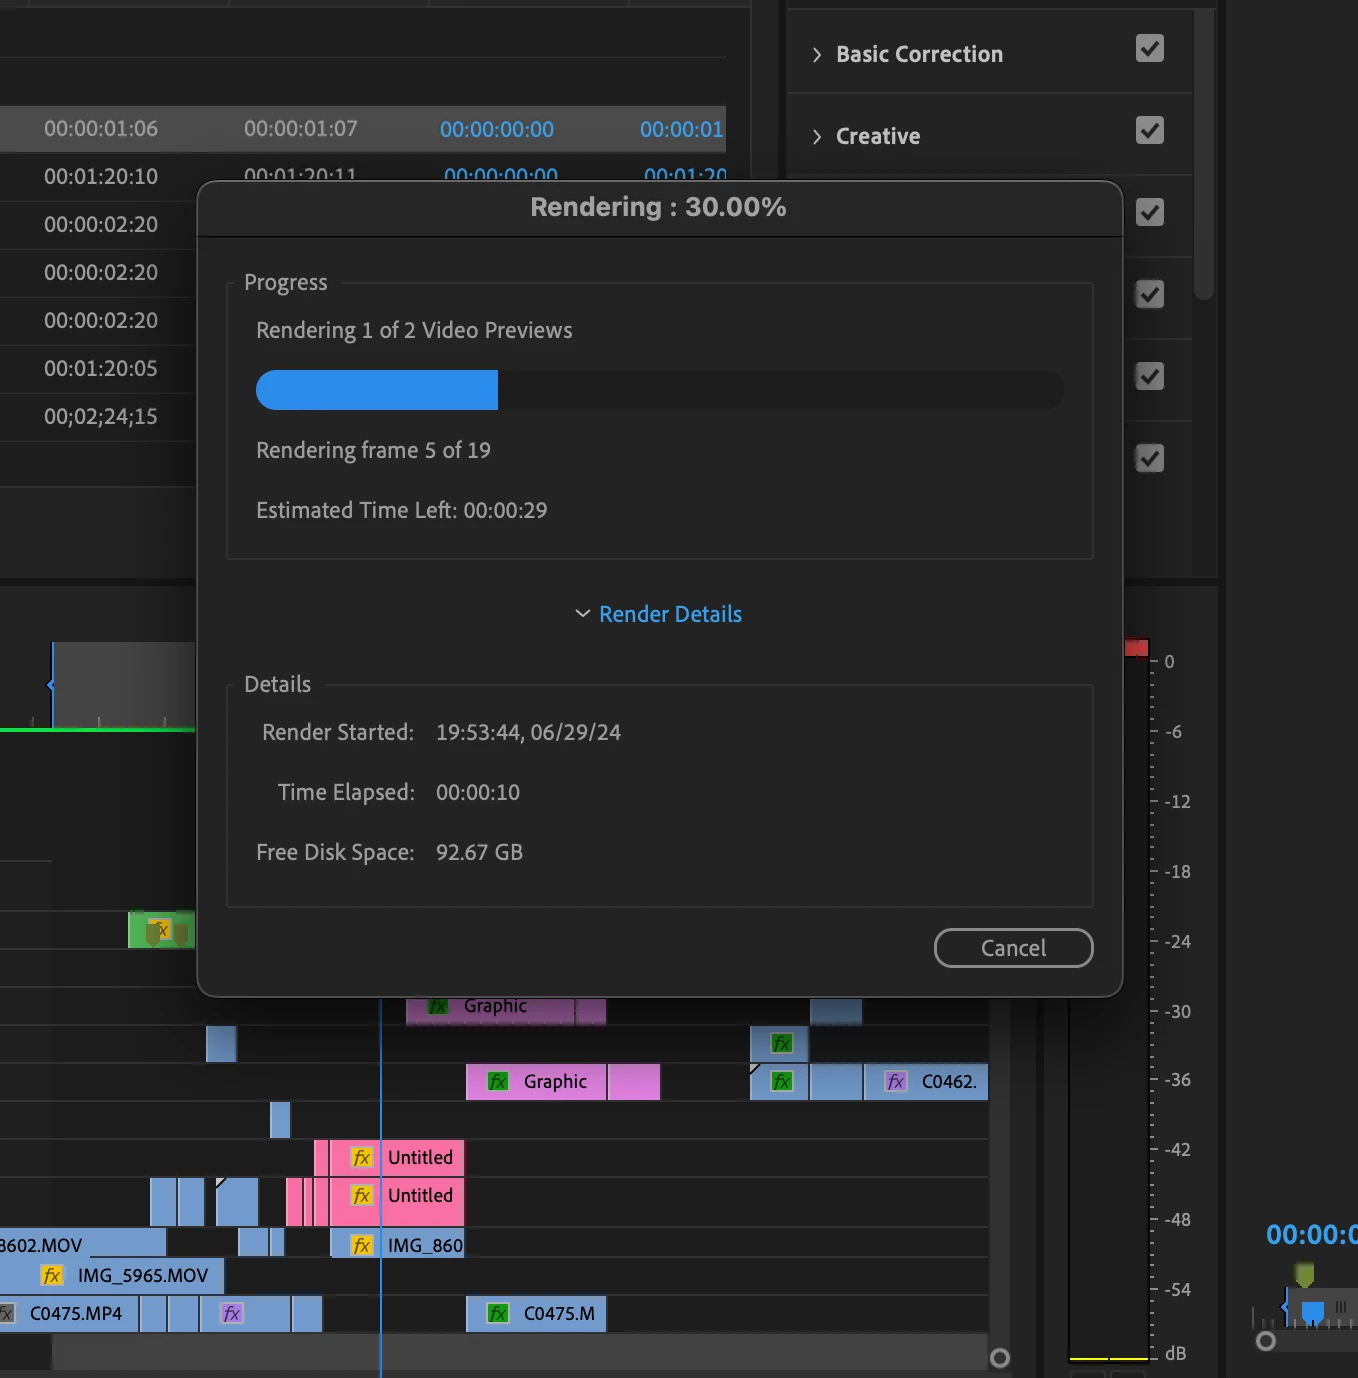
free media disk space not reflecting available space on storage

Hello! I'm curious as to why the Free Disk space when rendering is not reflecting my actual free disk space? I've cleared my media cache and ensured that it is pathed to the default `adobe/common`
destination. Any help would be great!

Premiere Pro 24.3
Macbook M2 Max 32g Sonoma 14.5

This topic has been closed for replies.
Correct answer Averdahl
quote

I've cleared my media cache and ensured that it is pathed to the default `adobe/common`
destination. Any help would be great!


By @joe38047926fg2b


The media cahce has nothing to do with the space left on the disk you render to. Leave it as is.


From the screen dumps it seems that you render the timeline, so what you should look at is your Project Settings. Go to Premiere Pro > Project Settings > Scratch Disks and look for the path seen under the Video Previews section. This is were the rendered files "land" when you render your timeline. Is that path set to Macintosh HD or maybe an external drive?

2 replies

Averdahl
Community Expert
AverdahlCommunity ExpertCorrect answer
Community Expert
June 30, 2024
quote

I've cleared my media cache and ensured that it is pathed to the default `adobe/common`
destination. Any help would be great!


By @joe38047926fg2b


The media cahce has nothing to do with the space left on the disk you render to. Leave it as is.


From the screen dumps it seems that you render the timeline, so what you should look at is your Project Settings. Go to Premiere Pro > Project Settings > Scratch Disks and look for the path seen under the Video Previews section. This is were the rendered files "land" when you render your timeline. Is that path set to Macintosh HD or maybe an external drive?

Community Expert
June 30, 2024

Actually that's right, 

Media Cache Files are temporary files that Premiere Pro creates to improve performance. Whenever you import a new video or audio file into a project, these media cache files are generated. You'll see this process indicated by a progress bar in the bottom right corner, which happens during the import, not during rendering. (Thanks to @Averdahl for pointing this out.)

Guide 1: Changing the Cache Size in Premiere Pro

  1. Open Premiere Pro.
  2. Go to Edit (Windows) or Premiere Pro (Mac) in the menu bar.
  3. Select Preferences and then Media Cache.
  4. In the Media Cache Preferences window, locate the Cache Files section.
  5. Use the Maximum Size slider to set your desired cache size in gigabytes.
  6. Click OK to save your changes.

Guide 2: Changing the Render Location in Premiere Pro

  1. Open Premiere Pro.
  2. Go to File in the menu bar and select Project Settings, then choose Scratch Disks.
  3. In the Scratch Disks window, you'll see various categories such as Captured Video, Captured Audio, and Video Previews.
  4. Next to Video Previews, click Browse to choose a new location for your render files.
  5. Select the desired folder and click Choose (Mac) or Select Folder (Windows).
  6. Click OK to save your changes.

Following these guides will help you manage your media cache files and render locations more efficiently, ensuring optimal performance for your projects.

T-Sal
Community Expert
June 29, 2024

Hello,

The default cache holds 100 GB, but you can adjust it to suit your needs. Keep in mind that if the cache approaches this limit or your disk space gets low, older cached items will be removed automatically when you exit the software.

For a more customized experience, navigate to Edit > Preferences > Cache. Here, you can use the Cache Size slider to specify the maximum disk space for the cache, up to 500 GB. A larger cache enhances performance but uses more disk space. Find the perfect balance to keep your creative process running smoothly!

T-Sal
Participant
June 30, 2024

Hey Toxos, thanks for the reply. I apologize I am relatively new to the adobe environment and I had never used bridge before. Do I need to have Adobe Bridge in order to adjust my disk space usage? Does it somehow partition out space exclusively for adobe products? If I recall correctly, I previously had over 100g free disk space when rendering which even doesn't accurately reflect my actual free disk space so maybe it wasn't capped at the time? 

Community Expert
June 30, 2024

Hello,
You don't need to do anything in Adobe Bridge. In Adobe Premiere, you can adjust the size by navigating to Edit > Preferences > Cache. Here, use the Cache Size slider to specify the maximum disk space.

T-Sal