Participating Frequently
September 19, 2017
Question

PAL DV export woes

  • September 19, 2017
  • 4 replies
  • 4098 views

Hi all,

I'm quite a new Premiere Pro user (migrated from Sony Vegas) as I get this software with CC .

I'm in the process of converting a large batch of old family PAL Mini DV videos into something digital (to be a Christmas pressie!) I'm attempting to preserve as much of the original quality as I can, but in a compressed format. H264 works okay but the PAL DV preset seems a little jerky compared to the original. It also seems to be more blurry than the original (maybe due to compression?) Anyway, I've been at this for ages and I can't work out a decent export setting for H264.

I'm sharing the media I've created in the hope that someone may be able to help me.

Original DV Source

Export A - (H264 with default PAL DV setting, but with VBR 2 pass, maximum depth and render quality)

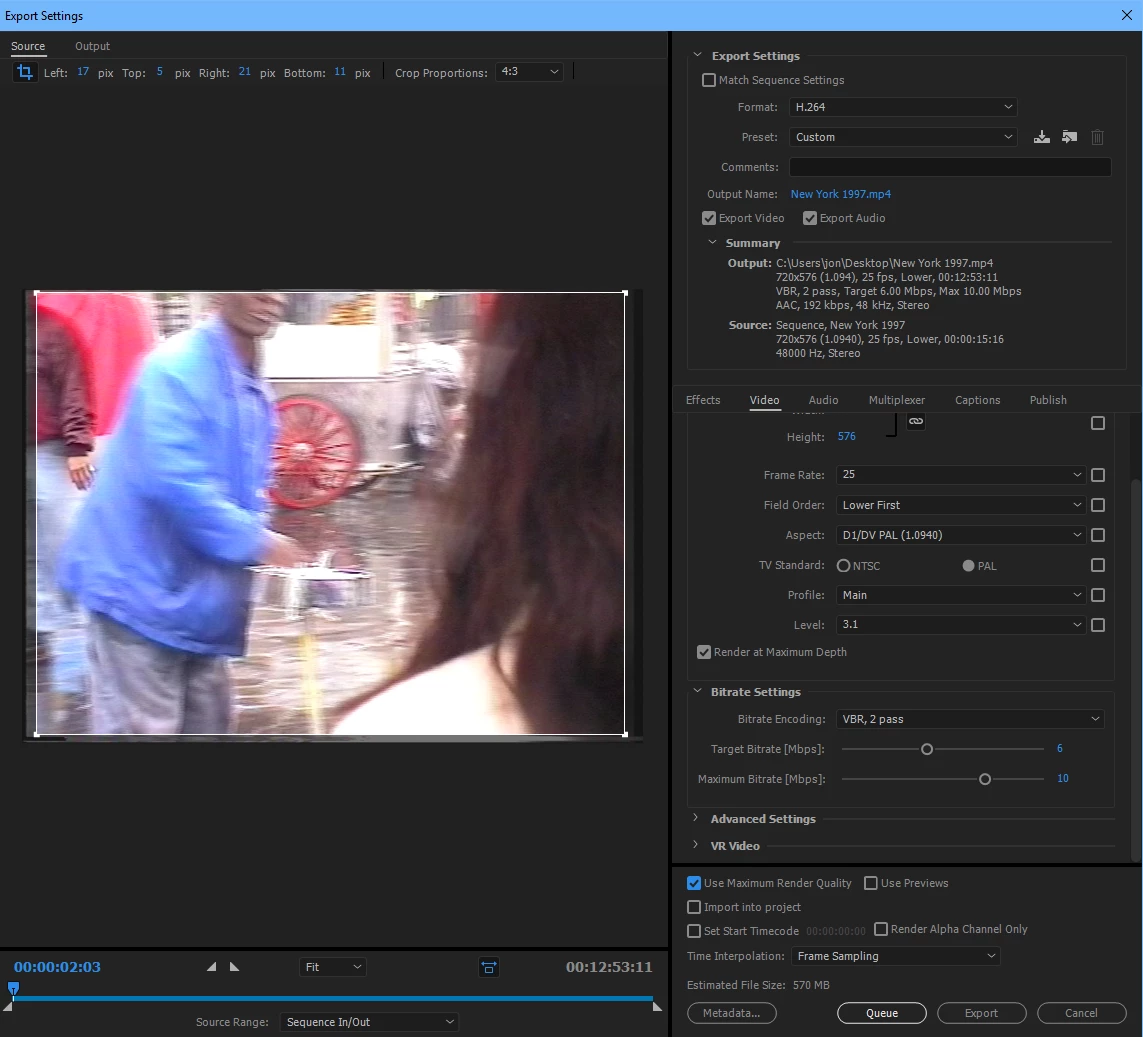
Export B - (As above, but changed Frame Rate to 50 and Field Order to Progressive to try and retain original fluidity)

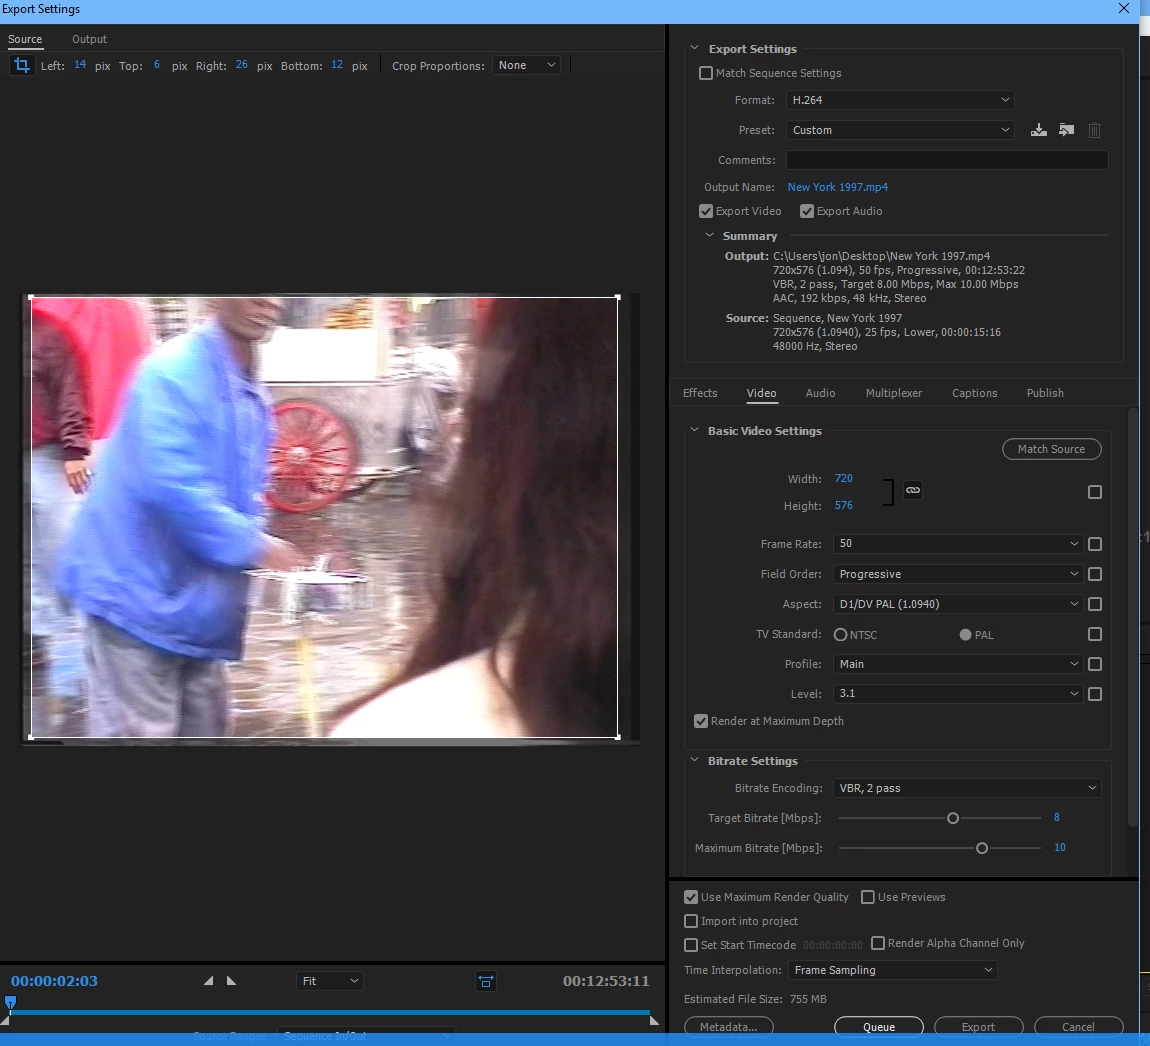
I'm also unsure about the time interpolation. Frame sampling, optical flow or frame blending?

Or am I being overly fussy? I just want to keep what I can from the source material in a way that can be easily stored to DVD (for archiving, not to play on a DVD player), but that I can keep in the cloud and share with family at Christmas. I know they won't necessarily notice - but I will!


Thanks all

    This topic has been closed for replies.

    4 replies

    Participating Frequently
    September 20, 2017

    Well it's for 2 things.

    1. To give to all my family so they can have a disc copy of these videos to watch on their PC's.

    2. I will upload a secondary copy to YouTube in a private folder, again for family use.

    I want to get it right now so I never have to go through the process of capturing 30+ DV tapes again (it's painful!)

    Ann Bens
    Community Expert
    Community Expert
    September 20, 2017

    1. as a video dvd or dvd rom?

    2. For Youtube export always needs to be progressive otkerwise you get interlaced artifacts.

    Participating Frequently
    September 19, 2017

    Okay thanks! More questions!

    1. What's the difference between scaling the media and just cropping in export? Is it one of control?
    2. Also I don't get the whole square pixel thing for?
    3. Time isn't really of the essence for me. Quality is, but I don't want ridiculous file sizes either!  I have to say I've rendered it Jeff's way, and Ann's way - side by side I'm struggling to tell the difference, except the former is about 60% smaller in file size!
    4. Also when I crop your way Ann, there's always a faint black line at the top or side (depending on if I lower the width of height of the video)

    Ann Bens
    Community Expert
    Community Expert
    September 19, 2017

    You can shift the image one pixel to the right or set it to 104.

    Participating Frequently
    September 19, 2017

    How can I do that? I tried 104, 105, 106 and there was still that blessed bar down the right. I tried setting the width to 749 but it didn't allow for odd numbers either. If I set it to 748, it goes, but then a 1px black bar appears along the bottom!

    Ann Bens
    Community Expert
    Community Expert
    September 19, 2017

    I would do it differently: exporting it to progressive and getting rid of the non square pixel aspect ratio.

    In the timeline I set the scale to 103 to get rid of the ugly border.

    Also I bumped the bitrate to 16 as the original is almost 25 as normal dv usually is.

    Jeff Bugbee
    Community Expert
    Community Expert
    September 19, 2017

    I just exported using the following and it looks identical to the source.

    BTW time interpolation doesn't matter if you're not changing changing speed or framerates.

    No need for max render quality since we're not doing any scaling. Just gonna make your render take longer.

    First: sequence settings:

    Second: export settings

    I only changed Field Order to Progressive, matched everything else, turned the bitrate down to 6 since the footage doesn't require a high bitrate.You can also change your audio bitrate down to 128 to save even more space. 320kbps is overkill for this.

    Participating Frequently
    September 19, 2017

    Amazing, thanks for doing that Jeff. 2 questions:

    1. It might be my eyes, but the rendered version has lost some of its original smoothness? There's something about the interlaced original that appears to be running at 50fps, hence the apparent smoothness of it. Or am I losing the plot/misunderstanding DV footage?
    2. What's the best way to crop this to get rid of the fluff around the edges? Just the crop tool in the export box, or should I do something to the sequence?

    Many thanks

    Participating Frequently
    September 19, 2017

    The original is interlaced but it's running at 25fps, not 50. Right now, I'm looking at the source footage and the export side by side on my 27" 5k Retina iMac screen and they both look exactly the same. Any smoothness you notice is just your eyes playing tricks on you.

    Cropping in the export box is fine for what you're doing here since you don't require supreme precision. You can just crop the majority of the aberrations and be done with it. Personally, I enjoy seeing old analog static/lines in footage like this. Reminds me of how the footage is from another era.


    Awesome, thank you again. I definitely want to crop it! Final question - when I do this, the Output tab has a number of scaling options. I've chosen scale to fill. Therefore is it worth ticking the max render quality, since it's being scaled?

    Oh and one more, given the content, I'm guessing VBR 2 pass isn't going to make the blindest bit of difference?