Exit
  • Global community
    • Language:
      • Deutsch
      • English
      • Español
      • Français
      • Português
  • 日本語コミュニティ
  • 한국 커뮤니티
1

Premiere 25.2.1 Bug Report - Keyframes can't be placed/animated inside the timeline

Community Beginner ,
Apr 19, 2025 Apr 19, 2025

Technical Specs: 

iMac Retina 5K, 27 Inch, 2017

Processor: 4,2 GHz Quad-Core Intel Core i7

Graphics: Radeon Pro 580 8 GB

Memory: 32 GB 2400 MHz DDR4

Adobe PremierePro 25.2.1 version


Bug Problem:

Inside the timeline I wanted to place 2 opacity-keyframes in order to create a "fade-in" effect on a MOV file exported from After Effects [motion graphics - quicktime - gopro cineform - RGB Alpha]. 


I tried to place those 2 keyframes with selection tool by holding cmd, but it didn't let me. Then I selected pen tool and I tried again, it also didn't work. Even though I can grab the "line" and I can drag it up and down, it shows me two values [0 and 46] so the keyframes are placed, but they are not shown. 


I must specify that on the footage [which is MP4] I don't encounter this problem. 

I will leave here a video so it will be clearer. 

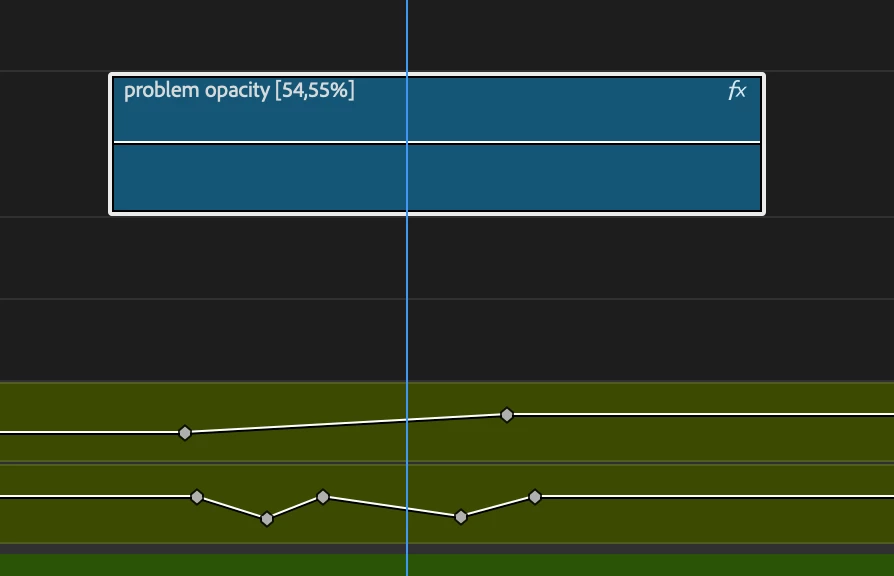
I attached a screenshot to show that the keyframes that I'm placing are shown in the Effect Controls panel, but not on the timeline. 

I also attached another screenshot to show that the footage below can be keyframed without any problems. 


I tried closing and opening again Premiere, but I still have the same problem. 

Thank you!

Screenshot 2025-04-19 at 11.06.56.png

Screenshot 2025-04-19 at 11.06.40.png


119
Translate
Report
Community guidelines
Be kind and respectful, give credit to the original source of content, and search for duplicates before posting. Learn more
community guidelines
Community Expert ,
Apr 19, 2025 Apr 19, 2025

Hi @Stefan5E21 

Based on how low the connector line is on the Video Clip Boundary in the video you posted, it looks like your fx badge is currently set to show a Motion parameter rather than Opacity.

Try right-clicking on the fx badge and then set it to show Opacity.


Pictured:  Setting the fx badge to show Opacity on the Clip BoundaryPictured: Setting the fx badge to show Opacity on the Clip Boundary


You should then be able to command click with the Selection Tool or switch to the Pen Tool to add keyframes to the connector line as expected.

Translate
Report
Community guidelines
Be kind and respectful, give credit to the original source of content, and search for duplicates before posting. Learn more
community guidelines
Community Beginner ,
Apr 21, 2025 Apr 21, 2025
LATEST

Thank you for your reply, Warren! 


I show in the video that I attached that it was set on Opacity. 

I managed to solve it simply by dragging it again from the project panel in the timeline and deleting the faulty one. 


No other parameter was modified according to the effect controls panel, the only one was opacity and it showed only the value of one "invisible keyframe" which was set at 54,55%. After I made this post, I noticed that if I placed the cursor a bit below the line [not on it] the hand tool was showing and I was able to move it up and down, influencing the transparency of the layer and by scrubbing through it, I was able to see the impact of all the 3 keyframes shown in the effect controls, but which were not appearing visually on the layer. 


Thank you again! I hope the next update won't be as buggy. :))

Translate
Report
Community guidelines
Be kind and respectful, give credit to the original source of content, and search for duplicates before posting. Learn more
community guidelines