• Global community
    • Language:
      • Deutsch
      • English
      • Español
      • Français
      • Português
  • 日本語コミュニティ
    Dedicated community for Japanese speakers
  • 한국 커뮤니티
    Dedicated community for Korean speakers
Exit
0

slog 3 footage overexposing on V22

New Here ,
Nov 22, 2021 Nov 22, 2021

Copy link to clipboard

Copied

Editing footage shot on A7s iii in slog 3 gamut 3 cine. Premeire Pro V15 displays the footage just fine however V22 is well over exposed. I have the footage set to override in rec 709 as well as the sequence. Anyone els run into this issue? Im so confused. 


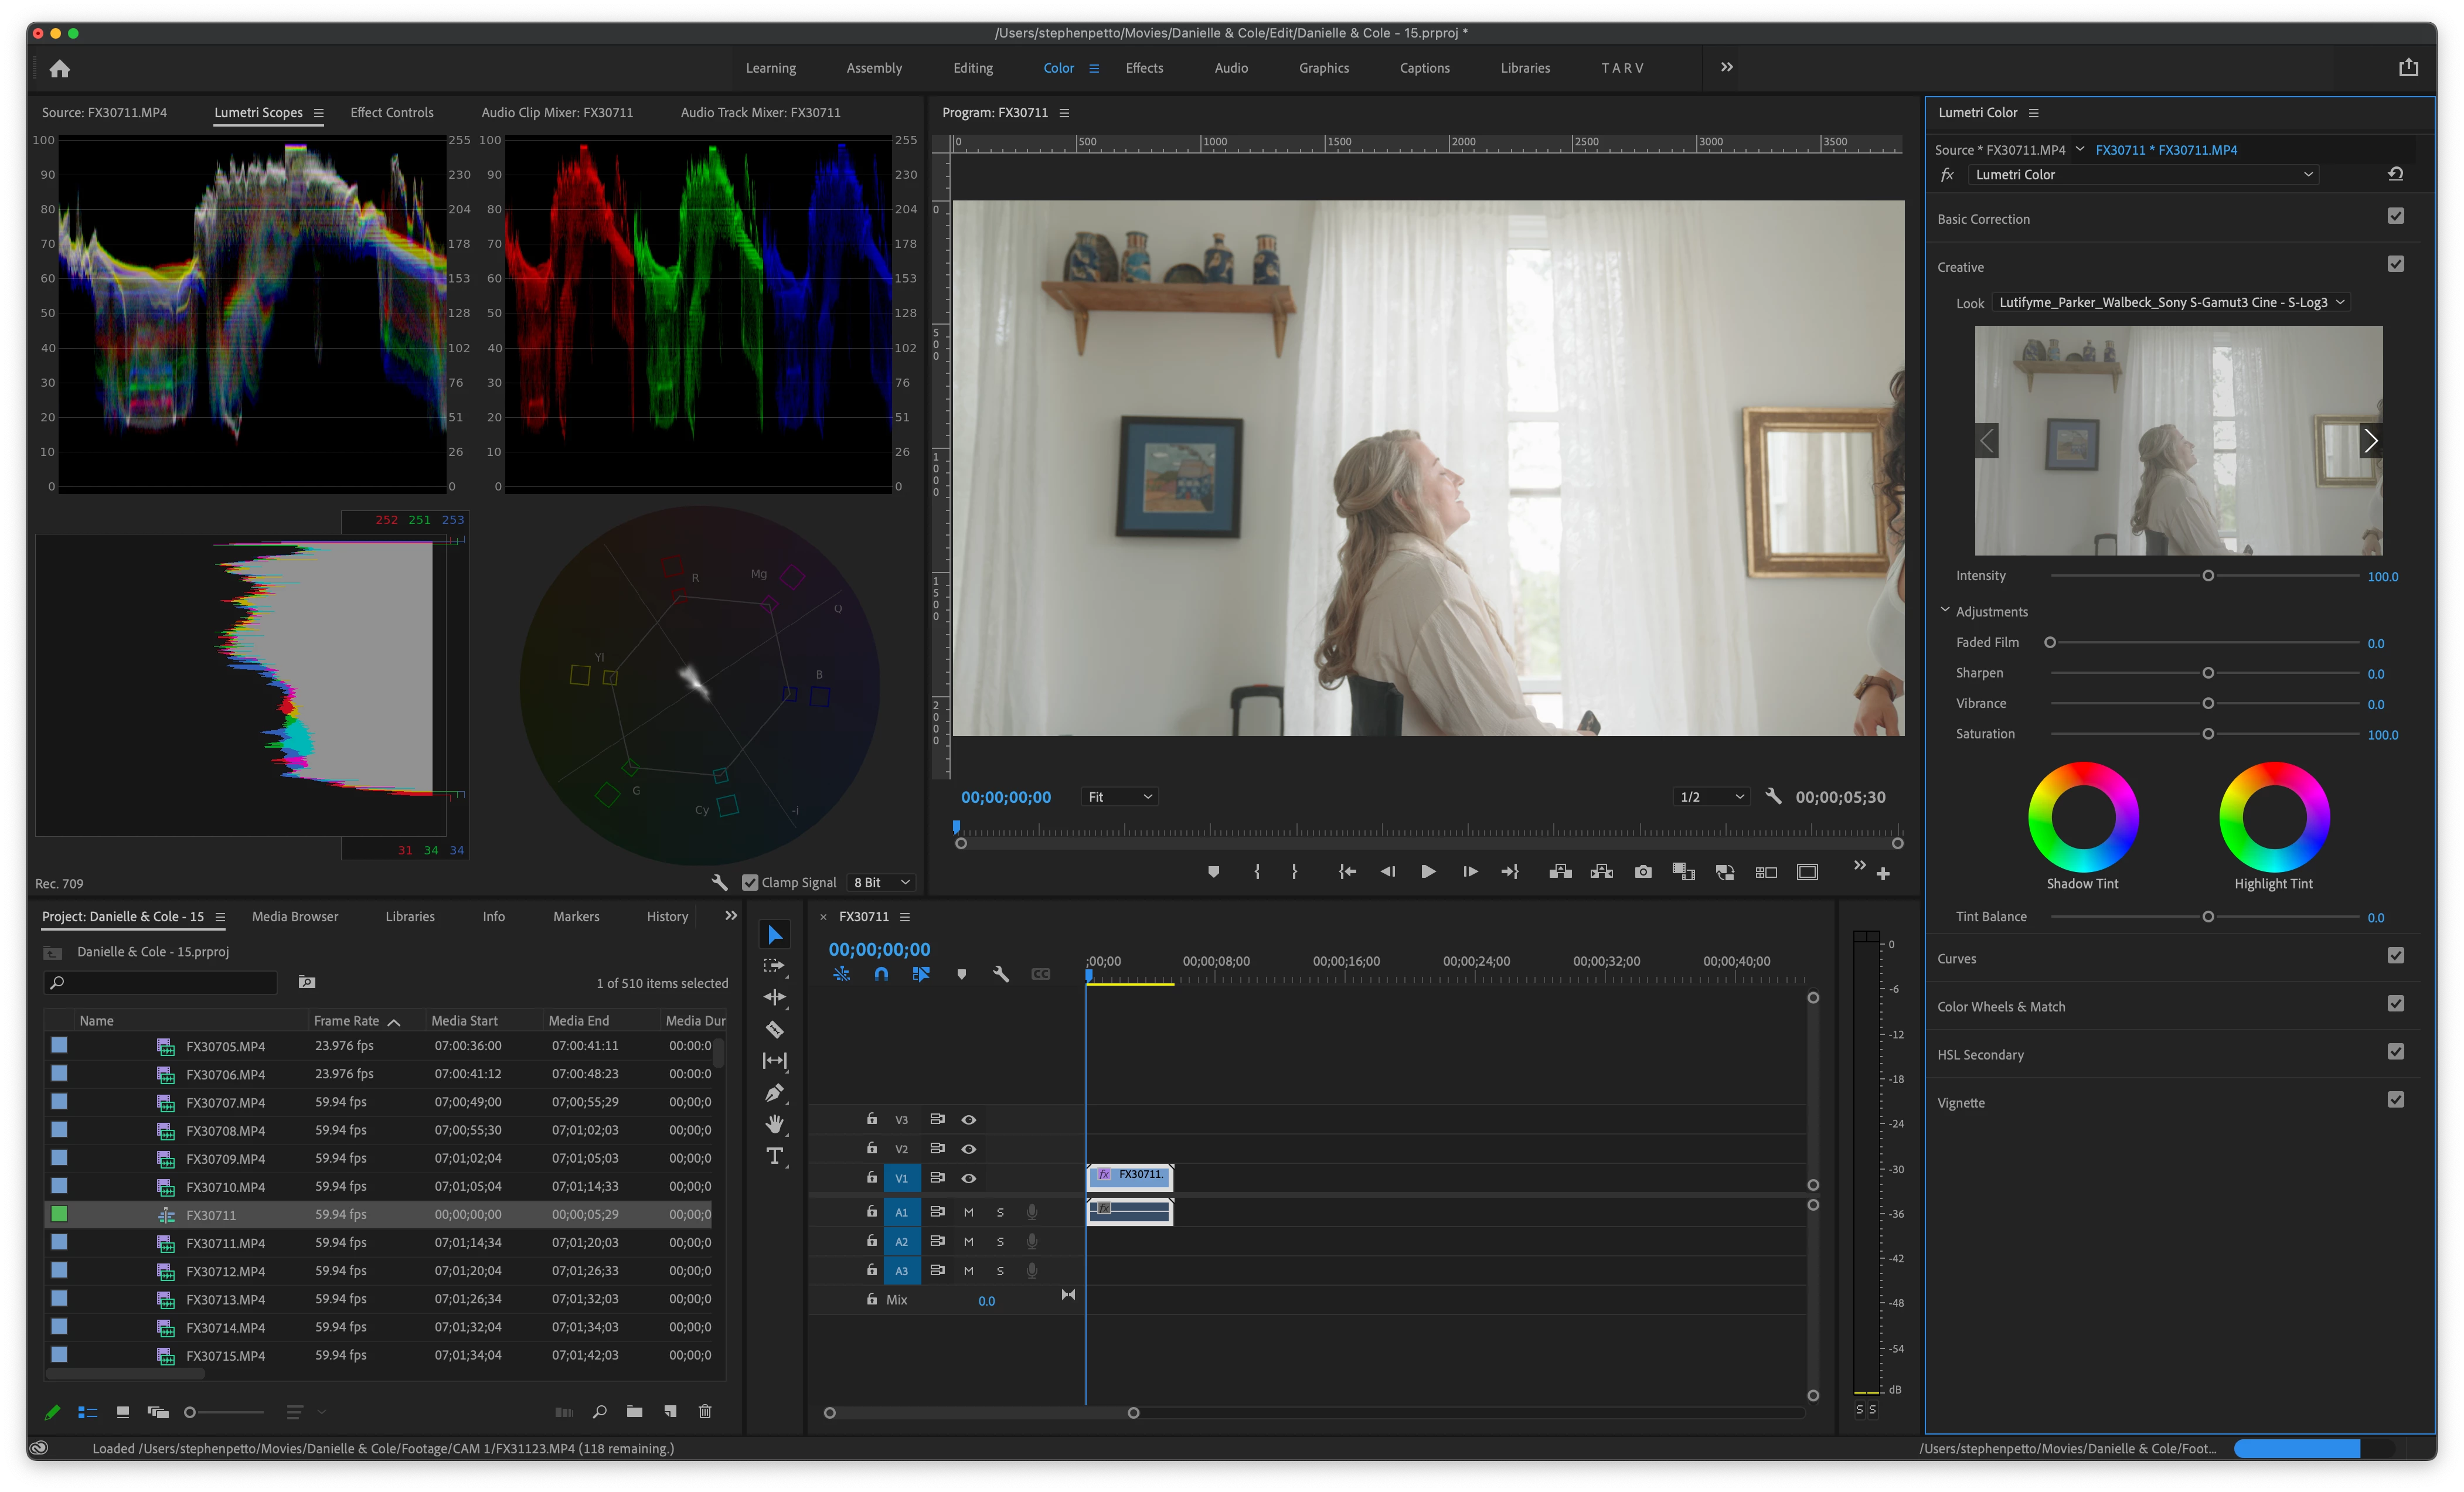
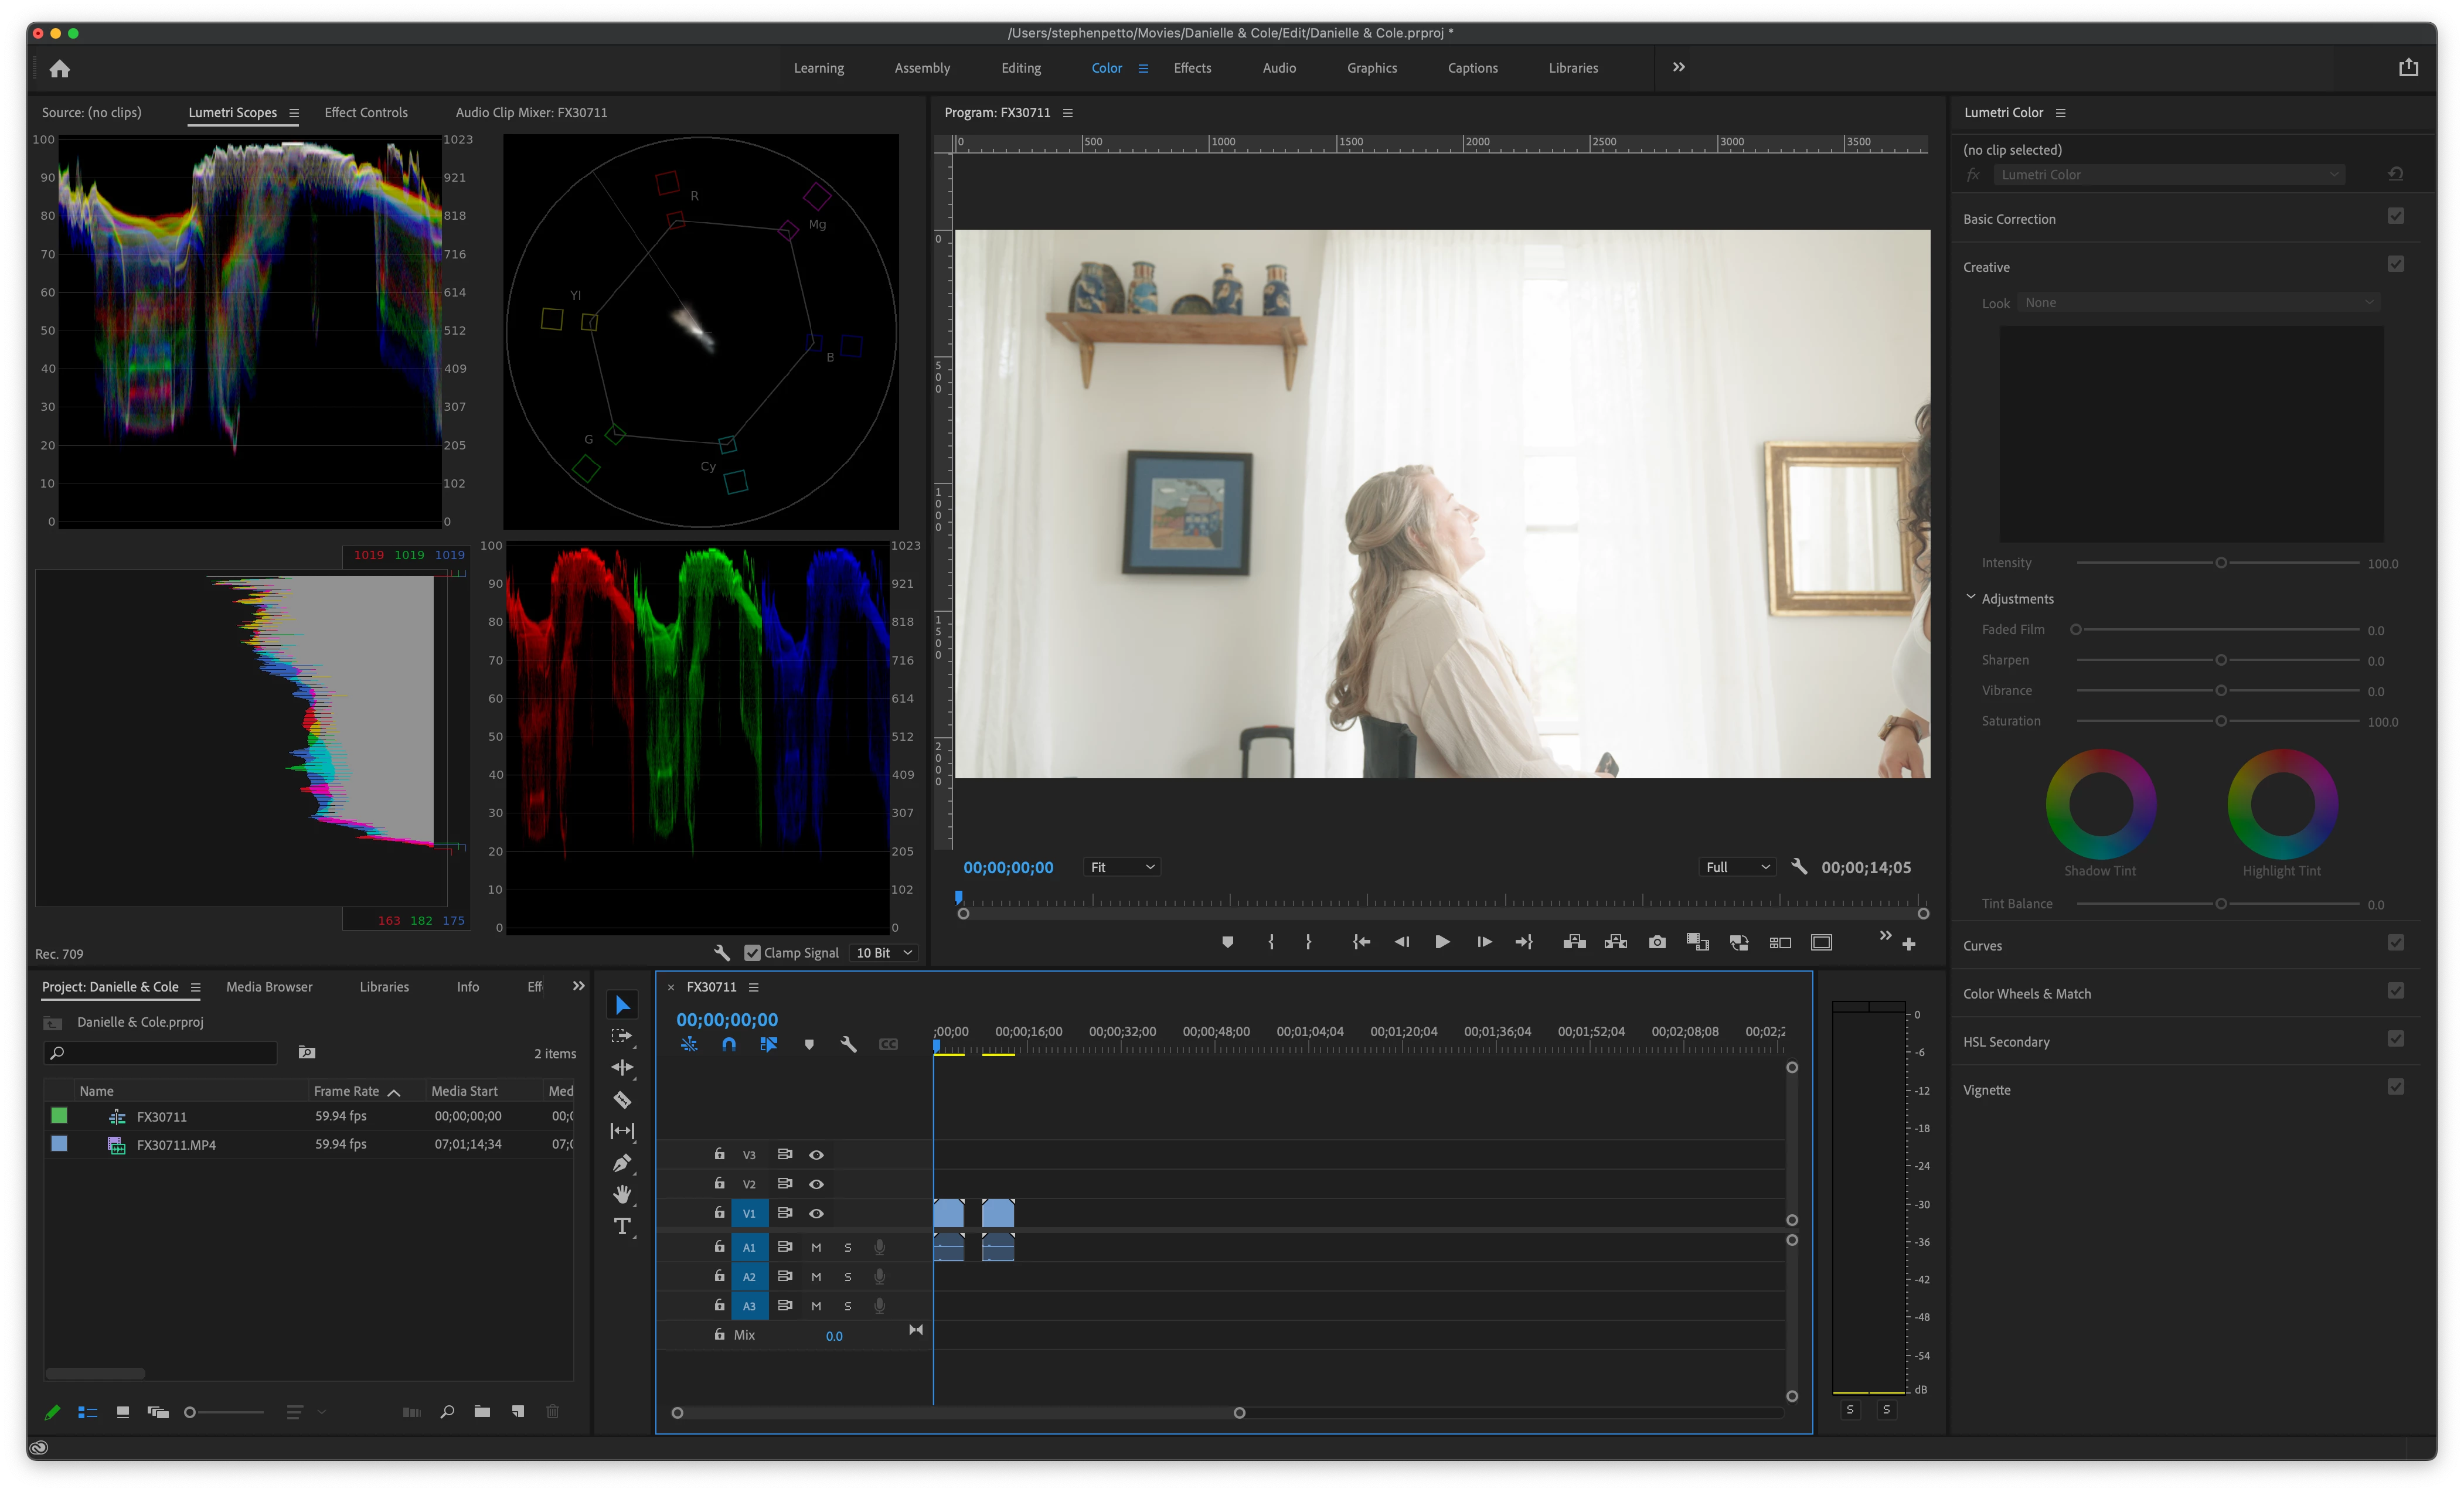
In the screenshots i applied LUTs to exaggerate the issue. 


V.22
Screen Shot 2021-11-22 at 8.05.38 PM.png


V.15

Screen Shot 2021-11-22 at 8.08.07 PM.png

TOPICS
Editing , Error or problem , Formats

Views

1.3K

Translate

Translate

Report

Report
Community guidelines
Be kind and respectful, give credit to the original source of content, and search for duplicates before posting. Learn more
community guidelines
LEGEND ,
Nov 22, 2021 Nov 22, 2021

Copy link to clipboard

Copied

Do you get any detail back by say bringing the Exposure slider down a bit in the Basic tab?


Neil

Votes

Translate

Translate

Report

Report
Community guidelines
Be kind and respectful, give credit to the original source of content, and search for duplicates before posting. Learn more
community guidelines
New Here ,
Nov 23, 2021 Nov 23, 2021

Copy link to clipboard

Copied

Well sure. A half stop seems to bring it back to the correct exposure and all the detail seems to be present. Have any idea why this would be happening?

Votes

Translate

Translate

Report

Report
Community guidelines
Be kind and respectful, give credit to the original source of content, and search for duplicates before posting. Learn more
community guidelines
LEGEND ,
Nov 23, 2021 Nov 23, 2021

Copy link to clipboard

Copied

Because the exposure of the clip is different from the clips the LUT was built around. It's one of the main problems colorists will teach about LUT usage. LUTs are the dumbest math out there, and any clip/shot not exposed "properly" for that LUT as the LUT was built to expect, will have a tendency for clipped whites, crushed blacks, or both.


For example, I have a HUGE issue with the application of LUTs in the Basic tab of Lumetri. No colorist on the planet would build that input LUT slot as the first part of the processing chain. Because normally the user will need to 'trim' the clip into the LUT.


If you apply a tech/transform LUT in the Creative tab LUT slot, then using the Basic tab controls (which are processed prior to the Creative tab), adjust the basic tonal values so the LUT "sees" what it needs to see, the results from that LUT will be what is needed/expected.


So I always apply technical/corrective LUTs in the Creative tab slot, so I can use the Basic tab to 'trim' the clip into the LUT.


Now that they have more media types getting 'default transforms', it means the user in some ways has less control. I'm not overly ... to put it mildly ... pleased with a default behavior the user cannot override.


But at least in this case, bringing Exposure down in the Basic tab seems to help with clipped 'default' values for many users. But I'm still arguing with their engineers about this.


Neil

Votes

Translate

Translate

Report

Report
Community guidelines
Be kind and respectful, give credit to the original source of content, and search for duplicates before posting. Learn more
community guidelines
New Here ,
Nov 25, 2021 Nov 25, 2021

Copy link to clipboard

Copied

Thanks for the explanation for those unfamiliar with LUTs and how the lumetri tool uses them. But for the sake of recording this issue I want to make sure folks tuning in know that LUTs have nothing to do with the issue. Premiere Pro is displaying untouched Sony Slog 3 footage over exposures by about a half stop. 

Votes

Translate

Translate

Report

Report
Community guidelines
Be kind and respectful, give credit to the original source of content, and search for duplicates before posting. Learn more
community guidelines
Community Expert ,
Nov 23, 2021 Nov 23, 2021

Copy link to clipboard

Copied

One screenshot shows Lumetri at 8 bit, the other 10 bit. Does matching those make a difference?

Votes

Translate

Translate

Report

Report
Community guidelines
Be kind and respectful, give credit to the original source of content, and search for duplicates before posting. Learn more
community guidelines
New Here ,
Nov 23, 2021 Nov 23, 2021

Copy link to clipboard

Copied

did'nt notcied V.15 was set to 8bit but no it dosen't make a diffrence. to be clear this issue is present before adding a LUT. I just added the same LUT to each clip to help show off the issue.

Votes

Translate

Translate

Report

Report
Community guidelines
Be kind and respectful, give credit to the original source of content, and search for duplicates before posting. Learn more
community guidelines
Community Beginner ,
Nov 23, 2021 Nov 23, 2021

Copy link to clipboard

Copied

I'm just migrating to my first Mac laptop and I have the same issue... I've been trying to figure this out for days now with no luck. All I can say is that it seems like my H.264 4:2:2 files are the ones that get overexposed when imported to Premiere 2022 and HEVC 4:2:0 are actually fine (both shot with slog3c), would be nice if you can confirm the codec that you used for this footage and if the general behaviour is similar to that on my Mac. Given how many people use A7sIII and Macs I'm so surprised there's no answer to this. Please let me know if you find out the answer somewhere.

Votes

Translate

Translate

Report

Report
Community guidelines
Be kind and respectful, give credit to the original source of content, and search for duplicates before posting. Learn more
community guidelines
Community Expert ,
Nov 23, 2021 Nov 23, 2021

Copy link to clipboard

Copied

See this post: https://community.adobe.com/t5/premiere-pro-discussions/superwhites-highlights-clipped-in-v15-v22/m-...


Looks similar to this issue. Appears to be a Premiere bug.

Votes

Translate

Translate

Report

Report
Community guidelines
Be kind and respectful, give credit to the original source of content, and search for duplicates before posting. Learn more
community guidelines
Community Beginner ,
Nov 24, 2021 Nov 24, 2021

Copy link to clipboard

Copied

Votes

Translate

Translate

Report

Report
Community guidelines
Be kind and respectful, give credit to the original source of content, and search for duplicates before posting. Learn more
community guidelines
LEGEND ,
Nov 24, 2021 Nov 24, 2021

Copy link to clipboard

Copied

Did you check lowering the Exposure slider in the Basic tab, and see if that brought back your detail? It has for a couple users, might help here. Or might not.


Neil

Votes

Translate

Translate

Report

Report
Community guidelines
Be kind and respectful, give credit to the original source of content, and search for duplicates before posting. Learn more
community guidelines
Community Beginner ,
Nov 25, 2021 Nov 25, 2021

Copy link to clipboard

Copied

Hi Neil, as a temporary fix I can regrade myself affected footage but I think that's besides the point, no? It's very clear something is wrong here and it's frustrating that nobody has answers, it's not like we are working with obscure cameras and codecs on outdated laptops using small indie editing software...

Votes

Translate

Translate

Report

Report
Community guidelines
Be kind and respectful, give credit to the original source of content, and search for duplicates before posting. Learn more
community guidelines
LEGEND ,
Nov 25, 2021 Nov 25, 2021

Copy link to clipboard

Copied

I think you missed the point of my query. And first, understand I'm not a fan of default behaviors the user can't change. Ever.


I've been sent several clips to test by other users that were LOG formats, several Sony's and another maker ... which Premiere clearly is now applying a transform to Rec.709 for when used in a Rec.709 timeline.


Those clips all had clipped whites, but I could simply use the Exposure slider to bring the whites down, and all detail was still there. This is not what would be expected say by applying a LUT in the Basic tab's Input LUT slot and adjusting controls after the LUT.


It is, however, the behavior I would expect if the LUT/transform was being applied after the Basic Tab controls were processed. Which would actually be correct colorist behavior.


All tech/transform operations can clip or crush data from clips that are not exposed precisely the same as the media the LUT was 'designed' from. So all colorists apply transforms in say a second node, so they can trim the clip prior to the transform.


In another thread on this forum, Mike Dzeniek (I'm slaughtering his last name I'm sure, I cant remember how to spell it) notes that he has to trim through the transform about 98% of the clips he works with. Which is consistent with all the colorists I work with.


So if Premiere is now applying a manufacturer's tranform/LUT to the clip, and then allows the user to trim the clip with the Basic tab controls, that would actually be close to the behavior I would expect in say Resolve.


It's not been discussed that way anywhere though. It seems to be the case but I haven't thorughly tested it enough to confirm. When I do get back to the shop, I'll test to see if the say Color Wheels or Curves tab controls can bring back data, or if it's only the Basic tab.


But an any rate, for any applied transform, the user must be able to trim the clip prior to the LUT. And if this works as it seems ... it's actually a correct behavior.


I would appreciate of course a far more specific explanation from the Premiere team.


Neil

Votes

Translate

Translate

Report

Report
Community guidelines
Be kind and respectful, give credit to the original source of content, and search for duplicates before posting. Learn more
community guidelines
Community Beginner ,
Nov 26, 2021 Nov 26, 2021

Copy link to clipboard

Copied

I agree that we are talking about different things. I'm no colorist but I know when there's a software issue when I see one. Since you took a lot of time to explain your point of view here's the link to screenshots of all sony 4k codecs across my Windows and Mac laptops as seen in most recent Premiere Pro v22:

https://drive.google.com/drive/folders/1Qu8NDHx2Qvb_VKKr6d23_F8dQPrtTAcJ?usp=sharing

The point is - the behaviour is inconsistent despite all things being equal, as far as I can check. Once again - Rec 709 everything, ticked Colour Management on both machines.


The problem only exsists when using h264 422 formats. Other formats are consistent across both computers. Here you can see that in my example h264 422 on Windows starts around 90 IRE and on Mac same clip starts around 98 IRE, applying technical LUT that's been working for me since forever and that continues to work on all the h265 footage happens to blow out highlights on Mac when working with h264 422 footage. Moving down the exposure slider before or after the application of tech LUT doesn't bring the highlights data, it's clipped, just moved down, also examples attached in Google Drive folder.

Just to quickly illustrate the key issue once again I show two pairs of h264 and h265 footage from both laptops - h264 is not consistent, h265 works fine.

Votes

Translate

Translate

Report

Report
Community guidelines
Be kind and respectful, give credit to the original source of content, and search for duplicates before posting. Learn more
community guidelines
LEGEND ,
Nov 26, 2021 Nov 26, 2021

Copy link to clipboard

Copied

LATEST

You're right, inconsistent is simply wrong.


As I've noted in several posts, this new CM is ... problematic. First, to me, because by implementation it is scattered across the app. There's no one place for a user to check color behaviors and set their preferred defaults. NOT good design.


Second, the M1 Macs are clearly having an issue with a couple CM things.


Third, they didn't give nearly enough information as to the changes that are happening in this new build series. Not even close.


And then, you've got this ... an inconsistent behavior. I'd love to test one of those 422 H264 clips on my machine ... oh, and did you try applying that LUT in the Creative tab, then use Basic tab to trim it?


Neil

Votes

Translate

Translate

Report

Report
Community guidelines
Be kind and respectful, give credit to the original source of content, and search for duplicates before posting. Learn more
community guidelines