Copy link to clipboard
Copied
I have a problem that just started with the new verison of Premiere Pro. Video (filmed on an iPhone 13 Pro) is imported, it appears fine. When moved to the timeline, it is blown out. Same issue when exporting. Here is a photo for reference. Any help on the fix?
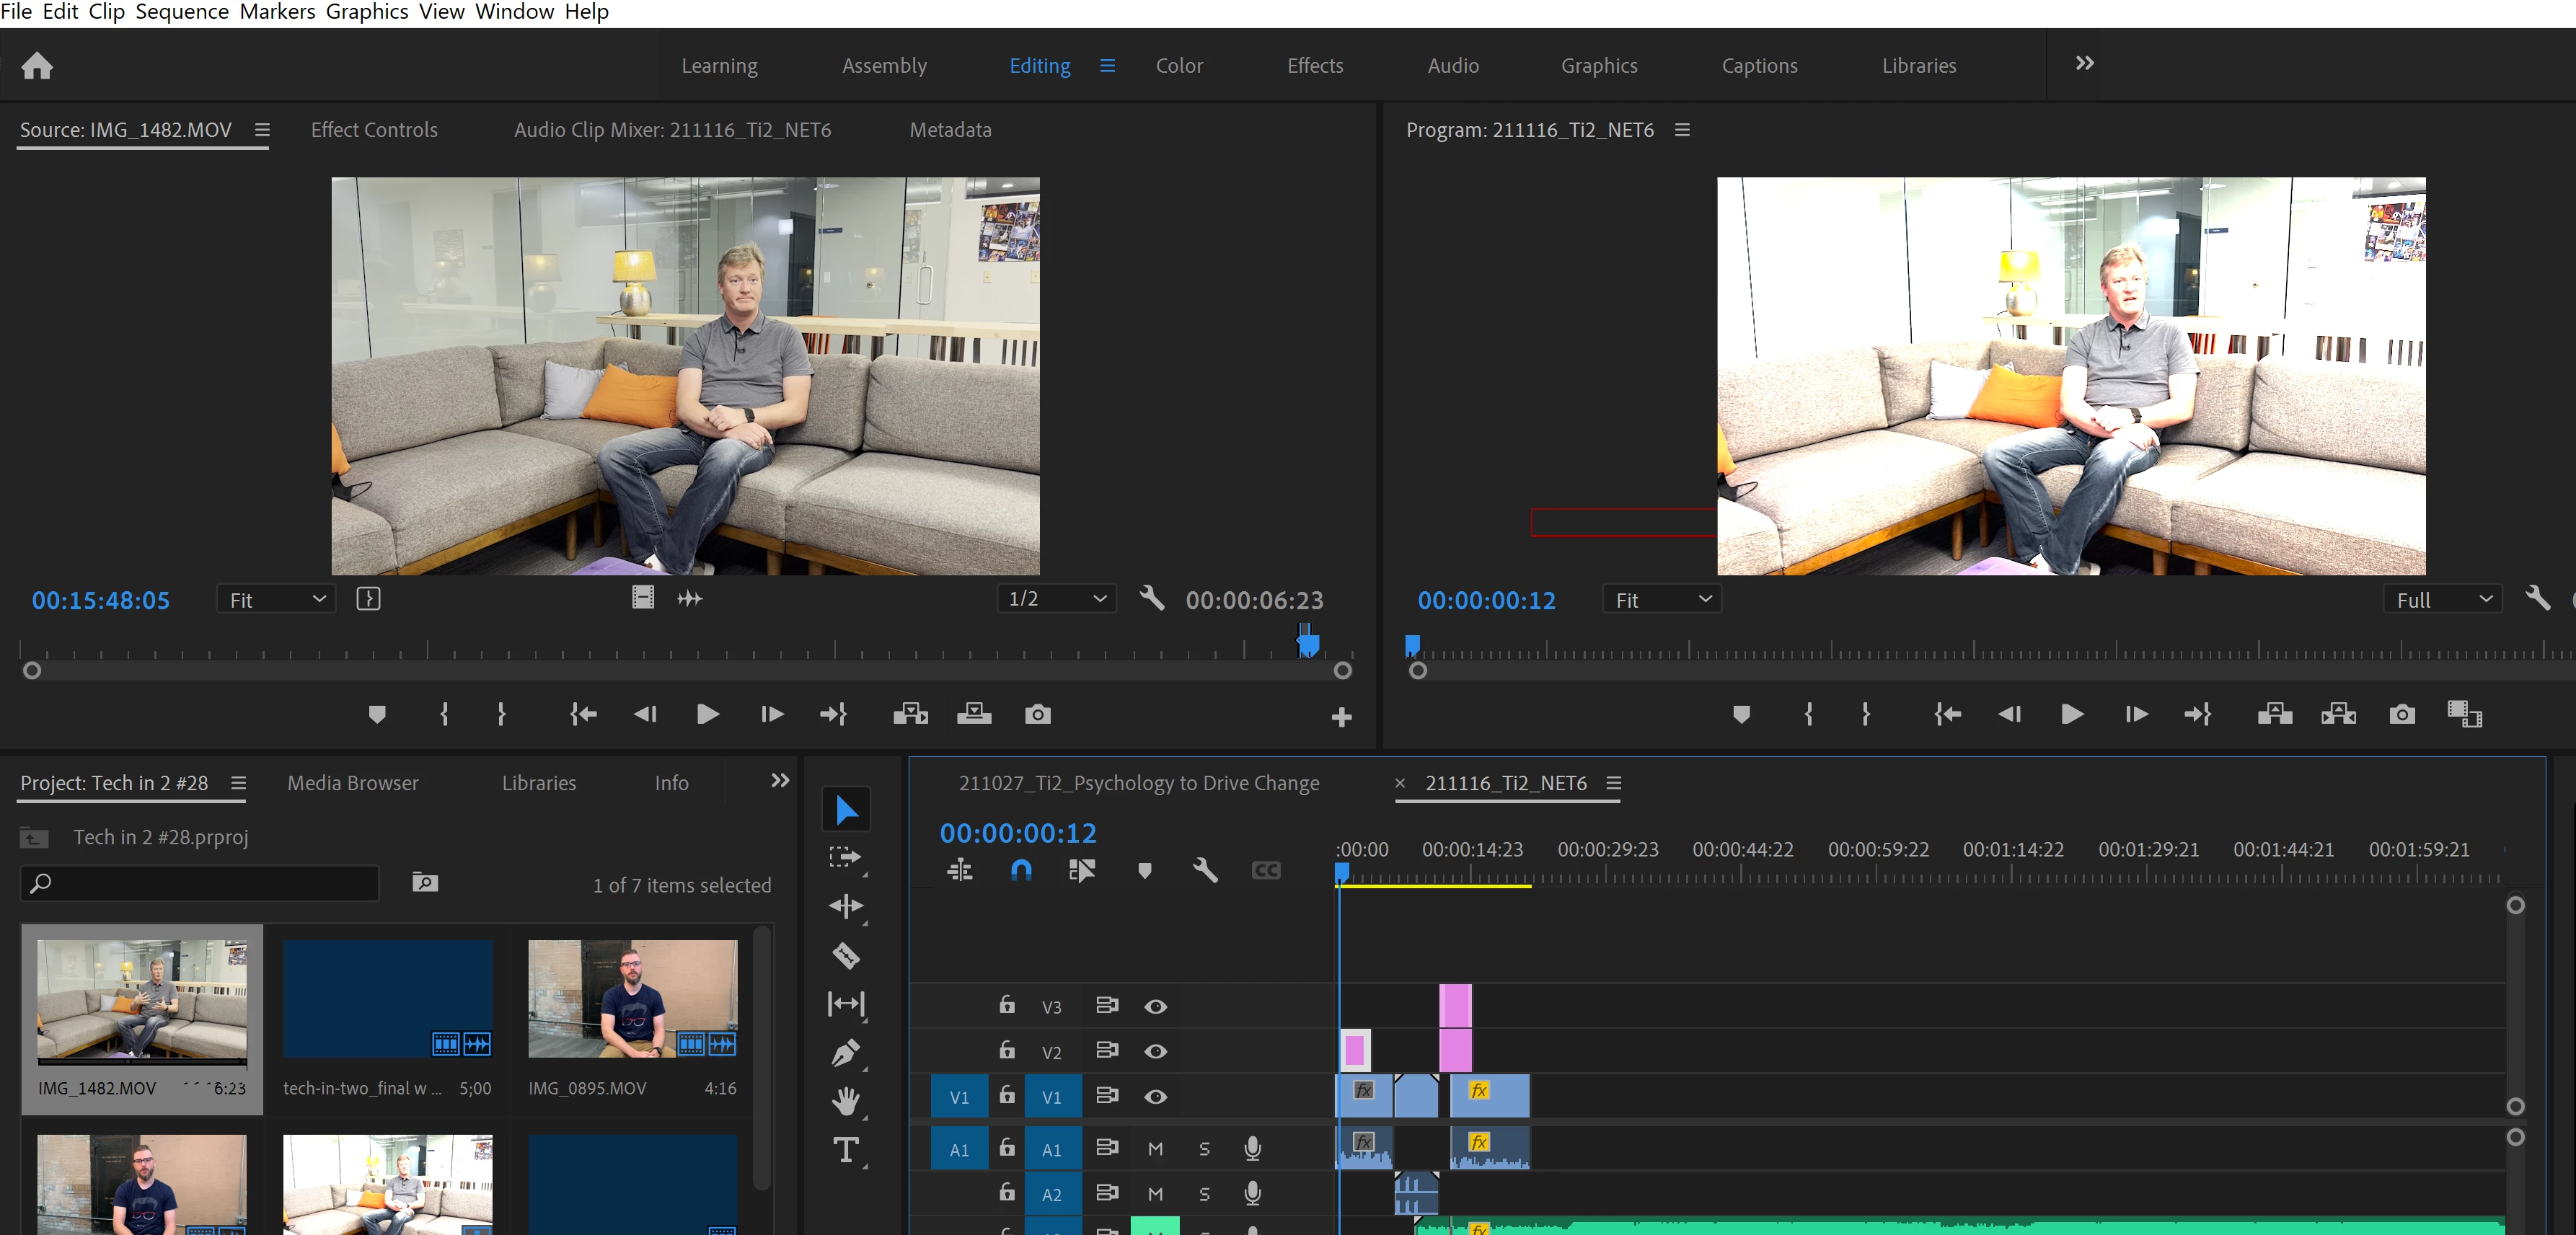
When moved to the timeline, it is blown out. Same issue when exporting. Here is a photo for reference. Any help on the fix?
By @tylerp59104425
Read this: FAQ: How to fix saturated/over-exposed HLG clips i... - Adobe Support Community - 12489252
The 2022 Premiere Pro version has several major changes in color management, and also several default behavior changes concerning many Log, RAW, and HDR formats HLG and PQ. That's what you've run into.
They have to change the program, to give us editors more color management options. I'm not best pleased with how they're rolling out the changes, but that they must is certain. And so I and others here are trying to get users used to the new process.
I've got a full FAQ for this forum with the
...Right click > Modify>Interpret Footage....Color Space overide to Rec 709.
Copy link to clipboard
Copied
When moved to the timeline, it is blown out. Same issue when exporting. Here is a photo for reference. Any help on the fix?
By @tylerp59104425
Read this: FAQ: How to fix saturated/over-exposed HLG clips i... - Adobe Support Community - 12489252
Copy link to clipboard
Copied
I am having the same issue! The original footage is NOT blown out. Please don't point us to how to fix overexposed footage. The footage is fine. When it's dropped to the timeline it's like the exposure was pumped up. At first this only happened on export but now it's on the timeline too.
Copy link to clipboard
Copied
Update:
the link above did fix the timeline issue but it does when I export the "source" window looks fine but the "output" tab and the actual exported file is blown out.
Copy link to clipboard
Copied
I am having the exact same issue, source window looks as expected at but output tab is overexposed and color temp is off. My footage was also filmed on an iphone 13 pro and I am editing on a 2021 Macbook pro M1 Max.
Copy link to clipboard
Copied
I am having the same issue since I updated to the latest version of Premiere in 2021. This is ridiculous. How could such an "industry standard" piece of software get this BAD of an update??? How is Final Cut working these days? Maybe it's time to switch back. I need a stable tool that works consistently. This new updated has rendered Premiere utterly useless. PLEASE ISSUE A NEW UPDATE WITH A FIX FOR THIS!!!!
Copy link to clipboard
Copied
The 2022 Premiere Pro version has several major changes in color management, and also several default behavior changes concerning many Log, RAW, and HDR formats HLG and PQ. That's what you've run into.
They have to change the program, to give us editors more color management options. I'm not best pleased with how they're rolling out the changes, but that they must is certain. And so I and others here are trying to get users used to the new process.
I've got a full FAQ for this forum with the complete details, and yes, I think most Premiere users should read the entire thing. These are changes that will only be added to, none of them will go away.
FAQ: Premiere Pro 2022 Color Management for Log/RAW Media
Clips of many Sony, Canon, and Panasonic in log formats are now simply applied to a timeline with "full" tonal and color depth. Unless the user chooses to "limit" the clips in the bin. Select one or more clips, right-click "Modify/Interpret Footage" and you can then set the color management for those clips at the bottom of the dialog.
For most purposes for some time, we'll all mostly be working in SDR (Rec.709) sequences and projects. So the better option will typically be to override to Rec.709.
And an interesting thing I've just learned ... dropping a Log clip on an SDR timeline will get the log-looking image: grayish due to no blacks/whites and little color saturation. Drop the same clip on an HDR timeline, without any conversion, LUT, transform, or tomemapping, and you'll get an image of the full dynamic range of the original log clip and full saturation.
Which is essentially what people are getting, and yea, you're not expecting it. Interpret the footage to override to Rec.709. Then make sure the sequence settings are Rec.709. And you should be fine.
Neil
Copy link to clipboard
Copied
This honestly makes no sense, why would the source and output be completely different. Why would you edit a video and colorgrade just to export it and have everything blown out? Does Adobe expect us to just figure it out for ourselves and still pay them for the software?
So annoying and has completely ruined my workflow into now have=ing to search the internet to see if there is a fix to this mess that utterly shouldn't be here.
Copy link to clipboard
Copied
Yes, it's frustrating to get such a major change of behavior. I've complained directly to several staffers about the lack of clear information on these changes for users. They have the beaker icon in the upper right corner of the public beta versions with all changes discussed. They should have that in the shipping version also.
That said, the changes are necessary. I don't like the implementation, as the CM settings are in several places and we will need to make routine changes to them. This is not as easy to do as it could be. I want a Color Management Panel with both the general default options and override options ... here's the UserVoice request ... please upvote:
And ... for now, here's an FAQ that I put together listing the changes, the old and new behaviors, and how to work with the new version. With examples.
Copy link to clipboard
Copied
Previous behavior of PrPro assumed an end-to-end Rec.709 workflow. So most clips were assumed and/or transformed to Rec.709 when used on a timeline.
The new behavior assumes the clips keep original color space/depth unless the user overrides those properties in the project panel.
So now, we need to pay attention to whether clips are Rec.709 or HLG or PQ. And many log media format from Sony, Canon and Panasonic are no longer treated as Rec.709. So when brought onto a timeline without an override to Rec.709, they are blown out.
Again, the user now must check and perhaps set the CM properties in the project panel bins.
You also need to make sure your media, sequence, and exports all "match". As sequences now have color spaces.
And on export, use the appropriate preset 'base' for the color space of the sequence, there are now added presets for HLG and PQ for those formats that can be set to HDR.
Neil
Copy link to clipboard
Copied
Davinci solved all my issues, the migration was super easy
Copy link to clipboard
Copied
Good.
Just everyone needs be aware, these apps are all tools. Fancy hammers, and like different hammers, have different strengths and misses. Resolve has better color management currently for certain. The multicam, subtitles, some other things, not so much.
But in the end, just use what works.
Neil
Copy link to clipboard
Copied
Thanks, R Neil Haugen, this quickly fixed it for me. Lumetri tab>Settings>Sequence:>Working Color Space>Rec709. For some reason it was preset to Rec 2100 HLG and my exports were looking all blown out even though the footage in my timeline looked properly corrected
Copy link to clipboard
Copied
Hey, this Brave New World with mulitple dynamic ranges and color spaces ... well, it's more 'malleable' to our wants, right?
But a lot more complicated to set up correctly.
Copy link to clipboard
Copied
I have an Iphone 13 and am having the same problem. Please fix this issue, and also please issue a NON CAPATABILITY ISSUE WITH IPHONE 13.
Dany
Copy link to clipboard
Copied
The probable issue is not understanding how to work with the complete change of color management in this version.
So ... read the FAQ that I link to above, and you should be able to get back to work.
Neil
Copy link to clipboard
Copied
agreed 100%/ put it back to default not blown out or we're leaving...
Copy link to clipboard
Copied
I ran into a similar problem today when I moved a clip from one sequence to another sequence where I was building a short film project. Once moved, the moved clip showed in the timeline as blown out whereas the clip in its own original standalone sequence still appeared to be perfectly exposed in the timeline. I Googled an explanation/solution and came across this thread. The problem is, I was still working on PP 2020. I decided to update to the latest version anyway in an effort to try and apply some of the pointers here. Interestingly/annoyingly, both sequence settings are at rec.709 but the original (created by right-clicking and selecting 'New Sequence from Clip') still appears lighter in the timeline than it did in the PP 2020 version but responds well to Lumetri adjustments (ie. it's rescue-able), whereas the clip moved from one sequence to another has clearly lost a load of information as it doesn't respond in the same way to the Lumetri adjustments. Any explanations/suggestions would be hugely helpful. I may be doing something wrong but I'm not doing anything different to how I've used PP for some time and have never come across this problem. Thanks in advance!
Copy link to clipboard
Copied
Right click > Modify>Interpret Footage....Color Space overide to Rec 709.
Copy link to clipboard
Copied
This worked perfectly. THANK YOU SO MUCH.
Copy link to clipboard
Copied
This is the right answer. Please mark it so others can see
Copy link to clipboard
Copied
I don't think I can thank you enough. Truly!!! My footage was pretty much unsaveable and I was about to jump into learning resolve. You just saved my project.
Copy link to clipboard
Copied
Thank you!
Copy link to clipboard
Copied
IT WORKED!! ive had this problem for so long, to the point of asking for a borrowed PC to edit a couple videos and still didnt make it.
i couldnt fix this in anyway possible. thank you so much!!
Copy link to clipboard
Copied
This fix didn't work for me. I adjusted the clip and checked the sequence settings. The clip is still blown out.