Participant
June 10, 2022
Question

When I export my video, the result is over saturated

  • June 10, 2022
  • 3 replies
  • 10906 views

This is how it looks BEFORE I export it.

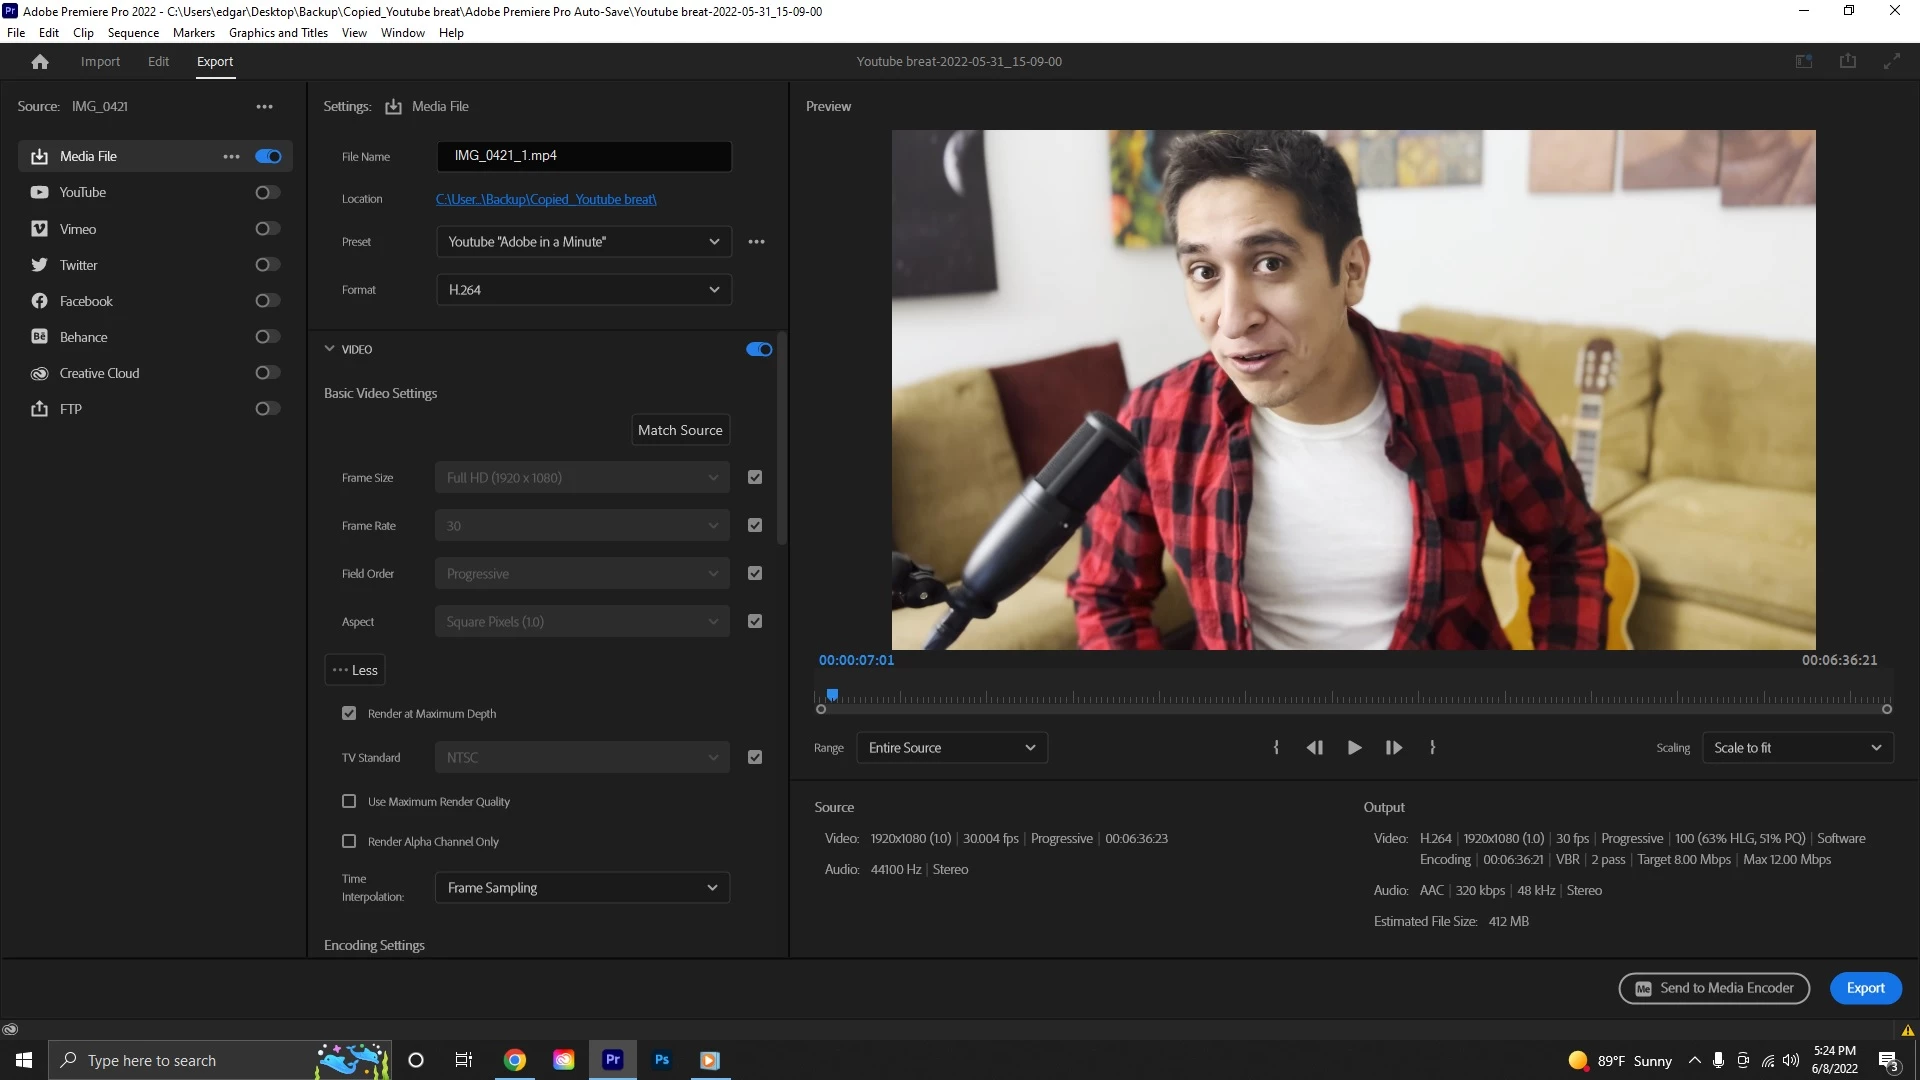
... and this is how it looks AFTER I export it.


I thought it was just my laptop until I switched it to my desktop and got the same result. That made me think it might be my export settings.


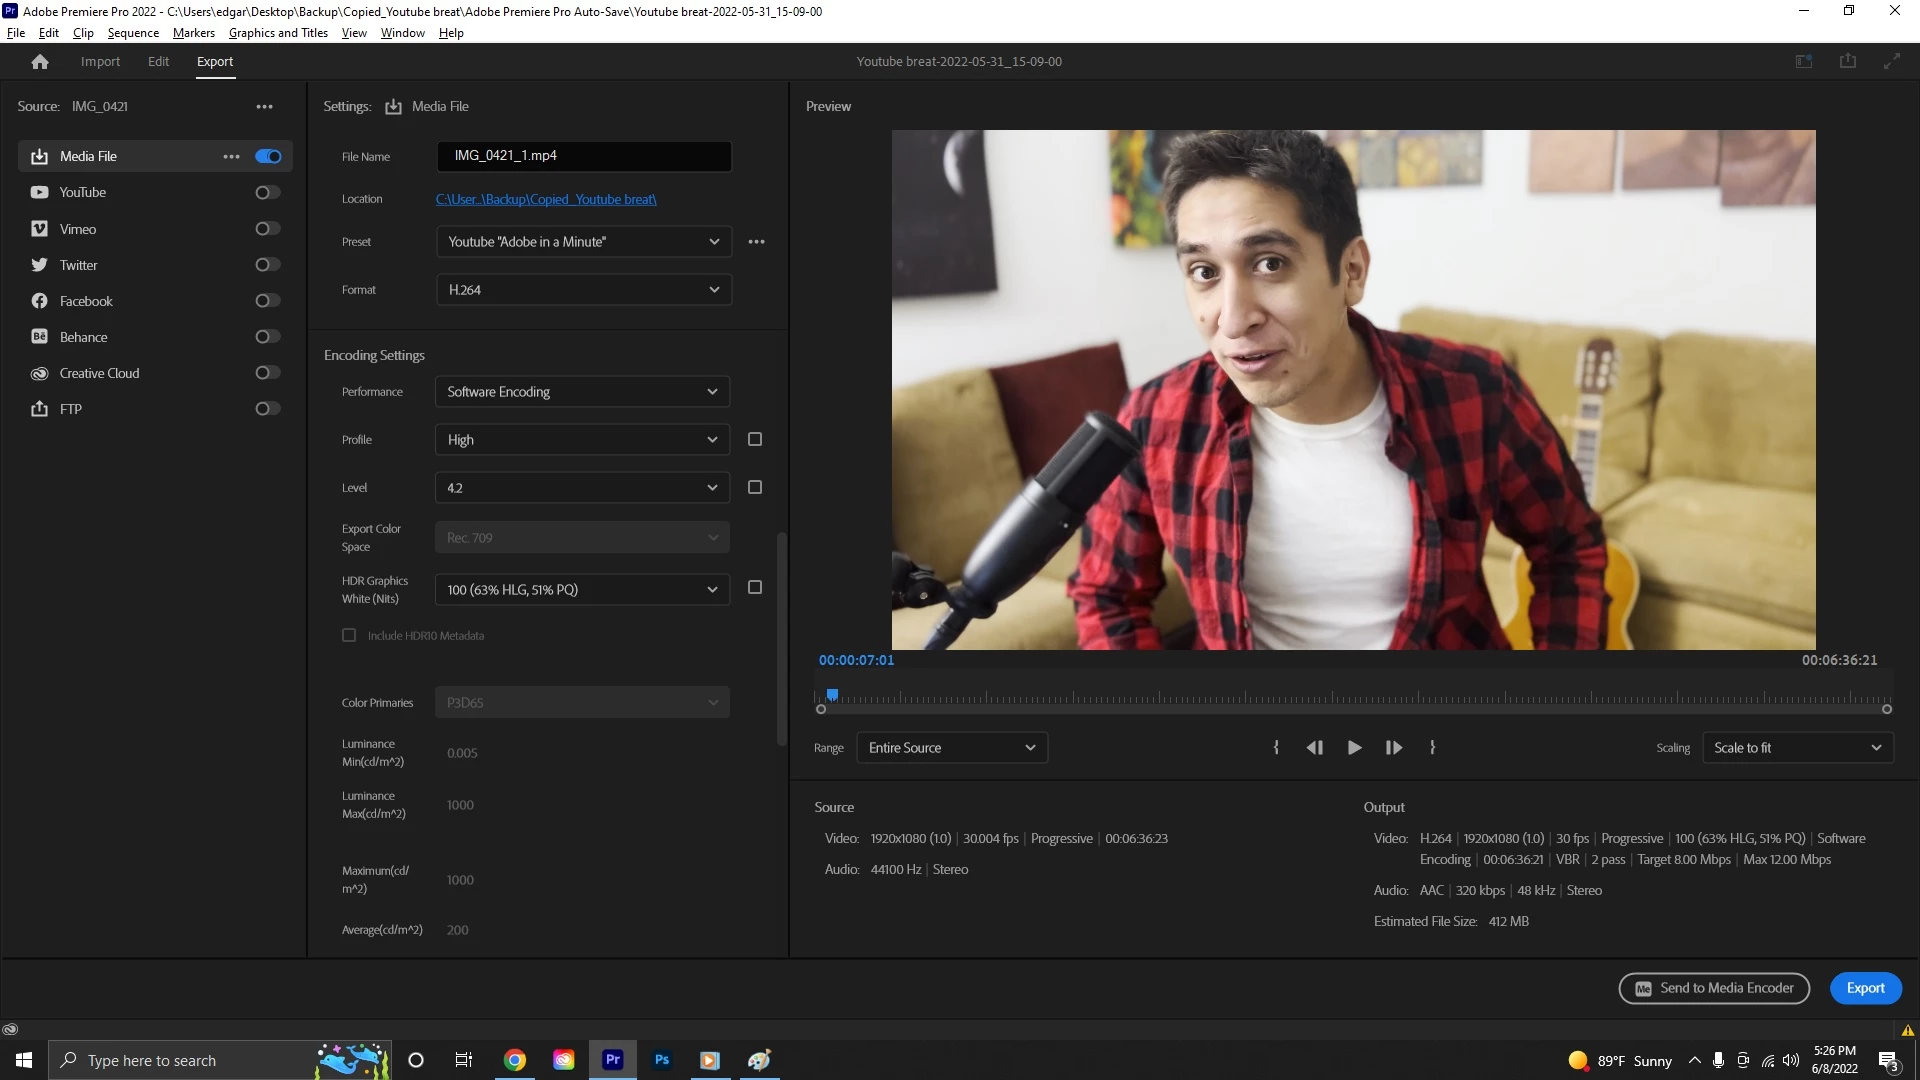
Here are my settings. 


I've been stuck on this problem for weeks! Please help! I just want to release the video!

3 replies

Participant
June 11, 2022

@Ann Bens thank you! This solved it for me! 

Inspiring
June 10, 2022

@Ann Bens nailed it. Long-term, your Sequence should be in a REC709 Color Space & bring your Exposure down in Lumetri Color until it doesn't look overblown.


If you're not exporting mixed footage, you might be able to get away with exporting in the HLG color space.

Under your Video Export setting, click the "..." for more settings. Change Profile to "High10", then you can change the Export Color Space to HLG 2100 (or REC 2020, whichever color space your footage/Sequence is).

R Neil Haugen
Legend
June 10, 2022

If the media is HLG or some log-encoded media, which Premiere is "seeing" as HLG, just changing the sequence settings will not help for exports. Premiere will still blow out the clips on export.


You must use the new color management controls on the clip ... found in the project panel.


Select one or more clips in the bin, right-click/Modify/Interpret Footage.


Go to the color management settings at the bottom, and set the Override option to Rec.709.


Now, make sure the sequence setting CM is set to Rec.709, and any adjustments you do to color/tonality will be respected at export.


Neil

Everyone's mileage always varies ...
Inspiring
June 11, 2022


quote

If the media is HLG or some log-encoded media, which Premiere is "seeing" as HLG, just changing the sequence settings will not help for exports. Premiere will still blow out the clips on export.


Premiere shouldn't blow out the clip if the Export settings are changed to HLG 2100 Color Space. Which can only be done by changing the Profile to High10, anything else limits the Color Space to REC 709 - resulting in the problematic image in OP.


quote

You must use the new color management controls on the clip ... found in the project panel.


Select one or more clips in the bin, right-click/Modify/Interpret Footage.


Go to the color management settings at the bottom, and set the Override option to Rec.709.


Now, make sure the sequence setting CM is set to Rec.709, and any adjustments you do to color/tonality will be respected at export.


um... gonna respectfully disagree here. I see a lot of recommendations to do it this way, but IMHO Premiere just cuts off anything beyond the REC 709 luma limits - which results in an image that doesn't have much contrast. Adding supplemental contrast from Lumetri Panel only degrades the image further.


Premiere's "Color Space Override" should lower the Exposure by 2/3 (roughly) to keep the luma-to-chroma ratio intact instead of just cutting off anything higher than 110 IRE. Until that happens, I'd recommend users lower the Exposure manually to prevent image/contrast/luma loss. ¯\_(ツ)_/¯  I spent a couple hours trying to get an HLG 2100 clip looking right in a 709 Sequence (having applied the Override you mentioned) before giving up on the Override function altogether.


To your point, working in 709 Sequences is a lot easier to manage than jumping between Color Spaces with exports.


Best,

Jon

Ann Bens
Community Expert
Community Expert
June 10, 2022